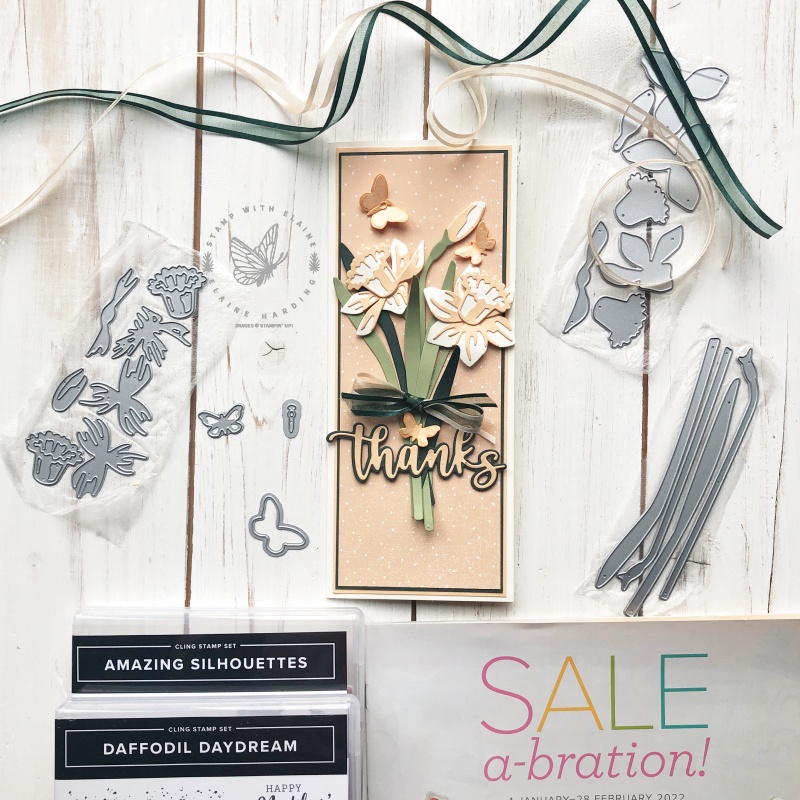
Today’s long, slim “Thank you” card has daffodils die cut with Stampin’ Up!’s Daffodil Dies. I had procrastinated too long, and with the end of Sale-a-bration nigh, it was time to address it. My last ditch effort to use the Daffodil Afternoon 12″ x 12″ DSP! Three more days, peeps and when it’s gone, it’s gone!
Like the tulips dies in a previous post which you can see HERE this daffodil die set also requires several pieces of die cuts to build the daffodil. There are two types of daffodils with different perspectives and a bud.
I chose to make the long, slim card because the stems of the daffodils are quite long.
Short cuts
You’ll notice in the photo that I’ve grouped my dies in 3 sections. The stems and leaves in a group, the accents in another and the base components in a third group. This is because they all require different coloured card stock. As there are so many components to create each bloom, I use a product called “Glad Press n’ Seal” and place my dies on it so that I can die cut them all together with one pass through the die cutting machine in their respective card stock colour groups. The dies stick to the Glad Press n’ Seal and stays in the configuration you put them in and you can lift them up altogether in their respective groups without having to position each die individually. It’s a time saver, for sure.

There are different schools of thought as to what the small die which looks like a “golf tee”. Some say that it is the stamen of a flower, but I beg to differ as I think it’s more suited to being the body of the butterfly so I’ve used it as such. If I’m wrong, then I stand corrected, but it doesn’t look out of place as the butterfly’s body don’t you think?
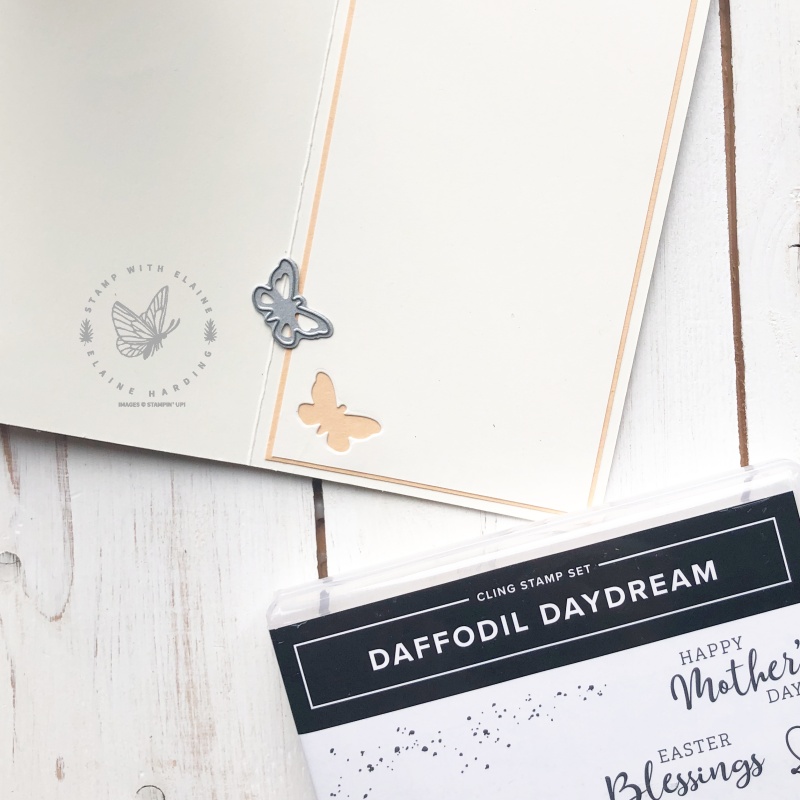
Inside card
Did you notice something about this card? If you guessed “no stamping” you are correct! I needed to balance the weight of the front of the card with the back, otherwise the card won’t stand up! Since I needed a coloured card stock behind the Very Vanilla layer, I simply die cut a butterfly aperture and let the card stock do the “talking”. It’s simple, but effective.

Card measurements
- Card base : Very Vanilla thick 7″ x 8-1/2″ (18 cm x 21.5 cm)
- First mat layer : 2 pieces Pale Papaya 3-1/4″ x 8-1/4″ (8.5 cm x 21 cm) one for card front and one for inside card
- Second mat layer : Evening Evergreen 3-1/8″ x 8-1/8″ (8 cm x 20.5 cm) card front
- Inside card second mat layer : Basic White 3-1/8″ x 8-1/8″ (8 cm x 20.5 cm)
- Third mat layer card front : Daffodil Afternoon DSP 3″ x 8″ (7.5 cm x 20 cm)
In addition you will need scraps of card stock in Very Vanilla , Pale Papaya, Evening Evergreen, Pear Pizzazz to die cut the daffodils, leaves and sentiment.
Video Tutorial
Do watch the video to see how the card came together. A visual demonstration makes it so much easier to understand!
Supply list
Listed below is the supply list. Just click on the picture to take you directly to the item in my online store.
Product ListStampin’ hugs!

- SHOP ONLINE – EARN 10% REWARDS ON ALL PURCHASES OVER £20
- PURCHASE A STARTER KIT : Get £155 worth of products for only £99. Choose from current catalogues and any specials available. Free Shipping. Read more
- Subscribe to my Video Tutorials – click here


