
I’m sharing a fun fold pop up card with Garden Greenhouse bundle today. It’s actually a stand alone pop up card. The first one I ever made was 12 years ago from a tutorial on Splitcoaststampers. Unfortunately it’s so long ago, I’ve mislaid the template and had to start from scratch and re-size it.
After several attempts at different heights, I finally settled on this one. When Eden’s Garden was introduced, they had some pretty papers to go with it. I should’ve checked to see if the papers were still available, and I didn’t. To my horror, the papers are no longer available. In the video, I’ve replaced it with the current Bloom Where You’re Planted DSP, so if you do happen to have some Ever Eden papers left you can make it with that too.
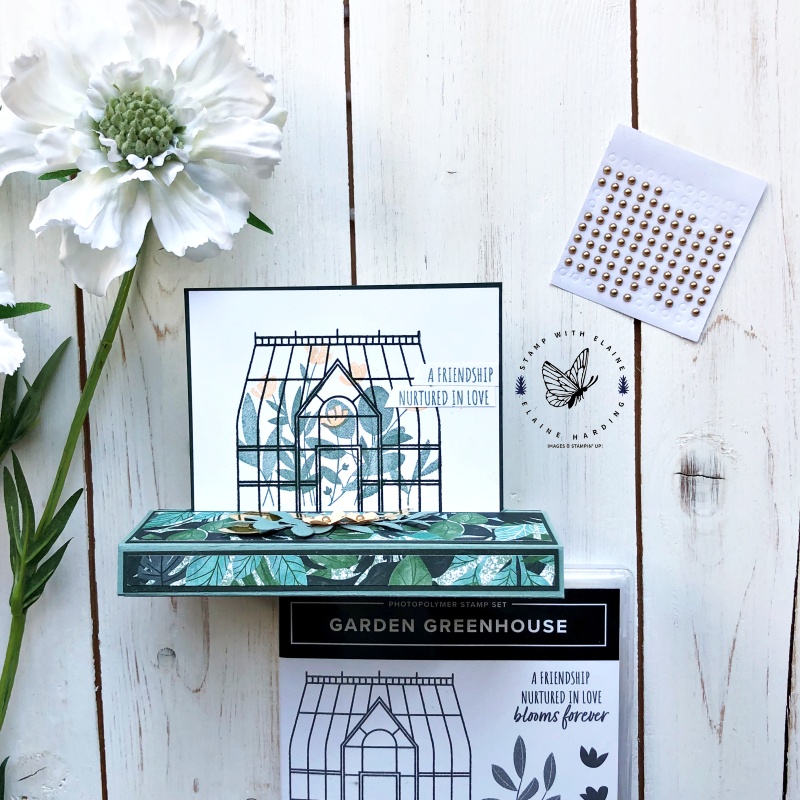
You can make it in any colour, of course, but my colour palette for this stand alone pop up is shades of green.
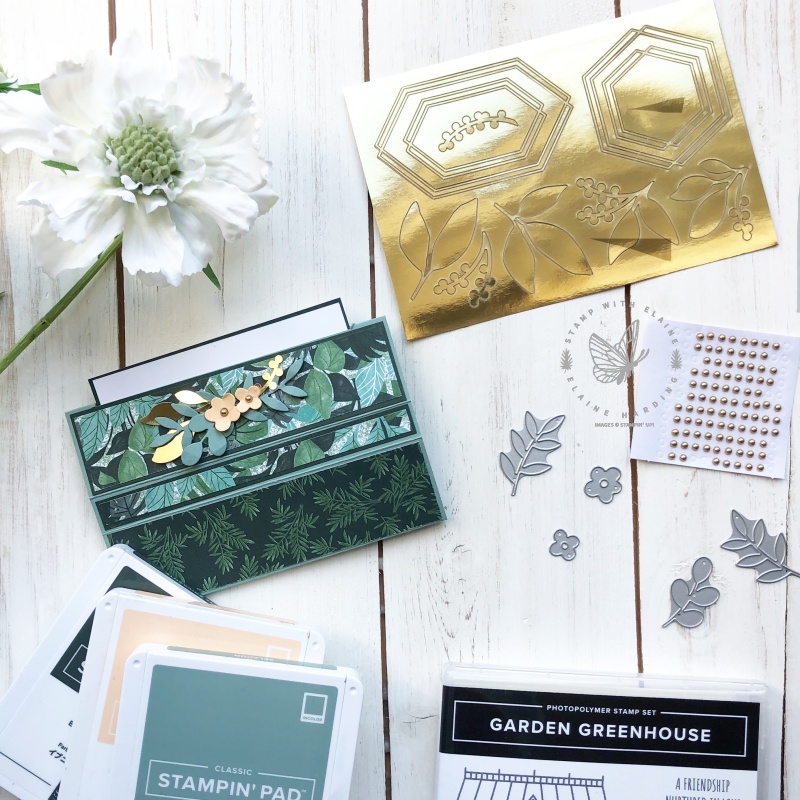
This is what it looks like when it’s laid flat for putting in an envelope for mailing. The inks I used are Evening Evergreen, Soft Succulent and Pale Papaya. To decorate the front of the card, I die cut some flowers in Pale Papaya and leaves in Soft Succulent. I also used the Expressions in Ink Ephemera pack for a touch of gold to coordinate with the metallic pearls.
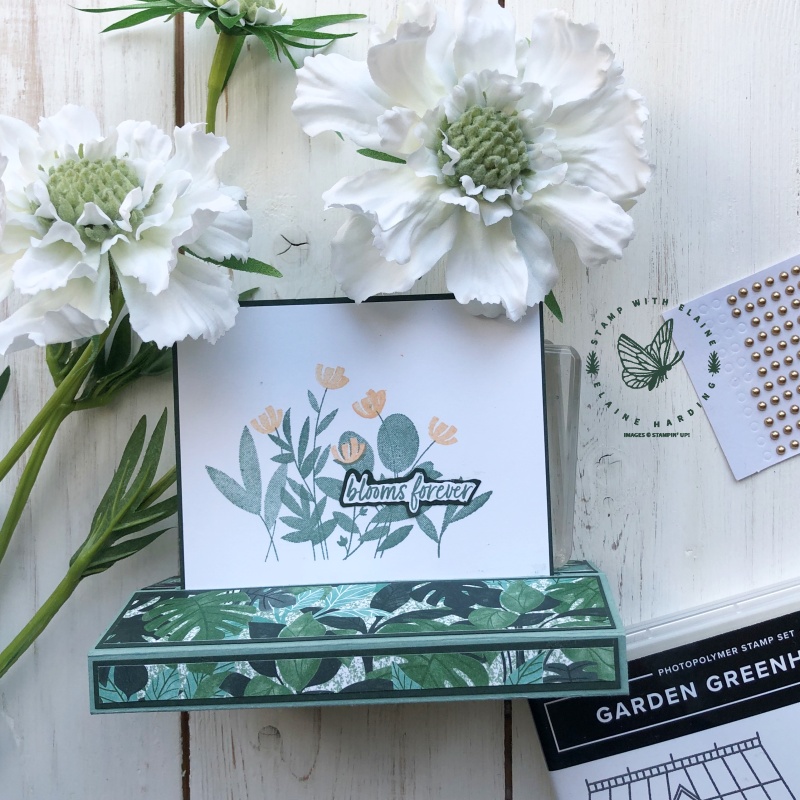
This is the reverse of the Pop Up insert. Somewhere to address the recipient and to say who it’s from.
Cutting guide
Please watch video for assembly instructions.
Imperial
- Pop Up card base mechanism : Soft Succulent 8-1/2″ x 5-1/2″
- Long side on top score at 5/8″, 2-1/8″, 2-3/4″, 4-1/4″, 5-3/4″ 6-3/8″, 7-7/8″.
- In same orientation with long side on top, you need to make two parallel cuts on either side of the 4-1/4″ score line. Align paper a tad to the left of 4-1/4″ score line and cut from 1/2″ down to 5″. Re-align paper a tad to the right of the 4-1/4″ score line and repeat cut. Connect the cuts top and bottom to create the slot.
- Top of box Mat layer 1 : cut 2 pieces Evening Evergreen 5-3/8″ x 1-3/8″
- Box sides Mat layer 1 : cut 2 pieces Evening Evergreen 5-3/8″ x 1/2″
- Top of box DSP Pattern 1 : cut 2 pieces 5-1/4″ x 1-1/4″
- Side of box DSP Pattern 1 : cut 2 pieces 5-1/4″ x 3/8″
- Bottom of box DSP Pattern 2 : cut 2 pieces 5-3/8″ x 1-3/8″
- Pop Up card insert Mat layer 1 : Evening Evergreen 4-3/8″ x 4″
- Basic white for stamping and adhering to no. 9 : cut 2 pieces 4-1/4″ x 3-7/8″
Metric
- Pop Up card base mechanism : Soft Succulent 22 cm x 14 cm.
- Long side on top score at 1.5 cm, 5.5 cm, 7 cm, 11 cm, 15 cm, 16.5 cm, 20.5 cm.
- In same orientation with long side on top, you need to make two parallel cuts on either side of the 11 cm score line. Align paper a tad to the left of 11 cm score line and cut from 1.5 cm down to 12.5 cm. Re-align paper a tad to the right of the 11 cm score line and repeat cut. Connect the cuts top and bottom to create the slot.
- Top of box Mat layer 1 : cut 2 pieces Evening Evergreen 13.5 cm x 3.5 cm.
- Box sides Mat layer 1 : cut 2 pieces Evening Evergreen 13.5 cm x 1 cm.
- Top of box DSP Pattern 1 : cut 2 pieces 13 cm x 3 cm.
- Side of box DSP Pattern 1 : cut 2 pieces 13 cm x 0.5 cm.
- Bottom of box DSP Pattern 2 : cut 2 pieces 13.5 cm x 3.5 cm.
- Pop Up card insert Mat layer 1 : Evening Evergreen 10.5 cm x 10 cm.
- Basic white for stamping and adhering to no. 9 : cut 2 pieces 10 cm x 9.5 cm
Video Tutorial
Here’s a visual aide to better illustrate how the card comes together. I’ve also shown a couple of extra samples not pictured in this blogpost.
Supply list
Listed below is the supply list. Just click on the picture to take you directly to the item in my online store.
Product List


 Designer Series Paper")


Stampin’ hugs!

- SHOP ONLINE – EARN 10% REWARDS ON ALL PURCHASES OVER £20
- PURCHASE A STARTER KIT : Get £155 worth of products for only £99. Choose from current catalogues and any specials available. Free Shipping. Read more
- Subscribe to my Video Tutorials – click here
Pingback: Fun Fold pop-up card - Silly Safari - Stamp with Elaine