
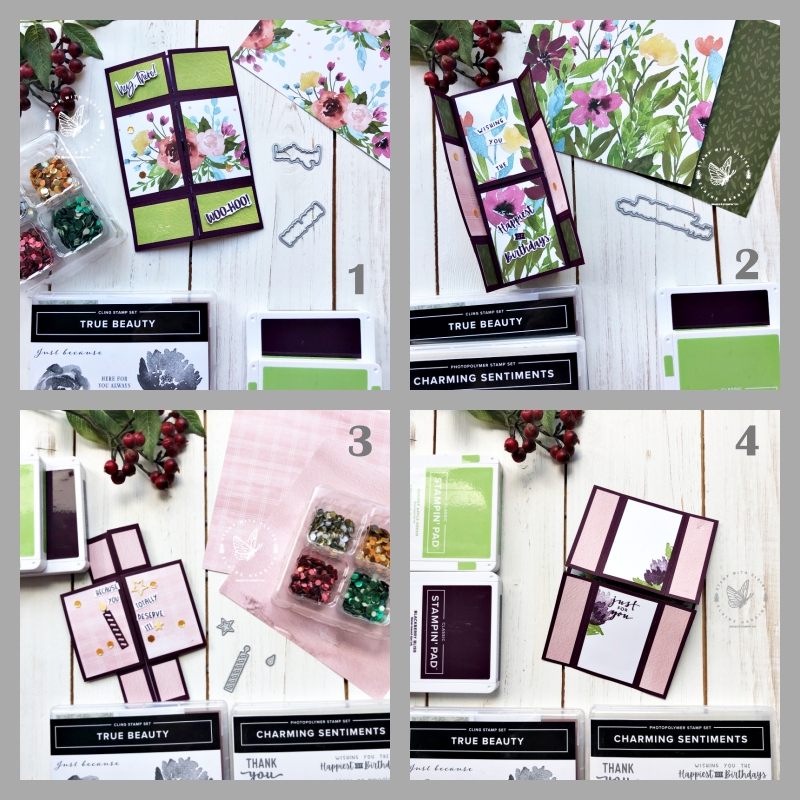
A long overdue tutorial on an Interactive Infinity card using the True Beauty bundle from the Awash in Beauty Suite and Charming Sentiments bundle. Imagine my dismay when I discovered that way back in March 2018 I had promised to do a tutorial on an infinity card but somehow had not delivered because I couldn’t find it anywhere on my blog when I searched my website! Lucky for me, I’d still kept the original as a template for future reference.
This is the card I made then which you can see HERE all those years ago. OMG – a mere 4 and a bit years overdue !!! How on earth did that happen? So today, I’m finally addressing the oversight!
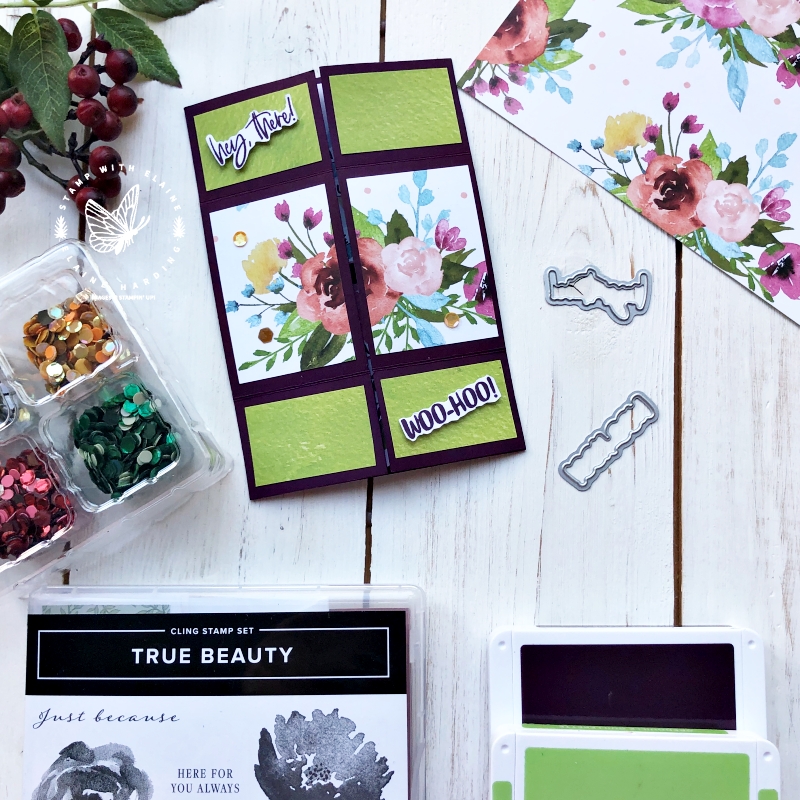
I thought it best to display it as a collage so you could see the progression of it being opened. There are four sides in all – the first opens like a gatefold.
On side 2, where the sentiment reads “wish you the” folds back. Then on the section where it says “happiest of birthdays”, that folds down and once flattened, it should resemble a cross.
The cross section is side 3. The sentiments have been trimmed to fit within the narrow panel above and below. To access Side 4, simple flip both large panels down toward the back for the reveal.
On side 4, I stamped and adhered the two centre panels and left enough white space to pen a few words and also for the signature.
Then to return to the beginning, you simply fold the top and bottom half backwards. If you fancy it….you can start ALL over again!!!
Infinity card mechanism
There are 3 measurements for different markets. The measurements for UK, Europe and South Pacific are both in Imperial and metric. I have a separate one for the US and Canadian markets because your A4 card stock is shorter and wider.
UK, Europe and South Pacific
Imperial & Metric in brackets
- Cut 2 pieces Blackberry Bliss – 4″ x 5-3/4″ (10 cm x 14 cm). I will call one piece “A” and the other “B”.
- Take “A” and on the short side score each end at 1″ (2.5 cm)
- Orient “A” on the long side and cut it in half at 2-7/8″ (7 cm). This will be the base of the Infinity mechanism. The top half is “A1” and the bottom half is “A2”.
- For “B” – long side at the top, score each end at 1-7/16″ (3.5 cm).
- Orient “B” on the short side and cut in half at 2″ (5 cm). The left half is “B1” and the right half is “B2”.
US and Canadian
- Cut 2 pieces Blackberry Bliss – 4-1/4″ x 5-1/2″ I will call one piece “A” and the other “B”.
- Take “A” and on the short side score each end at 1-1/16″
- Orient “A” on the long side and cut it in half at 2-3/4″ . This will be the base of the Infinity mechanism. The top half is “A1” and the bottom half is “A2”.
- For “B” – long side at the top, score each end at 1-3/8″.
- Orient “B” on the short side and cut in half at 2-1/8″. The left half is “B1” and the right half is “B2”.
Assembling mechanism
This is the same for all UK, Europe, South Pacific, USA and Canada. Top tip – use the Scoring Tool to ensure the corners of each layer is accurately aligned.
- Place A1 in portrait orientation on work surface. Apply adhesive in the top left corner and top right corner. If using multi-purpose glue, ensure it doesn’t seep beyond score line.
- Take B1 and align it in the top right corner with A1.
- Once that has bonded, take B2 and butt it up flush with B1 and simultaneously aligned with the top right corner of A1.
- Now place A2 into the corner of the scoring tool upside down so that the cut line is butted up to A1’s cut line.
- Apply adhesive into the top left and top right of A2 on the score tool – ensure adhesive stays well within the score line and doesn’t seep beyond.
- Turn your partially adhered mechansim upside down with the B pieces face up. Butt it up into the corner of the scoring tool and adhere to A2.
That’s it! The Designer Series paper layers are cut 1/4″ or 0.5 cm smaller for each section so watch the video for hints and tips on how the rest is assembled.
Video tutorial
Supply list
Listed below is the supply list. Just click on the picture to take you directly to the item in my online store.
Product List")
")

")
")

 Designer Series Paper")


- SHOP ONLINE – EARN 10% REWARDS ON ALL PURCHASES OVER £20
- PURCHASE A STARTER KIT : Get £155 worth of products for only £99. Choose from current catalogues and any specials available. Free Shipping. Read more
- Subscribe to my Video Tutorials – click here