
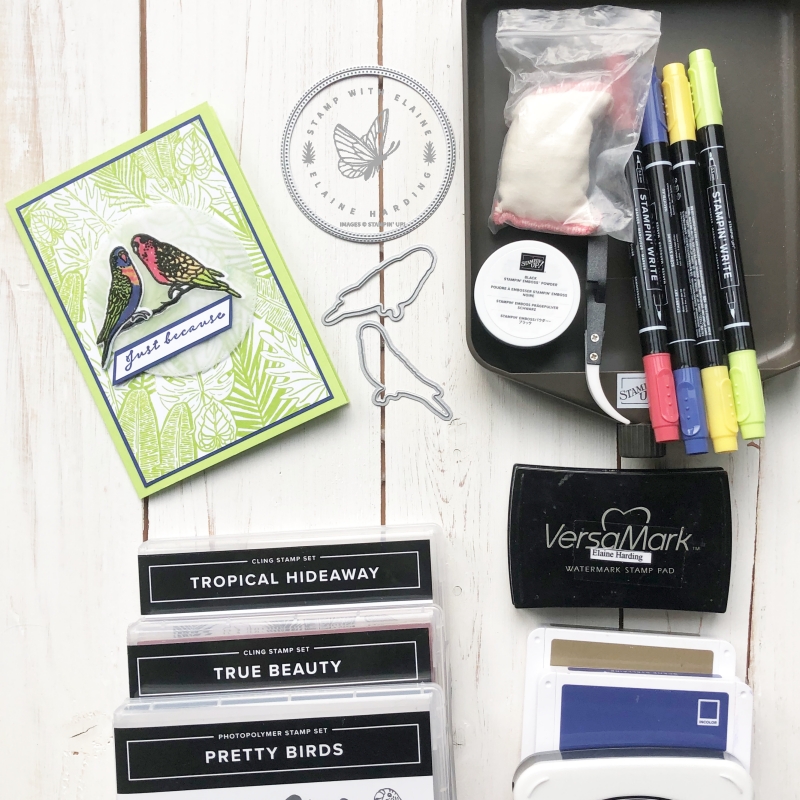
I have a Stain Glass Technique with Pretty Birds stamp set on a Tropical Hideaway background to share this Sunday. It wasn’t until recently that I treated myself to the Pretty Birds bundle. Ever since the Annual Catalogue for 2022-2023 launched, I had been eyeing it and couldn’t justify the expense. Almost six months since launch, I could resist it no longer and now I have it in my hot little hands!
There are so many different ways to use it so in the ensuing Sunday blog posts I will share the different techniques. My first is a Stain glass technique.
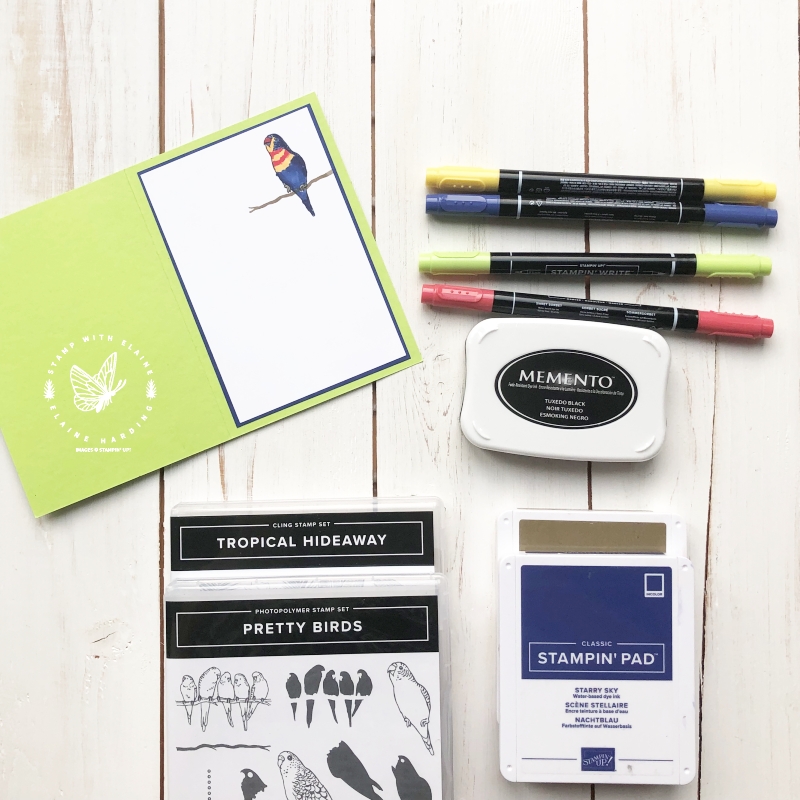
Here’s the inside……
Stain glass technique
Use an embossing buddy to prevent static and dust over your card stock. Stamp image in Versamark ink on Vellum card stock. You can use white or black embossing powder – I chose black. Heat set it. On the reverse side of the vellum, use Stampin’ Write marker pens to add colour to your image. Ensure you keep within the lines.
Turn your vellum card stock back to the right side and voila – there’s the stain glass look!
Card details
- Cut a Parakeet card base 8-1/4″ x 5-7/8″ (21 cm x 14.5 cm) and fold it in half.
- First mat layer for card front and inside card – cut 2 pieces in Starry Sky 5-1/2″ x 3-3/4″ (14 cm x 9.5 cm). Adhere this to the front and inside.
- Second mat layer for card front and inside card – cut 2 pieces in Basic White 5-3/8″ x 3-5/8″ (13.5 cm x 9 cm).
- Stamp the Tropical Hideaway image on one of the Basic White pieces with Parakeet Party ink and adhere on top of Starry Sky layer on card front.
- On the second piece of Basic White, stamp the branch in Soft Suede and the budgie facing front in Tuxedo Black Memento ink. Colour the budgie with Daffodil Delight, Starry Sky, Parakeet Party and Sweet Sorbet Stampin’ Write marker pens.
- With the largest Stylish Shapes circle die, cut a Vellum circle. Stamp birds, branch in versamark, sprinkle with black embossing powder and heat set. On the reverse side of vellum, colour in the birds.
- Die cut in basic white the corresponding birds and fussy cut a stamped branch. Attach these to the reverse of the vellum to align with the stamped images – this will make it “pop” and it will also hide the dimensionals. Attach dimensionals and adhere to card front.
- Stamp “just because” from True Beauty, trim and layer it on a Starry Sky mat layer to finish the card. Use glue dots to attach sentiment on top of vellum.
- For added stability, you can add dimensionals to back of vellum behind sentiment so that the dimensionals remain hidden.
Supply list
Listed below is the supply list. Just click on the picture to take you directly to the item in my online store.
Product List


")


Thank you for visiting – enjoy the rest of your weekend!

- SHOP ONLINE – EARN 10% REWARDS ON ALL PURCHASES OVER £20
- PURCHASE A STARTER KIT : Get £155 worth of products for only £99. Choose from current catalogues and any specials available. Free Shipping. Read more
- Subscribe to my Video Tutorials – click here