
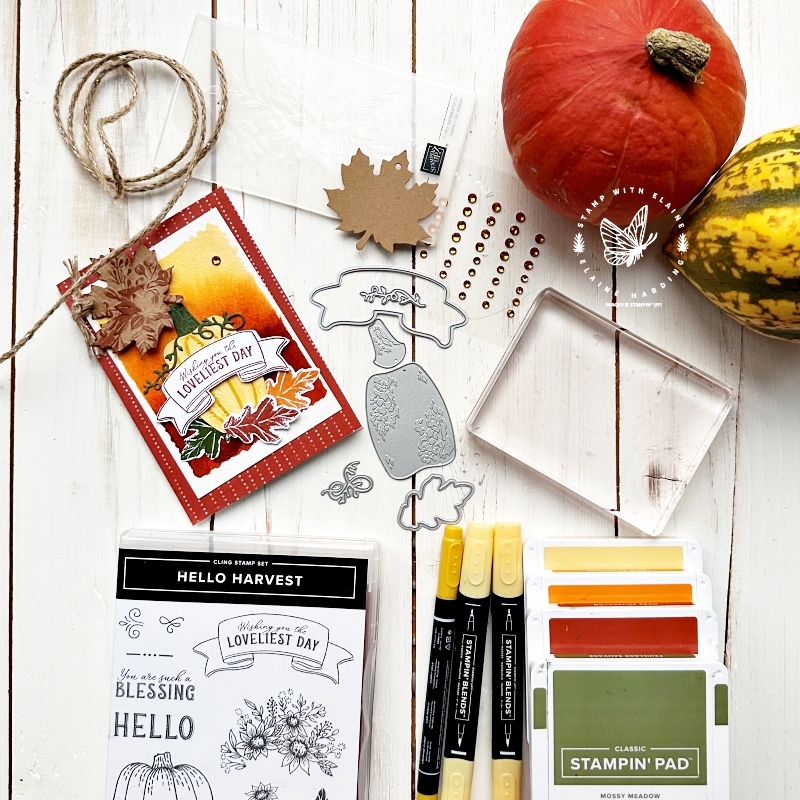
The block background technique is a lovely way to achieve an ombre look for this autumnal card using the Hello Harvest Bundle. It’s simple and effective and I love it. It’s a technique I often re-visit.
Block Background technique
Before you begin, protect your work space with waterproof matting or a waterproof container in which you can spritz the block so you keep your stamp area dry. Gather your materials.
- An acrylic block. The size of the block depends on the size of your project. I used Block E for this card.
- Specific to this project, I used 3 ink pads but this can vary depending on what effect you desire. You can go monotone with a single colour, or 2 colours or 3 colours. I would advise not to use more than 3 because it will muddy the colours. Ideally you want 3 shades, light, medium and dark. I chose autumn colours in So Saffron, Pumpkin Pie and Cajun Craze.
- A water spritzer.
- Water colour paper (Fluid 100)
Method
- Cut Stampin’ Up!’s Fluid 100 paper in half measuring 3 ½”x 5″ (7.6 cm x 12.7 cm)
- Hold acrylic E block in your hand and ink up ¼ of block in lightest ink (So Saffron)
- Lay block on work surface and ink block with medium colour (Pumpkin Pie) staying clear of the So Saffron layer.
- Use a shammy to wipe off excess Pumpkin Pie leaving a wider band of clear block for the darkest shade.
- Leave block on work surface and take ink pad in darkest colour (Cajun Craze) to ink up the rest of the block.
- Hold block over container and spritz with water a good few squirts.
- It’s easier to take the paper to the block because if you do it the other way round, the block will drip and you won’t have as much control over where the ink goes.
- Allow to dry before you stamp on it or use it as a backdrop.
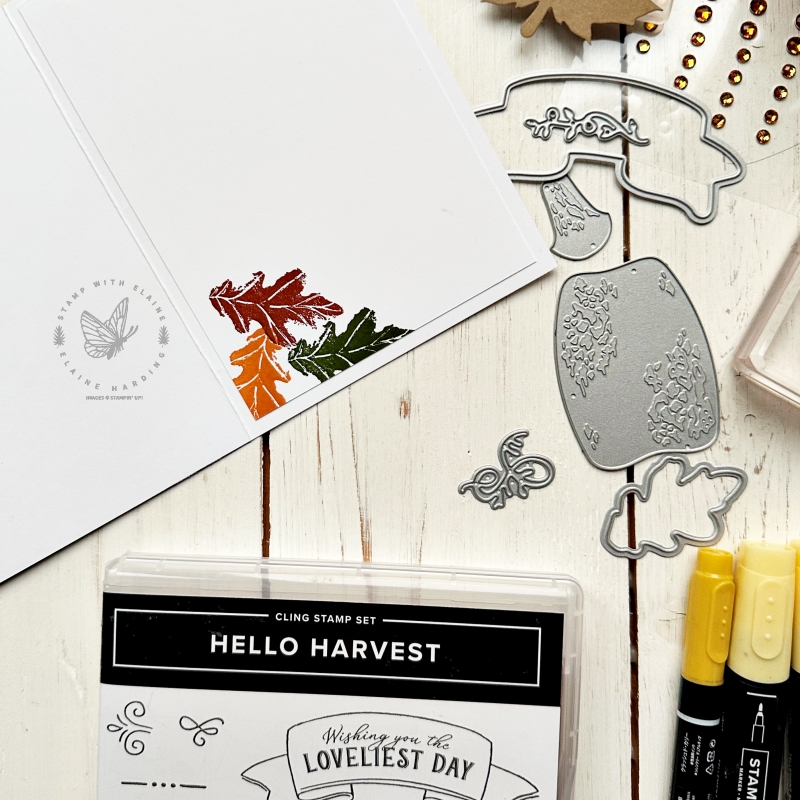
Inside card
I often keep the inside simple. The star of the show is usually the front. To tie in with the card front I simply stamped the leaf image in the same colours as the leaves on the card front.
Card Details
- Card base is Basic White Thick – ½ A4 sheet 5 ⅞” x 8 ¼” (14.5 cm x 21 cm) folded in half
- Cut Rustic Harvest DSP 5 ⅞” x 4 ⅛ ” (14.5 cm x 10.5 cm) and adhere to card front.
- Prepare your block background with the water colour paper and once it’s dried, punch a hold in the top left hand corner.
- Take one of the Leaf Labels and emboss with the Elegant Eucalyptus 3D embossing folder and swipe it over the Cajun Craze ink pad.
- Thread the Silver Threaded twine through both the leaf and water colour background piece and tie knot.
- Adhere this to card front at an angle.
- Stamp 3 leaves, one in Cajun Craze, one in Mossy Meadow and one in Pumpkin pie. Stamp banner sentiment.
- Die cut pumpkin elements with So Saffron, Mossy Meadow, the stamped leaves and the banner with the Rustic Pumpkin Dies.
- Highlight the Pumpkin die cut with Crushed Curry Stampin’ Write pen and So Saffron Stampin’ Blends combo.
- Adhere and layer the elements to the card front and add an amber gem in the top right corner.
- Stamp inside of card to finish.
Video Tutorial
Here’s a video tutorial to show how I assembled it.
Supply list
Listed below is the supply list. Just click on the picture to take you directly to the item in my online store.
Product List")
")


 Designer Series Paper")


- SHOP ONLINE – EARN 10% REWARDS ON ALL PURCHASES OVER £20
- PURCHASE A STARTER KIT : Get £155 worth of products for only £99. Choose from current catalogues and any specials available. Free Shipping. Read more
- Subscribe to my Video Tutorials – click here