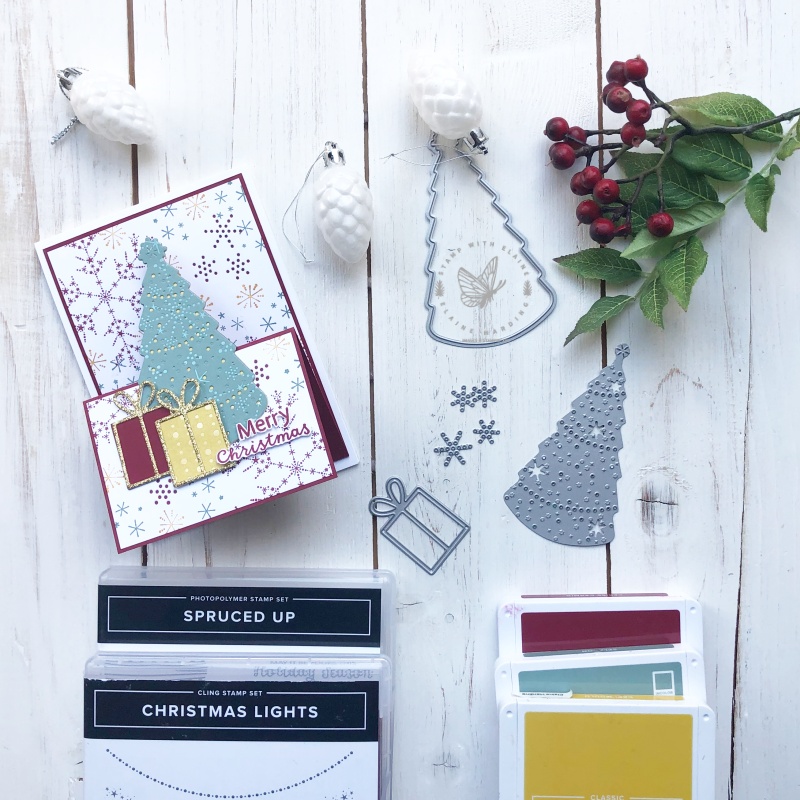
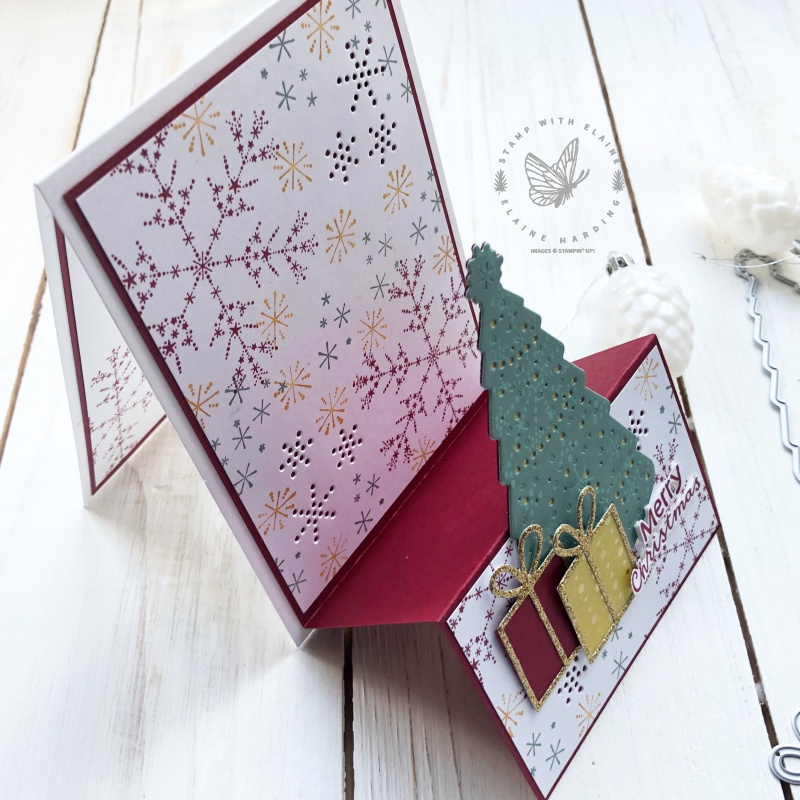
I am delighted with how this fancy fold card using the Christmas Lights bundle turned out. Today is episode 7 of 12 in my 12-week Christmas Countdown series for 2022. Instead of using bought patterned paper, I made my own to save my pennies!

Fancy Fold mechanism
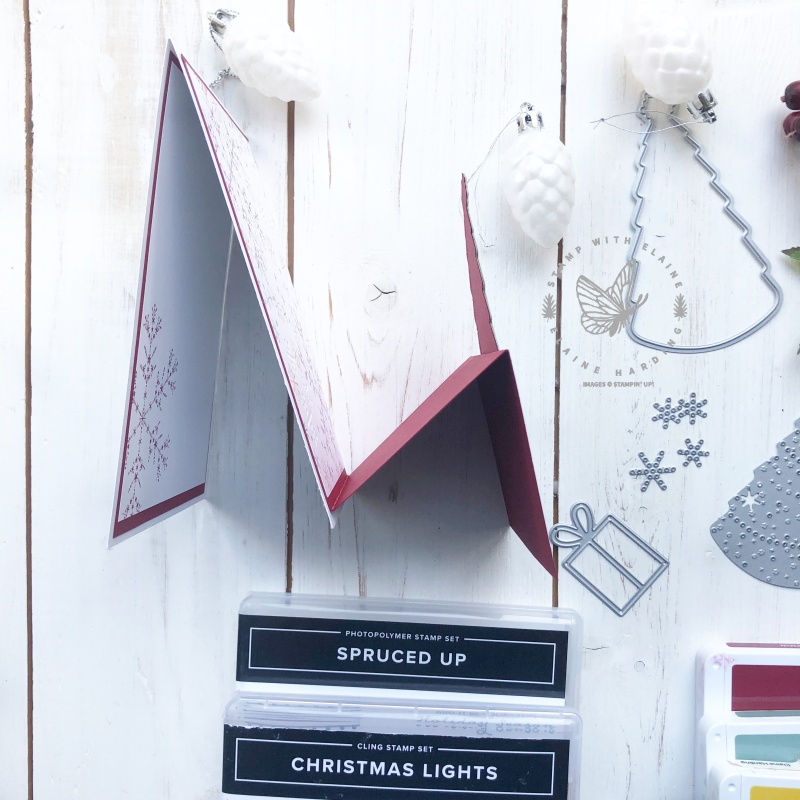
You won’t believe how simple this fancy fold is. The fancy fold mechanism is simply a much smaller card measuring 3 ⅞” x 11″ (10 cm x 28 cm) in Cherry Cobbler scored on the long side at 2 ¾” and 5 ½” (7 cm and 14 cm) and then adhered to the front of the card base with the fold on the right side in the opposite direction to that of the fold of the card base.


Card details
The card base is a standard card in Basic White Thick. In Europe this is half an A4 sheet which measures 5 ⅞” x 8 ¼” (14.5 cm x 21 cm) folded in half
- Fancy fold mechanism : Cherry Cobbler cut at 3 ⅞” x 11″ (10 cm x 28 cm). Long side score at 2 ¾” and 5 ½” (7 cm and 14 cm)
- Adhere Cherry Cobbler fancy fold mechanism to the front of the Basic White card base ensuring that the fold is on the bottom.
- Stamp your own patterned paper on Basic White cut at 3 ¾”x 5 ¼” (9.5 cm x 13.5 cm) . Use the Twinkling Lights dies to add snowflake perforations in the top right and bottom left corner.
- Once completed, adhere this piece to the back of the Fancy fold mechanism.
- Cut a Basic white piece and stamp your own patterned paper 2 ⅝” x 3 ¾” (6.5 cm x 9.5 cm). Also use Twinkling Lights dies to add perforations.
- Adhere this piece to the front step of fancy fold mechanism
Embellishing with Die Cuts
- Cut a tree silhouette in Festive Gold foil and Cherry Cobbler with Twinkling Lights dies.
- Soft Succulent Festive Foil – use both tree dies from Twinkling Lights dies to die cut and emboss perforated tree.
- Glue Soft Succulent tree on top of Festive Gold foil tree and then glue both on top of the Cherry Cobbler tree. Adhere trio of trees to front step.
- Apply adhesive sheet to back of Festive Glimmer specialty card stock in gold. Die cut 2 pieces with the present outline from Spruced Up outline dies. Partially peel back adhesive sheet, leaving *adhesive sheet on back of bow in tact and adhere Cherry Cobbler and Festive Gold foil on respective pieces. *Leave the back of the bow’s protective backing sheet in situ but cut away the rest.
- Partially adhere tree to step card front.
- Once the presents are prepped, stagger these and adhere to base of tree. The Cherry Cobbler gift is adhered directly on to tree, but the base and top right corner of the Gold gift is adhered with dimensionals.
- Stamp and fussy cut “Merry Christmas” and adhere to front step of card with dimensionals.
Inside card
- Cut and adhere Cherry Cobbler mat layer measuring 3 ⅞” x 5 ⅝” (10 cm x 14 cm)
- Mat layer #2 : Basic White 3 ¾” x 5 ½” (9.5 cm x 13.5 cm)
- Partially stamp the largest snowflake in the bottom left corner
- Adhere this to the Cherry Cobbler mat layer.
Video tutorial
Better still, just press play and watch how it came together!
Supply list
Listed below is the supply list. Just click on the picture to take you directly to the item in my online store.
Product List
- SHOP ONLINE – EARN 10% REWARDS ON ALL PURCHASES OVER £20
- PURCHASE A STARTER KIT : Get £155 worth of products for only £99. Choose from current catalogues and any specials available. Free Shipping. Read more
- Subscribe to my Video Tutorials – click here


