
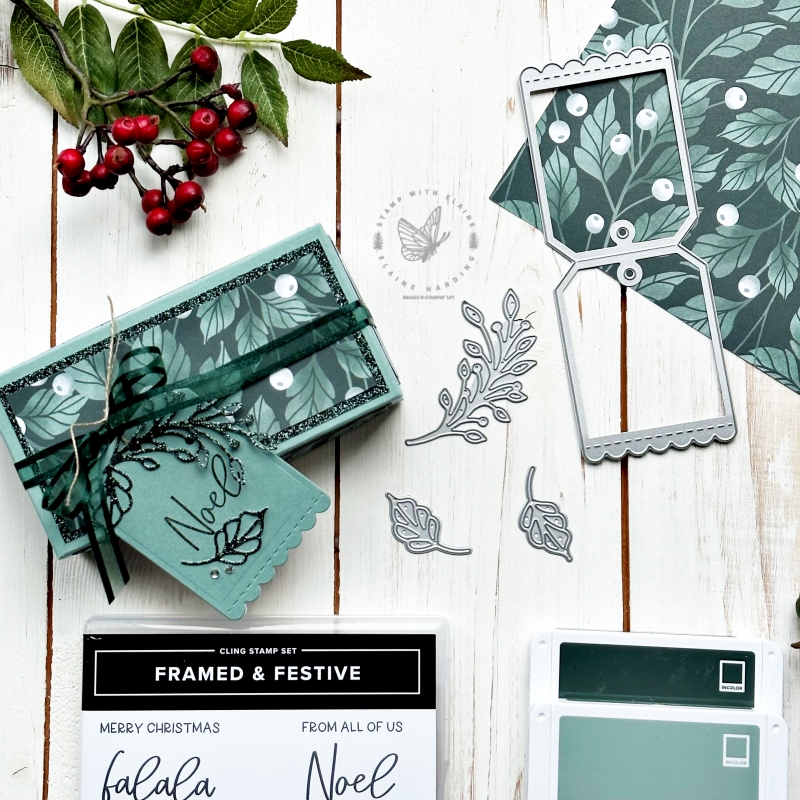
It’s episode 9 of 12 in my 12 week Christmas Countdown Series for 2022 and today I have a bespoke table favour using Framed Florets. In the Fitting Florets collection, there is a second stamped set called Framed and Festive which is only available for a limited time and only while stocks last.
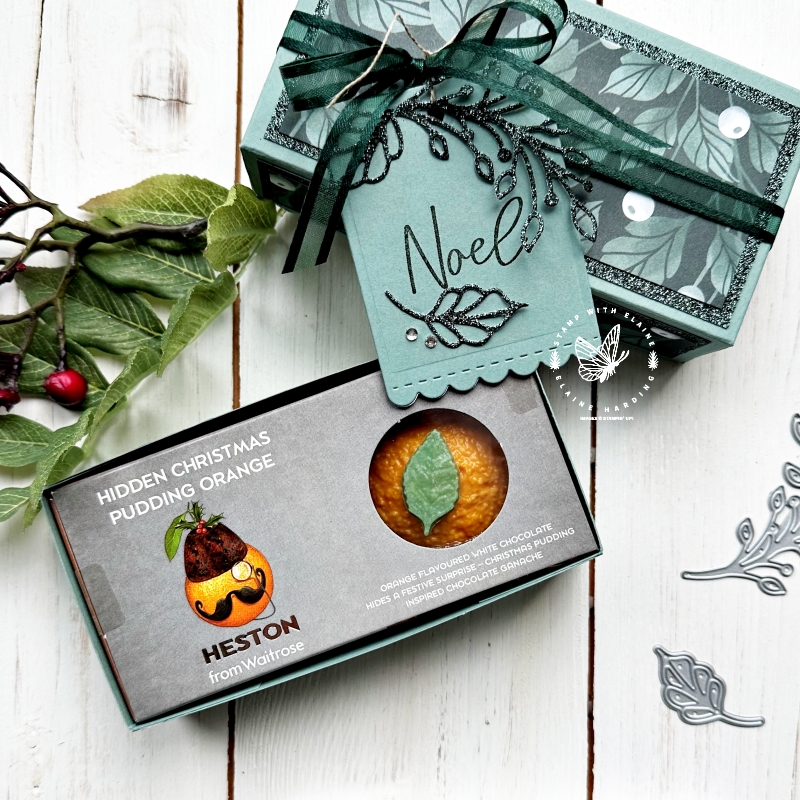
I could’ve used the ovals as a tag but felt it was too large for the box so I combined it with the Celebrate with Tags bundle which I featured HERE some time ago.
I found these chocolate treats from our local grocery store. A very famous Michelin Star chef is in partnership with them and around special occasions there’s always something new created to tempt the palette. This time it is a hidden Christmas pudding orange and I thought they would make wonderful table favours.
Cutting guide
Metric measurements are in brackets. For this box I’ve made a precise conversion into metric rather than round it off because the box has to be a snug fit.
Box Base
- Cut a piece of Soft Succulent 5 ⅜” x 8″ (13.6 x 20.3 cm)
- Score all 4 sides at 1 ⅜” (3.5 cm)
Lid of Box
- Cut a piece of Soft Succulent 5-7/16″ x 8-1/16″ (13.8 cm x 20.5 cm)
- Score all 4 sides at 1 ⅜” (3.5 cm).
Lid liner
You need this to cover up the ribbon attached to the lid.
- Cut a piece of Soft Succulent 2 ½” x 5 ⅛” (6.4 cm x 13 cm)
Decorating Box lid
Glimmer paper Evening Evergreen
- Short lid sides : 2 pieces 1 ⅛” x 2 ⅜” (3 cm x 6 cm)
- Long lid sides : 2 pieces 1 ⅛” x 5″ (3 cm x 12.7 cm)
- Top of box lid : 1 piece 2 ⅝” x 5″ (6.5 cm x 12.7 cm)
- On trimmer, gut all pieces with ¼” margin on all 4 sides. This makes it easier to adhere DSP on to the glimmer paper plus you have the added bonus of recycling it on another project!
Fitting Florettes 12″x 12″ (30.5 x 30.5 cm) DSP
If you wish your box lid to have a continuous pattern, cut the DSP the width of the box and add the total height together of all the pieces. Be mindful of the orientation of the pattern.
- Long sides+lid top : 3 ⅞” x 4 ¾” (9.8 cm x 12.1 cm)
- Orient DSP on the short side. Align left edge at ⅞” (2.2 cm) and cut – call it piece “A”
- Next align left edge at 2 ⅛” (5.4 cm) and cut – this will be the top of lid “B”
- Left over piece will measure ⅞” (2.2 cm) – the other side of box lid “C”.
- Short sides : 2 pieces cut at ⅞” x 2 ⅛” (2.2 cm x 5.4 cm)
Additional card stock required
- Soft Succulent scrap to die cut label
- Basic White scrap to die cut label
- Extra Evening Evergreen glimmer paper to die cut Framed Florets leaves and sprig.
Video Tutorial
I always advocate having something visual to refer to, so here’s the video to show you how I assembled the box.
Supply list
Listed below is the supply list. Just click on the picture to take you directly to the item in my online store.
Product List")
")
")

")
")

 Designer Series Paper")
 Specialty Paper")


 Open Weave Ribbon")


- SHOP ONLINE – EARN 10% REWARDS ON ALL PURCHASES OVER £20
- PURCHASE A STARTER KIT : Get £155 worth of products for only £99. Choose from current catalogues and any specials available. Free Shipping. Read more
- Subscribe to my Video Tutorials – click here