
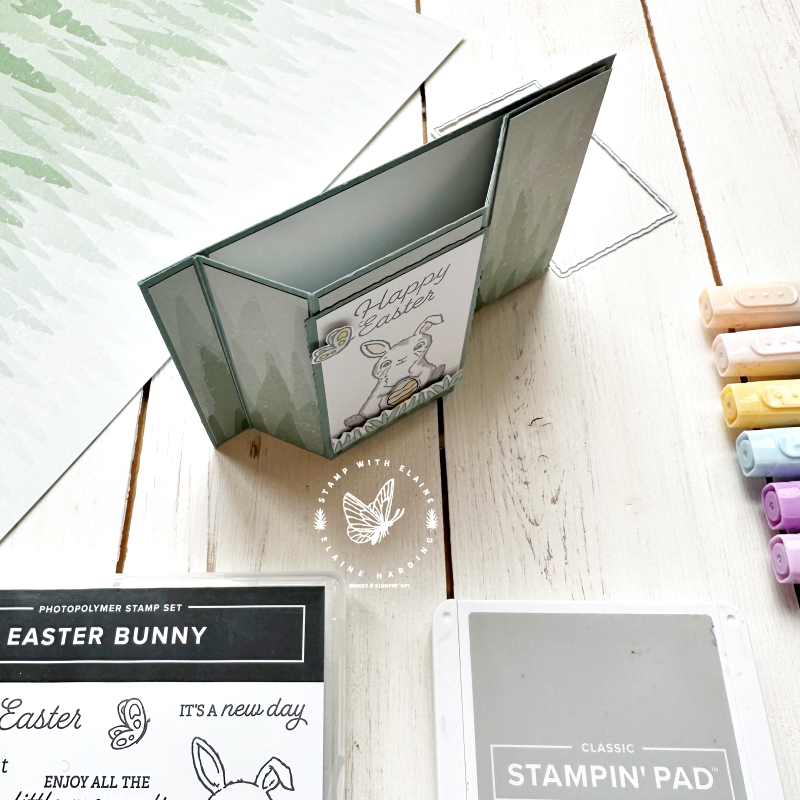
I’m using the Easter Bunny Bundle to make a fun fold Bay Window Easter card. The fold resembles a Bay window when tucked into the stopper attached to the inside of the card.
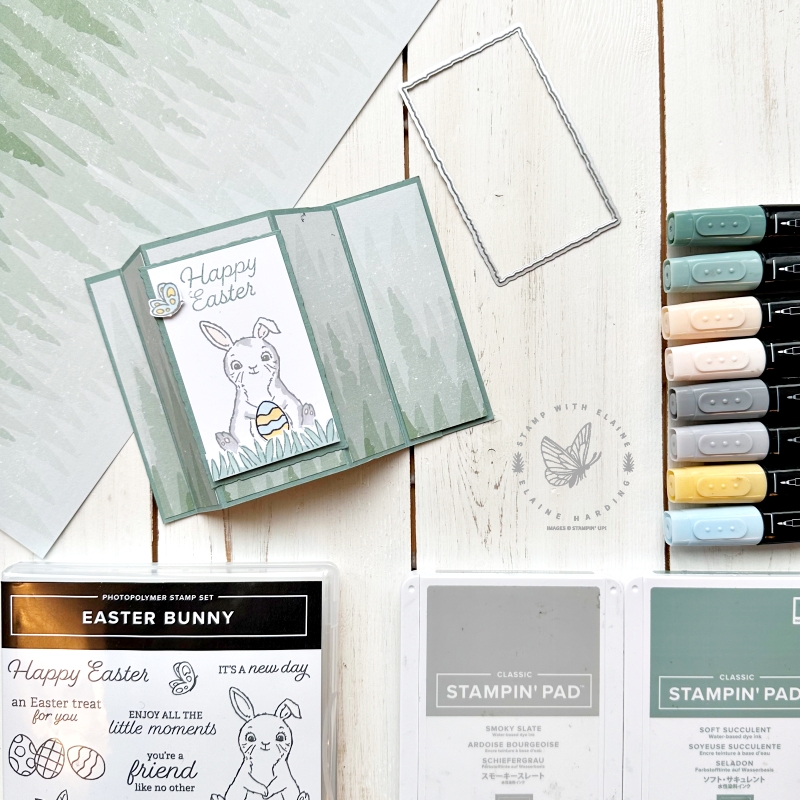
My take on the Bay Window fold is part a book fold too. I adhered the first panel to the card base like you do for a book fold so that when you tuck in the other end of the card into the stopper, it would sit better.
So, without further ado, let’s get started!
Cutting details
Imperial
Card Base
- Soft Succulent 4 ⅛” x 11 ½” folded in half
- Long side score at ⅝”, 1 ⅞”, 3 ⅞”, 5 ⅛”, 5 ¾” and mark at 10″
Card Front
- Deckled Rectange Dies – there are 8 nested dies. Beginning from the smallest being number 1, and 8 being the largest, select number 4 to die cut a Deckled Rectangle in Soft Succulent card stock.
- Cut a Basic White Mat layer at 3 ⅜” x 2”.
- Scraps of Basic White to stamp butterfly, easter egg and grass
Continuous pattern for DSP
- Enjoy the Journey 12″x 12″ DSP – overall size 11 ⅝” x 4”.
- Long side on top, cut off 1 ⅜” from right edge first. Set aside because this is the “stopper to adhere to the inside of the card base.
- Cut Soft Succulent 1 ⅜” x 4″ which is same size as DSP stopper. Adhere this to stopper DSP to strengthen stopper piece.
- Next cut remaining DSP which measures 10 ¼”x 4” in half at 5 ⅛” so you get two pieces which measure 5 ⅛” x 4″.
- Stack this on top of one another and cut both pieces simultaneously. Tip: use washi tape to ensure both pieces are aligned and stay in position.
- Keep pieces in the order which they’ve been cut i.e., ½”, 1 ⅛”, 1 ⅞”, 1 ⅛” and you should be left with a ½” piece.
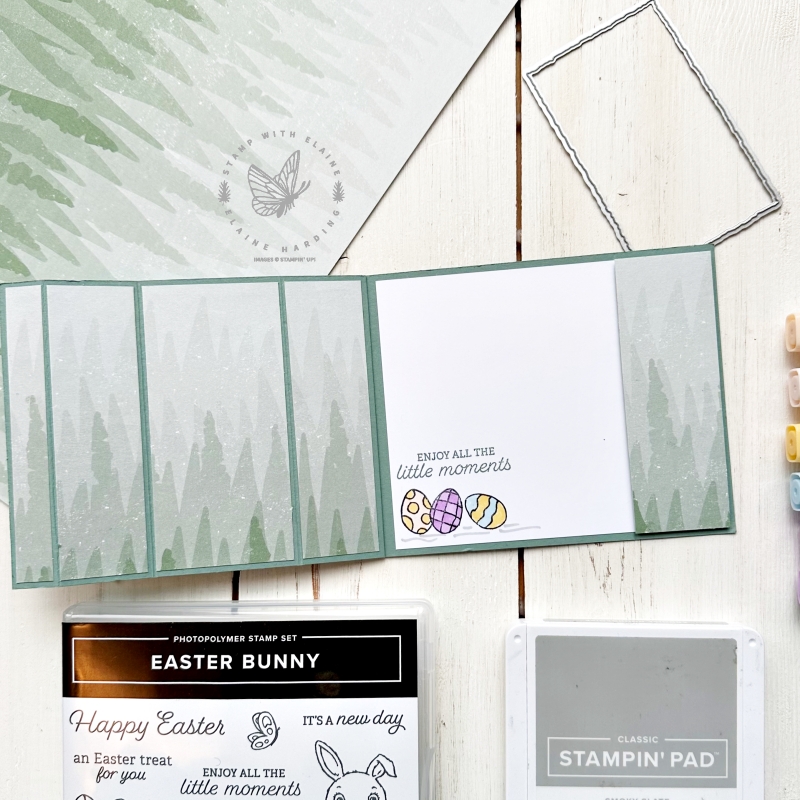
Inside card
- Cut a piece of Basic White at 4” x 4 ⅞”.
- Adhere this to the inside of the card base BEFORE you adhere stopper.
Metric
Card Base
- Soft Succulent 10.5 x 29 cm
- Long side score at 1.5 cm, 4.5 cm, 10 cm, 13 cm, 14.5 cm and mark at 25 cm.
- Scraps of Basic White to stamp butterfly, easter egg and grass
Card Front
- Deckled Rectange Dies – there are 8 nested dies. Beginning from the smallest being number 1, and 8 being the largest, select number 4 to die cut a Deckled Rectangle in Soft Succulent card stock.
- Cut a Basic White Mat layer at 8.5 cm x 5 cm.
Continuous pattern for DSP
- Enjoy the Journey 30.5 x 30.5 cm DSP – overall size 15.5 cm x 10 cm.
- Long side on top, cut off 3.5 cm from right edge first. Set aside because this is the “stopper to adhere to the inside of the card base.Fr
- Cut Soft Succulent 3.5 x 10 cm which is same size as DSP stopper. Adhere this to stopper DSP to strengthen stopper piece.
- Next cut remaining DSP which measures 12 cm x 10 cm in half at 6 cm so you get two pieces which measure 6 cm x 10 cm.
- Stack this on top of one another and cut both pieces simultaneously. Tip: use washi tape to ensure both pieces are aligned and stay in position.
- Keep pieces in the order which they’ve been cut i.e., 1 cm, 2.5 cm, 5 cm, 2.5 cm and you should be left with a 1 cm piece.
Inside card
- Cut a piece of Basic White at 10 cm x 12.5 cm .
- Adhere this to the inside of the card base BEFORE you adhere stopper.
Video Tutorial
Supply list
Listed below is the supply list. Just click on the picture to take you directly to the item in my online store.
Product List")
")


 Designer Series Paper")


- SHOP ONLINE – EARN 10% REWARDS ON ALL PURCHASES OVER £20
- PURCHASE A STARTER KIT : Get £155 worth of products for only £99. Choose from current catalogues and any specials available. Free Shipping. Read more
- Subscribe to my Video Tutorials – click here