
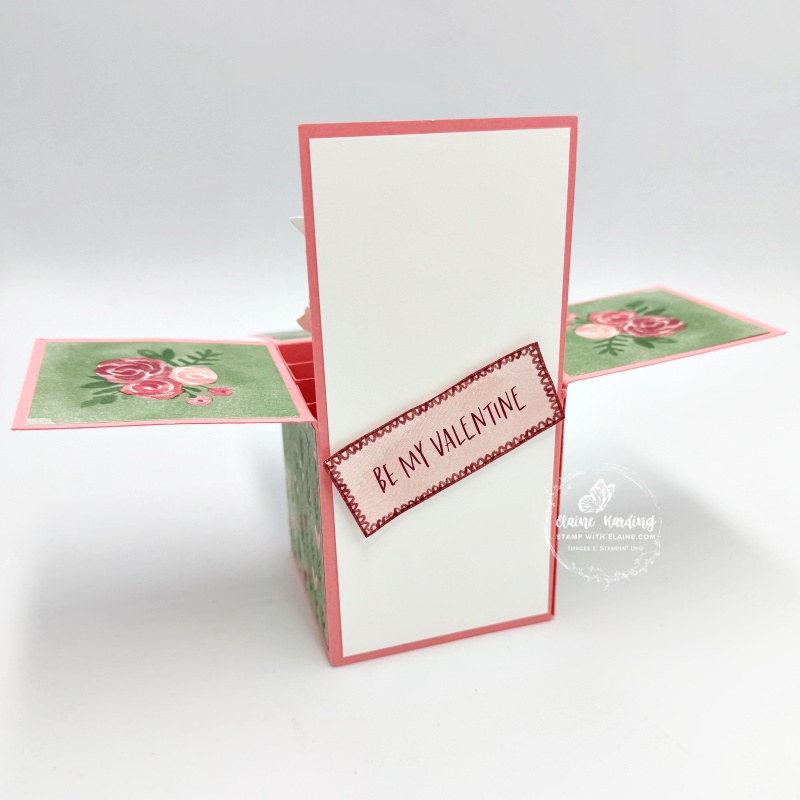
Card in a box Valentine. I have been making cards in a box with different variations from square ones to rectangular ones since 2014 for all sorts of occasions. Every now and again it’s good to revisit and make this fun fold with the latest offering of pretty papers and a different theme. Today’s card in a box is for Valentine’s Day using the Love Notes 6 x 6 DSP (Designer Series Papers).
No stamping!
There’s no stamping at all! I fussy cut what I needed where appropriate e.g., the heart shaped balloons, the hearts and arrow and the Be My Valentine greeting.

You can see a video tutorial of how this card is made in this post HERE back in June 2023! I cut directly from the trimmer then carried on scoring as a short cut which makes this card a lot easier to create.
Card in a box template
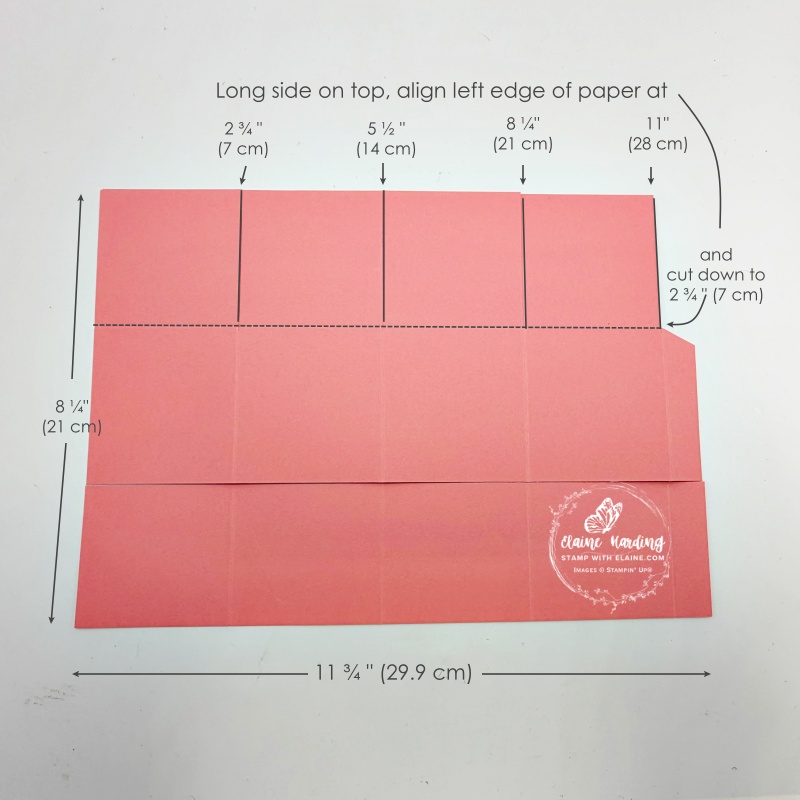
- Start off with an A4 sheet – in Europe it’s 8 ¼” x 11 ¾” (21 cm x 29.9 cm). Butt the long side at the top of your trimmer and align the left edge at 2 ¾”(7 cm) cutting down to 2 ¾”(7 cm). Repeat at 5 ½”, 8 ¼” and 11″(14 cm, 21 cm, 28 cm).
- Cut away rectangle as pictured.
- Place paper in score board with long side at the top using the cut lines as a guide, continue scoring to bottom of paper at 2 ¾”, 5 ½”, 8 ¼”, 11″ (7 cm, 14 cm, 21 cm, 28 cm).
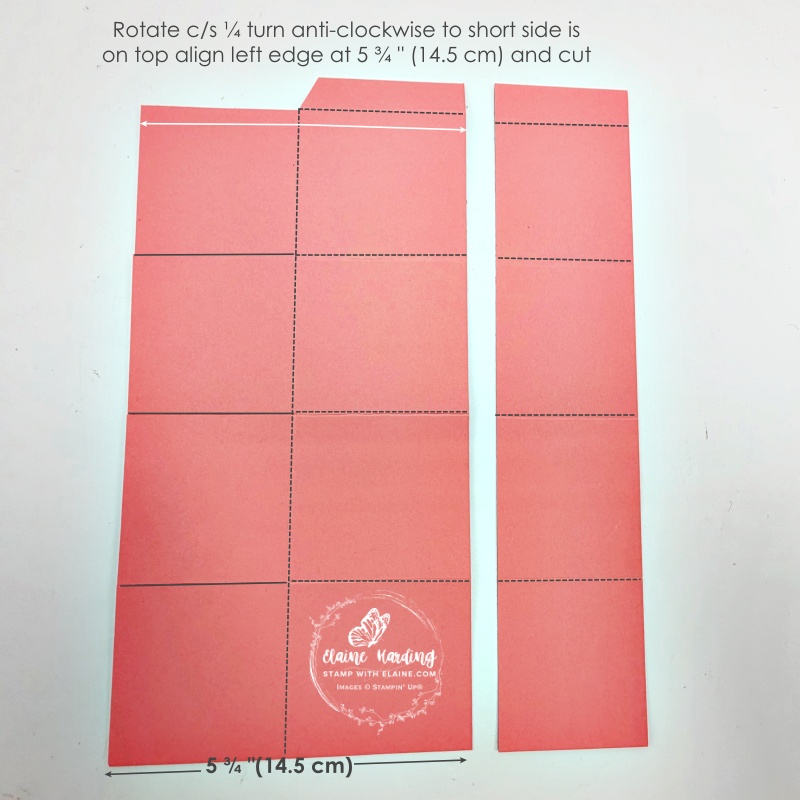
- Rotate card stock a quarter turn anti-clockwise so that the short side and narrow score line is at the top. Omit scoring the narrow section and the first panel. Score from 2 ¾” down to the bottom of paper.
- Switch back to trimmer and with narrow score line at top on the short side, align left edge at 5 ¾” (14.5 cm) and cut. If you need a visual aid you can watch the video in my post HERE.
Cutting the bridges
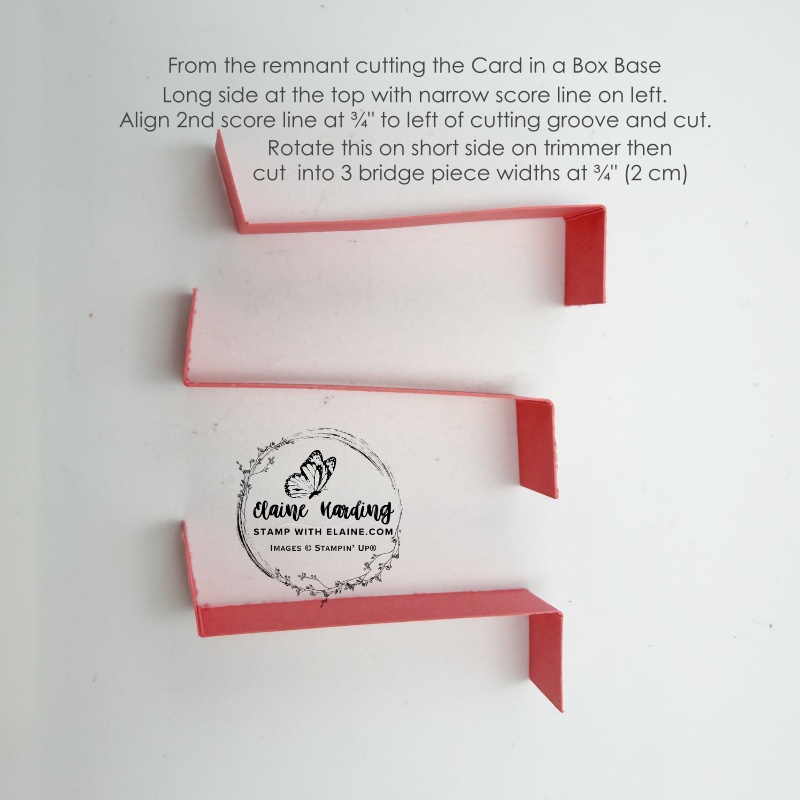
- Use the remnant to cut the bridges needed for inside the box. Follow instructions in picture.
- Fold each bridge into a z-fold. Set aside
DSP pieces
I limited myself to just this one pack so it was fun trying to mix and match everything to make it work. You can use alternatives to allow more choice and/or include a stamp set. I just wanted to show that it is possible to just use the papers on its own.
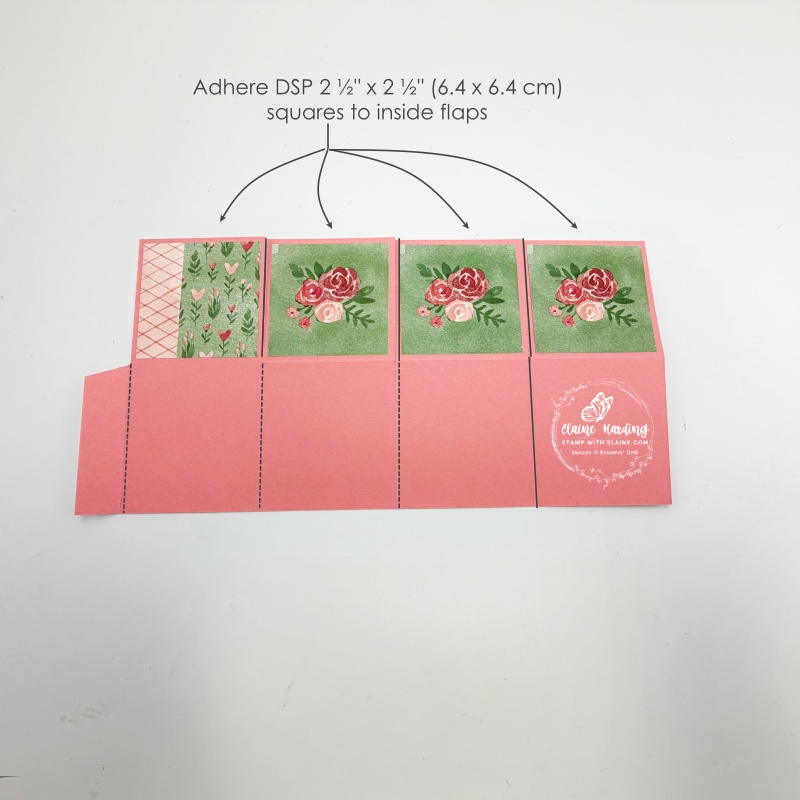
- Top inside flaps : 3 pieces pattern A and 1 piece pattern B cut at 2 ½” x 2 ½”(6.4 cm x 6.4 cm) and adhere as shown in left picture.
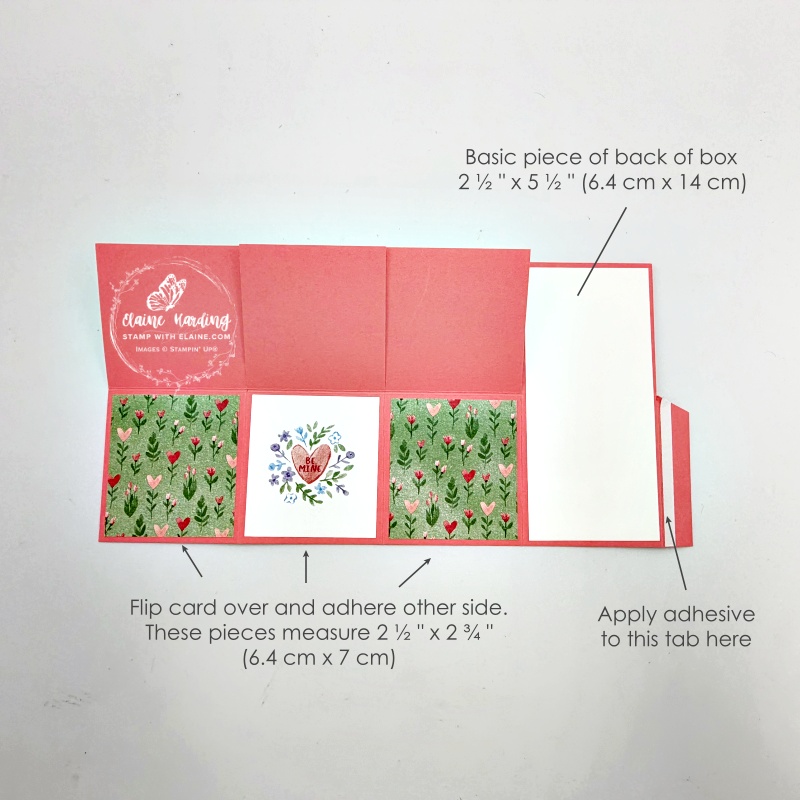
- Bottom outer panels : 3 pieces DSP cut at 2 ½” x 2 ¾” (6.4 cm x 7 cm)
- Unscored panel : Basic White 2 ½” x 5 ½” (6.4 cm x 14 cm)
Assembling card in a box
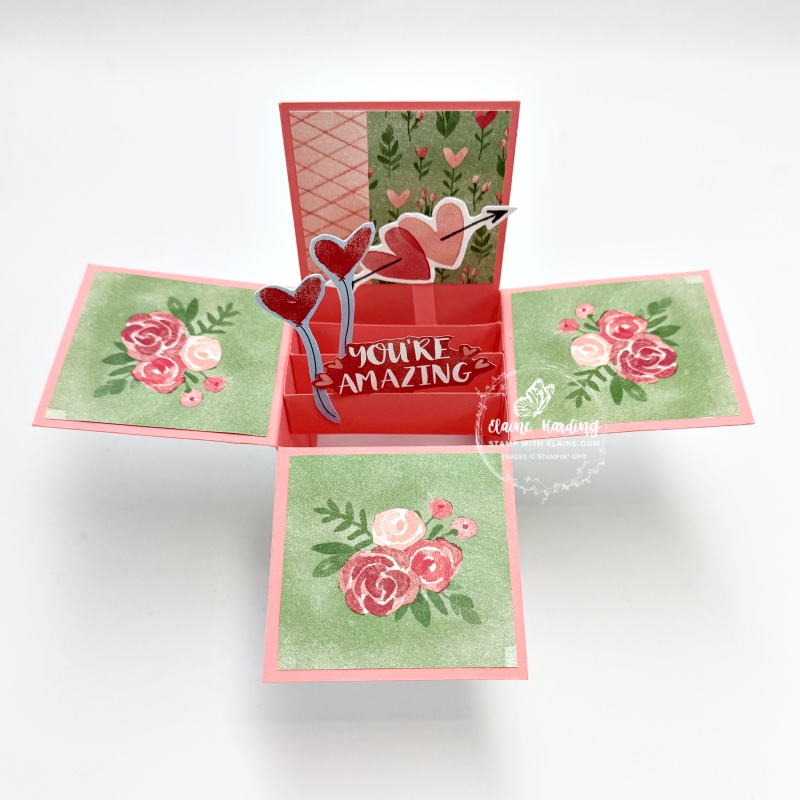

- Fussy cut elements of DSP you want to adhere to bridges
- Attach bridges aligning with top edge of box. Adhesive should be applied to the outside edge of each bridge so that it will adhere to the body of the box. You may have to trim about ½” (1 cm) off the last one so that the box will close properly.
- Once the bridges are in place, stagger and adhere the fussy cut elements.
- Adhere a greeting to the back with dimensionals.
Supply list
Listed below is the supply list. Just click on the picture to take you directly to the item in my online store.
Product List![Love Notes 6" X 6" (15.2 X 15.2 Cm) Mix & Match Designer Series Paper [ 166985 ]](https://assets1.tamsnetwork.com/images/EC042017NF/166985s.jpg "Love Notes 6\" X 6\" (15.2 X 15.2 Cm) Mix & Match Designer Series Paper [ 166985 ]")
![Flirty Flamingo A4 Cardstock [ 141421 ]](https://assets1.tamsnetwork.com/images/EC042017NF/141421s.jpg "Flirty Flamingo A4 Cardstock [ 141421 ]")
![Basic White A4 Cardstock [ 166781 ]](https://assets1.tamsnetwork.com/images/EC042017NF/166781s.jpg "Basic White A4 Cardstock [ 166781 ]")
![Paper Trimmer [ 152392 ]](https://assets1.tamsnetwork.com/images/EC042017NF/152392s.jpg "Paper Trimmer [ 152392 ]")
![Simply Scored [ 122334 ]](https://assets1.tamsnetwork.com/images/EC042017NF/122334s.jpg "Simply Scored [ 122334 ]")
![Paper Snips [ 103579 ]](https://assets1.tamsnetwork.com/images/EC042017NF/103579s.jpg "Paper Snips [ 103579 ]")

- SHOP ONLINE – EARN 10% REWARDS ON ALL PURCHASES OVER £20
- PURCHASE A STARTER KIT : Get £155 worth of products for only £99. Choose from current catalogues and any specials available. Free Shipping. Read more
- Subscribe to my Video Tutorials – click here