
There is more than one way of using the Inked Tile punches so in this post I show how you can create a label with it. You won’t believe how simple this hack is!
How to create the straight label
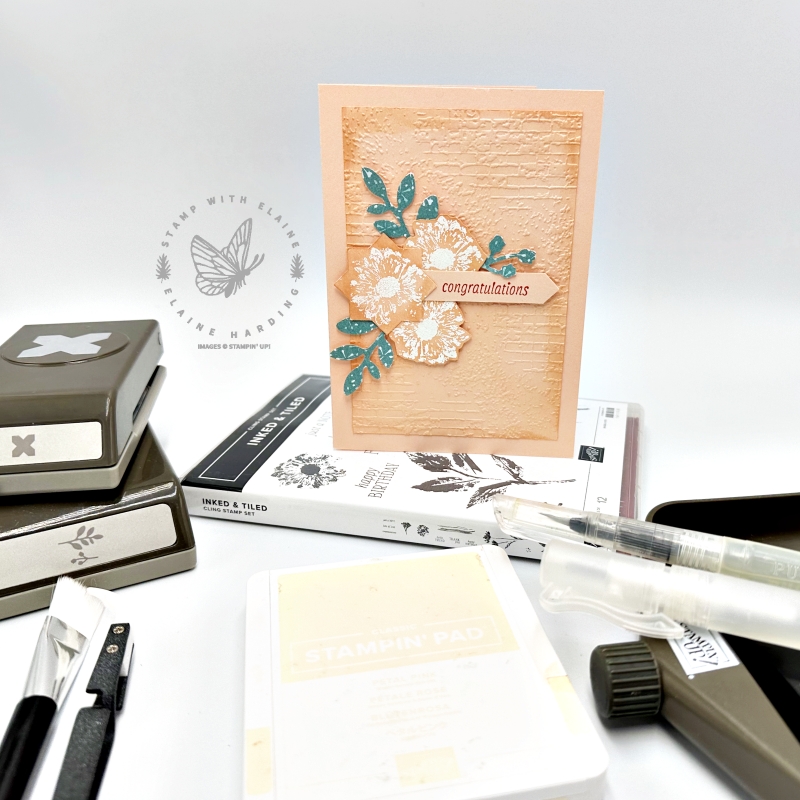
If you punch out the cross, orient it so that the opposite points faces North and South – simply cut it off so that you get a straight label on the sections pointing East and West.
For my card, this was too short, so I measured the width of the label which is ½” (1.3 cm) and cut a strip of Petal Pink card stock. I fed one end through the punch to create the pointy end. Stamp the “congratulations” greeting to the right closer to the pointy end. Trim the surplus when required during assembly process of card front.
Embossing techniques
There are two types of embossing for this card. This one is dry embossing with an embossing folder.
- Cut a mat layer for the card front measuring 3 ¾” x 5 ½” (9.5 cm x 14 cm).
- Dry emboss with Exposed Brick 3D embossing folder.
- Use a blending brush to darken the edges in Petal Pink ink.
- Adhere this to standard card base in Petal Pink card stock leaving an even border on all 4 sides.
Embossed flowers
Second embossing method is one where you stamp the image first with Versamark Ink. Next sprinkle embossing powder and heat set it afterwards before the ink dries.
- On a scrap piece of Petal Pink card stock, stamp 3 floral images in Versamark, sprinkle white embossing powder and heat set with heat tool.
- Punch one out with with the Inked Tiled star punch.
- Fussy cut the remaining floral images.
- Use a blending brush to darken the perimeter with Petal Pink ink.
Leaves
Use Bough Punch to punch out some leaves from the Inked Botanicals DSP pack.
Assembly
- Attach dimensionals to back of all three floral embossed images.
- Align the straight edge of the embossed flower punch star to left edge of Dry embossed Exposed Brick layer.
- Arrange remaining fussy cut floral pieces behind this.
- Trim and tuck the “congratulations” sentiment behind “star” flower.
- Apply adhesive to the Bough Punched leaves and arrange as shown to complete card front.
- Stamp and decorate inside of card as you wish. The inside piece should measure 3 ¾” x 5 ½” (9.5 cm x 14 cm)
Supply list
Listed below is the supply list. Just click on the picture to take you directly to the item in my online store.
Product List")
")


 Designer Series Paper")


If you subscribe to my blog and have been following my posts, which of the Inked & Tiled cards is your favourite? Thanks for visiting, enjoy the rest of your weekend! Stampin’ hugs!

- SHOP ONLINE – EARN 10% REWARDS ON ALL PURCHASES OVER £20
- PURCHASE A STARTER KIT : Get £155 worth of products for only £99. Choose from current catalogues and any specials available. Free Shipping. Read more
- Subscribe to my Video Tutorials – click here