
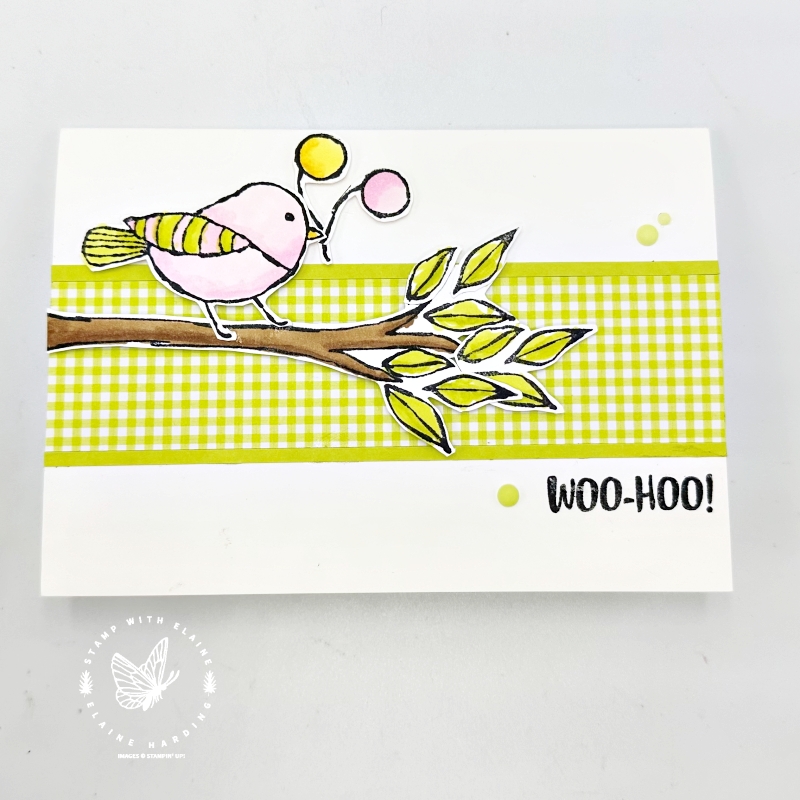
Good-day all – here’s a surprise pop-up card using the Bird’s Eye View stamp set. This stamp set doesn’t have any sentiments so you can borrow greetings from any of the stamp sets you have in your stash. The “Charming Sentiments” stamp set doesn’t have ANY images so it was a perfect “marriage between the two!
Pop-up mechanism
This is so easy to make! No brainer, really.
The pop-up mechanism is 6″ x 3 ½” (15 cm x 9 cm). * On the long side, score at 1″, 2″, 3″, 4″ and 5″. In metric this will be 2.5 cm, 5 cm, 7.5 cm, 10 cm, 12.5 cm). Simply fold in a concertina shape. Apply adhesive to the end panel and adhere to inside of card leaving ½” gap from the fold.
Apply adhesive to the top of the concertina stack, close the front of the card on top of the concertina stack to adhere it. Allow it to bond.

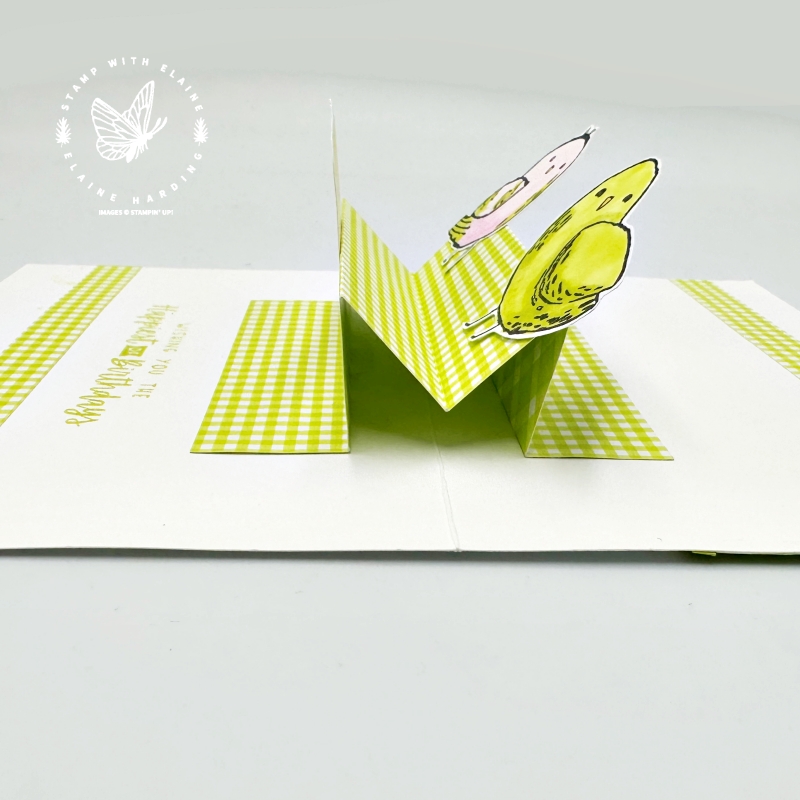
View from side
If you look from the side, the one end panel is adhered to the front of the card, and the other end panel is adhered to the card base. The portions not adhere form the silhouette of the letter “M”.
Cutting guide
- Card base : Basic White thick 5 ¾” x 8 ¼” (14.5 cm x 21 cm) folded in half.
- *Pop up mechanism : Glorious Gingham DSP : 6″ x 3 ½” (15 cm x 9 cm). Please refer to Pop Up Mechanism heading above for scoring instructions.
- Front of card Glorious Gingham DSP 1 ½” x 5 ¾” (3.5 cm x 14.5 cm)
- Lemon Lime Twist : 2 pieces ⅛” x 5 ¾” (0.3 cm x 14.5 cm) Adhere either side of Glorious Gingham DSP on front of card.
- Inside card : 2 pieces ½” x 5 ¾” (1.3 cm x 14.5 cm)
- Scrap of Basic White card stock for stamping and fussy cutting various bird images, the branch and leaves.
Assembly
- Adhere pop-up mechanism to the inside of your card first.
- Next adhere the two ½” (0.3 cm) strips of DSP, one at the top, and the other at the bottom as pictured.
- Apply adhesive to the bottom half of each owl. Adhere one in the middle of the first concertina fold.
- Adhere the bird facing to the right on the back concertina fold.
- Lastly, adhere remaining bird facing to the left on the back concertina fold.
- Stamp greeting below pop-up mechanism in Lemon Lime Twist ink.
- Adhere the 1 ½”m(3.5 cm) strip of DSP in centre of the card front.
- Run a thin line of glue on either side of the DSP and adhere the Lemon Lime Twist ⅛” strips butted up against the DSP.
- Apply stampin’ dimensionals on the back of the branch and leaves and adhere it on top of the DSP as pictured.
- Add a touch of glue to the feet of the bird and dimensionals and adhere the feet on branch.
- Trim the tails of balloon as desired and arrange balloons behind the bird’s beak.
- Stamp greeting to the right below the DSP in Tuxedo Black Memento ink.
- Finally add finishing touches with Ombre Matte Decorative Dots
Supply list
Listed below is the supply list. Just click on the picture to take you directly to the item in my online store.
Product List
")
 Designer Series Paper")


That’s all for today! Enjoy your weekend….. happy stampin’

- SHOP ONLINE – EARN 10% REWARDS ON ALL PURCHASES OVER £20
- PURCHASE A STARTER KIT : Get £155 worth of products for only £99. Choose from current catalogues and any specials available. Free Shipping. Read more
- Subscribe to my Video Tutorials – click here