
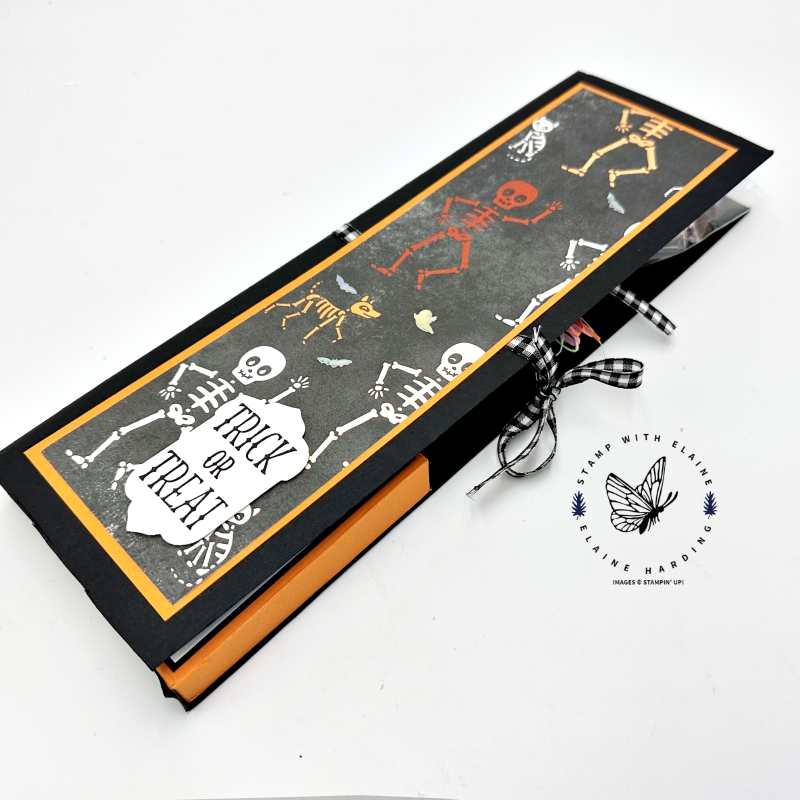
This is the ultimate Tricks & Treat bespoke treat holder to house a fabulous marshmallow skull Halloween treat in episode 4 of 6 in my Six Week Halloween countdown series. I discovered these gorgeous Marshmallow treats in a Department store quite by accident. It is a marshmallow skull on a long lollipop stick and rather top heavy, so the only solution was to create a customized treat holder to hold it in.
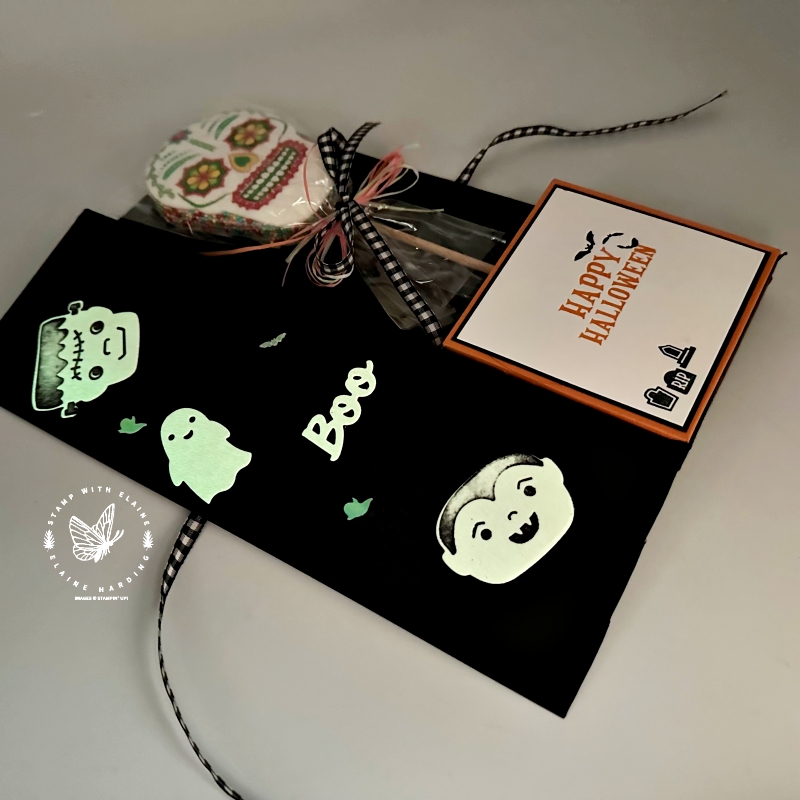
Did you know we have Glow-in-the-dark 6″x 6″ (15.2 x 15.2 cm) specialty paper as well as Glow-in-the-Dark Bats and Ghosts? They are SUCH fun! You can also stamp on the 6″x 6″Glow-in-the-Dark specialty paper but use a quick drying ink like Stazon ink. It takes longer to dry if you use any other ink.
Warning
- Unfortunately, Stazon ink does stain Photopolymer stamps and it’s not advisable to use the special Stazon ink remover which contains a solvent on Photopolymer stamps. Over time, the Stazon cleaner will break down the photopolymer stamps. If you do use the Stazon ink on photopolymer stamps, and subsequently the Stazon cleaner, wash it off as quickly as possible with a mild detergent afterwards to minimise damaging your photopolymer stamps. Note: For Red rubber stamps: Stazon ink is solvent based. It will not normally wash off with just soap and water. It is meant to stay on the item, and because of this Stampin’ Up! offers a solvent based cleaner. Clean first with Stazon All Purpose Cleaner and follow up with a moist paper towel, patting the stamp. Repeat this process until most of the ink is removed from the stamp.
- The paper attracts fibres so it will pick up all the residual fibres left in heavily marked cutting plates. However you can remove the fibres with a lint brush or if you don’t have a lint brush, use Painters tape or sellotape to pick up the fibres.
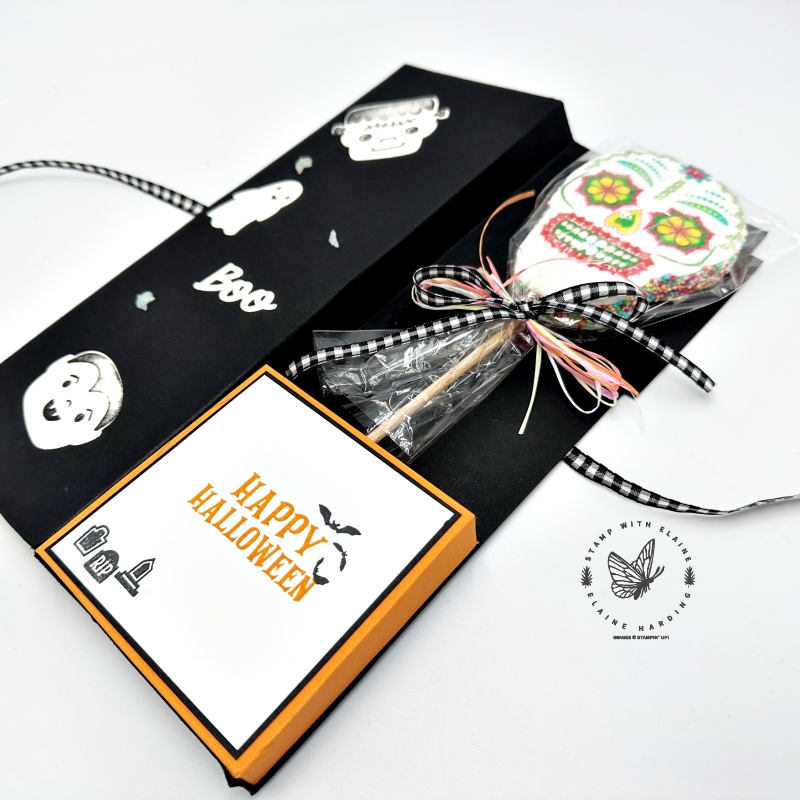
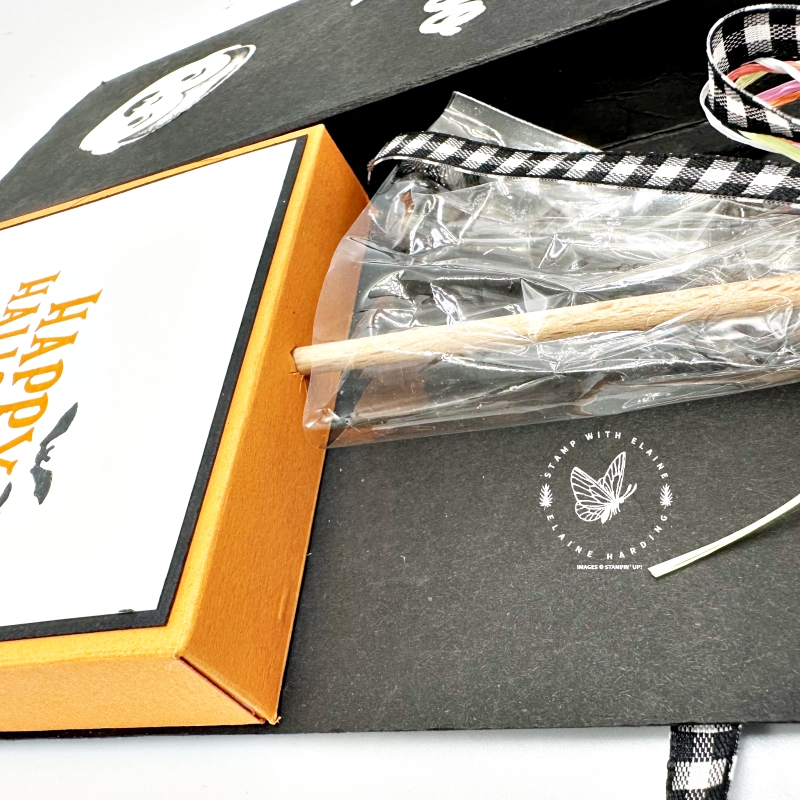
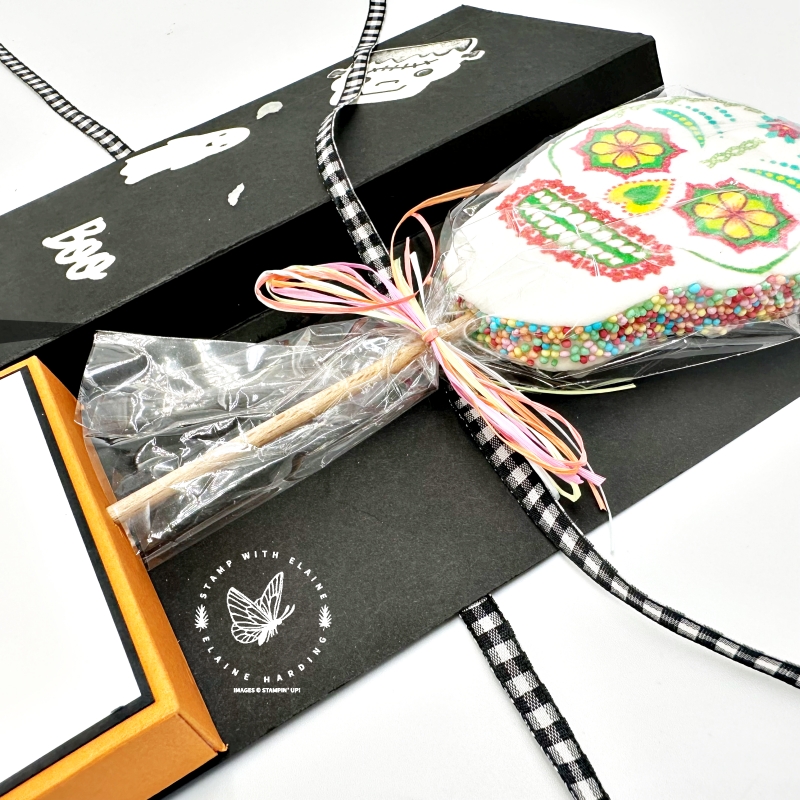
Want to take a peek inside? In order to keep the lolly stick in position, I added a box and used the cutting blade from Take Your Pick Crafter tips to make several small cuts in a star shape so that the lollipop stick would fit through it. To prevent the lollipop from falling out at the top, I cut two slots at the back of the gift packaging base so that I could thread the ribbon through it and tie a bow.
Cutting guide
Extra paper and embellishment
- 1 sheet of 6″x 6″ (15.2 x 15.2 cm) Glow-in-the-dark specialty paper
- Glow-in-the-dark Bats & Ghosts
Gift package base :
- Basic Black Base : A4 sheet. Long side on top, score one end at ¾” (2 cm).
- Rotate card stock so short side is on top and score at 3 ¾” (9.5 cm). Then rotate card stock 180 degrees and score other side at 3 ¾” (9.5 cm).
- Mat layers front and back Pumpkin Pie : 2 pieces cut at 3″ x 10 ¼” (7.5 cm x 26 cm)
- DSP Mat layer #2 : 1 piece cut at 2 ¾” x 10 ⅛ “ (7 cm x 25.5 cm)
Housing for lollipop stick
- Pumpkin pie : 5 ⅞” x 5 ⅞” (15 x 15 cm)
- Score 2 adjacent sides at ¾” and 1 ½” (2 cm, 3.8 cm)
- Remaining 2 adjacent sides score ¾” only (2 cm)
- Basic Black Mat layer #1 : 3 ½”x 3 ½” (9 cm x 9 cm)
- Mat layer #2 Basic White : 3 ⅜”x 3 ⅜” (8.5 cm x 8.5 cm)
For cutting tabs and hole for lollipop, please refer to video tutorial. Also refer to video for assembly instructions.
Video Tutorial
Supply list
Listed below is the supply list. Just click on the picture to take you directly to the item in my online store.
Product List")
")
 Designer Series Paper")
 Specialty Paper")


 Gingham Ribbon")

- SHOP ONLINE – EARN 10% REWARDS ON ALL PURCHASES OVER £20
- PURCHASE A STARTER KIT : Get £155 worth of products for only £99. Choose from current catalogues and any specials available. Free Shipping. Read more
- Subscribe to my Video Tutorials – click here