
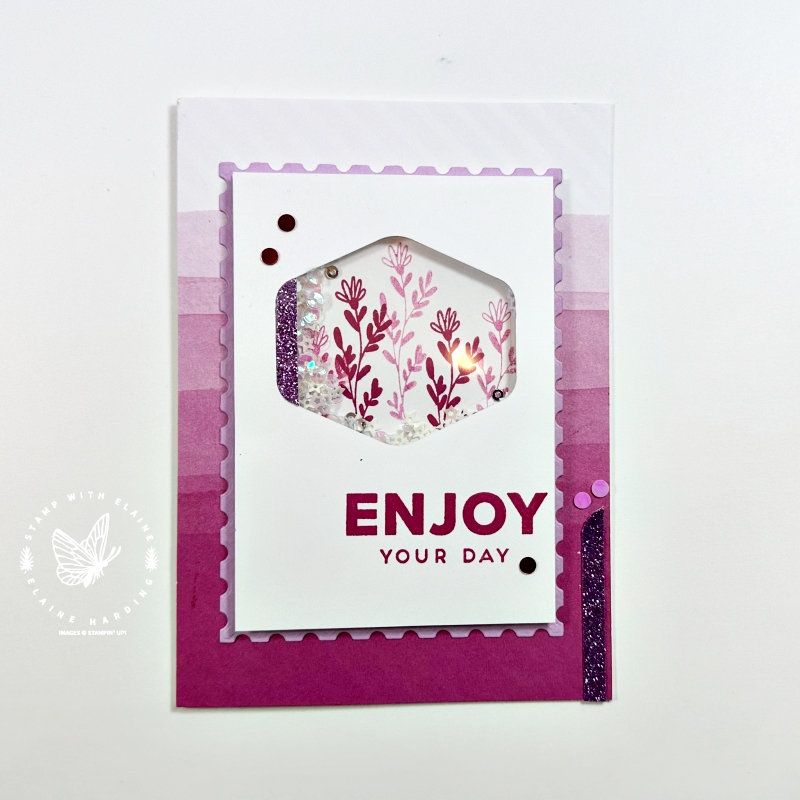
Today I have a shaker card using the Heartfelt Hexagon Bundle. I also used Sale-a-bration’s free stamp set which could be yours free with a qualifying purchase of £45 excluding shipping. This card was inspired by the sample in the January-April 2024 mini on page 12. It’s a stepped up version for an avid crafter and requires a die-cutting machine and additional dies from the Perennial Postage Dies.
How to make the card
- Prepare a standard card base in Basic White Thick – in Europe/Ireland this measures 8 ¼” x 5 ⅞” (21 cm x 14.5 cm)
- Cut a piece of Bright & Beautiful 6″x 6″ (15.2 x 15.2 cm) DSP to cover the whole of the card front. This measures 4 ⅛” x 5 ⅞” (10.5 cm x 14.5 cm). Adhere to card front.
- Mat layer #1 : Select 3rd largest Perennial Postage die to die cut from Fresh Freesia card stock. Centre and adhere on top of Bright & Beautiful card front.
Shaker element
- Shaker element – Cut 2 pieces Basic White 3” x 4 ¼” (7.5 cm x 10.8 cm).
- On one of the Basic White pieces, insert and centre and punch out a hexagon with the Heartfelt Hexagon punch.
- Stack this on the second Basic White piece and trace around aperture so you have a guide as to where to stamp.
- Stamp several floral images at full strength and also 2nd generation without re-inking stamp to get the lighter shade. Erase pencil marks.
- Attach foam adhesive strip around the aperture and fill with sequins. Ensure there are no gaps.
- Adhere foam adhesive strip where necessary outside of the sequin area to prevent “sagging”.
- Cut a piece of window sheet 2 ¼” x 2 ½” (6 cm x 6.5 cm) and adhere over the hexagonal shaped sequin area. Reminder – before adhering the window sheet, make sure the sequins are in!!
- On Basic White piece which has the hexagonal aperture, stamp sentiment in bottom right corner.
- Remove backing tape from foam adhesive strips and carefully align the top piece with the bottom.
- Adhere shaker to Perennial Postage layer on front of card leaving an even border all round.
Finishing touches
- Punch out a hexagon with Online Exclusive Three Colour Glimmer Paper. Trim off ¼” (0.5 cm) and adhere it with tear and tape to left. There’s a reason for this!
- This is a tip on how you can cover up a mistake! The foam adhesive tape was showing through the window sheet, so this was a quick fix! You may have done yours perfectly, so omit this step if you have.
- Optional to add another strip of glimmer paper – I added this to cover up a mark on the DSP!
- Lastly add Iridescent adhesive backed discs.
Supply list
Listed below is the supply list. Just click on the picture to take you directly to the item in my online store.
Product List")
")
 Designer Series Paper")
 Specialty Paper")


- SHOP ONLINE – EARN 10% REWARDS ON ALL PURCHASES OVER £20
- PURCHASE A STARTER KIT : Get £155 worth of products for only £99. Choose from current catalogues and any specials available. Free Shipping. Read more
- Subscribe to my Video Tutorials – click here