
Easel card with Rock Star. The Rock Star bundle is sadly retiring. I only acquired it recently and also bought the Rock Legend Kit because I thought it complimented each other.
The kit is so easy to assemble. I put it together while watching tv. The kit contains 4 each of 2 designs with envelops to match and was inspired to make my own with the stamps and dies before they retired.
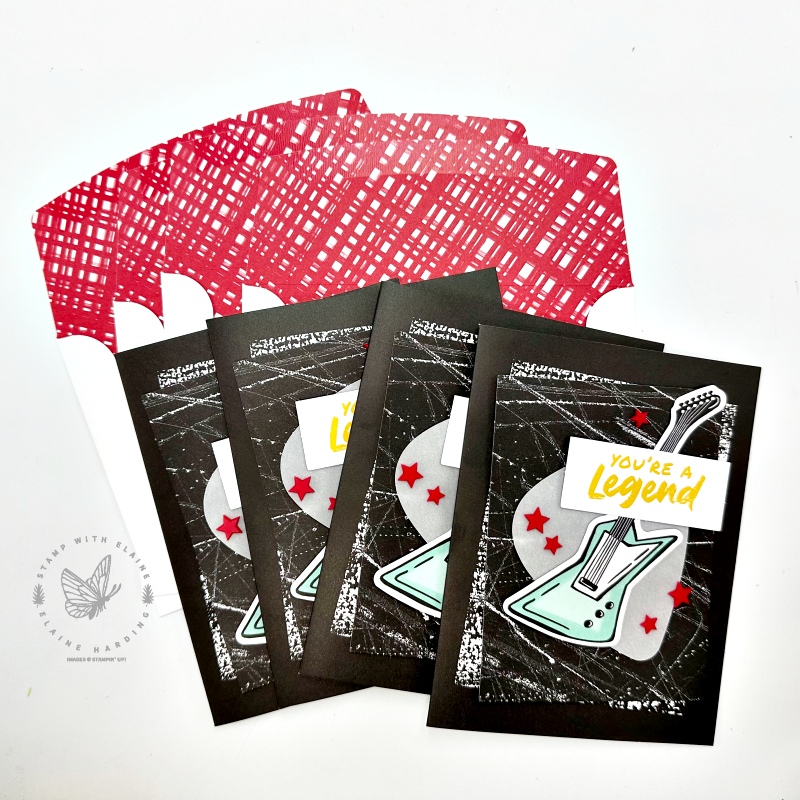

Rock Star Bundle
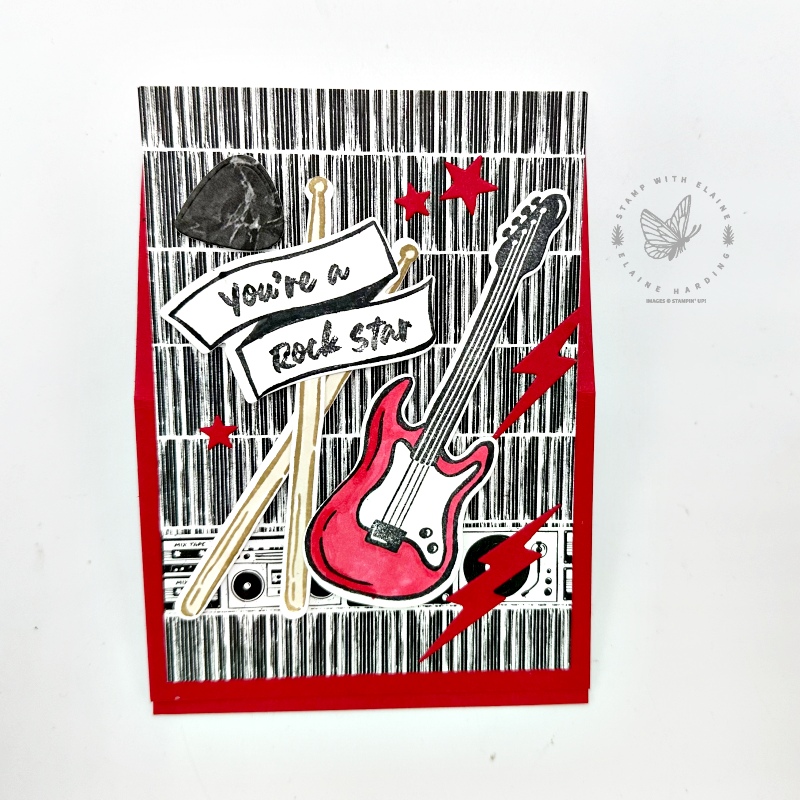
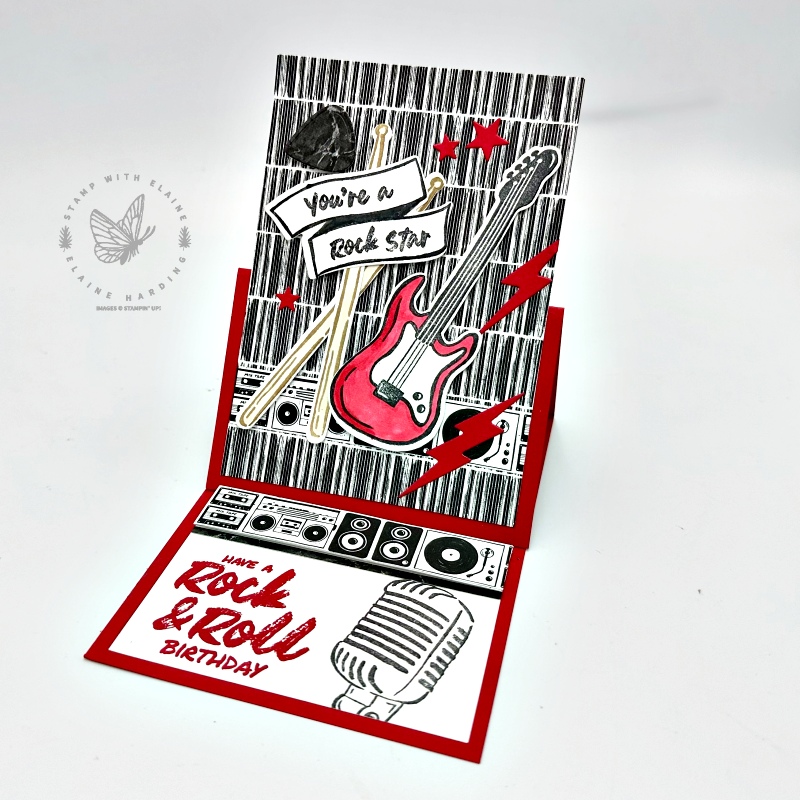
I made a fun fold easel card with the stamps and dies. The first picture shows the card lying flat in the closed position. The middle picture shows the card on display and reveals it’s an easel card. In the third picture, you can see the stopper mechanism I used for the easel section. I cut a strip of the Rock & Roll 12″ x 12″ Designer Series Paper to use for the “stopper” which was adhered with dimensionals.

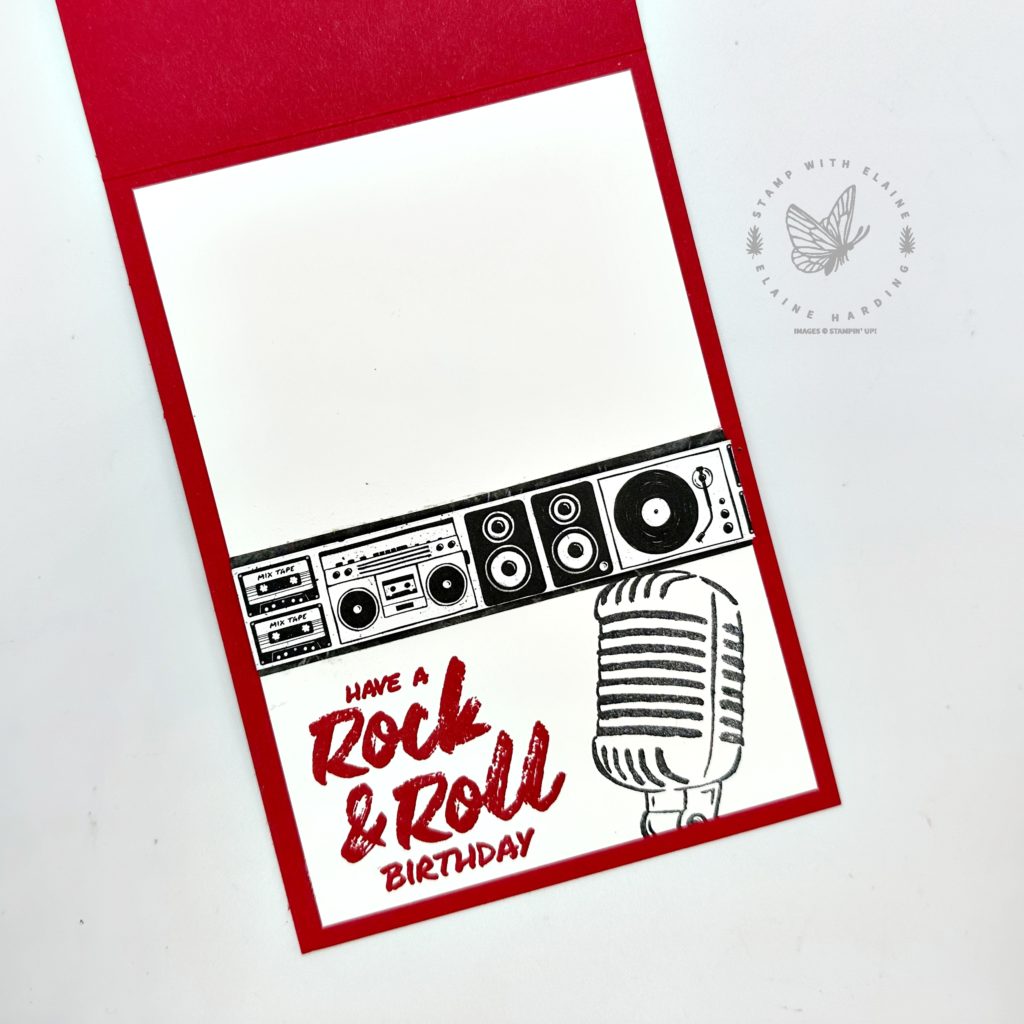
Inside card
I stamped the images and greeting in the lower third of the card and adhered the stopper mechanism above it.
Cutting guide
- Card base : Real Red 4 ⅛” x 11 ¾” (10.5 cm x 29 cm) folded in half.
- Fold the front of the card in half again which will form the upright to adhere the easel to.
- Easel piece : Basic White and Rock & Roll DSP both cut at 3 ¾” x 5 ½” (9.5 cm x 14 cm)
- Basic White card stock cut 1″ x 3 ¾” (2.5 cm x 9.5 cm)
- Rock & Roll DSP with radio and speakers pattern cut 2 pieces 1″ x 3 ¾” (2.5 cm x 9.5 cm)
- Inside card : Basic White cut at 3 ¾” x 5 ½” (9.5 cm x 14 cm)
- Basic White scrap for stamping guitar and drumsticks.
- Real Red scrap and scrap of Rock & Roll DSP to die cut plectrum
Stopper mechanism
- Basic White strip 1″x 3 ¾” (2.5 cm x 9.5 cm)
- Rock & Roll DSP 1″ x 3 ¾” (2.5 cm x 9.5 cm)
- Adhere one of the Rock & Roll DSP 1″x 3 ¾” (2.5 cm x 9.5 cm) to Basic White piece, and add dimensionals to the back.
- Remove backing paper and adhere approximately half way on the inside Basic White Mat Layer.
Easel
- Adhere the Rock & Roll DSP piece to the Basic White piece then adhere lower half to the front of card base. Be sure to leave the top half adhesive FREE otherwise the easel effect won’t work.
- Apply adhesive to the remaining Rock & Roll DSP 1″x 3 ¾” (2.5 cm x 9.5 cm) to bottom third of Easel.
- Stamp the guitar in Tuxedo Black Memento Ink and colour with Real Red Stampin’ Blends.
- Drumsticks – stamp in Crumb Cake and colour with Crumb Cake Stampin’ Blends.
- Stamp the banner sentiment in Tuxedo Black Memento ink.
- Die cut the stamped pieces.
- From the scrap of Rock & Roll DSP, die cut a plectrum.
- Real Red card stock : die cut the stars and lightning pieces.
- Attach dimensionals to the back of the guitar, drumsticks, banner and plectrum.
- Arrange on easel front and adhere.
- Finishing touches, adhere stars and lightning pieces.
Supply list
Listed below is the supply list. Just click on the picture to take you directly to the item in my online store.
Product List
")
 Designer Series Paper")


Thanks for visiting today. Have a lovely weekend.

- SHOP ONLINE – EARN 10% REWARDS ON ALL PURCHASES OVER £20
- PURCHASE A STARTER KIT : Get £155 worth of products for only £99. Choose from current catalogues and any specials available. Free Shipping. Read more
- Subscribe to my Video Tutorials – click here