
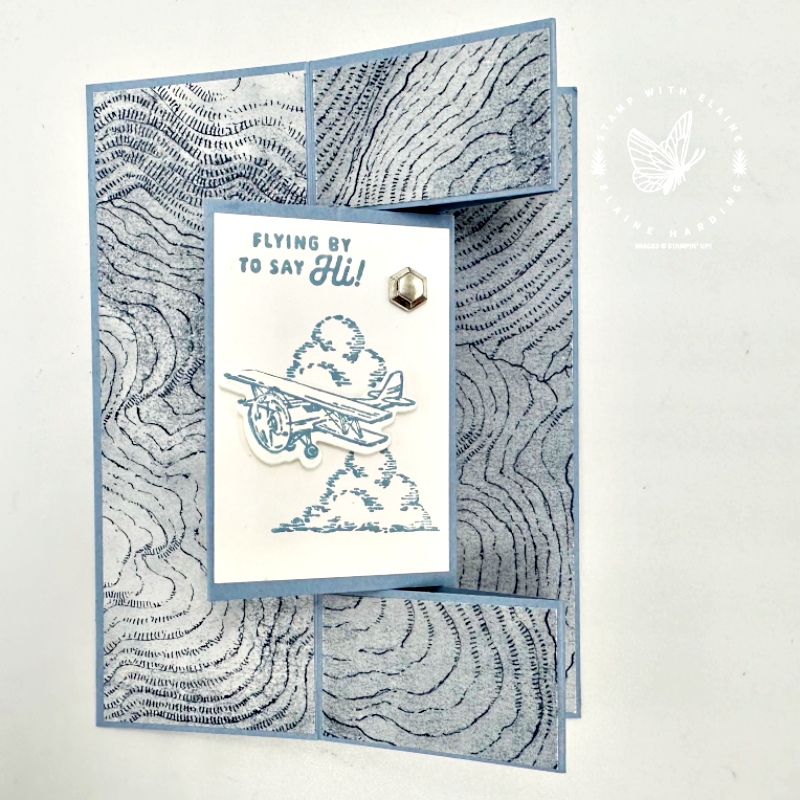
Fun pop-up card using the Adventurous Sky bundle. I had an idea buzzing in my head for a pop up card. I was hoping and praying that it would work, so I’m continuing with exploring the Adventurous Sky bundle before I forget!
Front of card
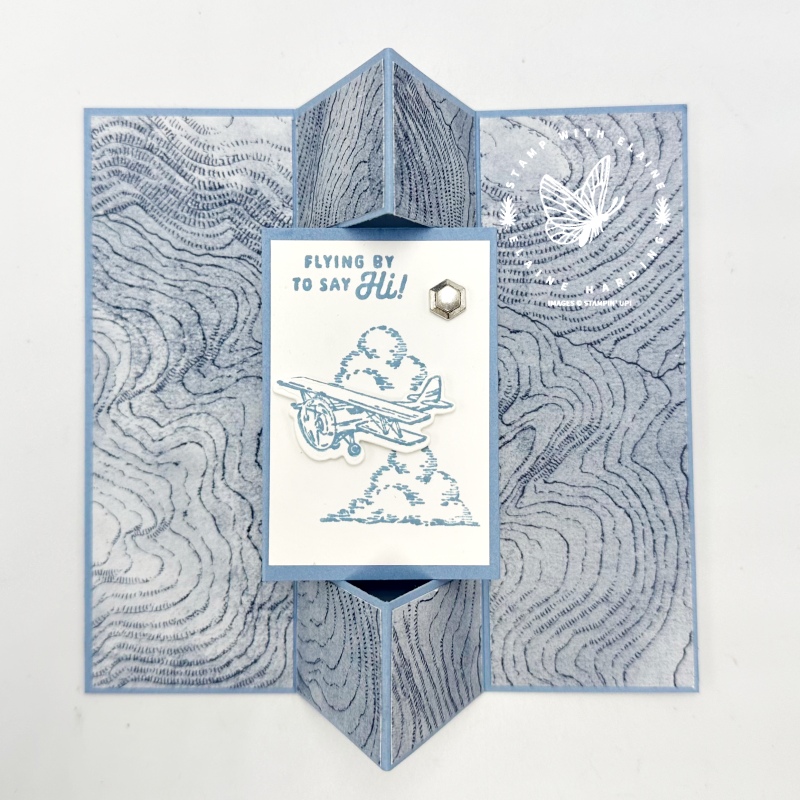
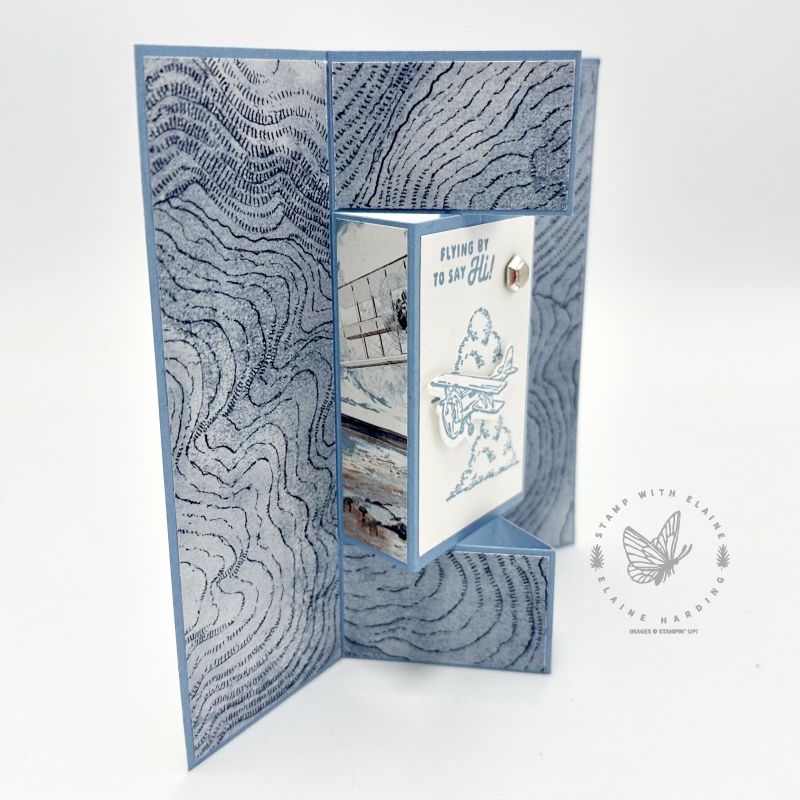
This is the fun pop-up card I made. In the photo on the left, this is the card closed so that it lies flat for posting and in the photo on the right, this is upright for display purposes.
Side and Back Elevation
I cut one of the tags to use as my patterned paper for both side panels. On the back of the card, I added Basic White so you can address the recipient and say who it’s from.
Cutting guide
The overall size measures 5 ½” x 8” (14 cm x 20 cm) and I’ve done a little diagram to make it easier to explain the cutting and scoring. It’s not to scale – I’m not a Draughtsman by trade, so the lines are a little bit wonky and I didn’t know how to correct it! Something is better than nothing, right?
The solid lines are the cut lines, and the dashed lines are where you score.
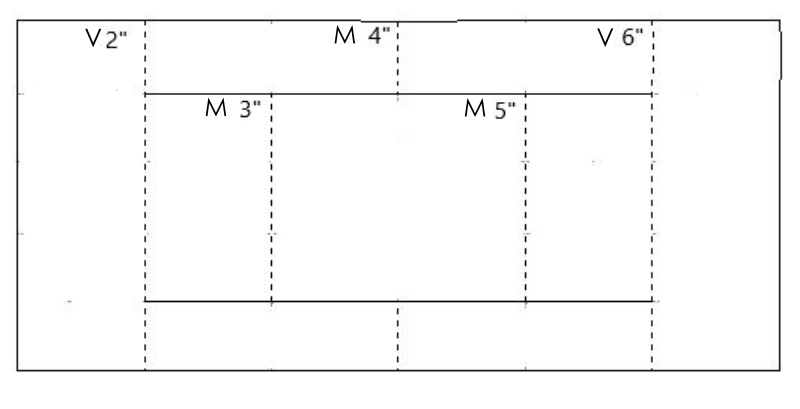
- With the long side at the top, score at 2″ and 6″ (5 cm and 15 cm).
- Orient card stock so that the short side is at the top and align left edge at 1 ¼” and cut from 2″ down to 6″ (metric align left edge at 3 cm and cut from 5 cm down to 15 cm)
- Rotate card stock 180 degrees and repeat i.e., align left edge at 1 ¼” and cut from 2″ down to 6″ (metric align left edge at 3 cm and cut from 5 cm down to 15 cm).
- Orient card stock so that the long side is at the top. If using a trimmer, align left edge at 3″ (7.5 cm) and score between the cut lines.
- Align left edge of card stock at 4″(10 cm) and partially score top and bottom outside the cut lines.
- Lastly, align left edge of card stock at 5″ (12.5 cm) and score between cut lines.
- Burnish the score lines – 2 outer panels are Valley Folds, the 4″ (10 cm) score lines are Mountain folds and so are the middle 3″ and 5″ (7.5 and 12.5 cm) score lines.
Cutting guide for DSP and back side panels
- Cut 3 strips of DSP 1 ⅞” x 5 ⅜” (4.5 cm x 13.5 cm)
- Set 2 aside for the side panels and with the remaining piece, orient paper on the long side and cut them into 4 pieces of 1 ⅛ x 1 ⅞” (2.5 x 4.5 cm) for the small centre rectangles.
- Side panels front of card : 2 pieces DSP (I cut one of the tags) ⅞” x 2 ⅞” (2 cm x 7.5 cm)
- Cut 2 pieces Basic White for the back panels 1 ⅞” x 5 ⅜” (4.5 cm x 13.5 cm)
- Front of card centre panel Basic White 1 ⅞” x 2 ¾” (4.5 cm x 7.5 cm)
Supply list
Listed below is the supply list. Just click on the picture to take you directly to the item in my online store.
Product List")
 Designer Series Paper")


- SHOP ONLINE – EARN 10% REWARDS ON ALL PURCHASES OVER £20
- PURCHASE A STARTER KIT : Get £155 worth of products for only £99. Choose from current catalogues and any specials available. Free Shipping. Read more
- Subscribe to my Video Tutorials – click here