
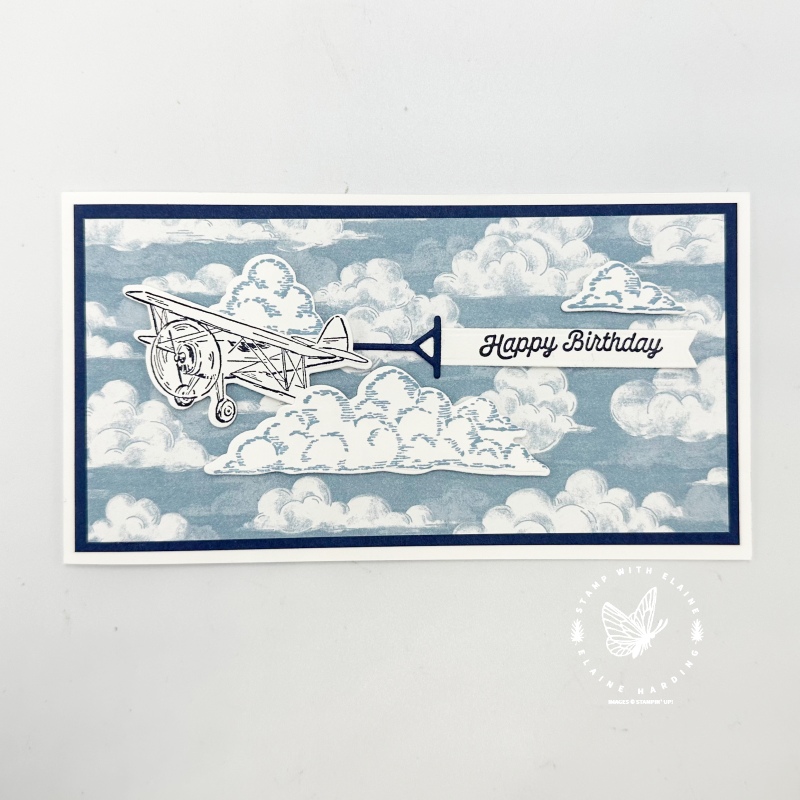
Mini slim card – landscape orientation with a difference. Recently whilst de-cluttering, I discovered a stash of envelops that Stampin’ Up! used to supply and are just perfect for mini slim cards. Many years ago, I stopped making any tent cards in a landscape orientation because they kept collapsing. Consequently, whenever I make a card in landscape orientation, I cut my card stock at 11 ½” x 4 ⅛”, scored on the long side at 5 ¾” so that the fold is on the left.
For a mini slim card in landscape orientation or a DL card, this may be problematic because most card stock is 12″x 12″ (30.5 x 30.5 cm) or an A4 size and it isn’t long enough to do it in one piece. My solution is to construct it in two pieces.
Adventurous Sky Bundle
Today’s card features the Adventurous Sky Bundle. It is part of the Take to the Sky Suite Collection on pages 36-37 in the 2024-2025 Annual Catalogue. This suite is great for masculine cards, and it’s also great for anyone who loves to travel or has an interest in flying. The dies help you build a bi-plane – love the vintage look of this aircraft. It even has an aerial banner, propellers and a variety of clouds in the Adventurous Sky die set. Sooo darn cute!
I’ve used the medium size bi-plane image in order to make use of the aerial banner element. It fits nicely on the mini slim card size.
Inside card
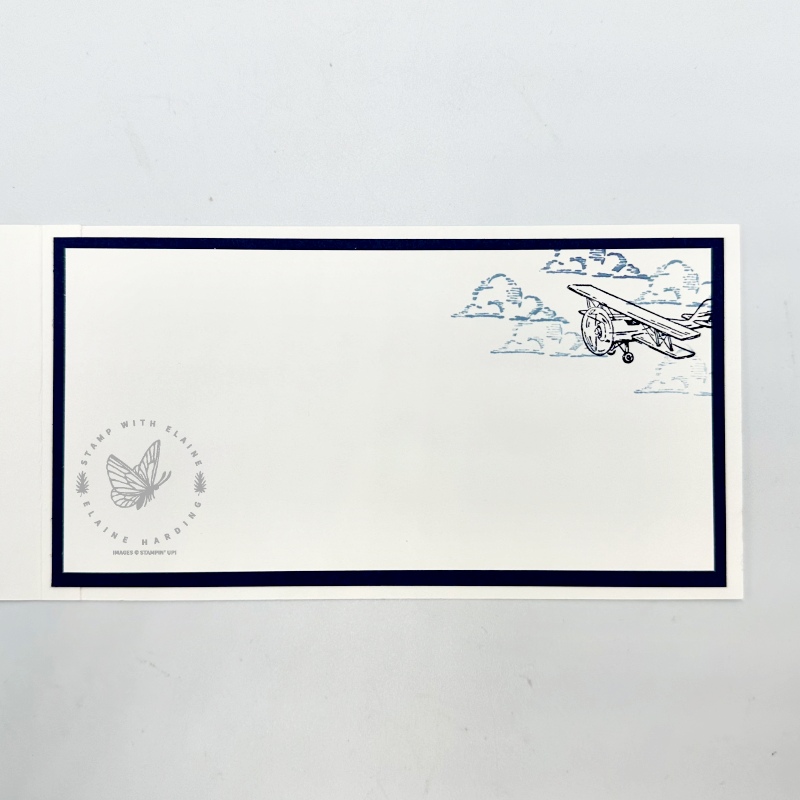
As usual, just some simple stamping inside to give you room for addressing the recipient and to say who it’s from. Handmade cards are so special, because you’ve spent time creating the card specifically with them in mind.
Cutting guide
- First section of card base – Basic White 6 ⅞” x 3 ½” (17.5 cm x 9.5 cm). Long side on top, score one end at ⅜” (1 cm). Burnish score line.
- Second section of card base – Basic White 6 ½” x 3 ½” (16.5 cm x 9.5 cm).
- Orient first section so that front of card is next to work surface and narrow score line is on the right. Ensure the flap is folded. Adhere second section on top of narrow fold flush with the first section on all four sides.
- Night of Navy Mat Layer card front and inside card – 2 pieces 6 ¼” x 3 ¼” (16 cm x 9 cm)
- Take to the Sky 12″x 12″ DSP – 6″ x 3″ (15.5 cm x 8.5 cm)
- Inside card Basic White – 6″ x 3” (15.5 cm x 8.5 cm)
- Scraps of Basic White for stamping and die-cutting medium biplane, clouds and banner
- Scrap of Night of Navy for die cutting tow bar for aerial banner
- Assemble the pieces as shown in picture to complete card.
Supply list
Listed below is the supply list. Just click on the picture to take you directly to the item in my online store.
Product List")
 Designer Series Paper")


If you have any questions, leave a comment below. Hope you’ve been inspired to make your own.

- SHOP ONLINE – EARN 10% REWARDS ON ALL PURCHASES OVER £20
- PURCHASE A STARTER KIT : Get £155 worth of products for only £99. Choose from current catalogues and any specials available. Free Shipping. Read more
- Subscribe to my Video Tutorials – click here