
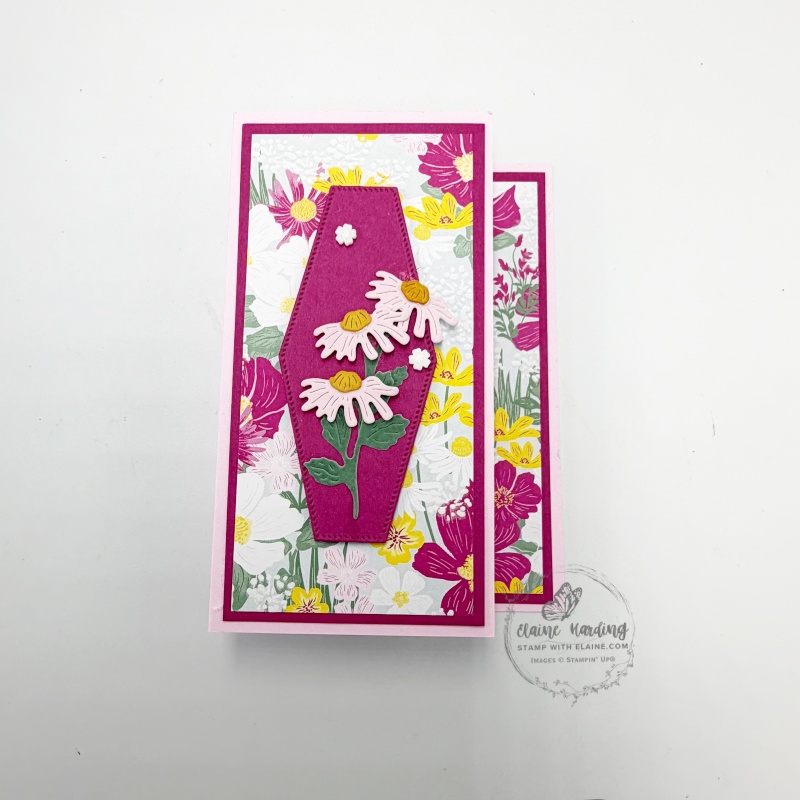
Fun fold card – Flowering Meadow. Flowering Meadow is from the Velvet Meadow Suite and is fabulous! I especially love the specialty soft flocked paper with peel & stick flowers. Each element in the suite complements the others on your cards, tags, and scrapbook pages. Whether you’re crafting for a special moment or just for fun, this collection makes it easy to create with confidence.
Fun fold any occasion card
I’m not sure what this type of fold is called, but I wanted to show off the papers to it’s best advantage. You really have to hold it in your hands to feel that velvet texture accents on the paper and see it in person! I was blown away!
How to cut and score card base
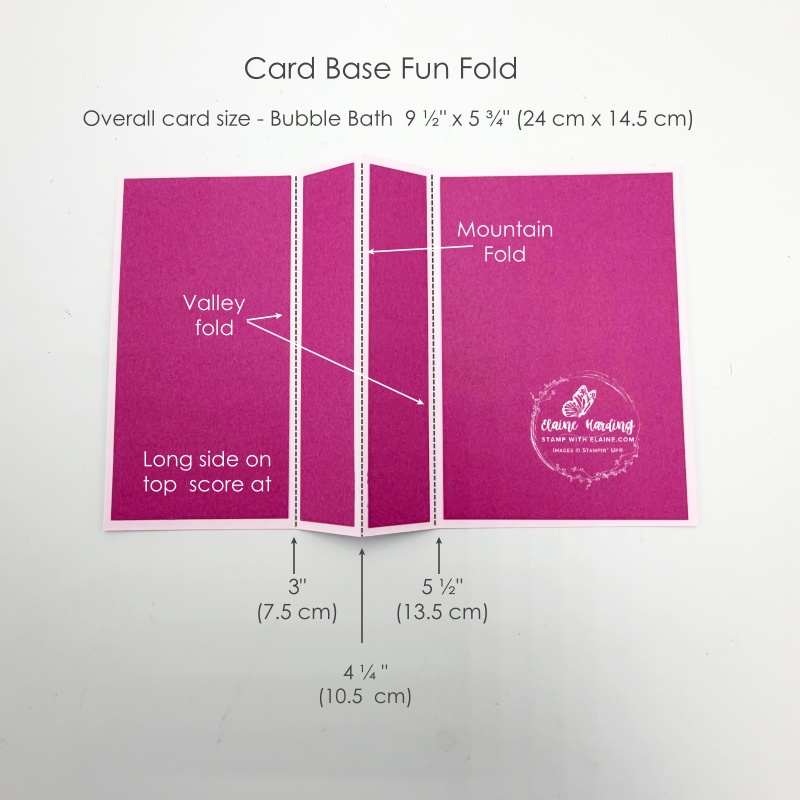
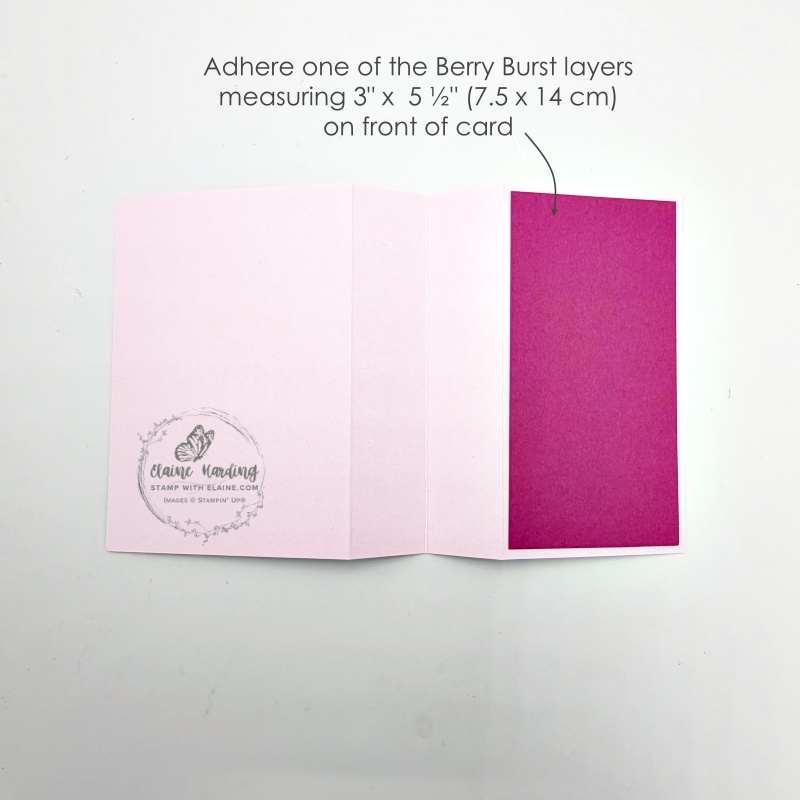
- Card base is cut at 9 ½” x 5 ¾” (24 cm x 14.5 cm). Long side on top score at 3″, 4 ¼”, and 5 ¼” (7.5 cm, 10.5 cm and 13.5 cm).
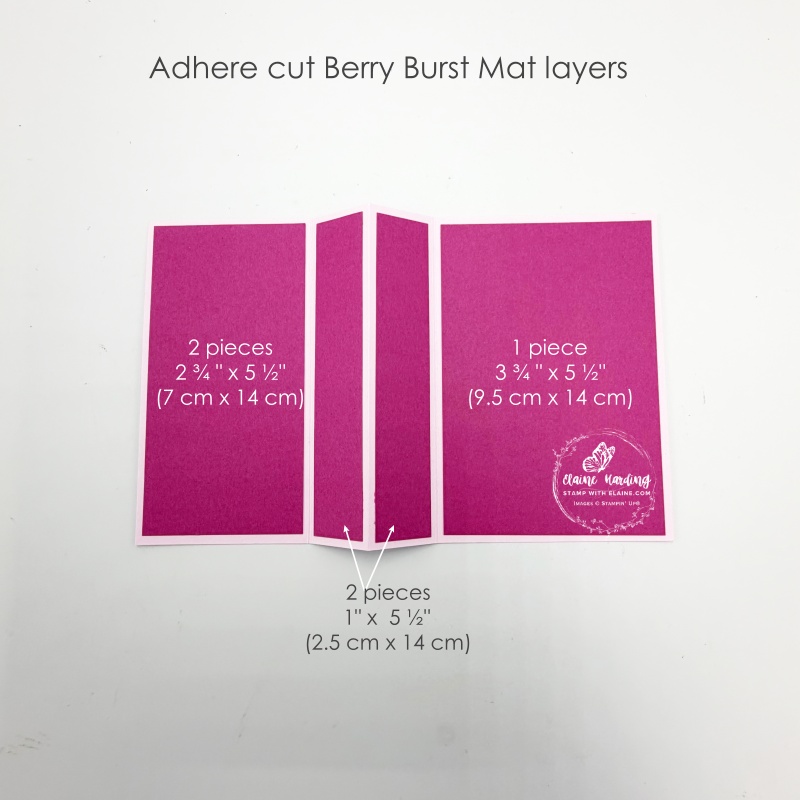
- Berry Burst card stock mat layers : Cut 2 pieces 2 ¾” x 5 ½”(7 cm x 14 cm).
- Narrow middle panels Berry Burst : cut 2 pieces 1″ x 5 ½” (2.5 cm x 14 cm)
- Last panel Berry Burst : cut 1 piece 3 ¾” x 5 ½” (9.5 cm x 14 cm)
- Adhere these panels as pictured above, and the second Berry Burst piece measuring 2 ¾” x 5 ½” (7 cm x 14 cm) should be on the front of the card as in the picture on the right.
Velvet Meadow 12″ x 12″ (15.2 x 15.2 cm) DSP Mat layers
Be mindful of how you orient papers if they are directional. If you wish the papers to have a continuous pattern, remember to cut and glue it in the order you cut it in.
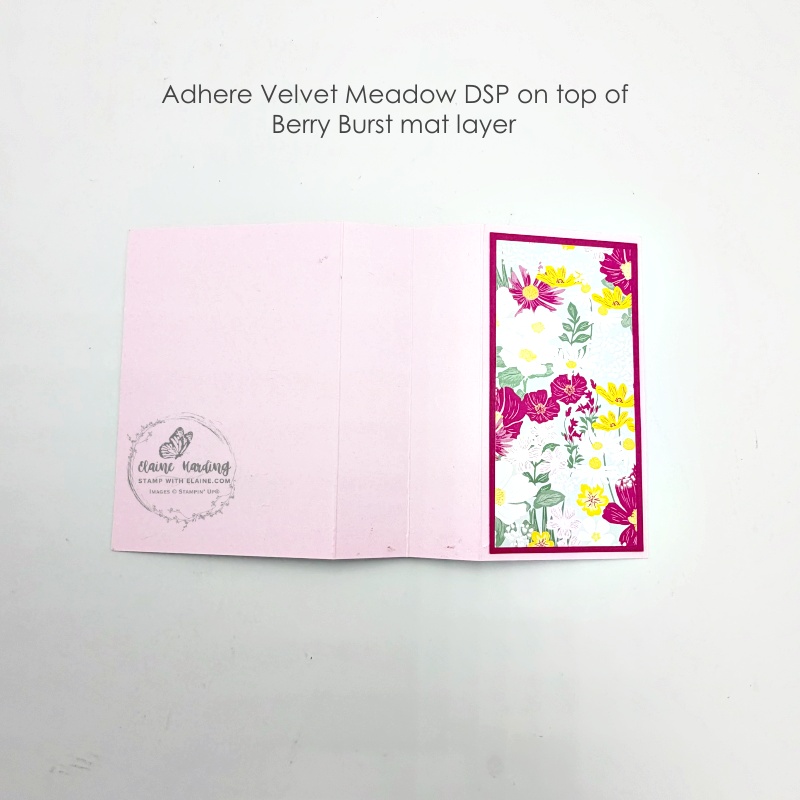
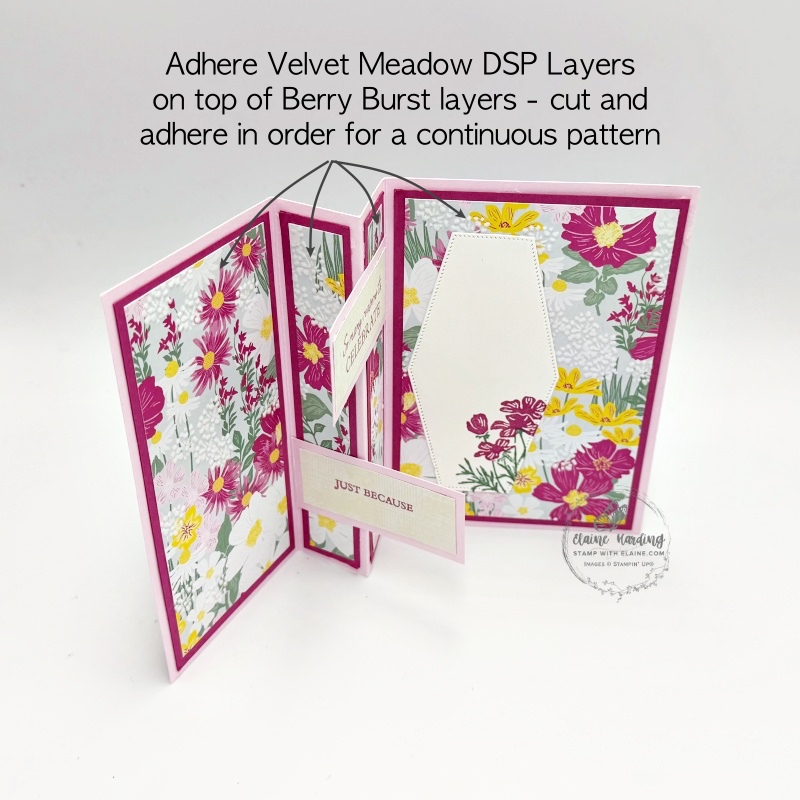
- Start with a piece that measures 5 ¼” x 12″ (13.5 cm x 30.5 cm).
- Cut 2 pieces at 2 ¾” x 5 ¼” (6.5 cm x 13.5 cm) – one for the front of the card and the other for the first panel inside the card.
- Narrow panels cut 2 pieces ¾” x 5 ¼” (2 cm x 13.5 cm)
- Last panel – cut 1 piece 3 ½” x 5 ¼” (9 cm x 13.5 cm)
- Adhere the first 2 ¾” x 5 ¼” (6.5 cm x 13.5 cm) on the front as in first picture.
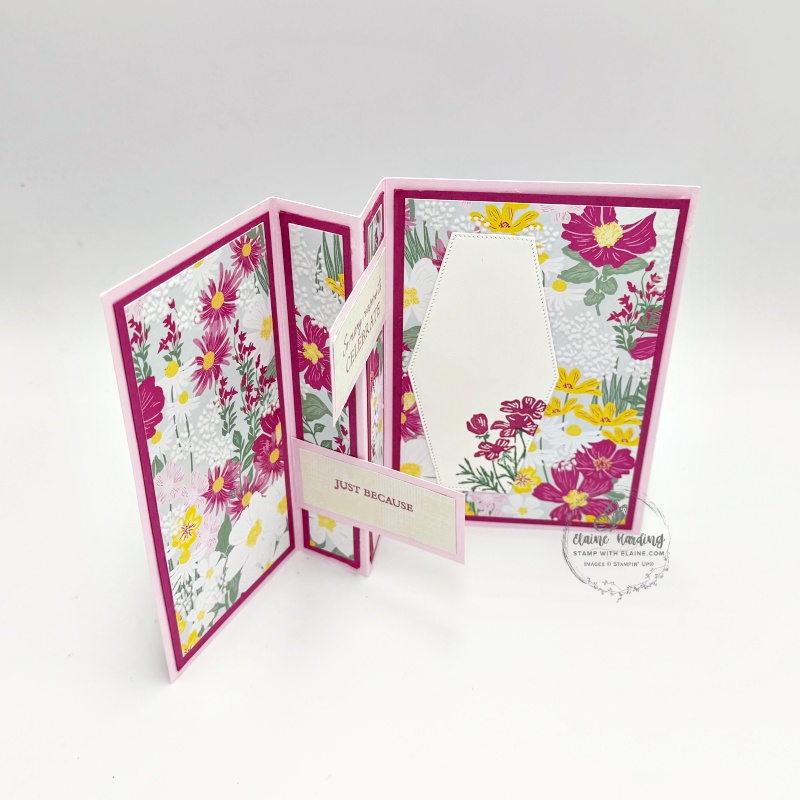
- Consecutive pieces adhere on the inside as pictured on the right.
Greeting mat layers
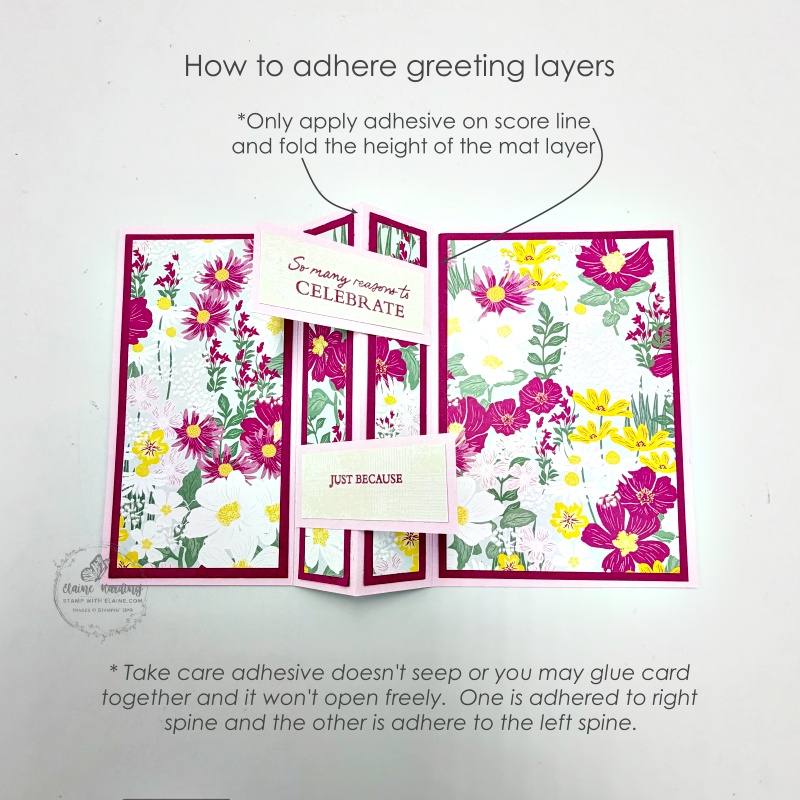
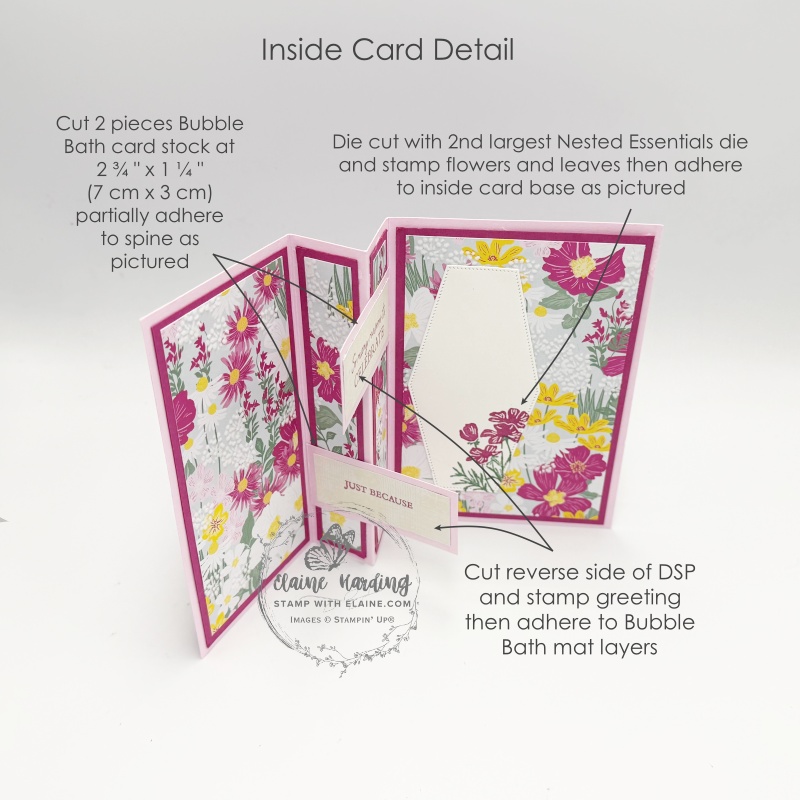
- Cut 2 Bubble Bath pieces at 2 ¾” x 1 ¼” (7 cm x 3.5 cm)
- Reverse side of DSP cut 2 pieces 2 ½” x 1″ (6.5 cm x 3 cm) and stamp “so many reasons to Celebrate” on one and “JUST BECAUSE” on the other. Adhere these to the Bubble Bath pieces leaving an even border on all 4 sides.
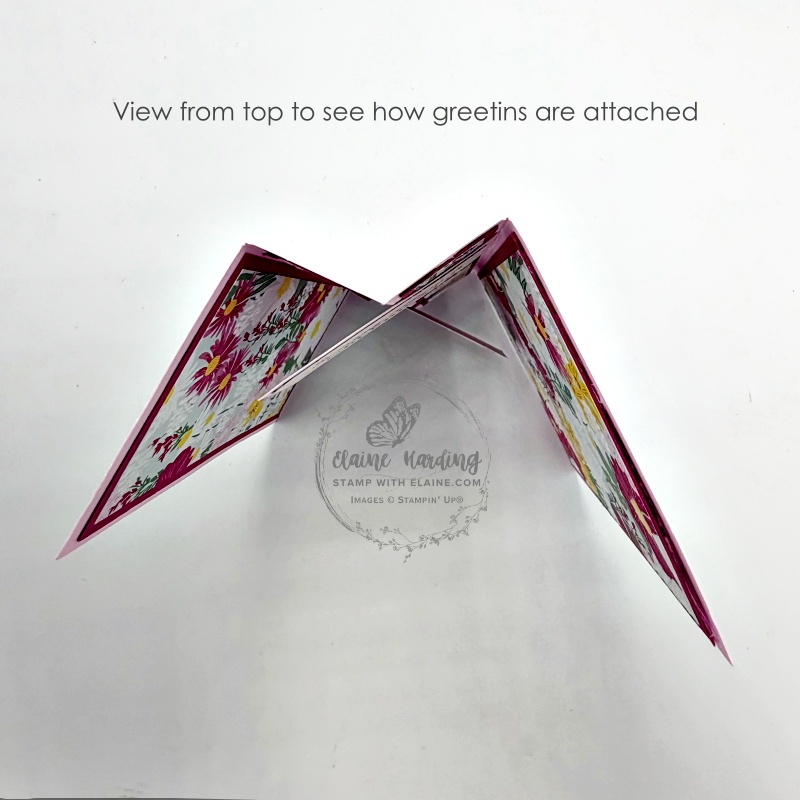
- Partially apply adhesive on each greeting piece and adhere one to right side of spine, and the other on the left as pictured above.
- From above, it should look like the picture on the right.
Nested Essential die cut layers and velveteen floral elements
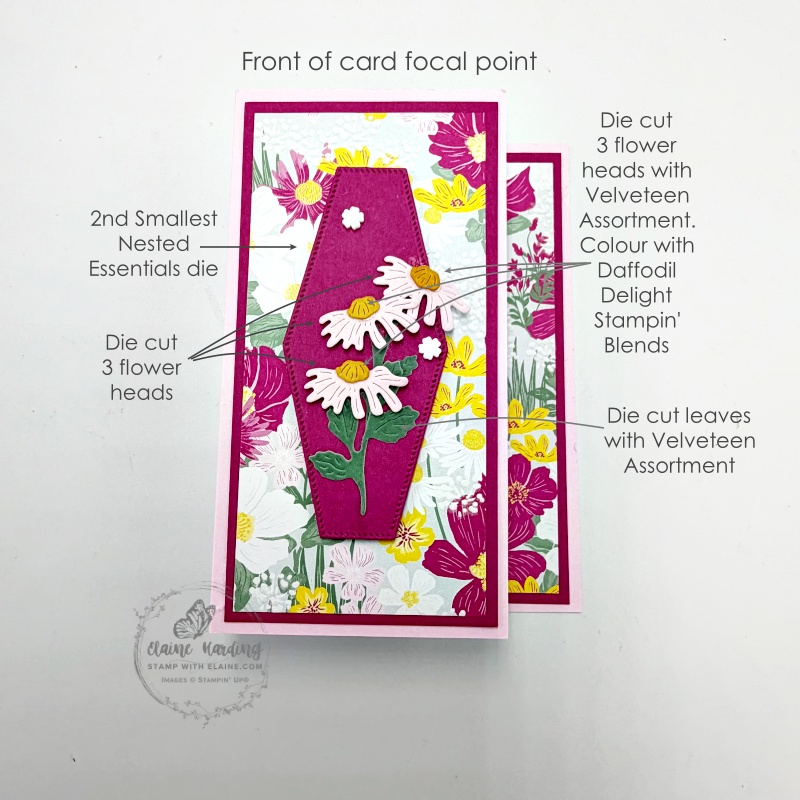
- With the 2nd smallest Nested Essential die – cut this elongated hexagonal shape in Berry Burst
- From the Velveteen paper, cut stems in Peaceful Pine, flower heads in Bubble Bath, flower centres in White. Colour White flower centres with Daffodil Delight Stampin’ Blend. Arrange stems and flowers as pictured and adhere to Berry Burst hexagonal piece. Lastly add Dreamy Flowers embellishments.
- Inside card – die cut Basic White Nested Essentials 2nd largest die. Stamp in the bottom right the stems first with Peaceful Pine ink. Next ink up flower stamp with Berry Burst ink, align stamp with stems in bottom right and stamp.
- Adhere Basic White stamped hexagon to inside of card as shown ensuring that it is not peeking out when card is closed.
Supply list
Listed below is the supply list. Just click on the picture to take you directly to the item in my online store.
Product List![Flowering Meadow Bundle (English) [ 167912 ]](https://assets1.tamsnetwork.com/images/EC042017NF/167912s.jpg "Flowering Meadow Bundle (English) [ 167912 ]")
![Nested Essentials Dies [ 161597 ]](https://assets1.tamsnetwork.com/images/EC042017NF/161597s.jpg "Nested Essentials Dies [ 161597 ]")
![Dreamy Flowers [ 167916 ]](https://assets1.tamsnetwork.com/images/EC042017NF/167916s.jpg "Dreamy Flowers [ 167916 ]")
![Velvet Meadow 12" X 12" (30.5 X 30.5 Cm) Specialty Designer Series Paper [ 167904 ]](https://assets1.tamsnetwork.com/images/EC042017NF/167904s.jpg "Velvet Meadow 12\" X 12\" (30.5 X 30.5 Cm) Specialty Designer Series Paper [ 167904 ]")
![Velveteen Assortment 12" X 12" (30.5 X 30.5 Cm) Specialty Paper [ 167915 ]](https://assets1.tamsnetwork.com/images/EC042017NF/167915s.jpg "Velveteen Assortment 12\" X 12\" (30.5 X 30.5 Cm) Specialty Paper [ 167915 ]")
![Basic White A4 Cardstock [ 166781 ]](https://assets1.tamsnetwork.com/images/EC042017NF/166781s.jpg "Basic White A4 Cardstock [ 166781 ]")
![Berry Burst A4 Cardstock [ 144249 ]](https://assets1.tamsnetwork.com/images/EC042017NF/144249s.jpg "Berry Burst A4 Cardstock [ 144249 ]")
![Bubble Bath A4 Cardstock [ 161727 ]](https://assets1.tamsnetwork.com/images/EC042017NF/161727s.jpg "Bubble Bath A4 Cardstock [ 161727 ]")
![Berry Burst Classic Stampin' Pad [ 147143 ]](https://assets1.tamsnetwork.com/images/EC042017NF/147143s.jpg "Berry Burst Classic Stampin' Pad [ 147143 ]")
![Simply Scored [ 122334 ]](https://assets1.tamsnetwork.com/images/EC042017NF/122334s.jpg "Simply Scored [ 122334 ]")

- SHOP ONLINE – EARN 10% REWARDS ON ALL PURCHASES OVER £20
- PURCHASE A STARTER KIT : Get £155 worth of products for only £99. Choose from current catalogues and any specials available. Free Shipping. Read more
- Subscribe to my Video Tutorials – click here
