
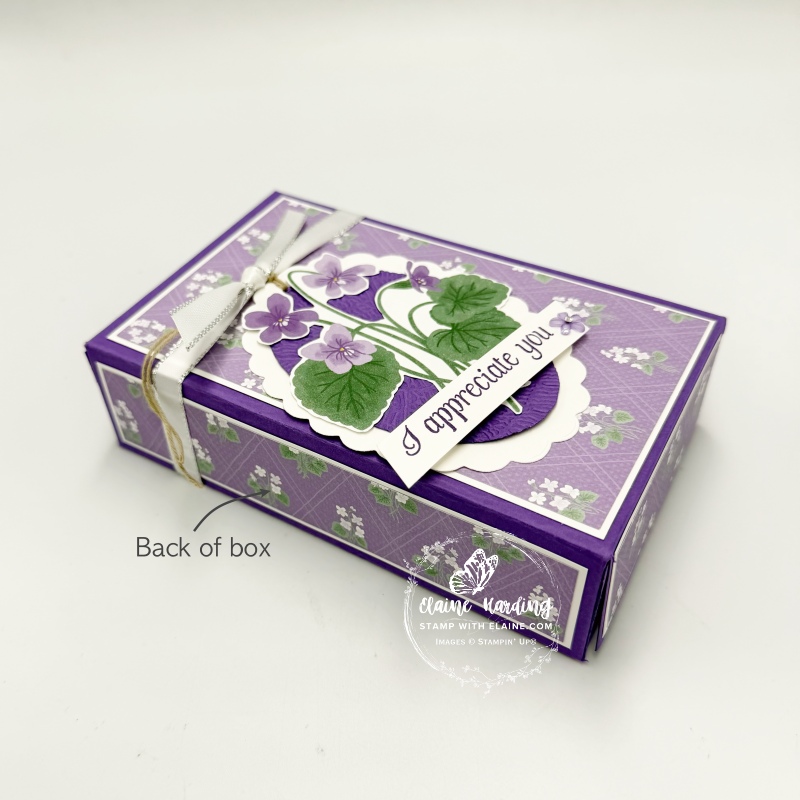
Gift packaging – Violet Dreams. My project today is gift packaging with the Violet Dreams Specialty Designer Series Papers. These papers are part of the Violet Dreams Suite Collection which is an Online Exclusive due to be released in July.
There are two options – to make the box entirely from a 9″x 12″ (23 cm x 30.5 cm) piece of Designer Series Paper or create one from a 9″x 12″ (23 cm x 30.5 cm) piece of card stock. I opted for the latter because it meant I could make the Designer Series Paper go further.
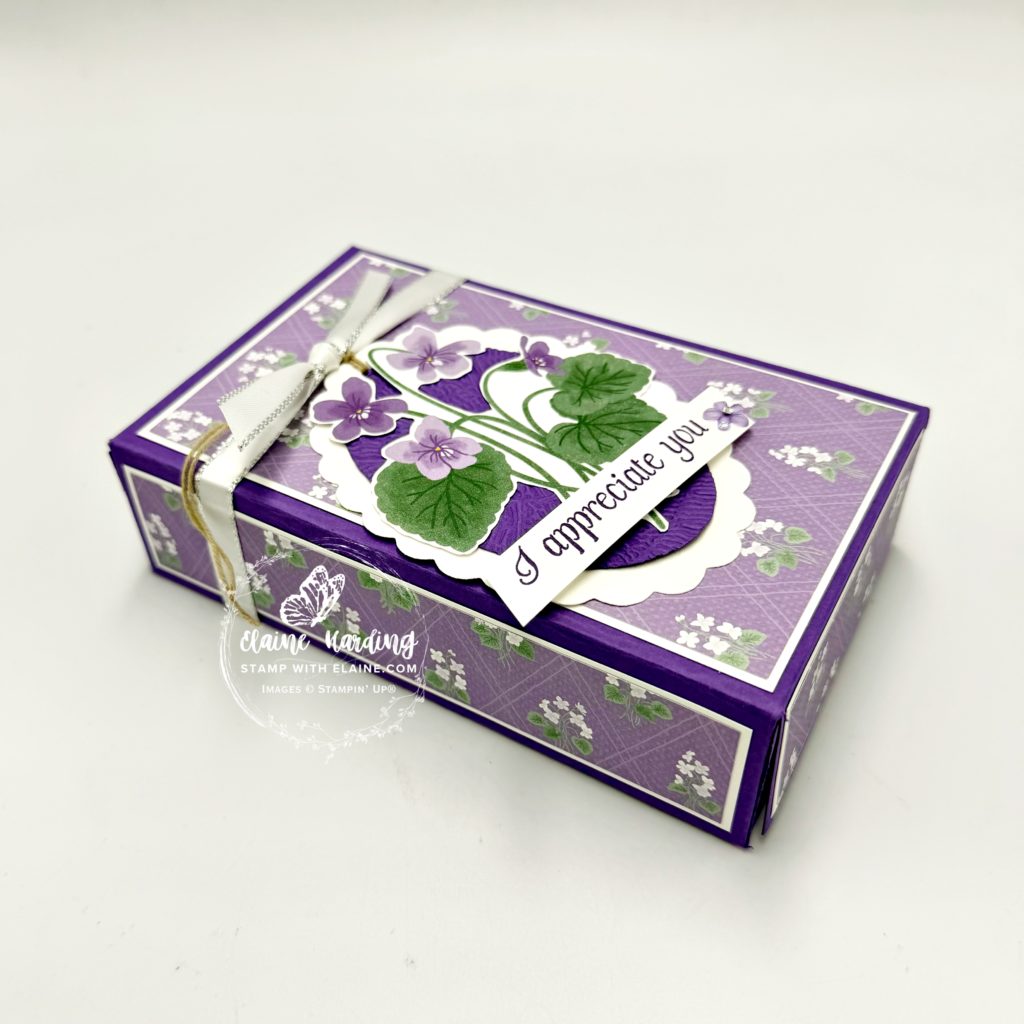
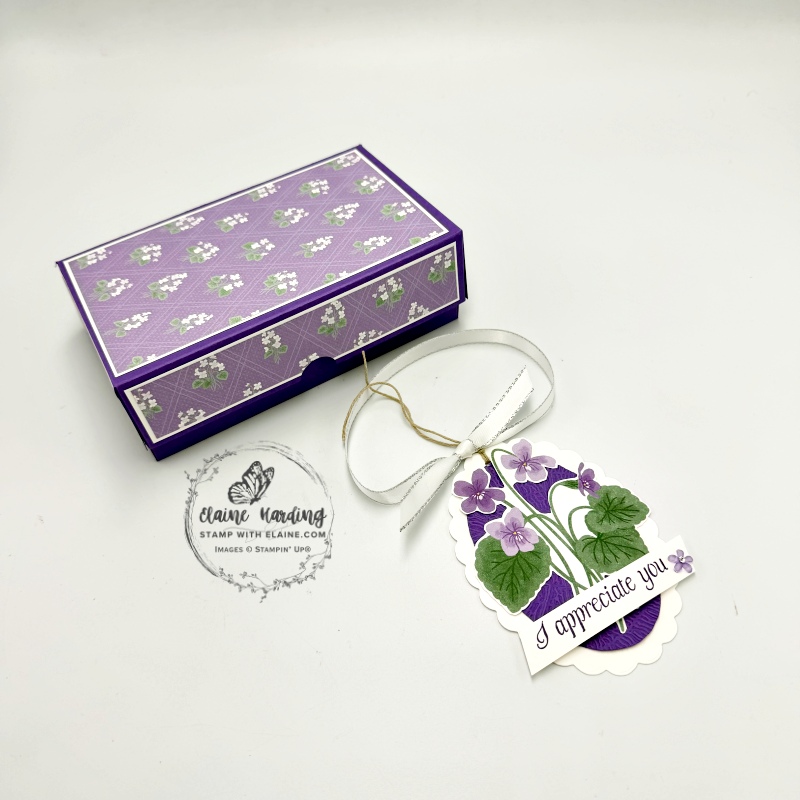
All in one box
I cut my box template from a 12″x 12″ (30.5 x 30.5 cm) Gorgeous Grape piece.
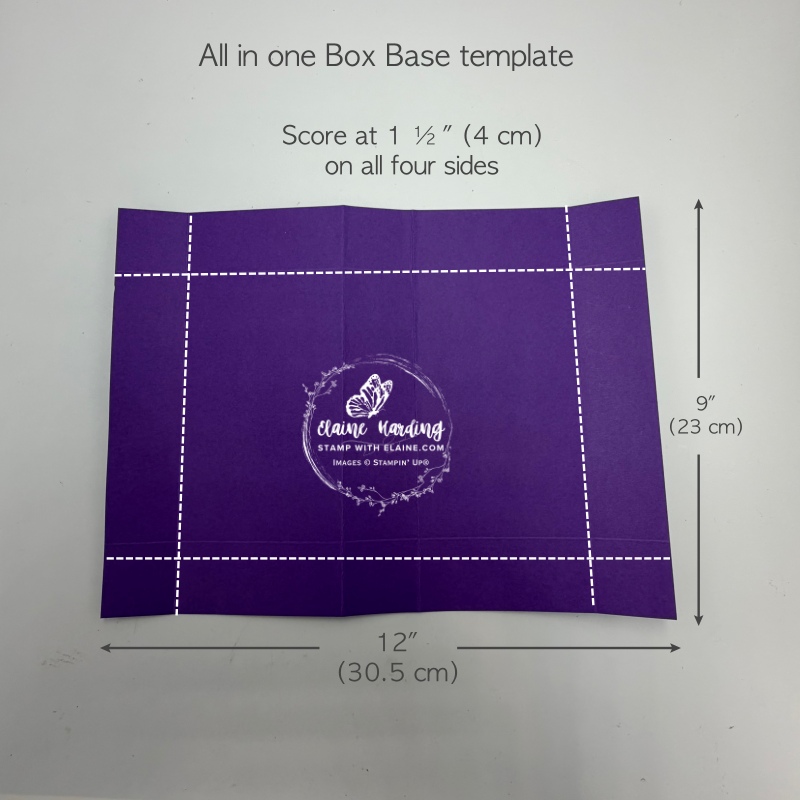
- Box template Gorgeous Grape cut at 9″ x 12″ (23 cm x 30.5 cm).
- Score all 4 sides at 1 ½” (4 cm)
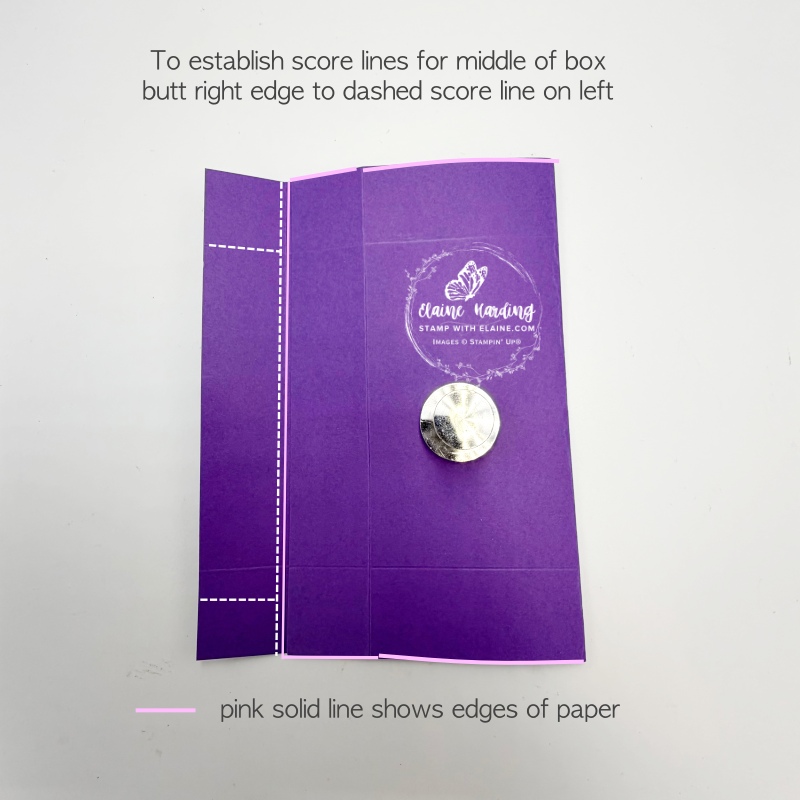
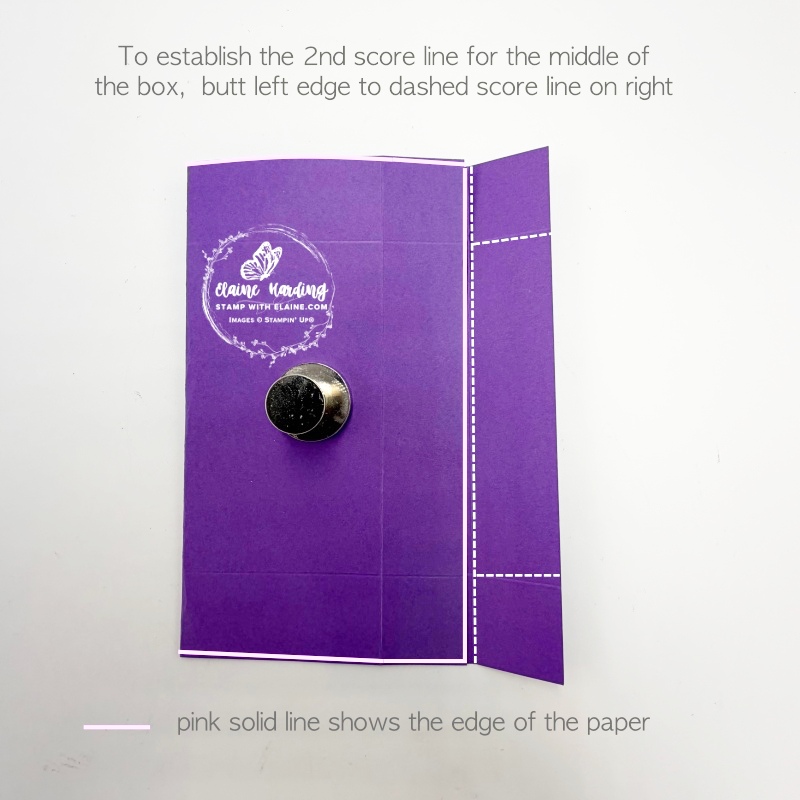
- Burnish each short end. Middle picture – fold right edge to just inside score line on left.
- Picture on the right – fold left edge to just inside score line on right.
Burnish centre score lines and apply adhesive
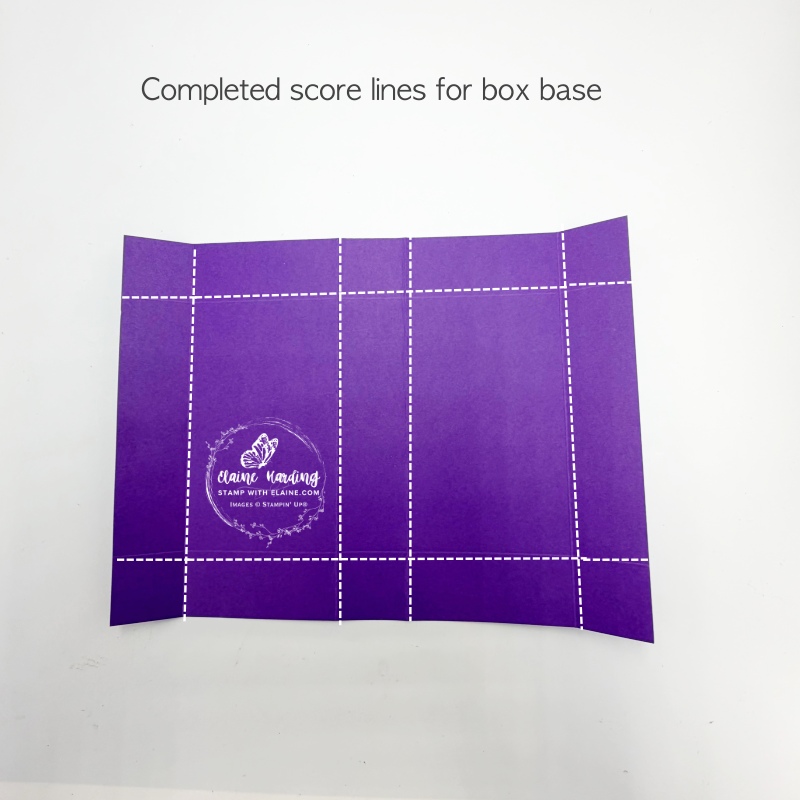
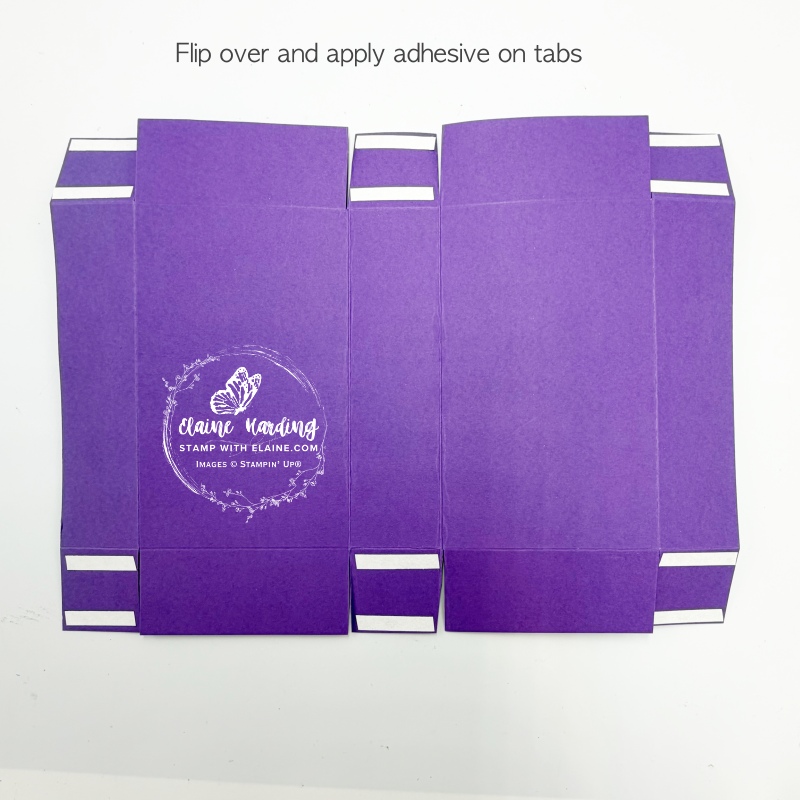
- Burnish all score lines as shown in picture on the left.
- Long side facing you, cut up to first scoreline the tabs both at the top and bottom as pictured above on the right.
Cutting guide for Mat and DSP layersb
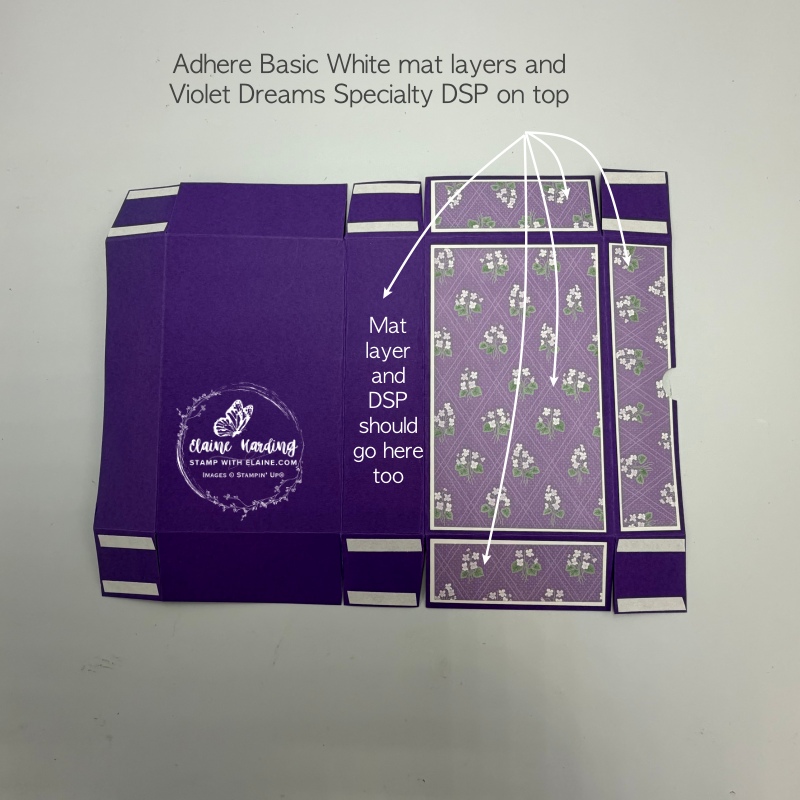
Mat layers
- Cut 2 Basic White mat layers for the short side of the box at 1 ¼” x 3 ⅜” (3.5 cm x 8.5 cm).
- Long sides : cut 2 pieces Basic White mat layers at 1 ¼” x 5 ¾” (3.5 cm x 14.5 cm)
- Top of box : cut 1 piece Basic White mat layer at 3 ⅜” x 5 ¾” (8.5 cm x 14.5 cm)
Violet Dreams Specialty DSP
- Short side DSP layers cut 2 pieces 1 ⅛” x 3 ¼” (3 cm x 8 cm)
- Long side DSP layers cut 2 pieces 1 ⅛” x 5 ⅝” (3 cm x 14 cm)
- Top of box DSP layer cut 1 piece 3 ¼” x 5 ⅝” (8 cm x 14 cm)
Assemble box
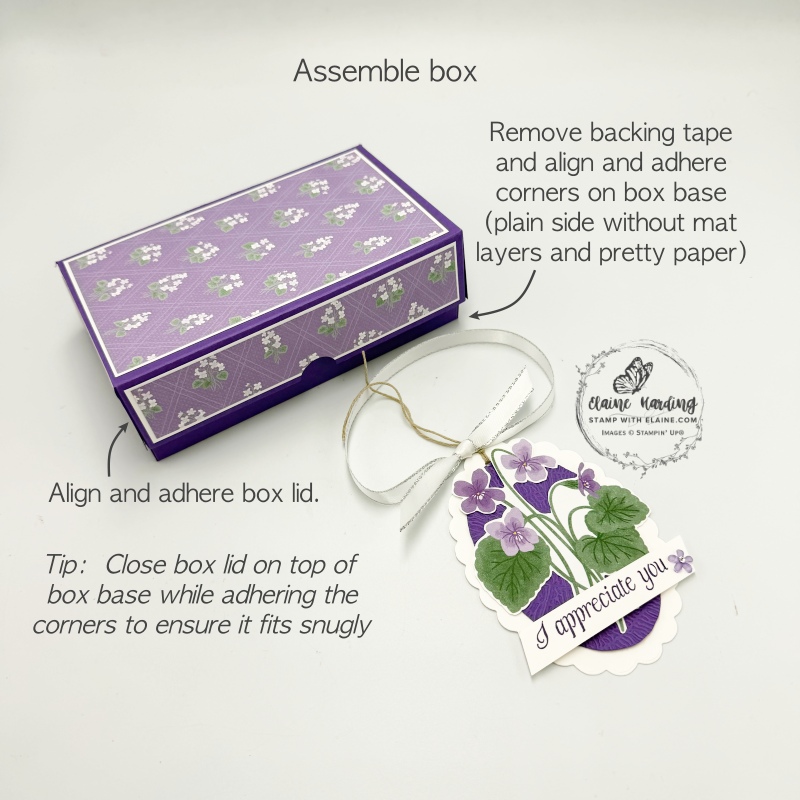
- Adhere corresponding DSP layers to Basic White layers then adhere to short sides, long sides and top of box as pictured above.
- Punch a finger hole on side of box before assembling box.
- Remove backing tape, align and adhere tabs to box bottom on all 4 corners.
- Close top over bottom of box, adhere the corner tabs on box lid.
Create tag and attach to box
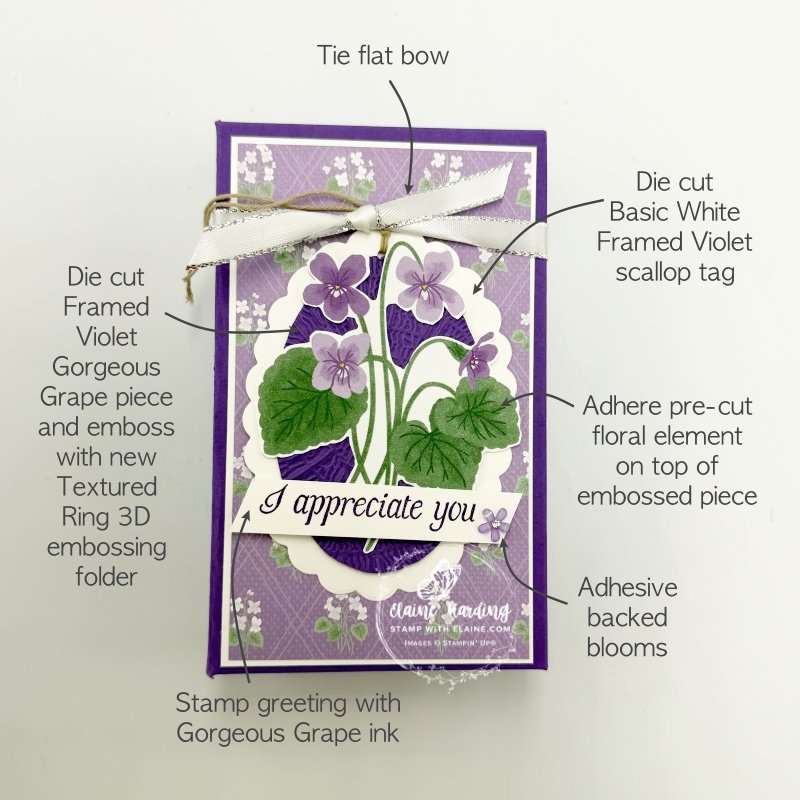
- Die cut large Framed Violet scalloped with Basic White card stock.
- Gorgeous Grape – die cut smaller Framed Violet frame. Emboss with new Textured Tree Ring 3D embossing folder. (Available July). Adhere to scalloped piece.Stamp
- Pop out floral element from Violet Dreams Specialty DSP. It has a wide border, so I trimmed mine fairly close before adhering on top of embossed piece.
- Stamp greeting with Gorgeous Grape ink on a scrap of Basic White. Trim at an angle and attach an adhesive backed bloom on the end. Adhere at bottom of tag with dimensionals.
- Punch hole at the top, thread linen thread through.
- Tie flat knot at top of box, and tie linen thread to flat knot to finish.
I will add supply list once it becomes available.

- SHOP ONLINE – EARN 10% REWARDS ON ALL PURCHASES OVER £20
- PURCHASE A STARTER KIT : Get £155 worth of products for only £99. Choose from current catalogues and any specials available. Free Shipping. Read more
- Subscribe to my Video Tutorials – click here
