
Luxe Foliage Leaves Series – Part 2. In Part 2, not only is the Lux Foliage Specialty paper, September’s Product of the month featured, but also an online exclusive Fun For Fall bundle. You can build seasonal scenes by stamping a cheerful scarecrow, crows, straw bales, and swirling leaves. Cut them out with the coordinating dies and add them to your cards and scrapbook pages to capture autumn’s charm.
Product of the month
If you love exclusive products, you’re going to love Product of the Month, a promotion centred around a special product release every month. The Product of the Month items are specially designed to be some of the best items Stampin’ Up! has to offer that aren’t available in any of our catalogues or our Online Exclusives. Every month we’ll release a new item that is only available for purchase once per account. These items will be limited quantity and are likely to sell out quickly—once they’re sold out, they’re gone for good!
What’s the catch? Spend a qualifying single order of £70 excluding shipping and you can purchase the current Product of the month for the princely sum of £5.00. That’s it! What a bargain!
Luxe Foliage and Fun for Fall card
Simple technique to show off the Luxe Foliage DSP. Layer it first, then add a second layer with torn two-tone card stock in corners to highlight the Luxe Foliage paper.
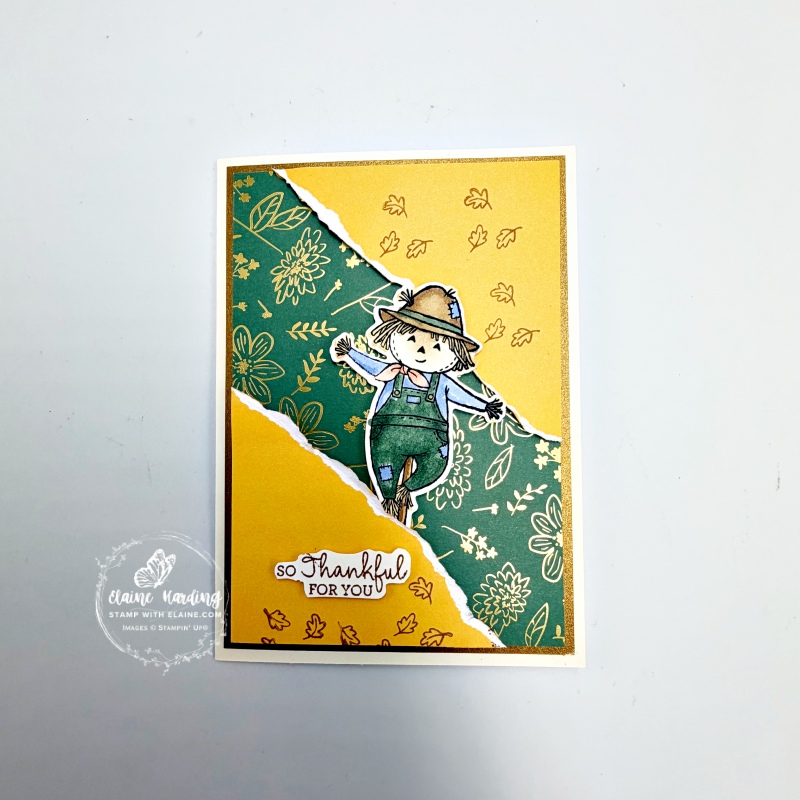
Cutting guide
- Card base : Very Vanilla cut at 5 ¾” x 8 ¼” (14.5 cm x 21 cm) folded in half.
- Copper Metal Effect 12″ x 12″ (30.5 x 30.5 cm) Specialty Paper cut at 3 ⅞” x 5 ½” (10 cm x 14 cm). Cut a ½” (1.5 cm) frame and reserve inside for another project.
- Luxe Foliage – green piece cut at 3 ⅞” x 5 ½” (10 cm x 14 cm).
- Daffodil Delight two-tone 12″x 12″ (30.5 x 30.5 cm) card stock cut at 3 ¾” x 5 ⅜” (9.5 cm x 13.5 cm). Cut it diagonally from top left to bottom right. Stack and align both triangles at the corners and tear toward you to expose white core.
- Scrap of Basic White to stamp and colour scarecrow and greeting
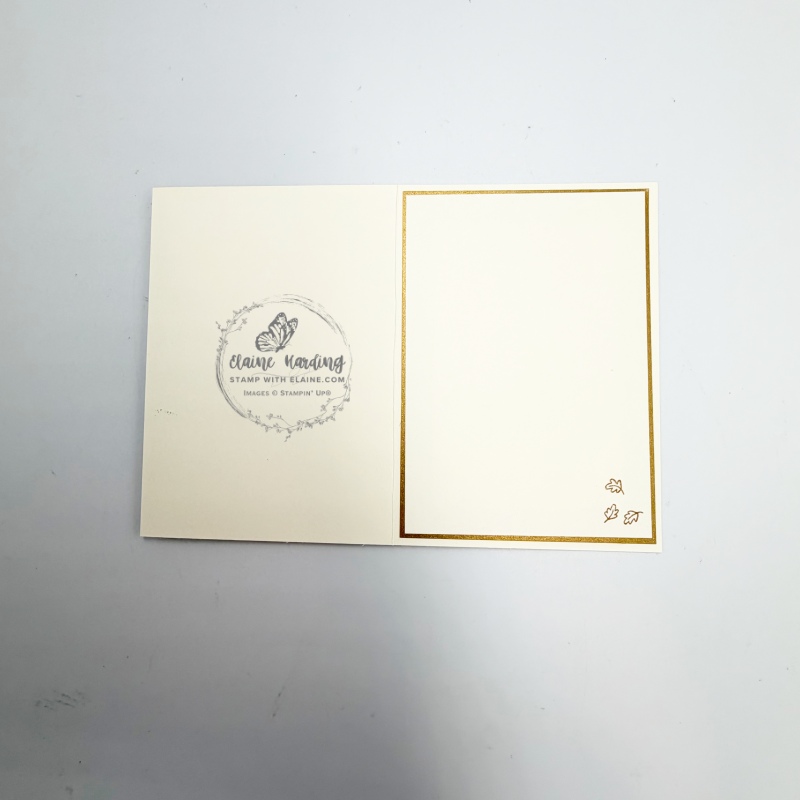
Inside card
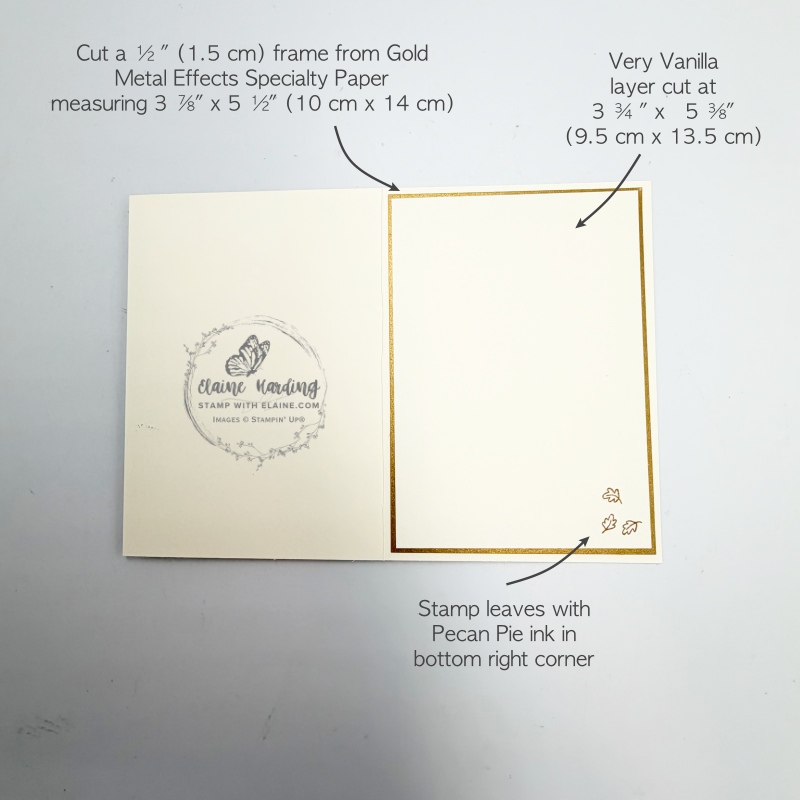
- Copper Metal Effect 12″ x 12″ (30.5 x 30.5 cm) Specialty Paper cut at 3 ⅞” x 5 ½” (10 cm x 14 cm). Cut a ½” (1.5 cm) frame and reserve inside for another project.
- Very Vanilla card stock cut at 3 ¾” x 5 ⅜” (9.5 cm x 13.5 cm).
Assembling card
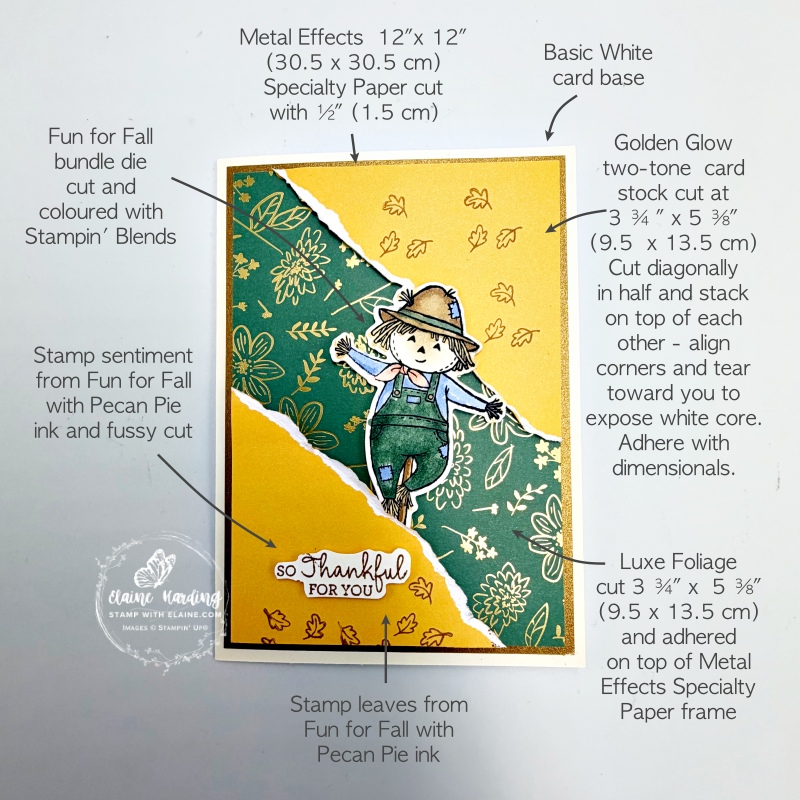
Front of card
- Adhere Copper Metal Effects frame on card front leaving an even border on all 4 sides.
- Apply adhesive to the back of the green Luxe Foliage piece and adhere on top of frame leaving an even border on all 4 sides.
- Stamp on the Daffodil Delight two-tone card stock torn corners as pictured. Apply dimensionals on the back. Align with corners of green Luxe Foliage and adhere as pictured.
- Stamp scarecrow with Memento black ink (retired) and colour Scarecrow with Stampin’ Blends. I used Peaceful Pine, Hydrangea Hue, Golden Glow, Crumb Cake and Pecan Pie. Die cut with corresponding die from Fun for Fall dies. Apply dimensionals behind body of scarecrow. Tuck behind bottom Daffodil Delight corner and adhere to green Luxe Foliage piece.
- Stamp greeting on Basic White or Very Vanilla scrap and fussy cut. Apply dimensionals and adhere in bottom left corner as pictured.
Inside card
- Adhere Copper Metals Effect frame to inside of card base leaving an even border on all 4 sides.
- Stamp a cluster of leaves in bottom right corner then adhere on top of Copper Metals Effect frame leaving an even border on all 4 sides.
Supply list
Listed below is the supply list. Just click on the picture to take you directly to the item in my online store.
Product List![Fun For Fall Bundle (English) [ 168139 ]](https://assets1.tamsnetwork.com/images/EC042017NF/168139s.jpg "Fun For Fall Bundle (English) [ 168139 ]")
![Luxe Foliage 12" X 12" (30.5 X 30.5 Cm) Specialty Designer Series Paper [ 168599 ]](https://assets1.tamsnetwork.com/images/EC042017NF/168599s.jpg "Luxe Foliage 12\" X 12\" (30.5 X 30.5 Cm) Specialty Designer Series Paper [ 168599 ]")
![Metal Effects 12" X 12" (30.5 X 30.5 Cm) Specialty Paper [ 167105 ]](https://assets1.tamsnetwork.com/images/EC042017NF/167105s.jpg "Metal Effects 12\" X 12\" (30.5 X 30.5 Cm) Specialty Paper [ 167105 ]")
![Daffodil Delight 12" X 12" (30.5 X 30.5 Cm) Two Tone Cardstock [ 166669 ]](https://assets1.tamsnetwork.com/images/EC042017NF/166669s.jpg "Daffodil Delight 12\" X 12\" (30.5 X 30.5 Cm) Two Tone Cardstock [ 166669 ]")
![Basic White A4 Cardstock [ 166781 ]](https://assets1.tamsnetwork.com/images/EC042017NF/166781s.jpg "Basic White A4 Cardstock [ 166781 ]")
![Pecan Pie Classic Stampin' Pad [ 161665 ]](https://assets1.tamsnetwork.com/images/EC042017NF/161665s.jpg "Pecan Pie Classic Stampin' Pad [ 161665 ]")
![Basic Black Hybrid Stampin' Pad [ 166648 ]](https://assets1.tamsnetwork.com/images/EC042017NF/166648s.jpg "Basic Black Hybrid Stampin' Pad [ 166648 ]")
![Crumb Cake Stampin' Blends Combo Pack [ 154882 ]](https://assets1.tamsnetwork.com/images/EC042017NF/154882s.jpg "Crumb Cake Stampin' Blends Combo Pack [ 154882 ]")
![Golden Glow Stampin’ Blends Combo Pack [ 167682 ]](https://assets1.tamsnetwork.com/images/EC042017NF/167682s.jpg "Golden Glow Stampin’ Blends Combo Pack [ 167682 ]")
![Hydrangea Hue Stampin’ Blends Combo Pack [ 167666 ]](https://assets1.tamsnetwork.com/images/EC042017NF/167666s.jpg "Hydrangea Hue Stampin’ Blends Combo Pack [ 167666 ]")
![Peaceful Pine Stampin’ Blends Combo Pack [ 167668 ]](https://assets1.tamsnetwork.com/images/EC042017NF/167668s.jpg "Peaceful Pine Stampin’ Blends Combo Pack [ 167668 ]")
![Pecan Pie Stampin’ Blends Combo Pack [ 161674 ]](https://assets1.tamsnetwork.com/images/EC042017NF/161674s.jpg "Pecan Pie Stampin’ Blends Combo Pack [ 161674 ]")

- SHOP ONLINE – EARN 10% REWARDS ON ALL PURCHASES OVER £20
- PURCHASE A STARTER KIT : Get £155 worth of products for only £99. Choose from current catalogues and any specials available. Free Shipping. Read more
- Subscribe to my Video Tutorials – click here
