
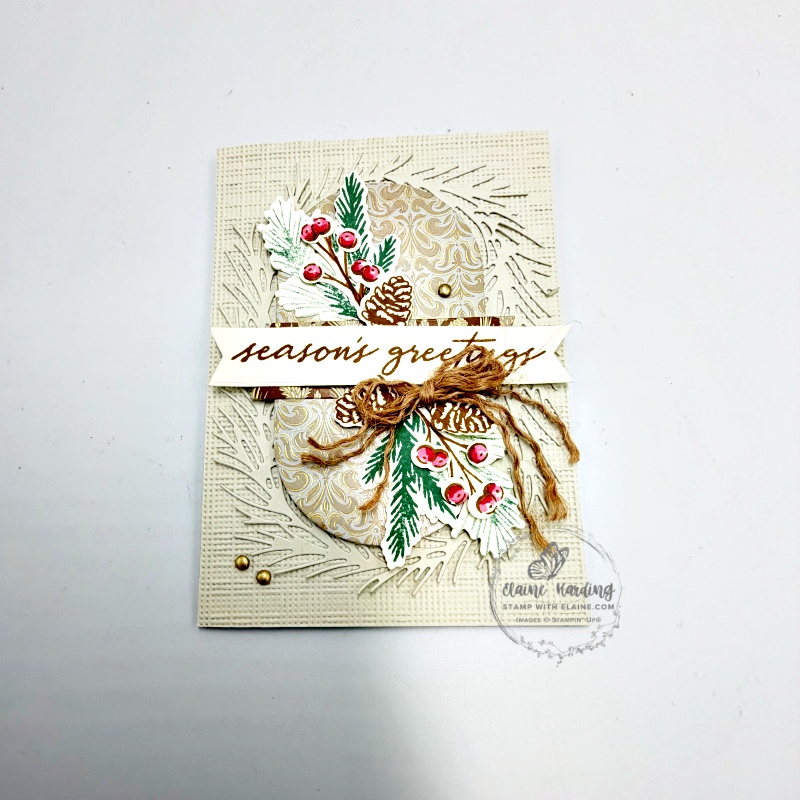
Noel Tidings – Week 5 Christmas Countdown Series. The Noel Tidings Bundle features stamps with evergreen sprigs, berries and acorns and merry sentiments. You can then use the matching dies to cut them out with ease. Its coordinating stamps and dies let you create sophisticated handmade cards that are full of Christmas cheer.
You can layer the evergreen sprigs to build full wreaths or tuck them into festive arrangements, then add pinecones and berries to accent your designs. Finish it all off with a cheerful Yuletide sentiment.
Neutral Noel Suite
Noel Tidings is part of the Neutral Noel Suite which is a mega-suite because it consists of two bundles. The other bundle is called Welcome Noel with which you can create a traditional Christmas village on your card fronts. I will re-visit this Suite collection in Week 6 of my Christmas Countdown Series the following Friday.
Neutral Noel Specialty Designer Series Paper
Of particular note, is the Neutral Noel Specialty Designer Series Papers in the suite. These are single sided 12″x 12″ (30.5 x 30.5 cm) single sided heavy weight papers, 2 each of 6 single sided designs. They’re ideal for making gift packaging and have a glossy finish with gold foil accents on each sheet. I used it to cut the oval piece in the centre of the card.
Cutting guide
- Card base Basic Beige cut at 5 ¾” x 8 ¼” (14.5 x 21 cm) folded in half.
- Basic Beige – cut 2 pieces at 4 ⅛” x 5 ¾” (10.5 x 14.5 cm). One piece is for embossing, and the other is for die cutting the wreath.
- Cut Adhesive sheet 4 ⅛” x 5 ¾” (10.5 x 14.5 cm) and adhere to back of one of the Basic Beige pieces for die cutting wreath.
- Die cut large oval with corresponding die from Noel Tidings with Design 1 of Neutral Noel Specialty Paper
- Die cut two smaller labels from Design 2 of Neutral Noel Specialty paper.
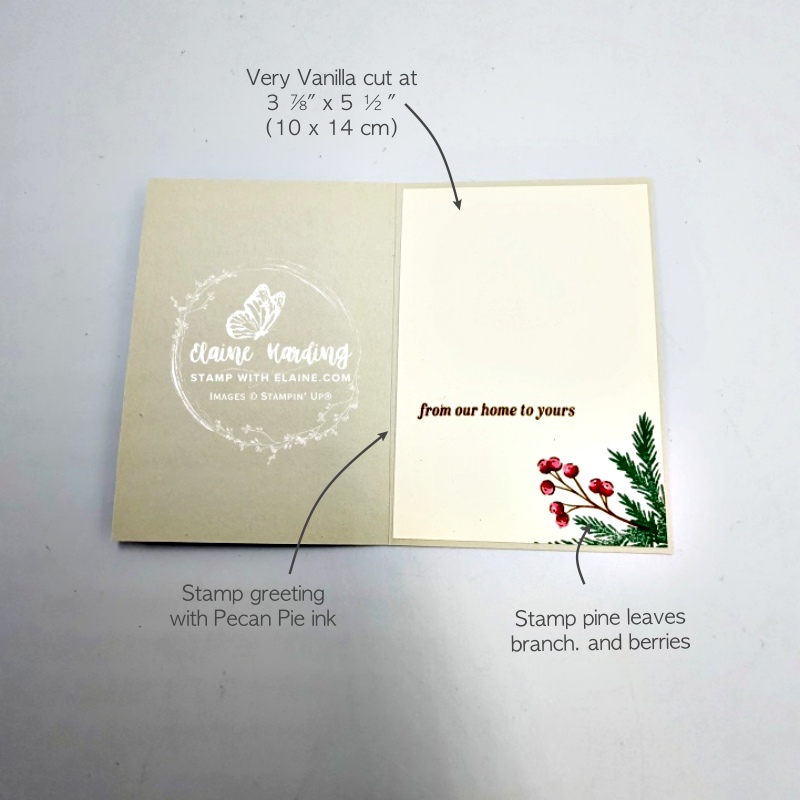
- Cut Very Vanilla layer at 3 ⅞” x 5 ½” (10 cm x 14 cm) for inside card base.
- Extra Very Vanilla Card stock for stamping/die cutting.
How to assemble card
Card front
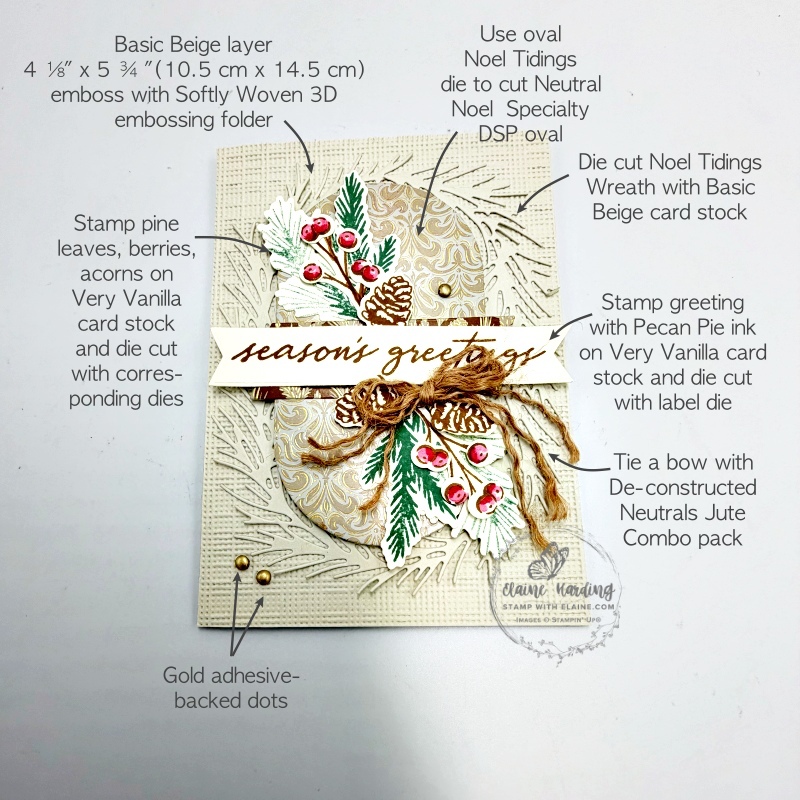
- Take remaining Basic Beige piece and emboss with Softly Woven 3D embossing folder. Adhere this to card front. Flip over and trim off any excess.
- Carefully remove backing tape from wreath and adhere on top of embossed layer.
- Apply dimensionals on back of oval Neutral Noel Specialty DSP on top of wreath in the centre of card.
- Stamp greeting on Very Vanilla card stock. Trim off excess and maintain flag end. Set aside.
Stamping elements
- On Very Vanilla card stock – Stamp one of the pine sprig with 1st generation Peaceful Pine ink.
- Switch to 2nd pine sprig stamp and stamp 2nd generation Peaceful Pine ink.
- Stamp two branch sprigs in Pecan Pie and several berries. Colour berries with Real Red Stampin’ Blend combo.
- Next stamp 3 acorns in Pecan Pie. Die cut all the stamped images with corresponding dies from Noel Tiding dies.
- Arrange pieces as pictured and adhere at an angle above and below label – add Design 2 Neutral Noel Specialty paper pieces above and below the Very Vanilla label.
- Apply dimensionals to back of flag end label and adhere as shown. If label is too long, trim ends a tad.
- Arrange and adhere pine cones with dimensionals as pictured.
- De-construct a length of Jute twine and tie in a bow – adhere with glue dots below label as shown.
Inside card
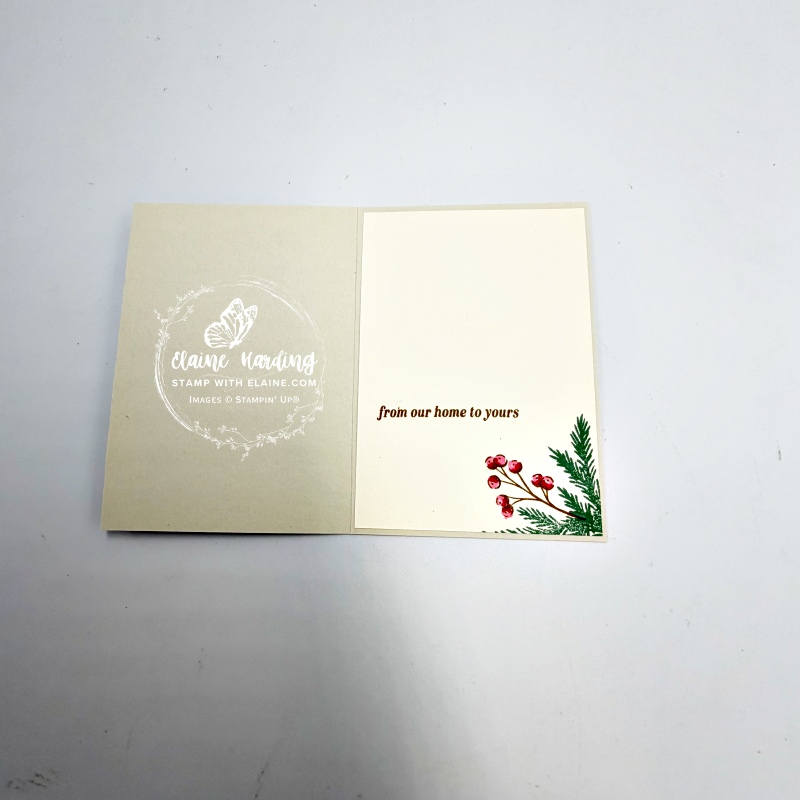
- Stamp Pecan Pie branch in bottom right corner. Then stamp berries to fill the branches and colour with Real Red Stampin’ Blend combo.
- Ink up pine sprig stamp with Peaceful Pine and stamp in the corner on either side of berries.
- Stamp greeting inside card.
- Adhere Very Vanilla layer to inside of card leaving an even border on all 4 sides.
Supply list
Listed below is the supply list. Just click on the picture to take you directly to the item in my online store.
Product List ![Real Red Combo Pack Stampin' Blends [ 147935 ] (Retired)](https://assets1.tamsnetwork.com/images/EC042017NF/147935s.jpg "Real Red Combo Pack Stampin' Blends [ 147935 ] (Retired)") Real Red Combo Pack Stampin’ Blends [147935] |
![Noel Tidings Bundle (English) [ 168458 ]](https://assets1.tamsnetwork.com/images/EC042017NF/168458s.jpg "Noel Tidings Bundle (English) [ 168458 ]")
![Noel Tidings Photopolymer Stamp Set (English) [ 168449 ]](https://assets1.tamsnetwork.com/images/EC042017NF/168449s.jpg "Noel Tidings Photopolymer Stamp Set (English) [ 168449 ]")
![Noel Tidings Dies [ 168457 ]](https://assets1.tamsnetwork.com/images/EC042017NF/168457s.jpg "Noel Tidings Dies [ 168457 ]")
![Neutral Noel 12" X 12" (30.5 X 30.5 Cm) Specialty Designer Series Paper [ 168448 ]](https://assets1.tamsnetwork.com/images/EC042017NF/168448s.jpg "Neutral Noel 12\" X 12\" (30.5 X 30.5 Cm) Specialty Designer Series Paper [ 168448 ]")
![Basic Beige A4 Cardstock [ 164512 ]](https://assets1.tamsnetwork.com/images/EC042017NF/164512s.jpg "Basic Beige A4 Cardstock [ 164512 ]")
![Very Vanilla A4 Cardstock [ 166785 ]](https://assets1.tamsnetwork.com/images/EC042017NF/166785s.jpg "Very Vanilla A4 Cardstock [ 166785 ]")
![Gold Adhesive Backed Dots [ 168467 ]](https://assets1.tamsnetwork.com/images/EC042017NF/168467s.jpg "Gold Adhesive Backed Dots [ 168467 ]")
![Neutrals Jute Combo Pack [ 168468 ]](https://assets1.tamsnetwork.com/images/EC042017NF/168468s.jpg "Neutrals Jute Combo Pack [ 168468 ]")
![Pecan Pie Classic Stampin' Pad [ 161665 ]](https://assets1.tamsnetwork.com/images/EC042017NF/161665s.jpg "Pecan Pie Classic Stampin' Pad [ 161665 ]")
![Peaceful Pine Classic Stampin Pad [ 167679 ]](https://assets1.tamsnetwork.com/images/EC042017NF/167679s.jpg "Peaceful Pine Classic Stampin Pad [ 167679 ]")

- SHOP ONLINE – EARN 10% REWARDS ON ALL PURCHASES OVER £20
- PURCHASE A STARTER KIT : Get £155 worth of products for only £99. Choose from current catalogues and any specials available. Free Shipping. Read more
- Subscribe to my Video Tutorials – click here
