
Product of the month October 26 Create truly stellar projects with the Shining Stars Dies – October 26 product of the month. These symmetrical star-shaped dies come in an assortment of sizes are perfect for handmade cards, scrapbooks, gift tags, home decor, and more. Whether you’re creating bold focal points or delicate accents, these dies will help your creativity shine!
There are six nested dies – 1 being the smallest and 6 being the largest – 4 stitched dies and 13 smallest dies making 23 dies in all the set.
Product of the month
If you love exclusive products, you’re going to love Product of the Month, a promotion centred around a special product release every month. The Product of the Month items are specially designed to be some of the best items Stampin’ Up! has to offer that aren’t available in any of our catalogues or our Online Exclusives. Every month we’ll release a new item that is only available for purchase once per account. These items will be limited quantity and are likely to sell out quickly—once they’re sold out, they’re gone for good!
What’s the catch? Spend a qualifying single order of £70 excluding shipping and you can purchase the current Product of the month for the princely sum of £5.00. That’s it! What a bargain!
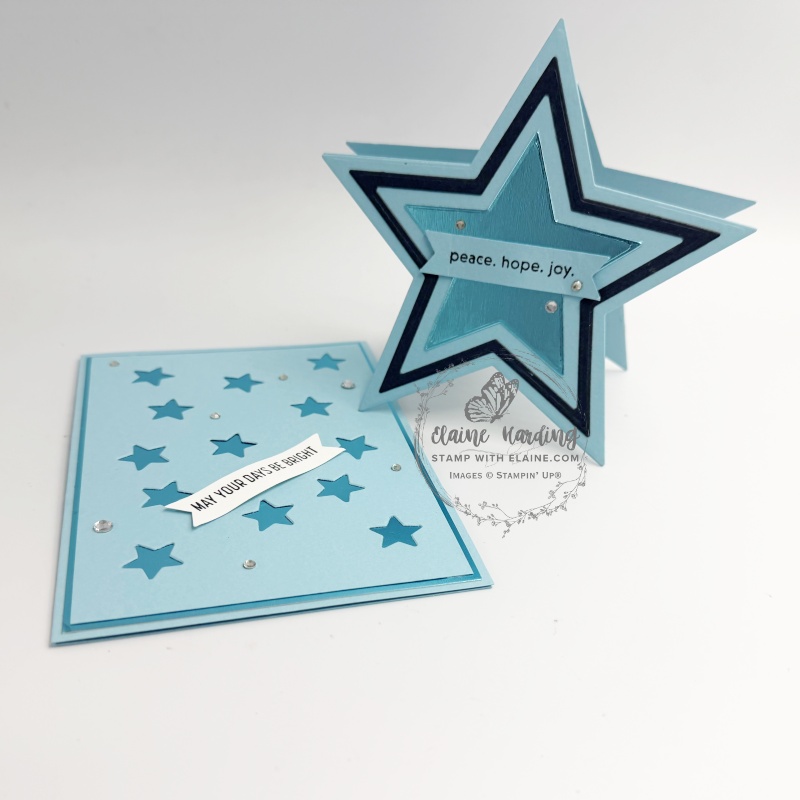
Simple card and a star shaped card base
Here are two simple card ideas. I’d just received the Spring Textured Metallic 12″x 12″ (30.5 x 30.5 cm) Specialty Paper – a November 2026 online exclusive so I wanted to feature it on the cards.
Rectangular card
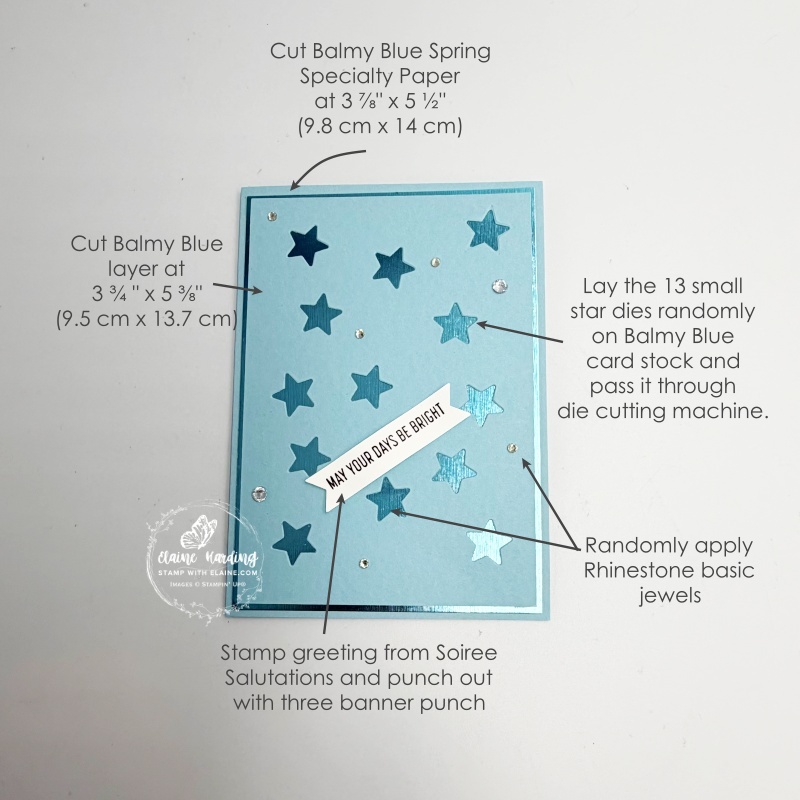
Card front
- Card base Balmy Blue cut at 5 ¾” x 8 ¼” (14.5 cm x 21 cm) folded in half.
- Cut Balmy Blue Spring Specialty Paper at 3 ⅞” x 5 ½ ” (9.8 cm x 14 cm)
- Balmy Blue layer cut at 3 ¾” x 5 ⅜” (9.5 cm x 13.7 cm). Lay all 13 smallest star dies randomly over this layer to die cut star apertures. Adhere this on top of Balmy Blue Spring Specialty Paper layer as pictured.
- Stamp greeting on scrap of Basic White card stock and punch out with 3 banner punch.
- Add rhinestones randomly.
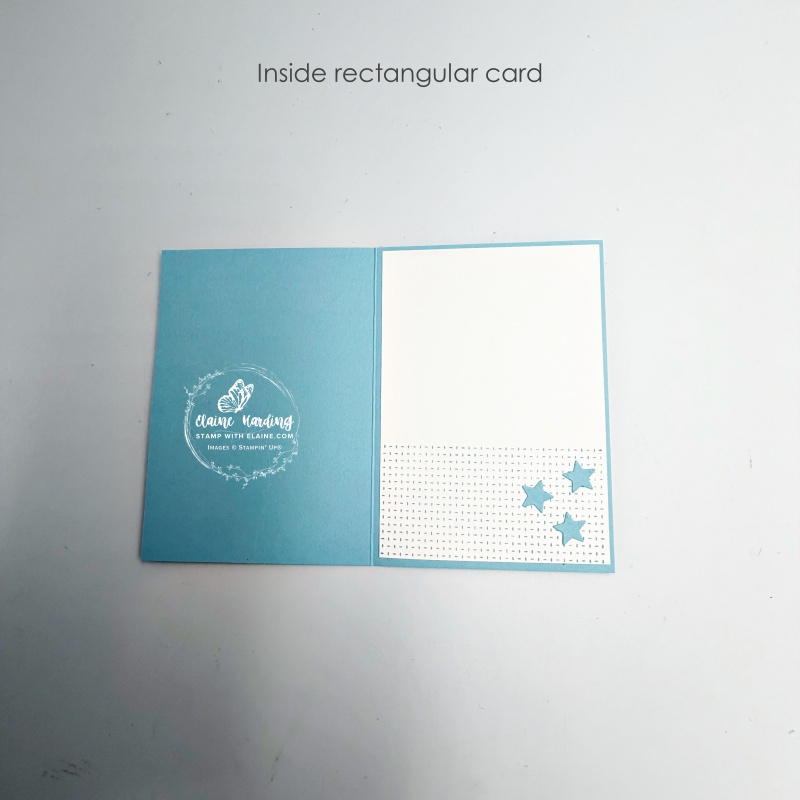
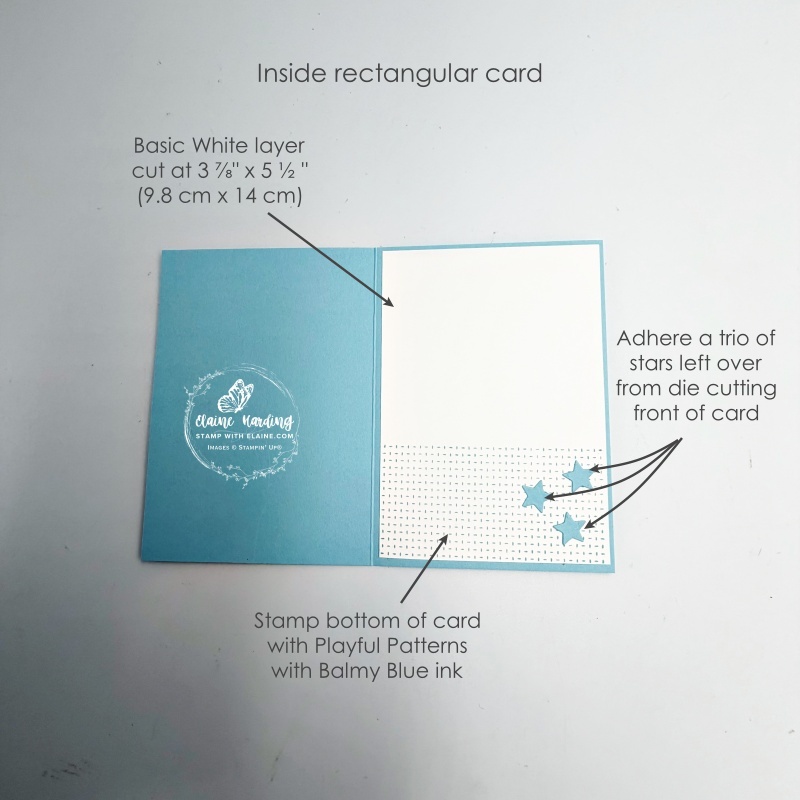
Inside card
- Cut Basic White layer at 3 ⅞” x 5 ½ ” (9.8 cm x 14 cm).
- Stamp pattern from Playful Patterns at bottom of card with Balmy Blue ink. Adhere to inside card base.
- Adhere 3 of the stars from die cutting star aperture on card front randomly to finish.
Star shaped hinged card
To create star shaped hinged card you need to cut a card base measuring 5 ¾” x 11 ½” (14.5 cm x 29 cm) and fold it in half. Die cut with the largest Star Die (picture on left)
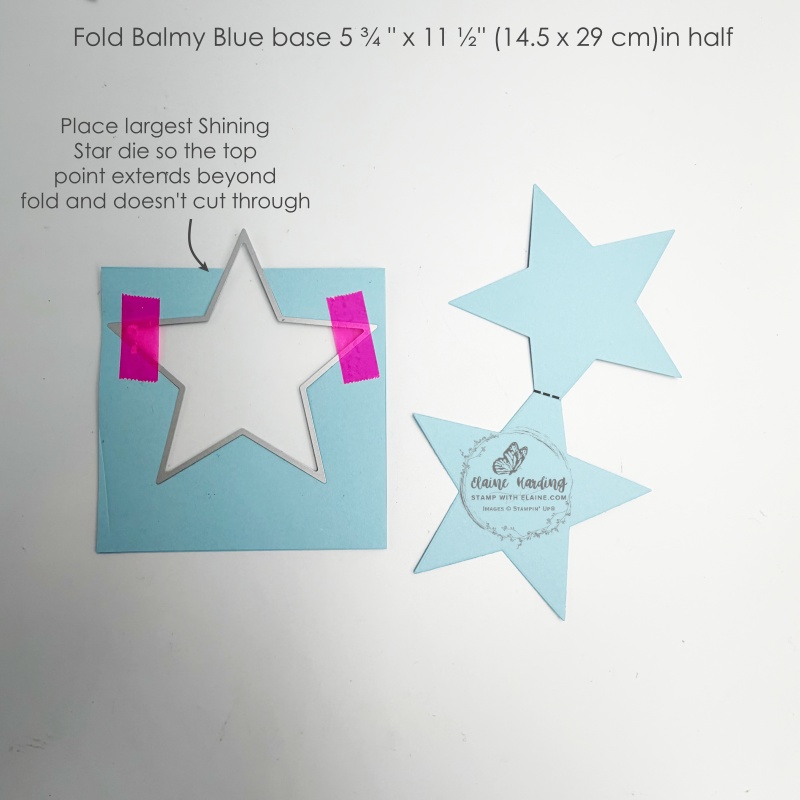
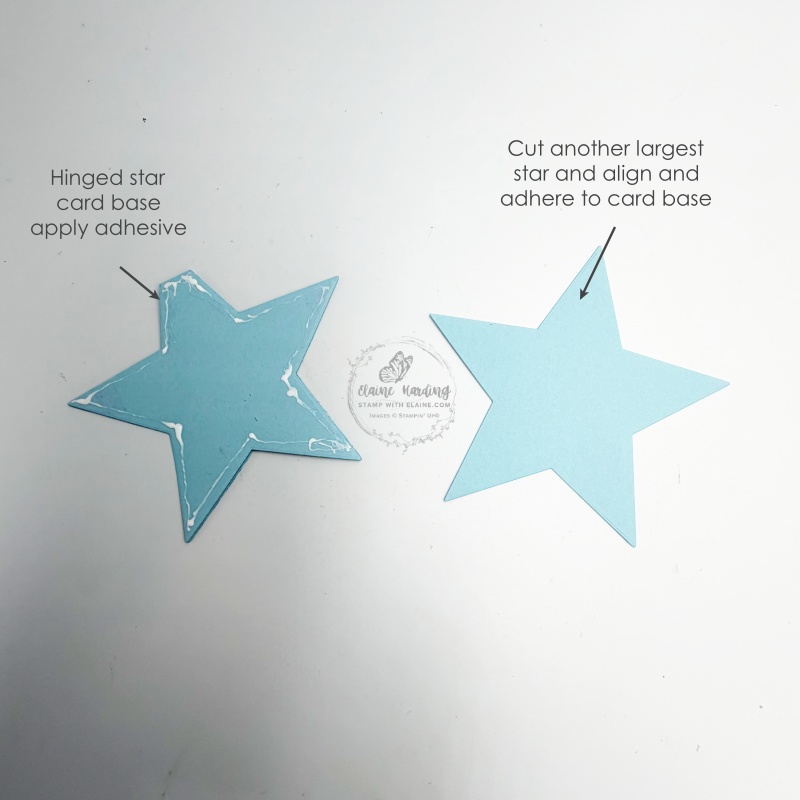
- Place largest star on folded 5 ¾” x 11 ½” (14.5 cm x 29 cm) card base to create hinged star base card.
- Die cut the largest Balmy Blue star and glue this on top of the hinged Star card base.
How to cut star frame and inside star card base
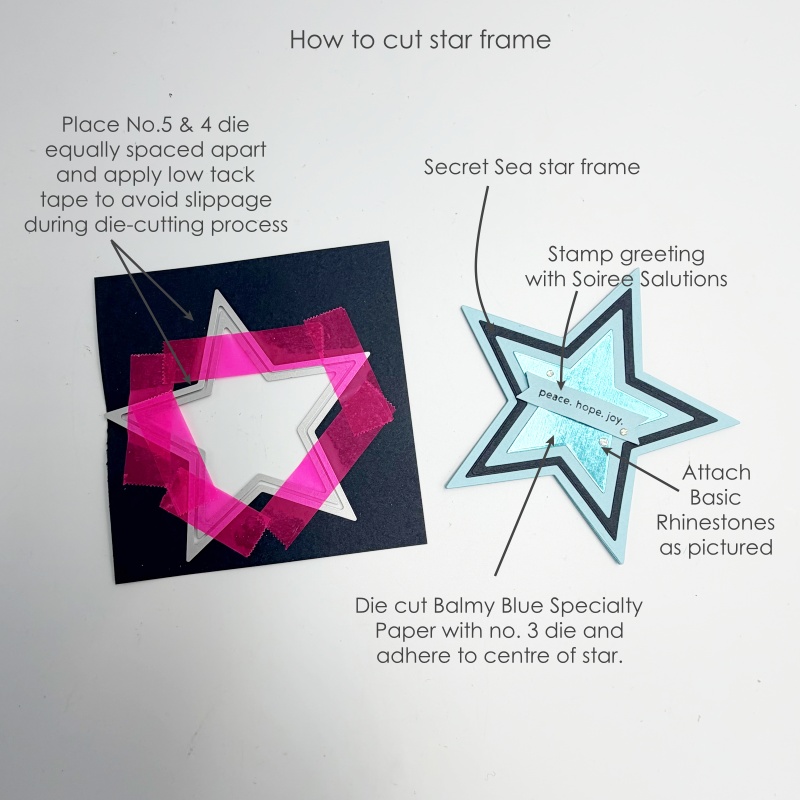
Cutting star frame
- Position no. 5 & 4 dies on a scrap of Secret Sea card stock evenly spaced and secure with low tack tape then run through die cutting machine.
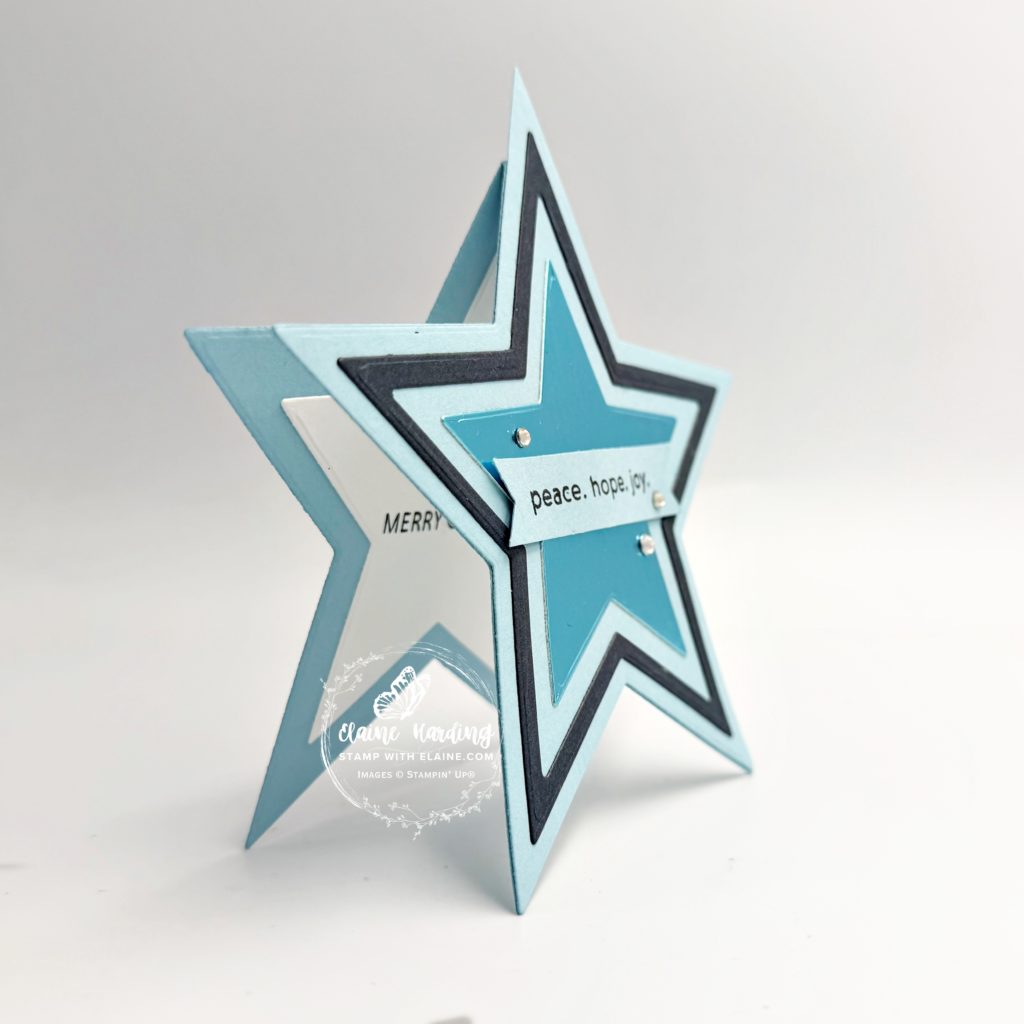
- Adhere Secret Sea star frame to front of card.
- Next die cut Balmy Blue Spring Textured Metallic specialty paper with no. 3 die and adhere in centre of star.
- Stamp greeting on scrap of Balmy Blue and punch with 3 banner punch – adhere label in centre of card as pictured.
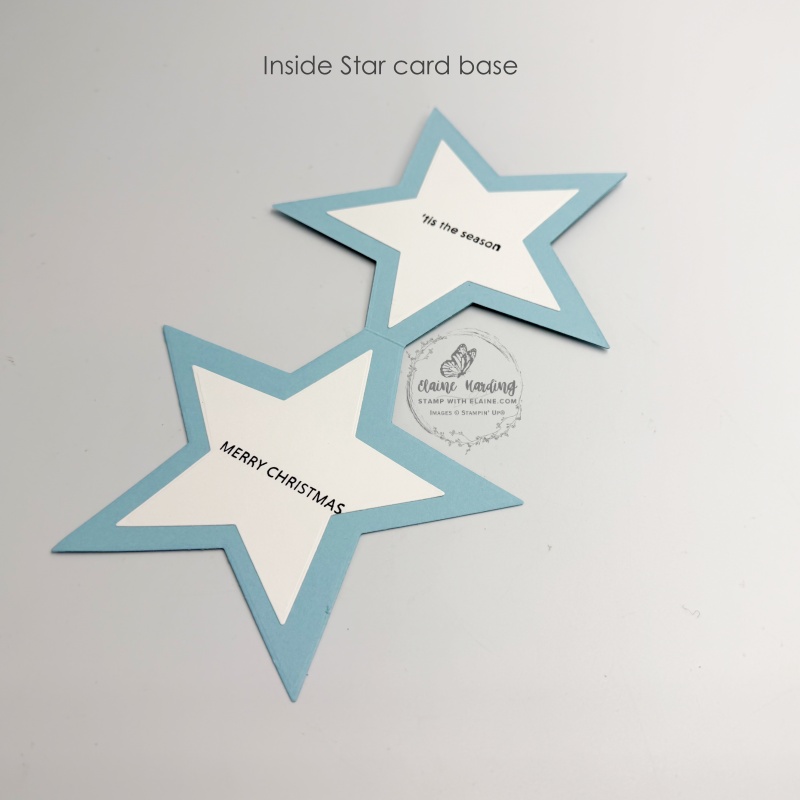
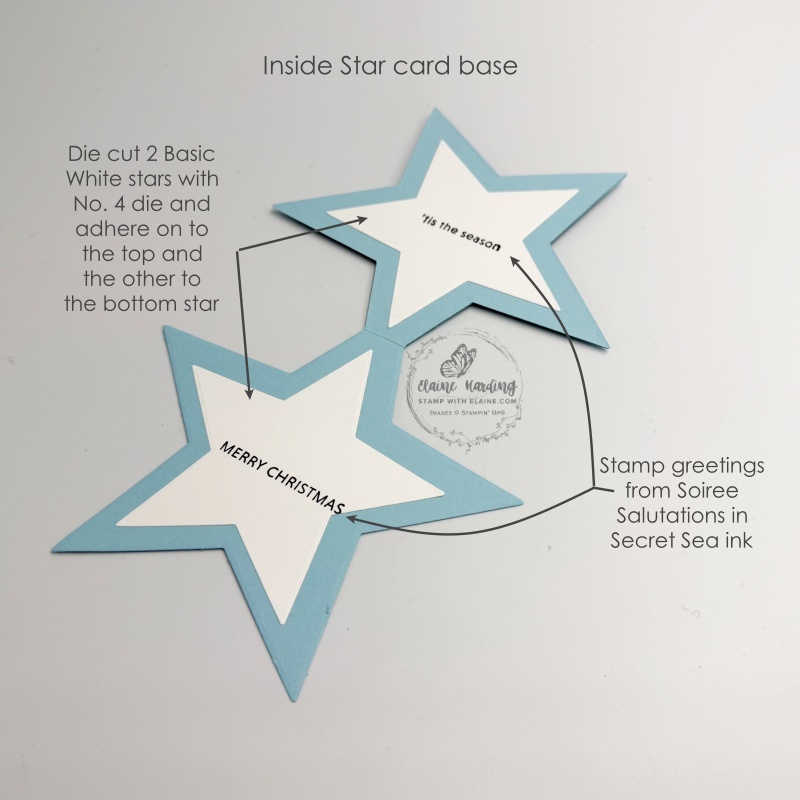
Inside star card base
- Die cut 2 no. 4 Basic White stars.
- Adhere one on the top, and the other on the bottom.
- Stamp greetings from Soiree Salutations in Secret Sea ink.
Back of card
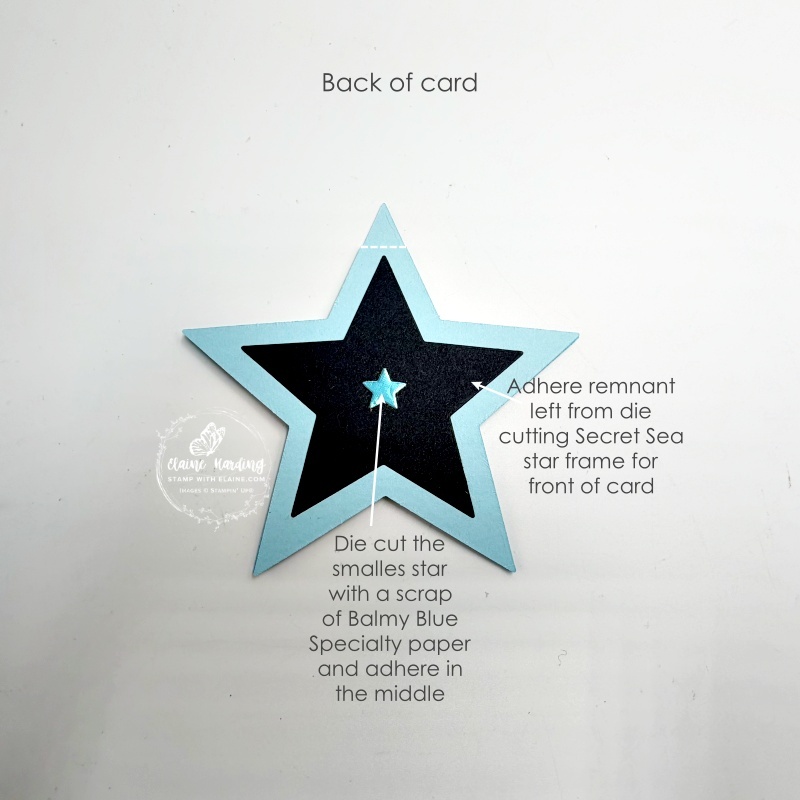
- Adhere the Secret Sea remnant left from cutting the star frame on the front of the card to the back of the card.
- Die cut the smallest star with Balmy Blue Specialty Paper and adhere in the centre.
- Once completed, the card should look like the picture on the right.
Supply list
Listed below is the supply list. Just click on the picture to take you directly to the item in my online store.
I will add the Spring Textured Metallic Specialty paper once they become available in November.
Product List![Soiree Salutations Photopolymer Stamp Set (English) [ 168337 ]](https://assets1.tamsnetwork.com/images/EC042017NF/168337s.jpg "Soiree Salutations Photopolymer Stamp Set (English) [ 168337 ]")
![Playful Patterns Photopolymer Stamp Set [ 168564 ]](https://assets1.tamsnetwork.com/images/EC042017NF/168564s.jpg "Playful Patterns Photopolymer Stamp Set [ 168564 ]")
![Shining Stars Dies [ 168600 ]](https://assets1.tamsnetwork.com/images/EC042017NF/168600s.jpg "Shining Stars Dies [ 168600 ]")
![Three Banner Punch [ 167050 ]](https://assets1.tamsnetwork.com/images/EC042017NF/167050s.jpg "Three Banner Punch [ 167050 ]")
![Balmy Blue A4 Cardstock [ 147007 ]](https://assets1.tamsnetwork.com/images/EC042017NF/147007s.jpg "Balmy Blue A4 Cardstock [ 147007 ]")
![Secret Sea A4 Cardstock [ 165296 ]](https://assets1.tamsnetwork.com/images/EC042017NF/165296s.jpg "Secret Sea A4 Cardstock [ 165296 ]")
![Basic White A4 Cardstock [ 166781 ]](https://assets1.tamsnetwork.com/images/EC042017NF/166781s.jpg "Basic White A4 Cardstock [ 166781 ]")
![Balmy Blue Classic Stampin' Pad [ 147105 ]](https://assets1.tamsnetwork.com/images/EC042017NF/147105s.jpg "Balmy Blue Classic Stampin' Pad [ 147105 ]")
![Secret Sea Classic Stampin' Pad [ 165285 ]](https://assets1.tamsnetwork.com/images/EC042017NF/165285s.jpg "Secret Sea Classic Stampin' Pad [ 165285 ]")
![Rhinestone Basic Jewels [ 144220 ]](https://assets1.tamsnetwork.com/images/EC042017NF/144220s.jpg "Rhinestone Basic Jewels [ 144220 ]")

- SHOP ONLINE – EARN 10% REWARDS ON ALL PURCHASES OVER £20
- PURCHASE A STARTER KIT : Get £155 worth of products for only £99. Choose from current catalogues and any specials available. Free Shipping. Read more
- Subscribe to my Video Tutorials – click here
