
Hello – Happy Sunday – today I’m going to show you how to use patterned paper for card making. These are really simple cards. It isn’t necessary to do a lot of stamping. Pretty papers can do the job for you.
The paper I’ve used here is free during Sale-a-bration subject to a qualifying£45 purchase excluding shipping/handling. They’re called Dainty Flowers 12″ x 12″ (30.5 x 30.5 cm) DSP.
Card 1
This card is in portrait orientation.
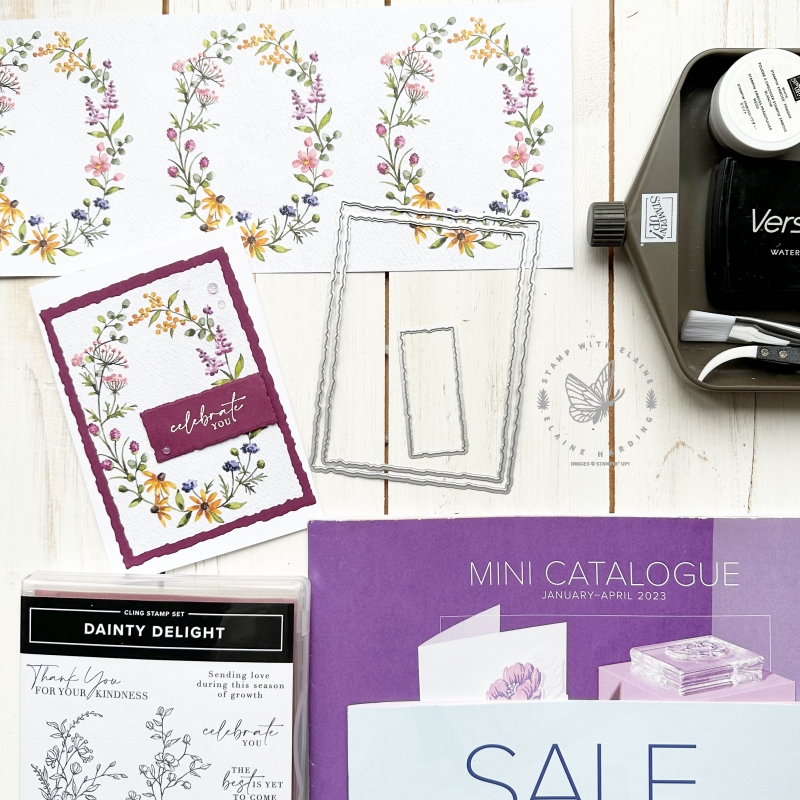
Deckled Rectangle Dies
I used the Deckled Rectangle Dies to cut my layers. There are eight nested Deckled Rectangles in the die set. Number 1 being the smallest, and number 8 being the largest.
- Use the number 1 deckled rectangle die for the label. Stamp sentiment in Versamark ink, sprinkle with white embossing powder and heat set with heat tool.
- Die cut the oval pattern with number 7.
- Rich Razzleberry mat layer – die cut with number 8.
The Deckled Rectangle dies are more suited to US size card stock, so if you adhere your layers at an angle, it is less noticeable that the border is not equidistant on all four sides.
Card 2
The same paper but in landscape orientation. I used both the Dainty Delight Dies and Fragrant Flowers die on this card.

- Die cut daisies and flower centres in Basic White card stock.
- Colour daisies with blending brush with Crushed Curry ink. Tip colour the Basic White cardstock before die cutting. Once die cut, it’s difficult to use blending brush on the petals. If you add colour after you’ve die cut the flowers, use a sponge dauber instead.
- Flower centres – colour with blending brush with Early Espresso ink. The same colouring tip for the flower centres, colour card stock before die cutting.
- Stamp sentiment on Basic White card stock with Rich Razzleberry ink and die cut label with Fragrant Flowers die.
- Adhere to centre of patterned paper with dimensionals as well as the floral elements.
- Tie a double strand of Bakers twine in a box and adhere with glue dot as pictured.
- Adhere layers together and attach to Basic White Thick card base to finish.
Supply list
Listed below is the supply list. Just click on the picture to take you directly to the item in my online store.
Product List")
 Designer Series Paper")


I hope you enjoyed these two very easy cards. Enjoy the rest of your weekend.

- SHOP ONLINE – EARN 10% REWARDS ON ALL PURCHASES OVER £20
- PURCHASE A STARTER KIT : Get £155 worth of products for only £99. Choose from current catalogues and any specials available. Free Shipping. Read more
- Subscribe to my Video Tutorials – click here
Cheers