
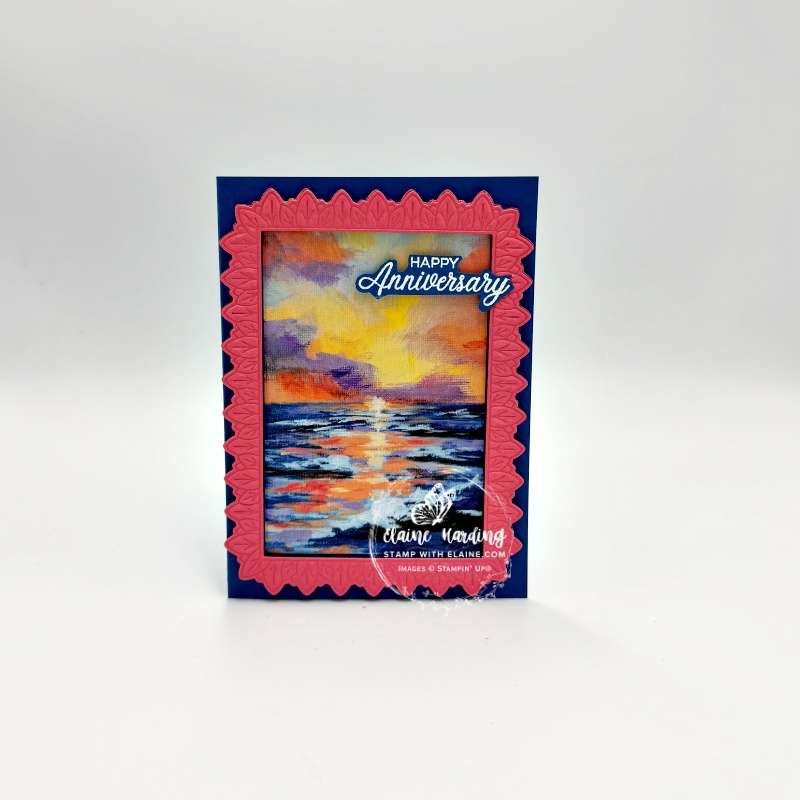
Simple anniversary card Phrases and Frames. This simple anniversary card is made with the second set of Impressions dies in the May-August 26 catalogue. It can be found on page 37. The bundle includes stamp sentiments for birthdays, anniversaries, sympathy, and encouragement, along with coordinating dies.
Scenic Coast 6″x 6″ (15.2 x 15.2 cm) Specialty Designer Series Paper
I used the Scenic Coast SDSP paper which features vivid colours and layered textures with coastal sunsets on one side and versatile patterns on the other. Some sheets feature iridescent details that shift colour as you move them. With such beautiful paper, it would be a sin to cover it up. That’s why the Phrases and Frames Impressions dies are featured on today’s card.
Cutting guide
- Card base : Blueberry Bushel 5 ¾” x 8 ¼” (14.5 cm x 21 cm) folded in half.
- Strawberry Slush : 4 ¼” x 6″ (11 cm x 15.2 cm) to die cut largest frame from Frames & Phrases Impressions die set. Cut die as normal, run it through a second time with paper inside die and die cutting edge face up. Place impressions plate on top followed by Plate 4 and run it through machine.
- Scenic Coast 6″ x 6″ (15.2 x 15.2 cm) Specialty DSP to die cut largest frame, retain inside remnant from cutting frame as feature for card as pictured above.
- Retain frame and adhere to Strawberry Slush frame underneath to strengthen frame.
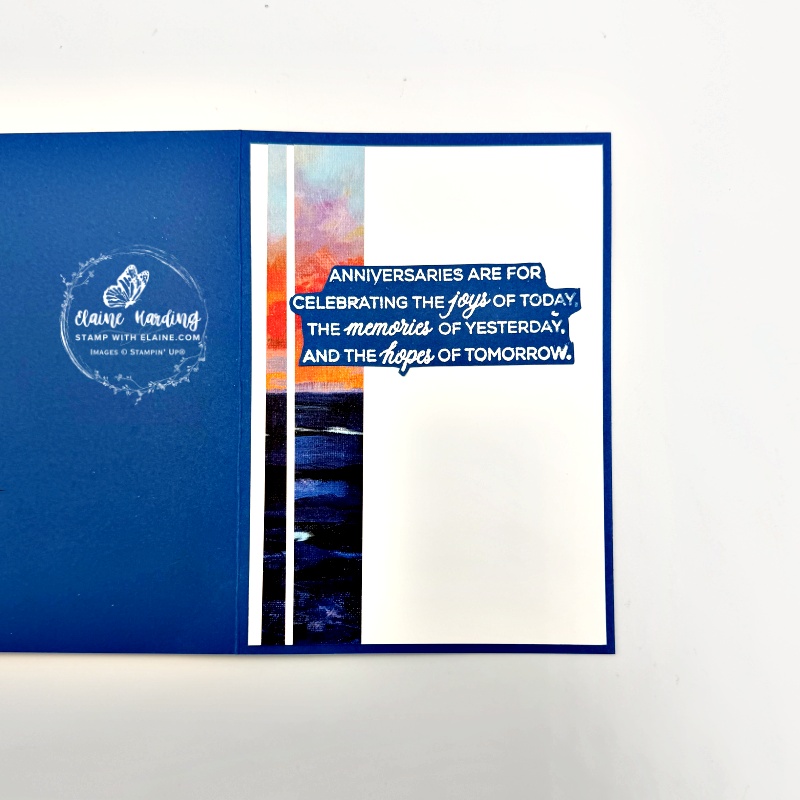
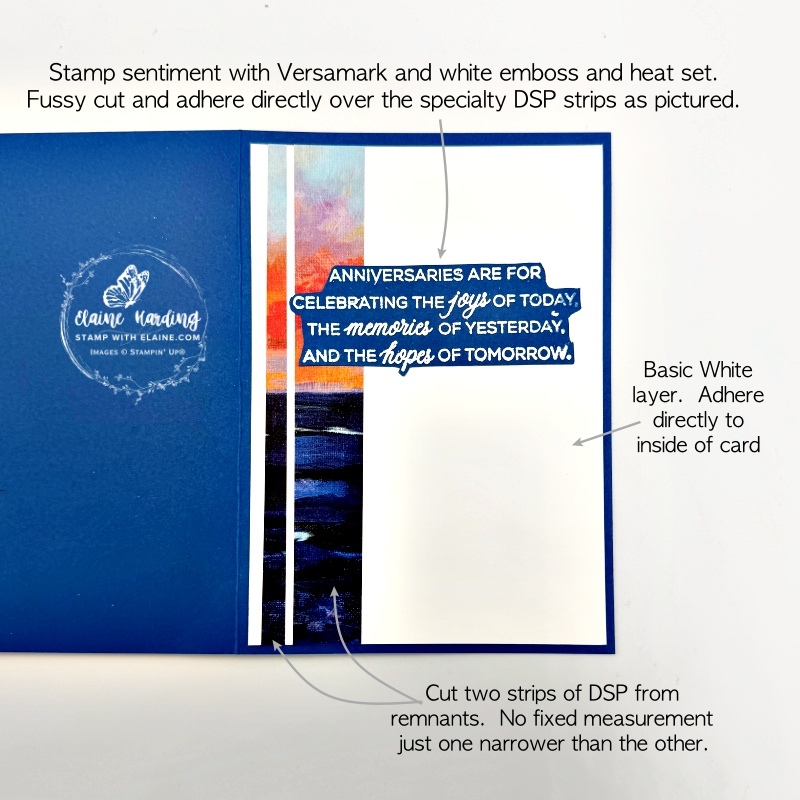
- Keep left over pieces to decorate inside card with.
- Basic White layer inside card : 5 ⅝” x 3 ⅞” (14 cm x 10 cm)
- Scrap of Blueberry Bushel to white emboss greeting.
Assembling card
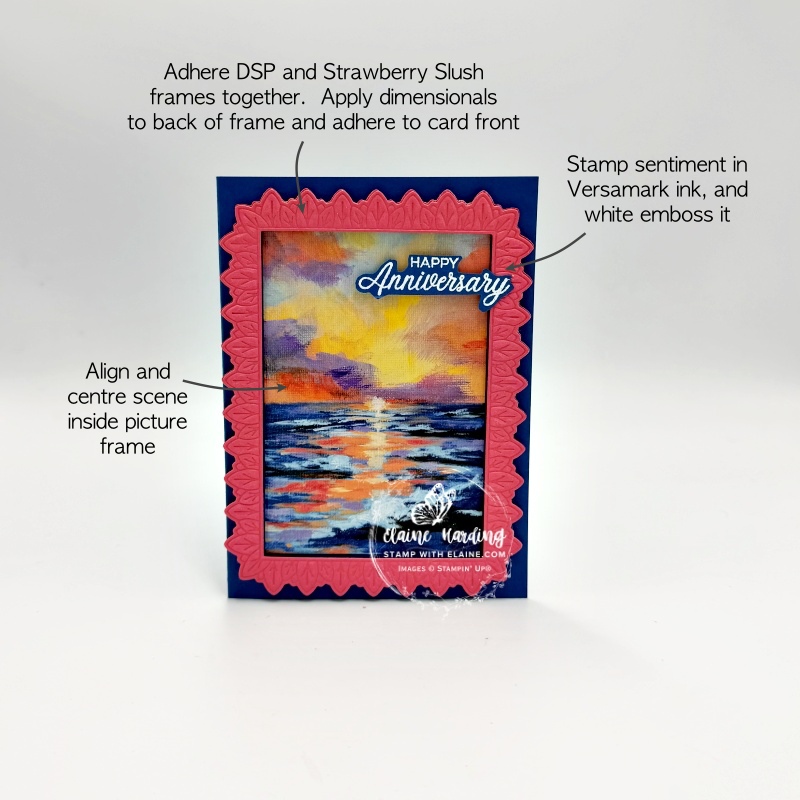
- Adhere frame with dimensionals to card front.
- Apply adhesive to back of DSP scene and adhere directly to card base inside frame.
- On scrap of Blueberry Bushel, stamp greeting in Versamark and white emboss. Fussy cut sentiment, apply dimensionals and adhere toward top of frame as pictured.
Inside card
- Adhere DSP strips to left of Basic White layer. Flip over to back and cut of any excess then adhere layer to inside of card base leaving an even border on all 4 sides.
- Apply adhesive to back of sentiment and adhere toward top of inside of card as pictured to complete card.
Supply list
Listed below is the supply list. Just click on the picture to take you directly to the item in my online store.
Product List![Phrases & Frames Bundle (English) [ 167587 ]](https://assets1.tamsnetwork.com/images/EC042017NF/167587s.jpg "Phrases & Frames Bundle (English) [ 167587 ]")
![Impressions Plate [ 167767 ]](https://assets1.tamsnetwork.com/images/EC042017NF/167767s.jpg "Impressions Plate [ 167767 ]")
![Scenic Coast 6" X 6" (15.2 X 15.2 Cm) Specialty Designer Series Paper [ 167773 ]](https://assets1.tamsnetwork.com/images/EC042017NF/167773s.jpg "Scenic Coast 6\" X 6\" (15.2 X 15.2 Cm) Specialty Designer Series Paper [ 167773 ]")
![Strawberry Slush A4 Cardstock [ 165297 ]](https://assets1.tamsnetwork.com/images/EC042017NF/165297s.jpg "Strawberry Slush A4 Cardstock [ 165297 ]")
![Blueberry Bushel A4 Cardstock [ 146991 ]](https://assets1.tamsnetwork.com/images/EC042017NF/146991s.jpg "Blueberry Bushel A4 Cardstock [ 146991 ]")
![Basic White A4 Cardstock [ 166781 ]](https://assets1.tamsnetwork.com/images/EC042017NF/166781s.jpg "Basic White A4 Cardstock [ 166781 ]")
![Versamark Pad [ 102283 ]](https://assets1.tamsnetwork.com/images/EC042017NF/102283s.jpg "Versamark Pad [ 102283 ]")
![Basics Wow! Embossing Powder [ 165679 ]](https://assets1.tamsnetwork.com/images/EC042017NF/165679s.jpg "Basics Wow! Embossing Powder [ 165679 ]")
![Embossing Additions Tool Kit [ 159971 ]](https://assets1.tamsnetwork.com/images/EC042017NF/159971s.jpg "Embossing Additions Tool Kit [ 159971 ]")
![Heat Tool - Uk Plug [ 129054 ]](https://assets1.tamsnetwork.com/images/EC042017NF/129054s.jpg "Heat Tool - Uk Plug [ 129054 ]")

- SHOP ONLINE – EARN 10% REWARDS ON ALL PURCHASES OVER £20
- PURCHASE A STARTER KIT : Get £155 worth of products for only £99. Choose from current catalogues and any specials available. Free Shipping. Read more
- Subscribe to my Video Tutorials – click here
