
Multi-layered Tent card – Fern and Flora. I love this Fun fold multi-layered card and chose the Fern & Flora bundle from the Moonlight Flora Suite. The Fern & Flora Bundle combines elegant, nature-inspired imagery and sentiment stamps, perfect for heartfelt thank-you cards. I need birthday cards more often, so I made a birthday card instead.
The dies in the Fern & Flora bundle have so many extra elements apart from those for the stamped images, e.g., butterflies, and dies to build floral elements. The possibilities are endless!
Multi-layered tent fun fold
This card references a tent because when in portrait orientation, the fold is at the top so when you open it up to display the card, it resembles a tent. Inside the card is a mini card so there are layer upon layer of papers to adorn it.
There are alot of pieces to cut, and it can be confusing which piece goes where. So I’m doing it along with the photo references to make it easier to follow.
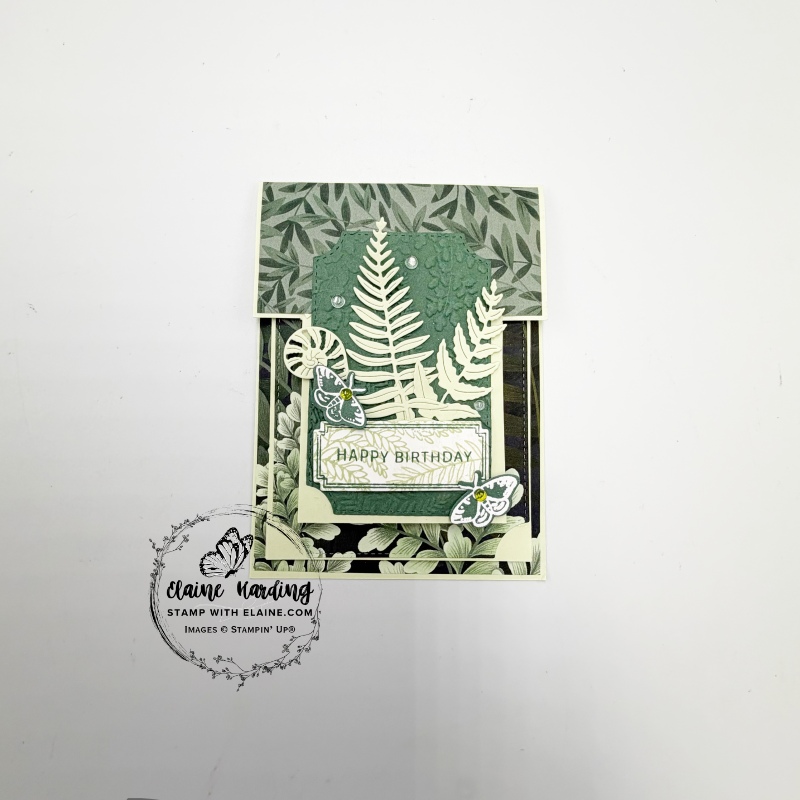
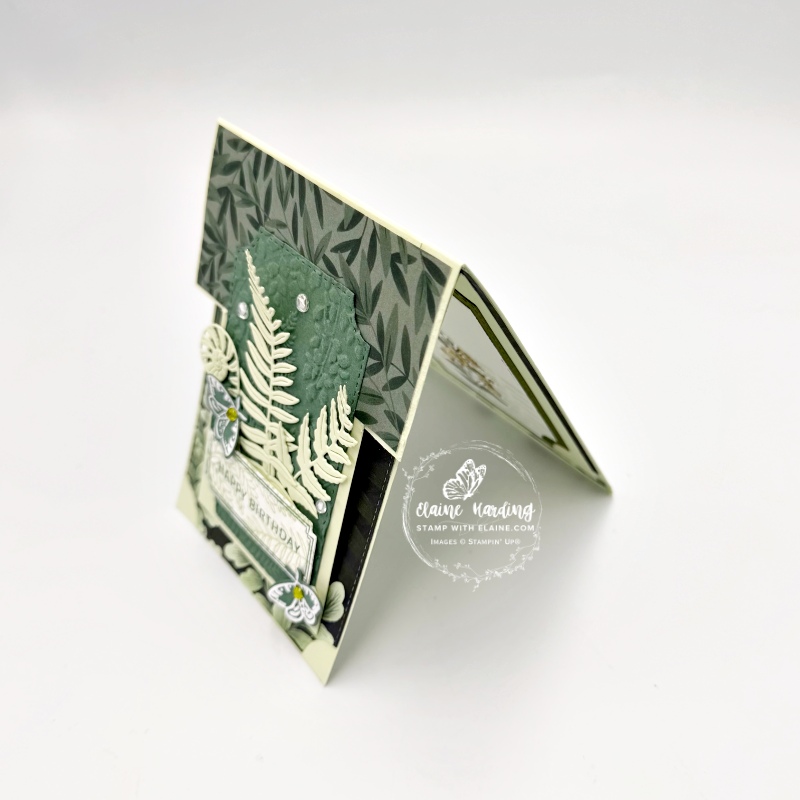
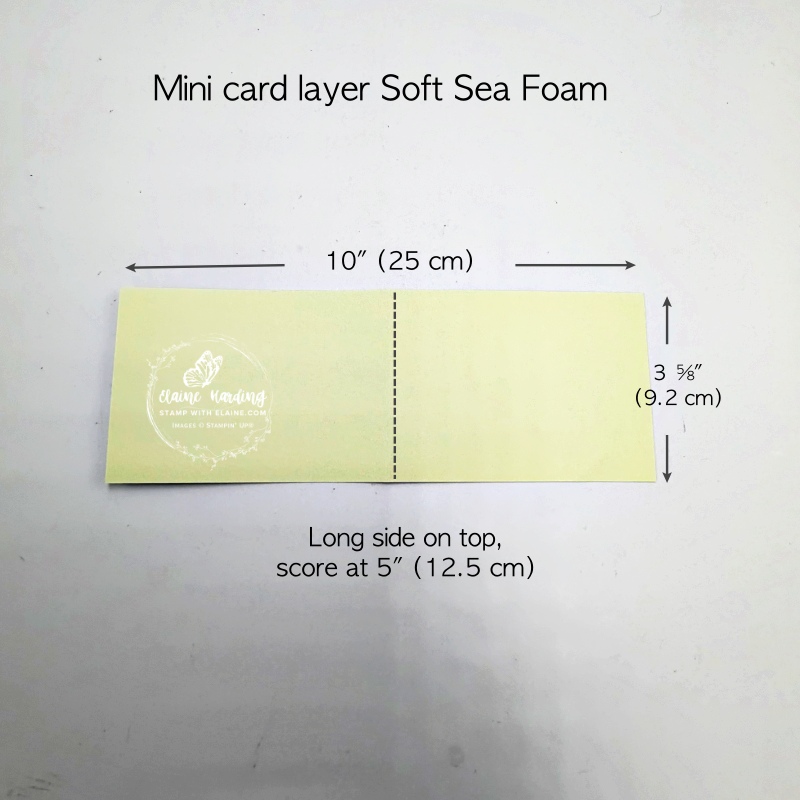
Card base for main card and mini card
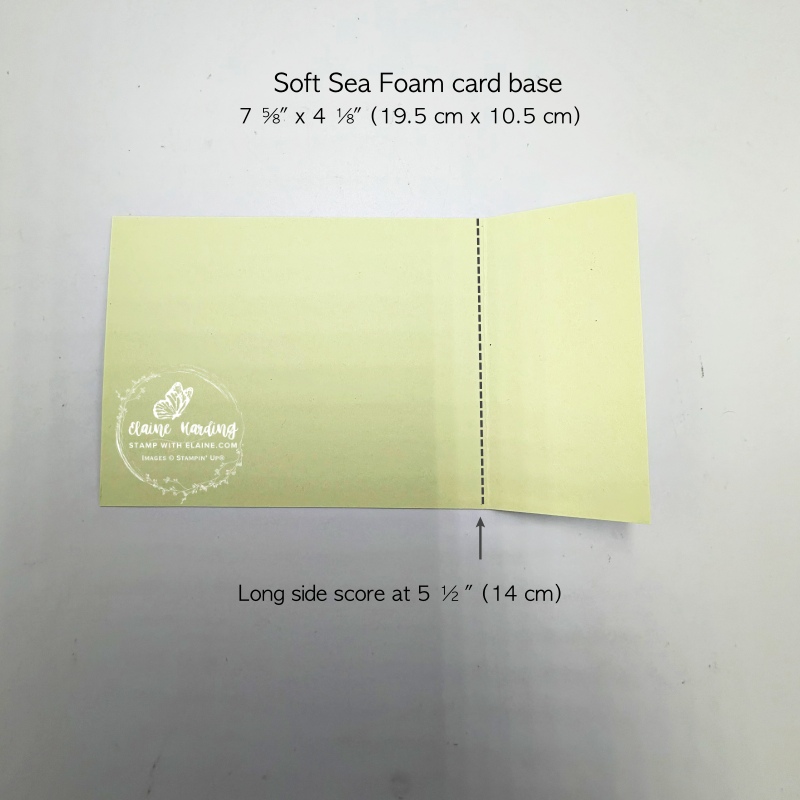
- Card base : Soft Sea Foam 7 ⅝” x 4 ⅛” (19.5 cm x 10.5 cm). On the long side, score at 5 ½” (14 cm). Burnish fold and rotate it ¼ turn and orient in portrait mode.
- Mini card: Soft Sea Foam 10″ x 3 ⅝” (25 cm x 9.2 cm). On long side, score at 5″ (12.5 cm). Set aside.
Branching Out Dies (Last Chance List)
You need a set of nesting dies to die cut the various layers for the card base, mini card, and embossed layer for the extra layer to be attached on the flap of the card base.
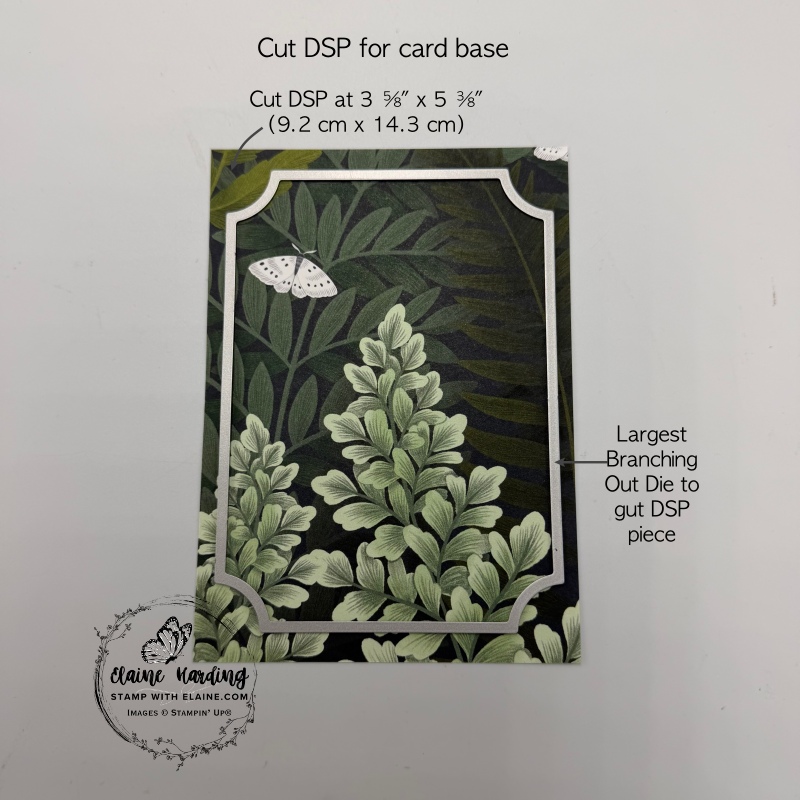
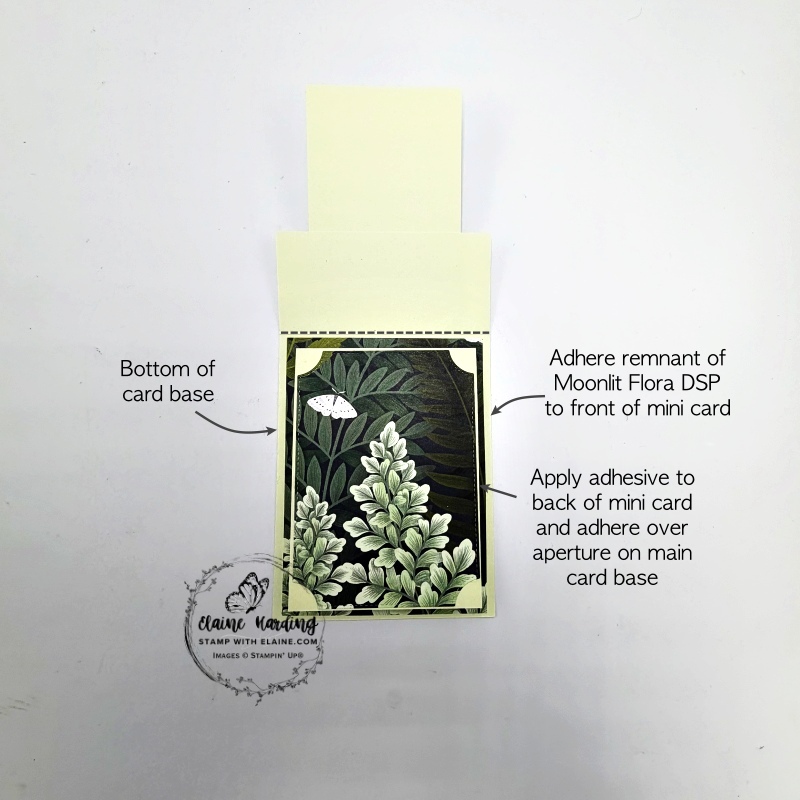
- Moonlit Flora DSP : Cut 3 ⅝” x 5 ⅜” (9.2 cm x 14.3 cm). Use the largest Branching out die to gut the DSP. Ensure the top and bottom and both sides are equidistant from the edges. Reserve the inside to be used on the top of the mini card.
- Apply adhesive to back of Mini Card and adhere over aperture of bottom of card base.
- Next adhere Moonlit Flora DSP remnant to front of Mini card.
Adding front tab/die cutting Branching Out layers
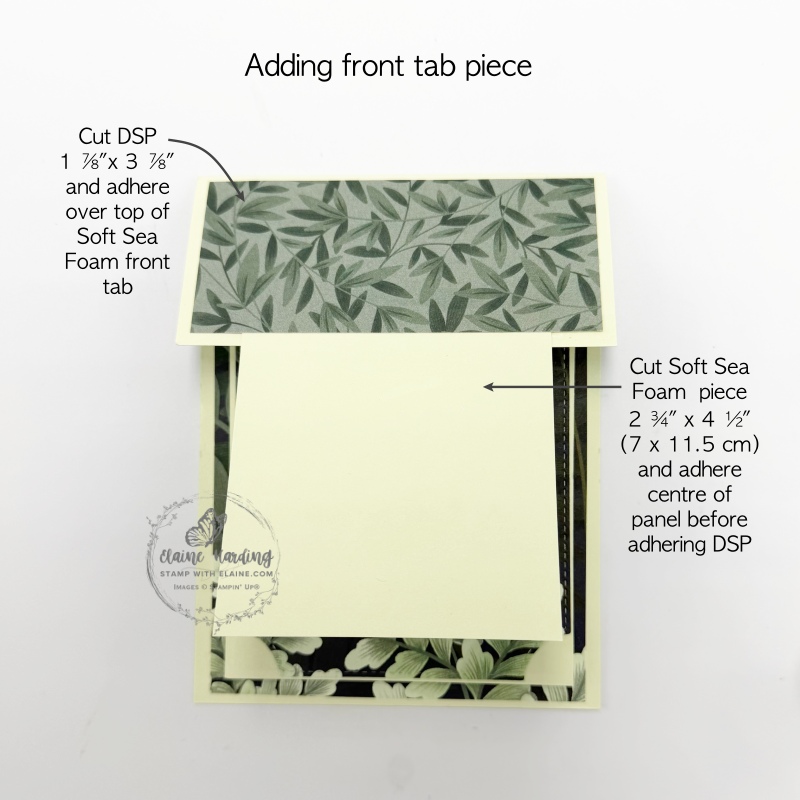
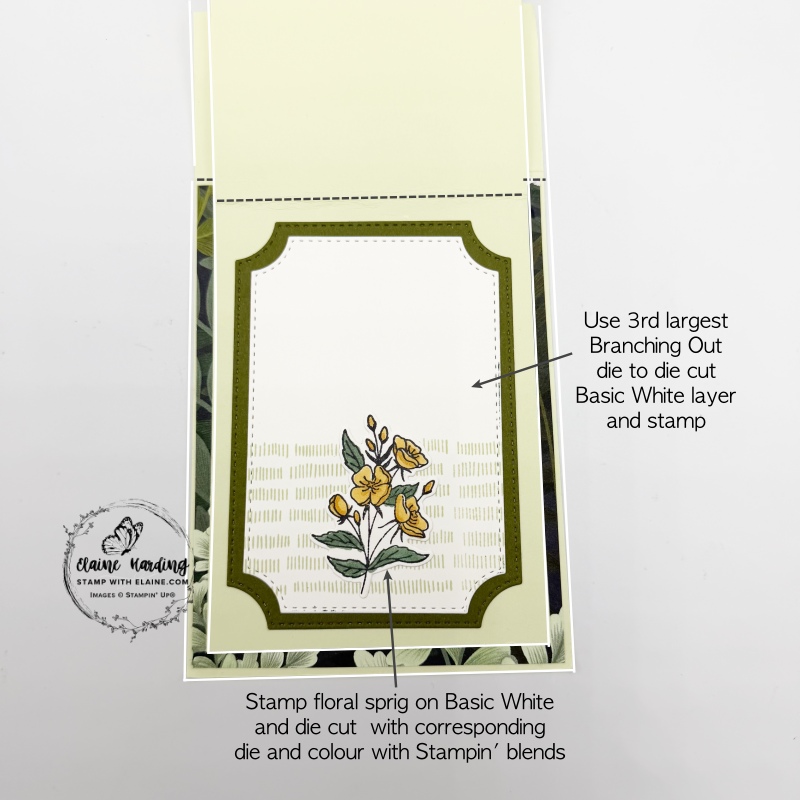
- Cut Soft Sea Foam piece at 2 ¾” x 4 ½” (7 cm x 11.5 cm). Centre and adhere to top of card base flap by first aligning it with the Mini Card card front so there are even borders at the bottom and two sides of mini card. Remember to only partially apply adhesive where needed otherwise you won’t be able to open the card.
- Select a different Moonlit Flora DSP pattern and cut at 1 ⅞” x 3 ⅞”(4.8 cm x 9.8 cm) and adhere on top of Soft Sea Foam front piece as pictured above on the left.
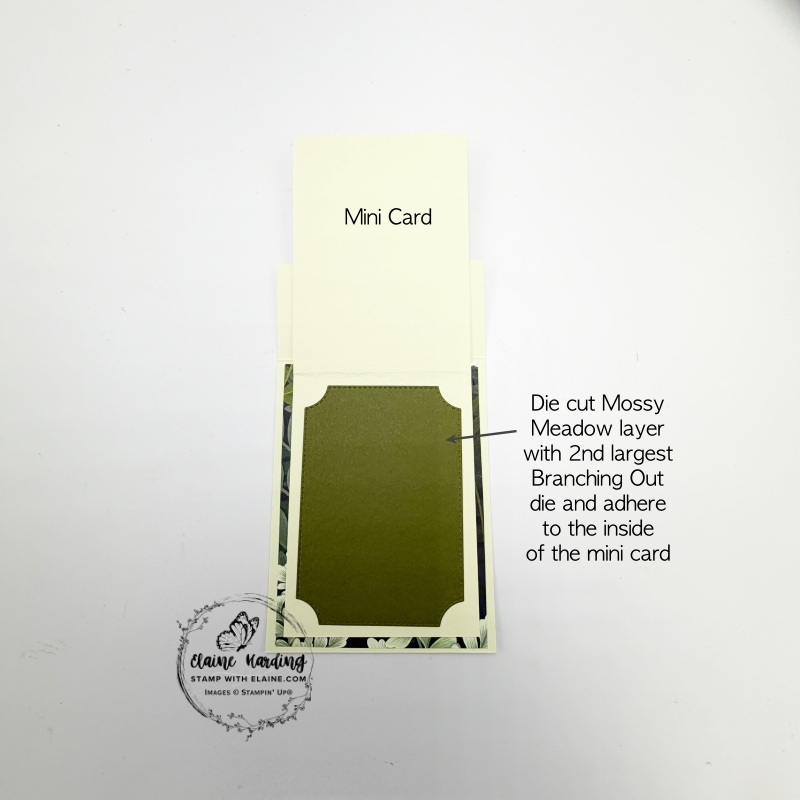
- Die cut with 2nd largest Branching Out die a Mossy Card layer and adhere to the inside of the mini card. (middle picture)
- Use 3rd largest Branching Out die to die cut layer in Basic White. Stamp with Soft Sea Foam striped stamp for the background. (picture on the right)
- On scrap of Basic White stamp floral element in Tuxedo black Memento ink and colour leaves with Peaceful Pine and flowers with Golden Glow Stampin’ Blends. Adhere as shown to Basic White layer.
Finishing touches for front flap
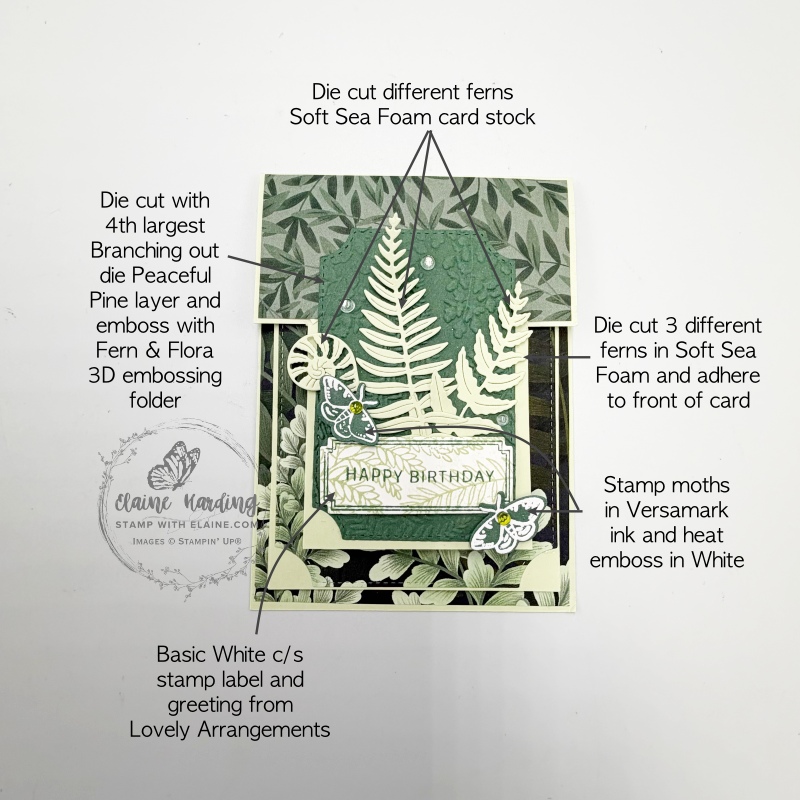
- Die cut Peaceful Pine layer with 4th largest Branching Out die and emboss with Fern & Flora 3D embossing folder. Centre and adhere leaving even borders on both sides and the bottom of front flap.
- Soft Sea Foam scrap – die cut 3 varieties of fern and adhere in centre of Peaceful Pine embossed piece.
- Next die cut Basic White label with Fern & Flora die. Stamp background with Soft Sea Foam ink and frame stamp with Peaceful Pine ink.
- Stamp birthday greeting from Lovely Arrangements stamp set. Adhere with dimensionals as pictured.
- Stamp moths in Versamark ink on Peaceful Pine scrap and white emboss. Adhere as shown.
- Add Dewdrops embellishments to finish.
Supply list
Listed below is the supply list. Just click on the picture to take you directly to the item in my online store.
Product List![Fern & Flora Bundle (English) [ 167745 ]](https://assets1.tamsnetwork.com/images/EC042017NF/167745s.jpg "Fern & Flora Bundle (English) [ 167745 ]")
![Fern & Flora 3 D Embossing Folder [ 167744 ]](https://assets1.tamsnetwork.com/images/EC042017NF/167744s.jpg "Fern & Flora 3 D Embossing Folder [ 167744 ]")
![Moonlit Flora 12" X 12" (30.5 X 30.5 Cm) Designer Series Paper [ 167737 ]](https://assets1.tamsnetwork.com/images/EC042017NF/167737s.jpg "Moonlit Flora 12\" X 12\" (30.5 X 30.5 Cm) Designer Series Paper [ 167737 ]")
![Branching Out Dies [ 165775 ]](https://assets1.tamsnetwork.com/images/EC042017NF/165775s.jpg "Branching Out Dies [ 165775 ]")
![Dewdrops Embellishments [ 167748 ]](https://assets1.tamsnetwork.com/images/EC042017NF/167748s.jpg "Dewdrops Embellishments [ 167748 ]")
![Basic White A4 Cardstock [ 166781 ]](https://assets1.tamsnetwork.com/images/EC042017NF/166781s.jpg "Basic White A4 Cardstock [ 166781 ]")
![Soft Sea Foam A4 Cardstock [ 147012 ]](https://assets1.tamsnetwork.com/images/EC042017NF/147012s.jpg "Soft Sea Foam A4 Cardstock [ 147012 ]")
![Mossy Meadow A4 Cardstock [ 133683 ]](https://assets1.tamsnetwork.com/images/EC042017NF/133683s.jpg "Mossy Meadow A4 Cardstock [ 133683 ]")
![Peaceful Pine Classic Stampin Pad [ 167679 ]](https://assets1.tamsnetwork.com/images/EC042017NF/167679s.jpg "Peaceful Pine Classic Stampin Pad [ 167679 ]")
![Soft Sea Foam Classic Stampin' Pad [ 147102 ]](https://assets1.tamsnetwork.com/images/EC042017NF/147102s.jpg "Soft Sea Foam Classic Stampin' Pad [ 147102 ]")
![Versamark Pad [ 102283 ]](https://assets1.tamsnetwork.com/images/EC042017NF/102283s.jpg "Versamark Pad [ 102283 ]")
![Basics Wow! Embossing Powder [ 165679 ]](https://assets1.tamsnetwork.com/images/EC042017NF/165679s.jpg "Basics Wow! Embossing Powder [ 165679 ]")
![Embossing Additions Tool Kit [ 159971 ]](https://assets1.tamsnetwork.com/images/EC042017NF/159971s.jpg "Embossing Additions Tool Kit [ 159971 ]")
![Heat Tool - Uk Plug [ 129054 ]](https://assets1.tamsnetwork.com/images/EC042017NF/129054s.jpg "Heat Tool - Uk Plug [ 129054 ]")

- SHOP ONLINE – EARN 10% REWARDS ON ALL PURCHASES OVER £20
- PURCHASE A STARTER KIT : Get £155 worth of products for only £99. Choose from current catalogues and any specials available. Free Shipping. Read more
- Subscribe to my Video Tutorials – click here
