
Altered Paper Pumpkin – Bikes and Blooms 2. This is part 2 of altered Paper Pumpkin Bikes & Blooms released in June. You can see part 1 HERE for cards 1- 4. Apologies for the tardiness in posting! My excuse is that it arrived late and it had a knock on effect!
Without further ado, lets get stuck into the 3 other altered cards I made.
Altered Cards Part 2
I provided my own card bases with Basic White Thick cardstock for cards 5 and 6. For card 7, I used the whole of the card base in the kit to create another fun fold.
Fifth card
The bicycle image in the Paper Pumpkin kit is the third design which is choreographed. I’ve cut this in half to make two fun fold cards. The front end of the bicycle was used for this card.
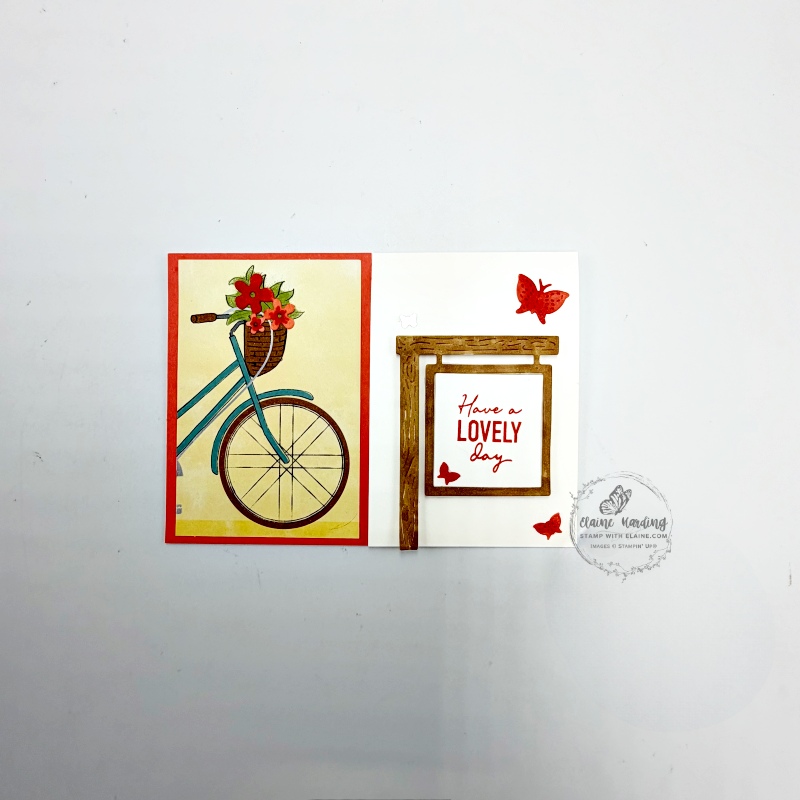
Cutting guide
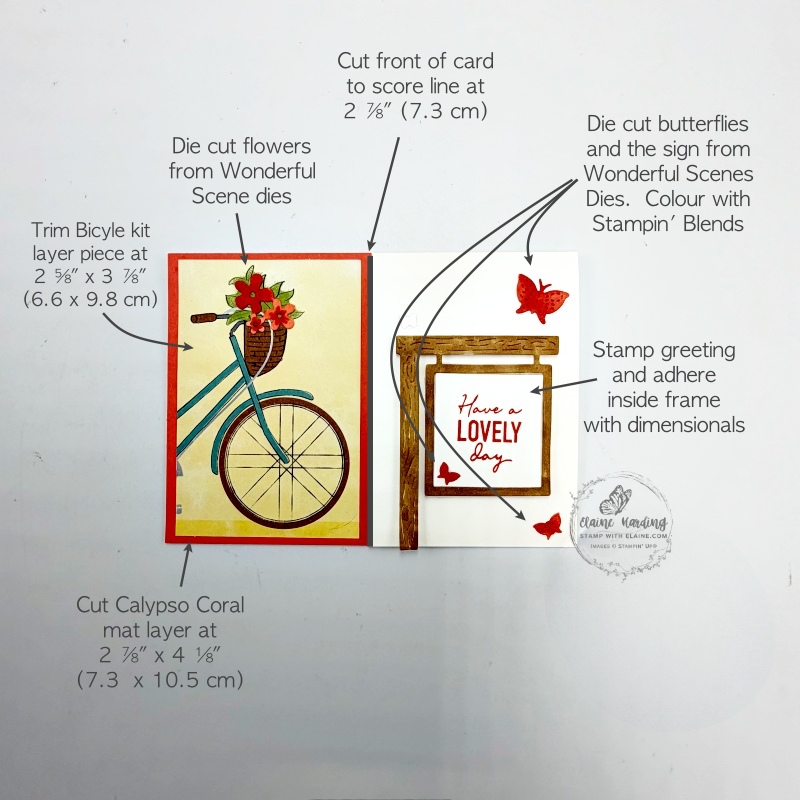
- Card base : Basic White thick 5 ¾” x 8 ¼” (14.5 cm x 21 cm) folded in half.
- Cut the front of the card at 2 ⅞” (7.3 cm) up to the score line.
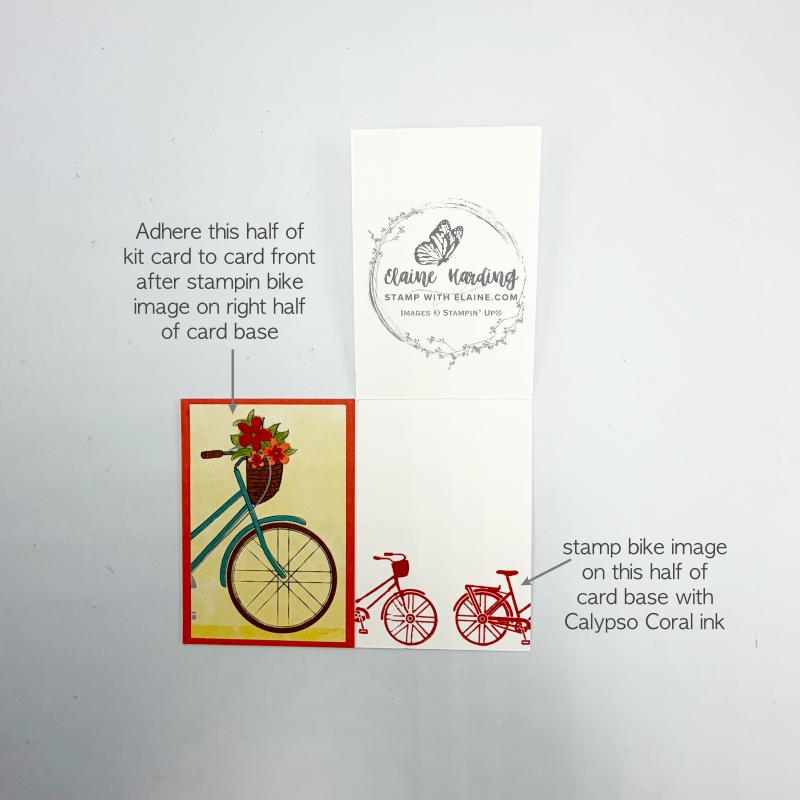
- Calypso Coral : cut 2 ⅞” x 4 ⅛” (7.3 x 10.5 cm) and adhere to left half of front of card. Once you’ve stamped the. inside of the card on the right, you can apply adhesive on the back and adhere to the card base on the left.
- Trim the bicycle kit card layer to 2 ⅝” x 3 ⅞” (6.6 x 9.8 cm) and adhere on top of Calypso Coral layer.
Die cutting elements from Wonderful Scenes
- Basic White scrap – Die cut Sign, butterflies and flowers.
- Use Stampin’ Blends : Calypso Coral combo – colour flowers and butterflies and Pecan Pie combo to colour sign.
- Stamp remnant from die cutting sign with greeting in Calypso Coral. Adhere with dimensionals inside aperture on sign.
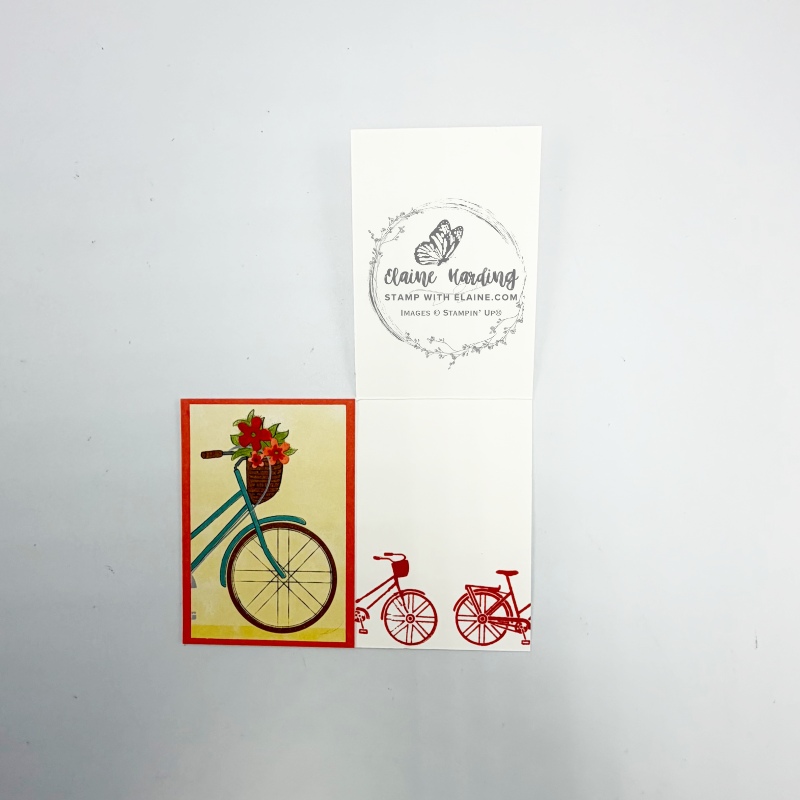
Inside card
- Stamp the bicycle as shown.
- Once you’ve stamped bicycles, you can glue the left hand side panel down to card base.
Sixth card – easy fun fold with back half of bicycle
This fun fold is cut on either side and adhered to card base leaving the wider middle panel free to open. I used the yellow card base as mat layers for the outer panels and to cut a strip for the middle inside of card so I could stamped a sentiment on top.
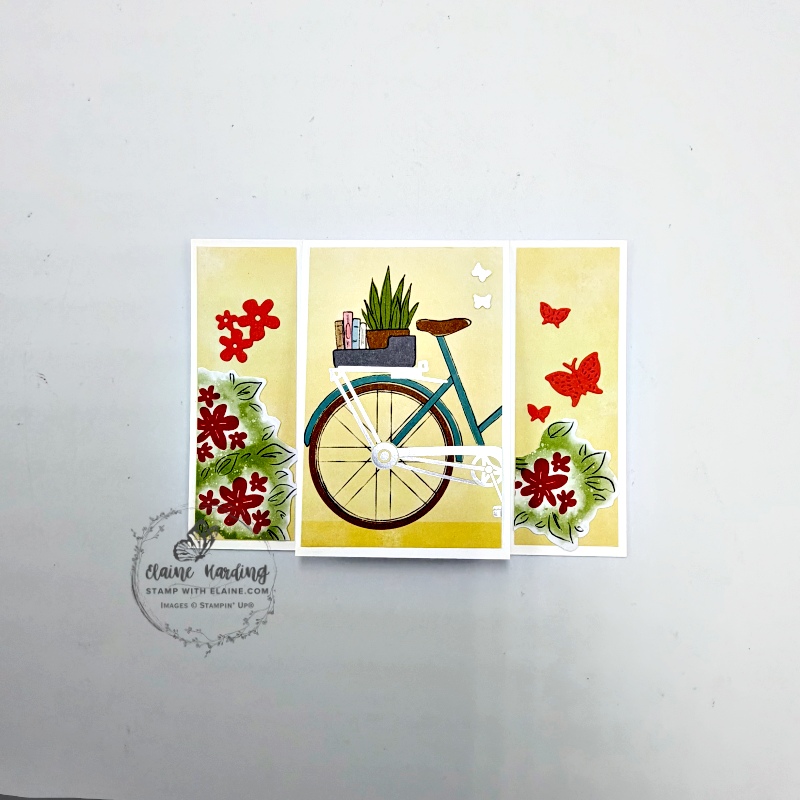
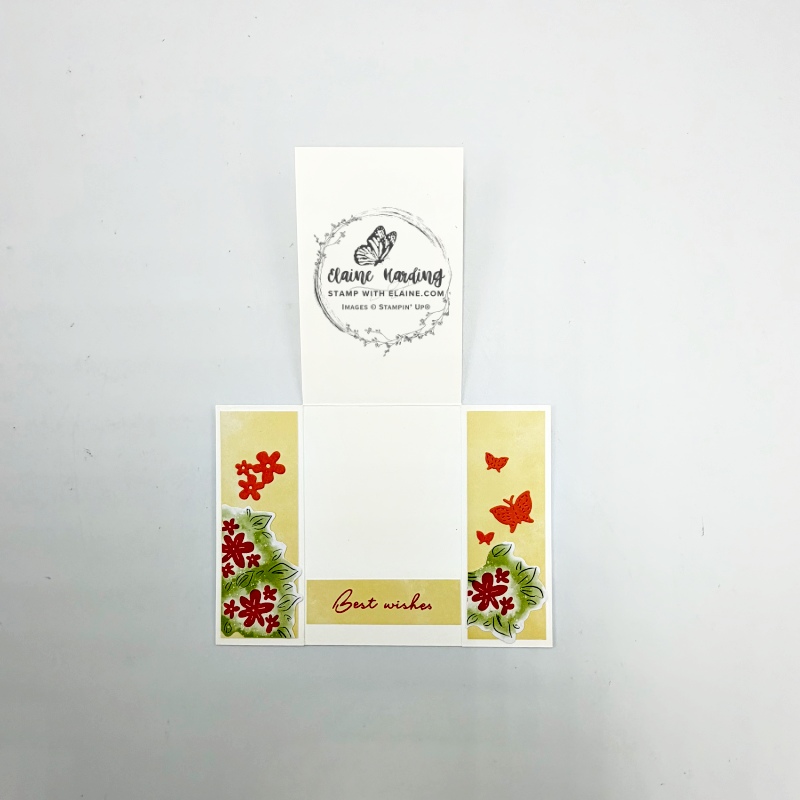
Cutting guide
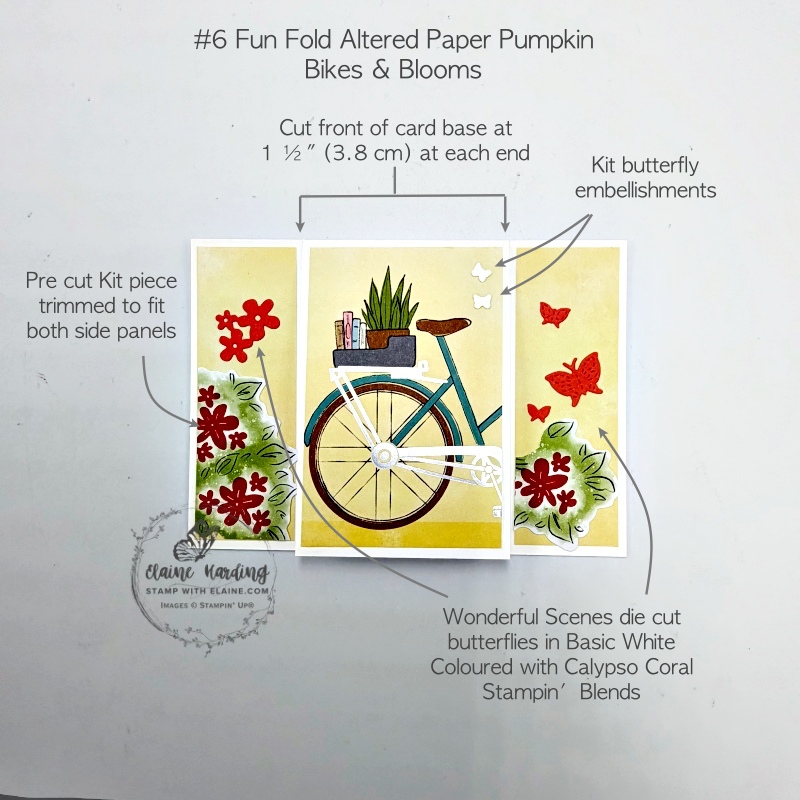
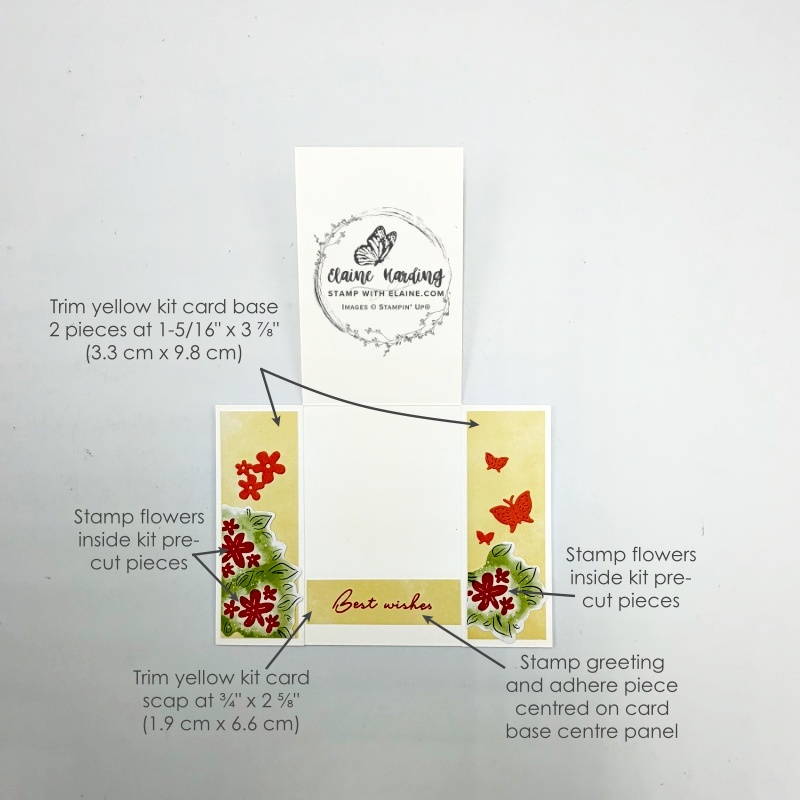
- Card base : Basic White thick cut at 5 ¾” x 8 ¼” (14.5 cm x 21 cm) folded in half.
- Offer front of card up to trimmer, align at 1 ½” (3.8 cm) and cut down to score line. Rotate card stock 180 degrees and repeat.
- Cut 2 panels from Kit’s yellow card base at 1-5/16″ x 3 ⅞” (3.3 x 9.8 cm) and adhere to side panels.
- Stamp flowers inside large floral kit card piece. Divide the trio of flowers between two side panels, one with 2 flowers and the other with one flower. Adhere and trim off excess then glue side panels down. Tip: Close centre panel so that you can align side panels to each edge to prevent it from being crooked.
- Strip of Kit’s yellow card base cut at ¾” x 2 ⅝” (1.9 cm x 6.6 cm). Adhere centred on centre panel. Stamp greeting.
Die cutting elements from Wonderful Scenes
- Basic White scrap – die cut flowers, colour with Calypso Coral Stampin’ blends and adhere to left hand panel as pictured.
- Also die cut butterflies in Basic White and colour with Calypso Coral Stampin’ Blends and adhere to right panel.
Seventh card – another fun fold
This seventh card uses the whole of the kit card base in Calypso Coral. I cut up an envelop to use as layers for the inside panels of the card and the polka dot label was cut in half so I had two pieces, one for the front, and one for the inside panel. For the shelf on the end panel, I cut what was left behind on the pre-cut sheet and added the extra flowers which were die cut from the Detailed Flora Dies with Calypso Coral and Daffodil Delight scraps.
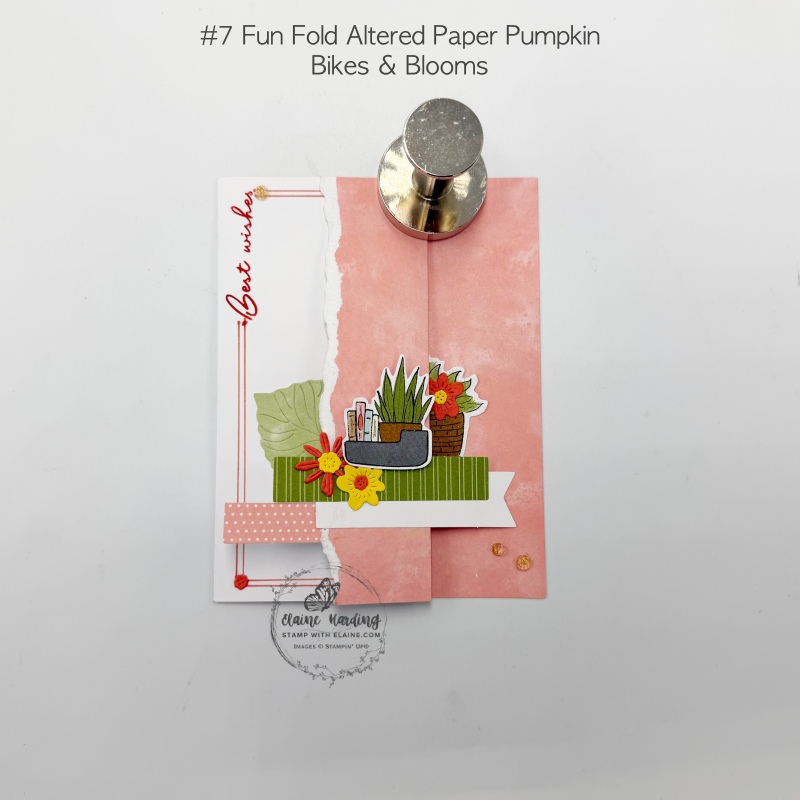
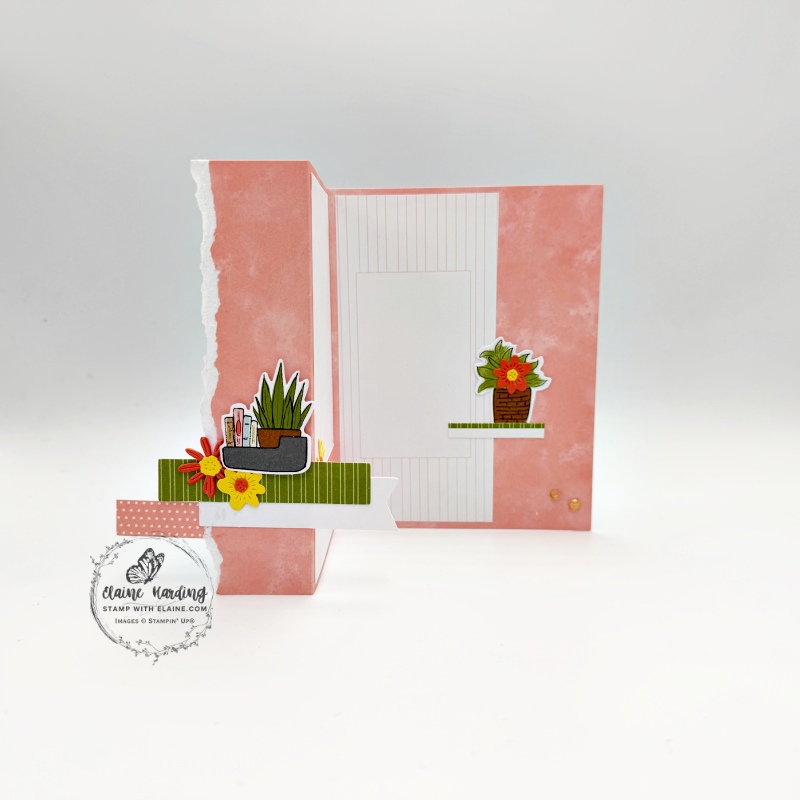
Cutting guide
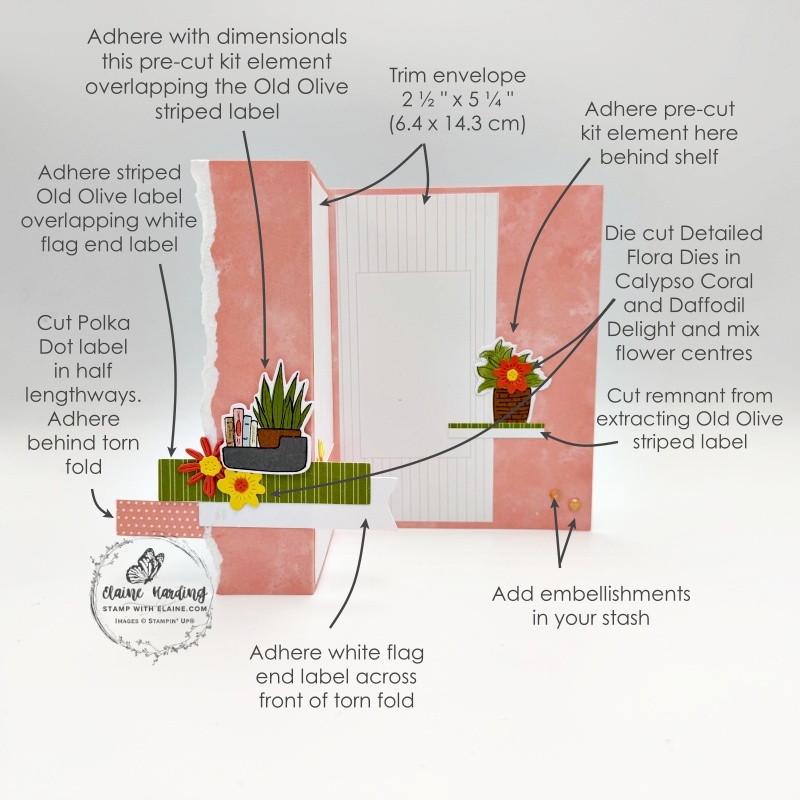
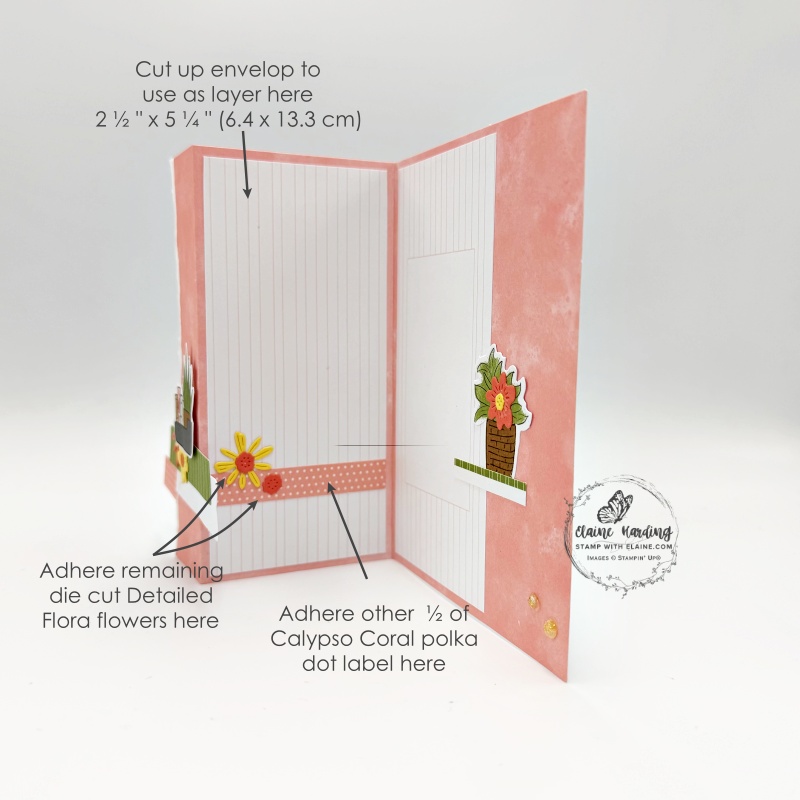
- .The kit card base measures 5 ½ ” x 8 ½ ” (14 cm x 21.6 cm). On the long side score at 1 ½ ” (3.8 cm).
- From the 1 ½ ” (3.8 cm) panel, tear a slither toward you to expose the white core. First fold, mountain fold and the other is a valley fold.
- Cut an envelop for inside card mat layers 2 ½” x 5 ¼” (6.4 x 14.3 cm). The one on the right has a blank space, when trimming this piece try and centre the blank rectangle in the middle. Adhere as shown.
- Adhere ½ of the polka dot label behind the fold. Then adhere white flag end label across the front of the fold as shown in the original photo which is closed. There is a magnet holding the front of the card down and shows the placement of the white flag end label.
- Place striped Old Olive label overlapping white flag end label and adhere books and plant pre-cut element on dimensionals and adhere as shown.
- Tuck the second flower pot element behind the cut remnant of Old Olive striped label used as a shelf. To help with placement, close card flap to see where to adhere.
Detailed Flora die cut elements
- Die cut 2 sets of flowers – one set in Calypso Coral and the other in Daffodil Delight. Mix the flower centres. Tip – Cut an extra daisy to give the petals extra strength because it has thinner more delicate petals and they get bent otherwise.
- Adhere flowers as shown.
- Second half of polka dot label is adhered on the inside panel (picture on the right) and remaining flowers adhered there.
- Die cut 2 leaves from the envelop flap in green.
Back of card
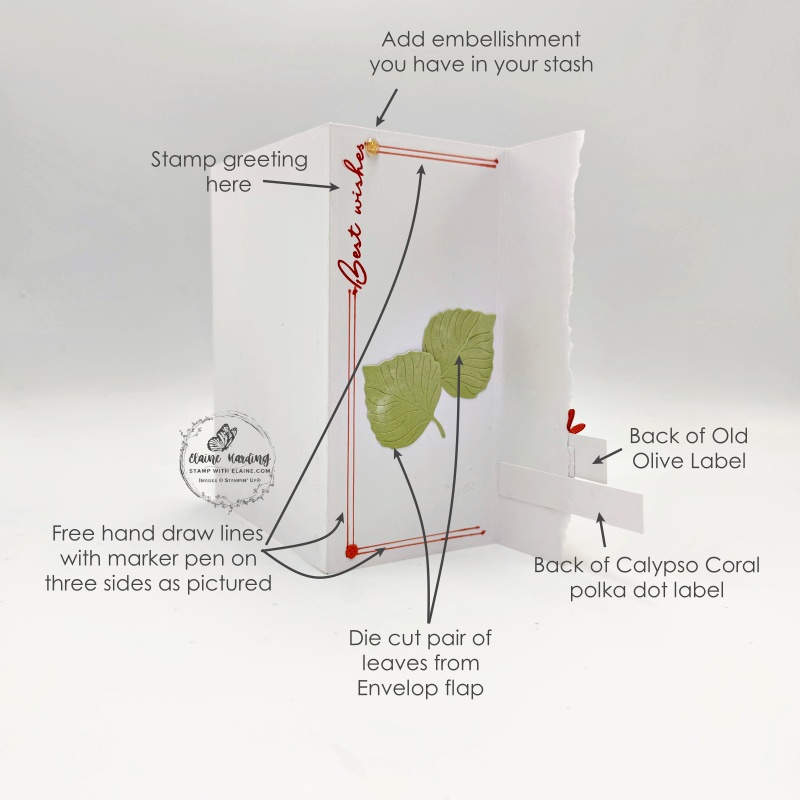
- Stamp greeting on back of card vertically and draw freehand a couple of thin lines on three sides as shown.
- Adhere a little flower in the bottom left corner and/or embellishment in top left corner.
- Close card to position where you want to adhere your leaves to finish card.
I hope you’ve enjoyed these alternate cards. Sorry it’s been so late… as they say – better late than never!
Supply list
Listed below is the supply list. Just click on the picture to take you directly to the item in my online store.
Product List ![Calypso Coral Stampin' Blends Markers Combo Pack [ 144045 ] (Retired)](https://assets1.tamsnetwork.com/images/EC042017NF/144045s.jpg "Calypso Coral Stampin' Blends Markers Combo Pack [ 144045 ] (Retired)") Calypso Coral Stampin’ Blends Markers Combo Pack [144045] | ||
![Wonderful Scenes Dies (English) [ 168665 ]](https://assets1.tamsnetwork.com/images/EC042017NF/168665s.jpg "Wonderful Scenes Dies (English) [ 168665 ]")
![Detailed Flora Dies (English) [ 168664 ]](https://assets1.tamsnetwork.com/images/EC042017NF/168664s.jpg "Detailed Flora Dies (English) [ 168664 ]")
![Bikes & Blooms Paper Pumpkin Refill (English) [ 171466 ]](https://assets1.tamsnetwork.com/images/EC042017NF/171466s.jpg "Bikes & Blooms Paper Pumpkin Refill (English) [ 171466 ]")
![Paper Pumpkin Subscription [ 166815 ]](https://assets1.tamsnetwork.com/images/EC042017NF/166815s.jpg "Paper Pumpkin Subscription [ 166815 ]")
![Paper Pumpkin 3 Month Subscription [ 166816 ]](https://assets1.tamsnetwork.com/images/EC042017NF/166816s.jpg "Paper Pumpkin 3 Month Subscription [ 166816 ]")
![Paper Pumpkin 6 Month Subscription [ 166817 ]](https://assets1.tamsnetwork.com/images/EC042017NF/166817s.jpg "Paper Pumpkin 6 Month Subscription [ 166817 ]")
![Paper Pumpkin 12 Month Subscription [ 166818 ]](https://assets1.tamsnetwork.com/images/EC042017NF/166818s.jpg "Paper Pumpkin 12 Month Subscription [ 166818 ]")
![Basic White A4 Thick Cardstock [ 159230 ]](https://assets1.tamsnetwork.com/images/EC042017NF/159230s.jpg "Basic White A4 Thick Cardstock [ 159230 ]")
![Calypso Coral A4 Card Stock [ 124392 ]](https://assets1.tamsnetwork.com/images/EC042017NF/124392s.jpg "Calypso Coral A4 Card Stock [ 124392 ]")
![Daffodil Delight A4 Card Stock [ 121680 ]](https://assets1.tamsnetwork.com/images/EC042017NF/121680s.jpg "Daffodil Delight A4 Card Stock [ 121680 ]")
![Pecan Pie Stampin’ Blends Combo Pack [ 161674 ]](https://assets1.tamsnetwork.com/images/EC042017NF/161674s.jpg "Pecan Pie Stampin’ Blends Combo Pack [ 161674 ]")
![Dewdrops Embellishments [ 167748 ]](https://assets1.tamsnetwork.com/images/EC042017NF/167748s.jpg "Dewdrops Embellishments [ 167748 ]")

- SHOP ONLINE – EARN 10% REWARDS ON ALL PURCHASES OVER £20
- PURCHASE A STARTER KIT : Get £155 worth of products for only £99. Choose from current catalogues and any specials available. Free Shipping. Read more
- Subscribe to my Video Tutorials – click here
