
Easy quick anniversary card – Sunset Coast. The Sunset Coast is a Two-step stampin’ set where you layer two or more images to create one final image. You can find it in the March-August 2026 catalogue and is part of the Scenic Coast Suite collection on pages 26-27.
Sunset Coast Bundle
This Sunset Coast bundle has coordinating Scenic Coast 6″ x 6″ (15.2 x 15.2 cm) Designer Series Paper which features vivid colours and layered textures depicting coastal sunsets on one side and versatile patterns on the other. On the coastal sunset side, some sheets feature iridescent details and they shift colour as you move them. It is absolutely stunning!
The dies in the bundle bring a coastal vibe. You can layer the sailboat and lighthouse pieces over patterned paper or snip them from the frame and use them as stand alone focal points and the sentiments in the Sunset Coast stamp set are ideal for anniversaries or retirement.
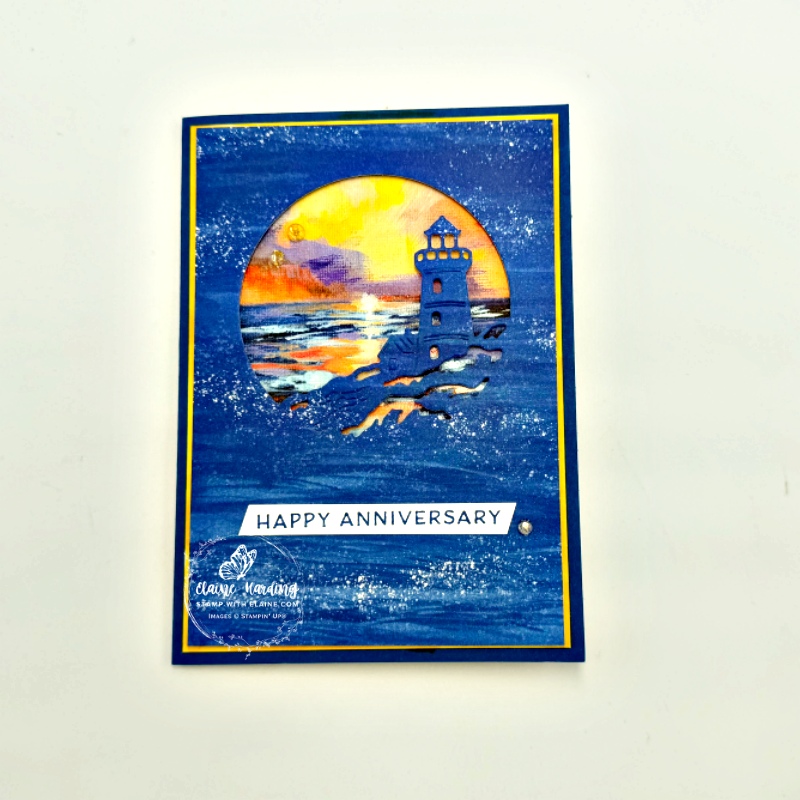
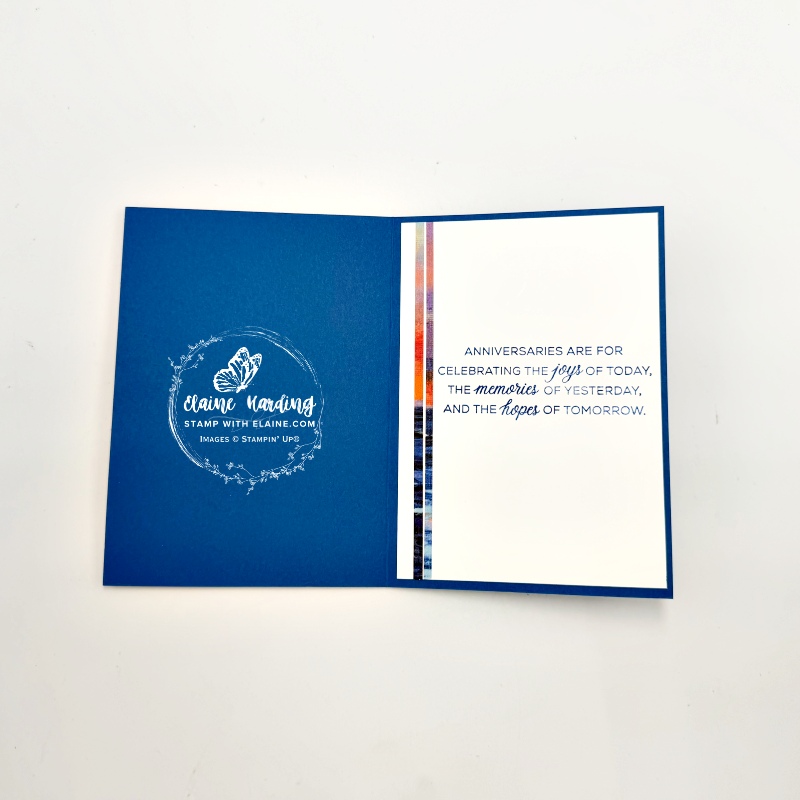
Cutting guide
- Card base : Blueberry Bushel 5 ¾” x 8 ¼” (14.5 cm x 21 cm) folded in half.
- Basic White layer #1 for front and inside of card : cut 2 pieces 3 ⅞” x 5 ½” (10 cm x 14 cm)
- Sunset side of Scenic Coast 6″x 6″ (15.2 x 15.2 cm) DSP : cut 1 piece 3 ¾” x 5 ⅜” (9.5 cm x 13.5 cm)
- Select a the reverse pattern as shown above from Scenic Coast DSP also cut at 3 ¾” x 5 ⅜” (9.5 cm x 13.5 cm). Use lighthouse die to die cut aperture on this piece placed equidistant from top and both sides as shown.
- On scrap of Basic White, stamp and trim “happy anniversary” sentiment.
- Reserve 2 strips of ⅛” (0.3 cm) pieces of DSP to use for inside of card.
Assembly instructions
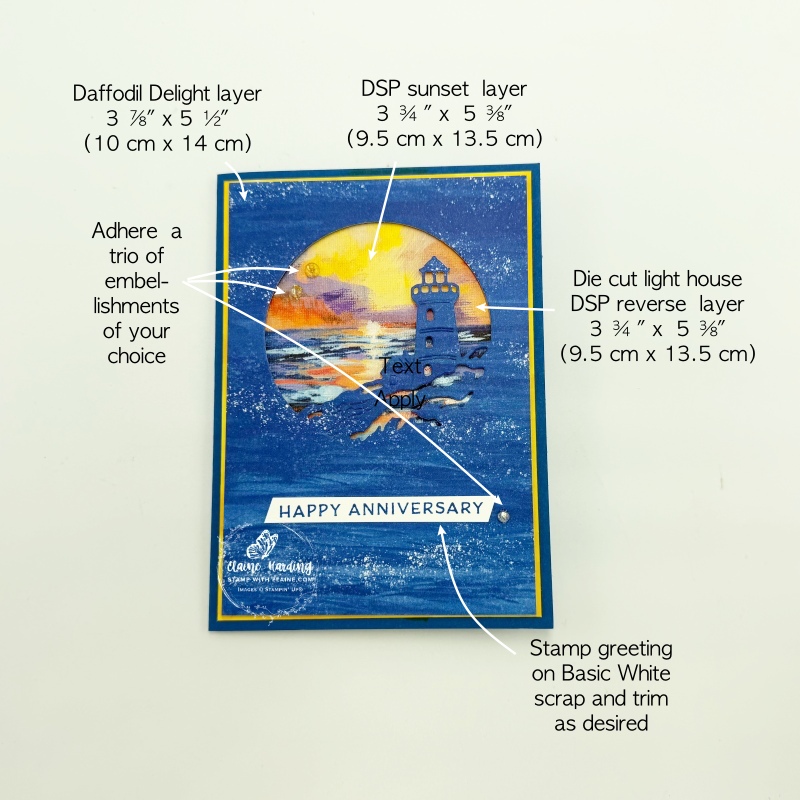
Front of card
- Adhere Basic White piece to front of card leaving an even border on all 4 sides.
- Use the Dark Daffodil Delight Stampin’ Blend, colour ¼” in on all 4 edges then adhere to front of card base.
- Apply dimensionals on back of reverse DSP layer along the straight edges and also around the circle and back of lighthouse.
- Align DSP Sunset layer behind the blue piece as pictured above. Apply adhesive to the back of sunset layer then adhere to coloured Basic White piece leaving an even border on all 4 sides.
- Adhere stamped and trimmed greeting below lighthouse directly as shown.
- Add trio of embellishments as shown.
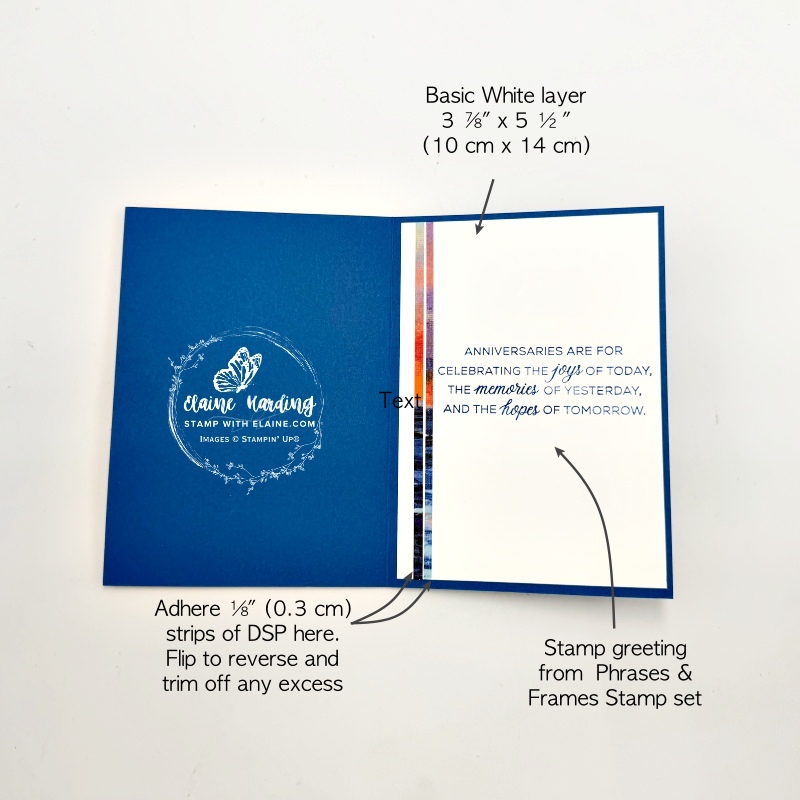
Inside card
- Stamp greeting with Blueberry Bushel ink using the greeting from Phrases & Frames stamp set.
- Adhere strips of DSP as shown in picture on right above. Flip over to back and trim off excess.
- Then adhere piece to inside of card as shown.
Voila – you’re done! How quick and simple was that?
Supply list
Listed below is the supply list. Just click on the picture to take you directly to the item in my online store.
Product List![Sunset Coast Bundle (English) [ 167781 ]](https://assets1.tamsnetwork.com/images/EC042017NF/167781s.jpg "Sunset Coast Bundle (English) [ 167781 ]")
![Phrases & Frames Bundle (English) [ 167587 ]](https://assets1.tamsnetwork.com/images/EC042017NF/167587s.jpg "Phrases & Frames Bundle (English) [ 167587 ]")
![Phrases & Frames Photopolymer Stamp Set (English) [ 167581 ]](https://assets1.tamsnetwork.com/images/EC042017NF/167581s.jpg "Phrases & Frames Photopolymer Stamp Set (English) [ 167581 ]")
![Phrases & Frames Dies [ 167586 ]](https://assets1.tamsnetwork.com/images/EC042017NF/167586s.jpg "Phrases & Frames Dies [ 167586 ]")
![Scenic Coast 6" X 6" (15.2 X 15.2 Cm) Specialty Designer Series Paper [ 167773 ]](https://assets1.tamsnetwork.com/images/EC042017NF/167773s.jpg "Scenic Coast 6\" X 6\" (15.2 X 15.2 Cm) Specialty Designer Series Paper [ 167773 ]")
![Blueberry Bushel A4 Cardstock [ 146991 ]](https://assets1.tamsnetwork.com/images/EC042017NF/146991s.jpg "Blueberry Bushel A4 Cardstock [ 146991 ]")
![Basic White A4 Cardstock [ 166781 ]](https://assets1.tamsnetwork.com/images/EC042017NF/166781s.jpg "Basic White A4 Cardstock [ 166781 ]")
![Blueberry Bushel Classic Stampin' Pad [ 147138 ]](https://assets1.tamsnetwork.com/images/EC042017NF/147138s.jpg "Blueberry Bushel Classic Stampin' Pad [ 147138 ]")
![Daffodil Delight Stampin' Blends Combo Pack [ 154883 ]](https://assets1.tamsnetwork.com/images/EC042017NF/154883s.jpg "Daffodil Delight Stampin' Blends Combo Pack [ 154883 ]")
![Rhinestone Basic Jewels [ 144220 ]](https://assets1.tamsnetwork.com/images/EC042017NF/144220s.jpg "Rhinestone Basic Jewels [ 144220 ]")

- SHOP ONLINE – EARN 10% REWARDS ON ALL PURCHASES OVER £20
- PURCHASE A STARTER KIT : Get £155 worth of products for only £99. Choose from current catalogues and any specials available. Free Shipping. Read more
- Subscribe to my Video Tutorials – click here
