
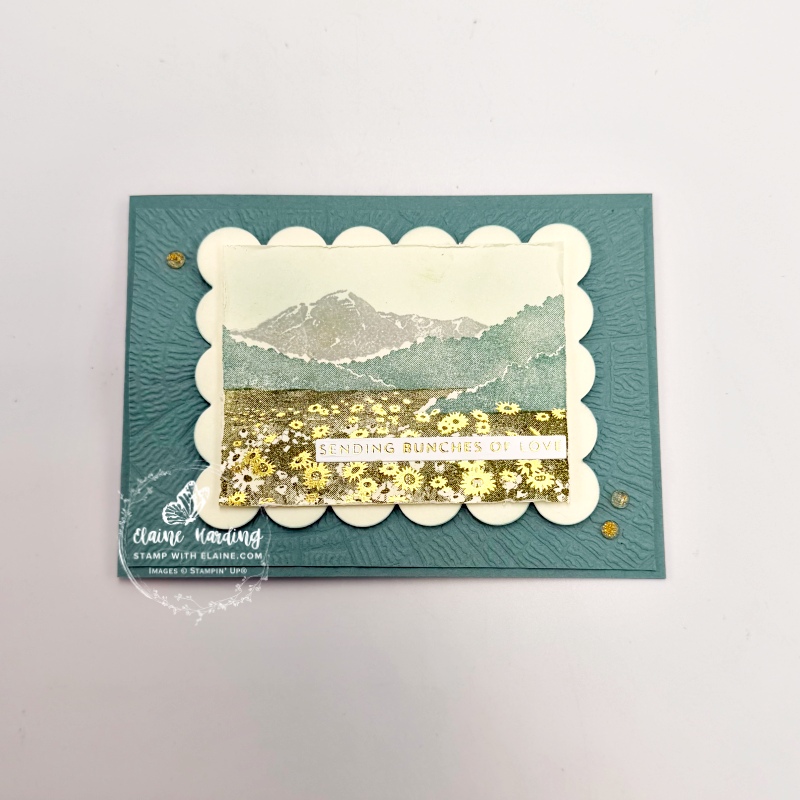
Two-step stamping – Shimmering Scenes. Happy Sunday everyone! Today’s offering is a landscape card and a sneak peek at some dies which will be coming in the September-December 2026 catalogue! Sorry to say, I can’t get my head around “Christmas in July” even after 18 years with Stampin’ Up!
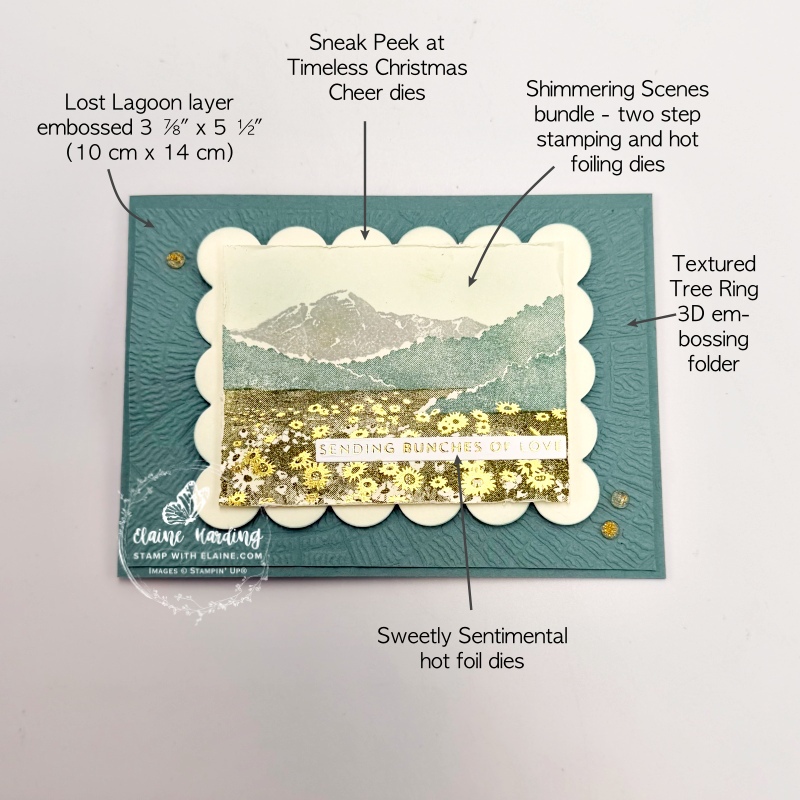
I just received the two-step stamping Shimmering Scenes bundle so I couldn’t resist having a play and here’s what I came up with. Can you spot which item is a sneak peek?
Stampin’ Hot Foil System
If you haven’t heard about hot foiling, scroll down to bottom of post where you’ll see a Stampin’ Up! video all about it, but if you have been following my blog, you can skip past it. You can tell I’ve been bitten by the Hot Foiling bug!
Shimmering Scenes
The Shimmering Scenes stamps can be used just as a stamp set, but if you’d like to invest in the Stampin’ Hot Foil System there is a free class included in the purchase price until January 4, 2027. After that, the class will cost £28. Should you wish to purchase the Stampin’ Hot Foil System you can purchase the Shimmering Scenes bundle rather than just the stamp set. Please be aware there are different plugs for different markets so do make sure you select the correct one for your market. In UK – select the UK/IE Stampin’ Hot Foil System & Craft Class – item code 170011. The foils have to be purchased separately so don’t forget to add those too.
Cutting guide
- Card base : Lost Lagoon 11 ½” x 4 ⅛” (29 cm x 10.5 cm) folded in half.
- Emboss Lost Lagoon scrap piece with Textured Tree Ring 3D embossing folder then trim to 3 ⅞” x 5 ½” (10 cm x 14 cm). Reserve remnant for inside card.
- Available from September 1, 2026 – Timeless Christmas Cheer dies – 2nd largest scalloped rectangle cut in Very Vanilla. Use blending brush to darken the scalloped edges a tad.
- Scrap of Very Vanilla – hot foil in gold the “field of flowers” first.
- Two step stamping the scene from Shimmering Scenes using Old Olive over hot foiled flowers, Lost Lagoon mountains, then Cloud Cover mountain. Use blending brush to apply Balmy Blue for the sky. Trim to 2 ¾” x 3 ⅝” (7 cm x 9 cm) and distress edges with edge of scissors.
- Adhere scene to scalloped edge frame with dimensionals.
- Lastly add trio of embellishments of your choice.
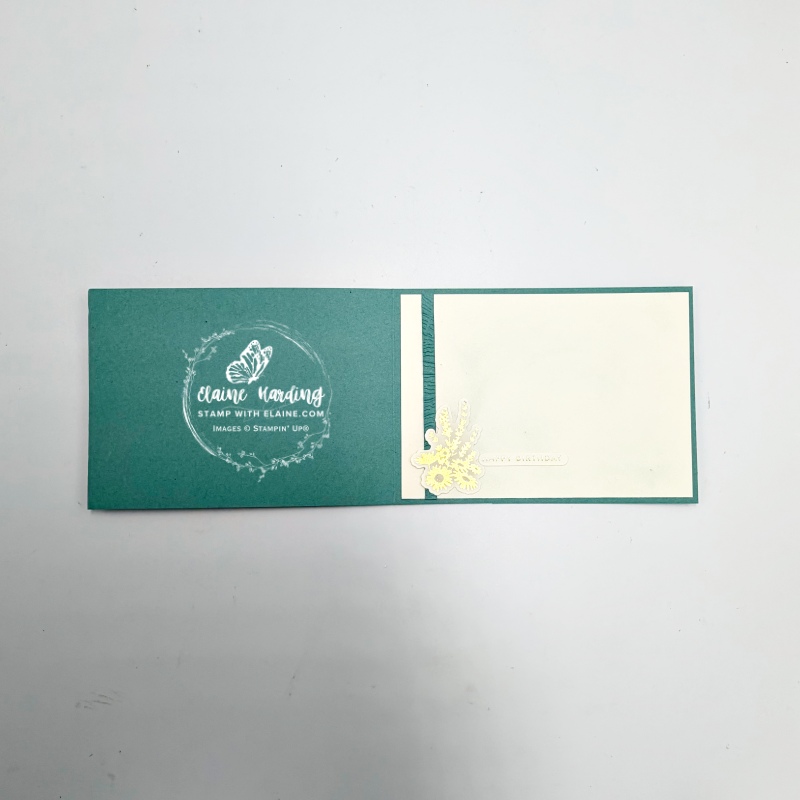
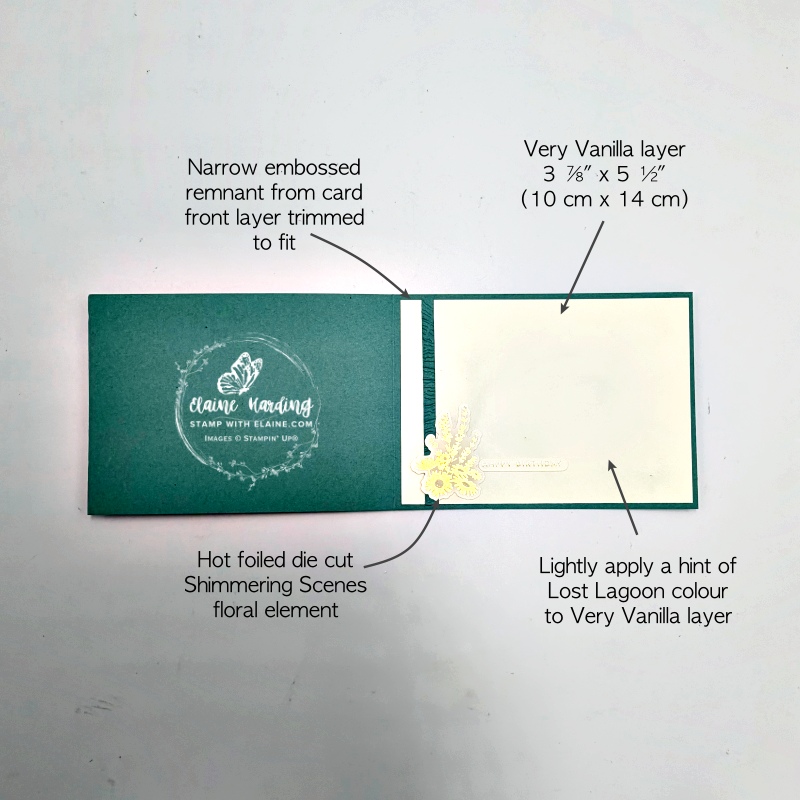
Inside card
- Cut Very Vanilla layer for inside of card at 3 ⅞” x 5 ½” (10 cm x 14 cm). Use blending brush to apply a light colour with Lost Lagoon ink.
- Adhere embossed remnant to Very Vanilla layer with a small margin and trim off excess then adhere to inside of card.
- Hot foil corresponding floral element from Shimmering Scenes Hot Foil Dies in gold, die cut with corresponding die and adhere to left of card overlapping embossed Lost Lagoon strip,
Stampin’ Hot Foil System
This is a new tool by Stampin’ Up! with special Hot Foil Dies. If you missed the post introducing the machine and information all about it, here’s a video to explain how the system works. Please be aware this machine is designed to fit Stampin’ Up!’s larger Stampin’ Cut & Emboss machine and was tested with their own line of products. It would render the 1 year warranty on the Stampin’ Hot Foil System null and void if you use it on non-Stampin’ Up! machines which may not fit.
Also be sure you’re ordering the machine with the right plug for your market. Foils and dies have to be purchased separately.
If you purchase the Stampin’ Hot Foil System before Jan 4, 2027, it will also include the Metallic Magic Craft Class for free. The class will cost £28.00 to purchase when the free class offer ends.
.
Supply list
Listed below is the supply list. Just click on the picture to take you directly to the item in my online store.
Product List![Uk/Ie Stampin' Hot Foil System & Craft Class [ 170011 ]](https://assets1.tamsnetwork.com/images/EC042017NF/170011s.jpg "Uk/Ie Stampin' Hot Foil System & Craft Class [ 170011 ]")
![Shimmering Scenes Bundle [ 170717 ]](https://assets1.tamsnetwork.com/images/EC042017NF/170717s.jpg "Shimmering Scenes Bundle [ 170717 ]")
![Sweetly Sentimental Bundle (English) [ 170053 ]](https://assets1.tamsnetwork.com/images/EC042017NF/170053s.jpg "Sweetly Sentimental Bundle (English) [ 170053 ]")
![Textured Tree Ring 3 D Embossing Folder [ 168220 ]](https://assets1.tamsnetwork.com/images/EC042017NF/168220s.jpg "Textured Tree Ring 3 D Embossing Folder [ 168220 ]")
![Blending Brushes [ 153611 ]](https://assets1.tamsnetwork.com/images/EC042017NF/153611s.jpg "Blending Brushes [ 153611 ]")
![Balmy Blue Classic Stampin' Pad [ 147105 ]](https://assets1.tamsnetwork.com/images/EC042017NF/147105s.jpg "Balmy Blue Classic Stampin' Pad [ 147105 ]")
![Lost Lagoon Classic Stampin' Pad [ 161678 ]](https://assets1.tamsnetwork.com/images/EC042017NF/161678s.jpg "Lost Lagoon Classic Stampin' Pad [ 161678 ]")
![Cloud Cover Classic Stampin' Ink Refill [ 165279 ]](https://assets1.tamsnetwork.com/images/EC042017NF/165279s.jpg "Cloud Cover Classic Stampin' Ink Refill [ 165279 ]")
![Uninked Stampin' Spots [ 141822 ]](https://assets1.tamsnetwork.com/images/EC042017NF/141822s.jpg "Uninked Stampin' Spots [ 141822 ]")
![Lost Lagoon A4 Cardstock [ 133686 ]](https://assets1.tamsnetwork.com/images/EC042017NF/133686s.jpg "Lost Lagoon A4 Cardstock [ 133686 ]")
![Very Vanilla A4 Cardstock [ 166785 ]](https://assets1.tamsnetwork.com/images/EC042017NF/166785s.jpg "Very Vanilla A4 Cardstock [ 166785 ]")
![Shimmering Dots [ 167949 ]](https://assets1.tamsnetwork.com/images/EC042017NF/167949s.jpg "Shimmering Dots [ 167949 ]")

- SHOP ONLINE – EARN 10% REWARDS ON ALL PURCHASES OVER £20
- PURCHASE A STARTER KIT : Get £155 worth of products for only £99. Choose from current catalogues and any specials available. Free Shipping. Read more
- Subscribe to my Video Tutorials – click here
