
Graceful Evergreen Deer Pt 2 – Week 4 Christmas Countdown Series. In Part 2 I show you how you can use the reverse hot foiled piece to make another card and how to make another card using the remaining hot foiled doe and her fawn. I reiterate that this stamp and hot foil die bundle combines illustrated trees, snowfall, and starry details with metallic foiled deer designs to add warmth, texture, and shine to your cards and tags.
The Hot Foil Die set adds metallic foil details for an elegant, eye-catching finish when used with Stampin’ Hot Foil Rolls and the Stampin’ Hot Foil System (both sold separately). You’ll also need the Stampin’ Cut & Emboss machine. The mini Stampin’ Cut & Emboss machine is not suitable.
If you’re new to hot foiling and the virtues of the Reverse Hot Foil die, scroll down to the end of the post to see the videos that Stampin’ Up! had produced.
Part 2 – Introduces the Alpine Winter Craft Paper and Swirls of Magic Embossing Folder
When you hot foil the Graceful Evergreen Deer hot foil dies, be sure to use the grid on the Hot Foil System platform to position your deer so that you can use the negative piece of foil to make a second card.
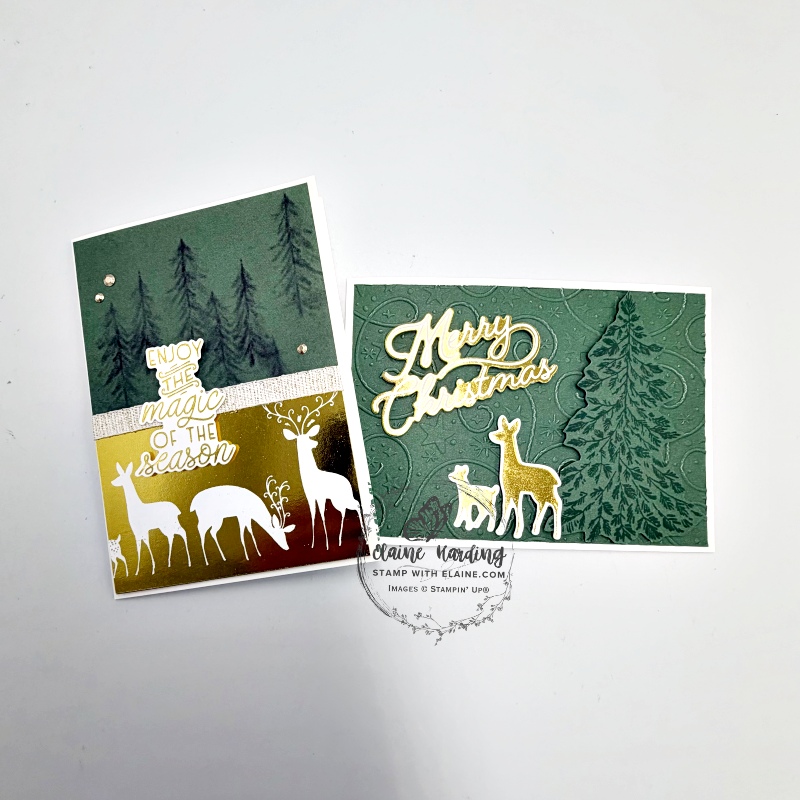
Card 1 – using the negative Graceful Evergreen Deer Hot Foiled piece
Being strategic about how you place your Graceful Evergreen Dear Hot Foiled deer e.g, place them on your Hot Foil System along the grid line means that you can use the reverse foiled piece as a strip to decorate another card (picture on the left).
As the card base used Basic White Thick cardstock, I omitted using a layer for the inside of the card.
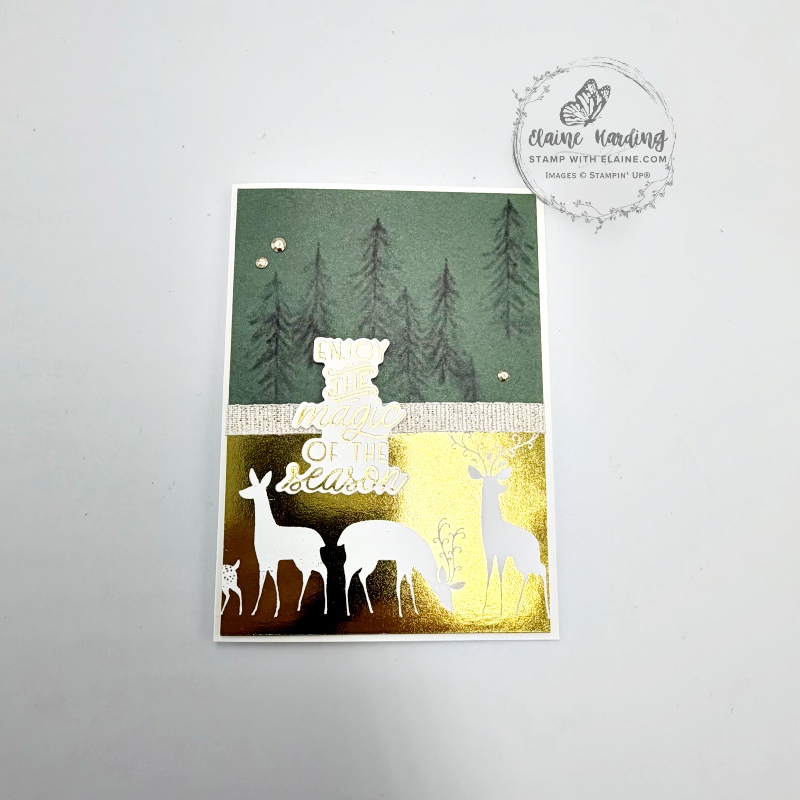
Cutting guide and assembly
The Reverse Hot Foil die allows you to maximise your Stampin’ Hot Foil Rolls because the solid die lets you create two designs from one piece of foil: the main design and the negative image left on the foil. Simply apply the used foil following the usual foiling process for a shiny bonus design.
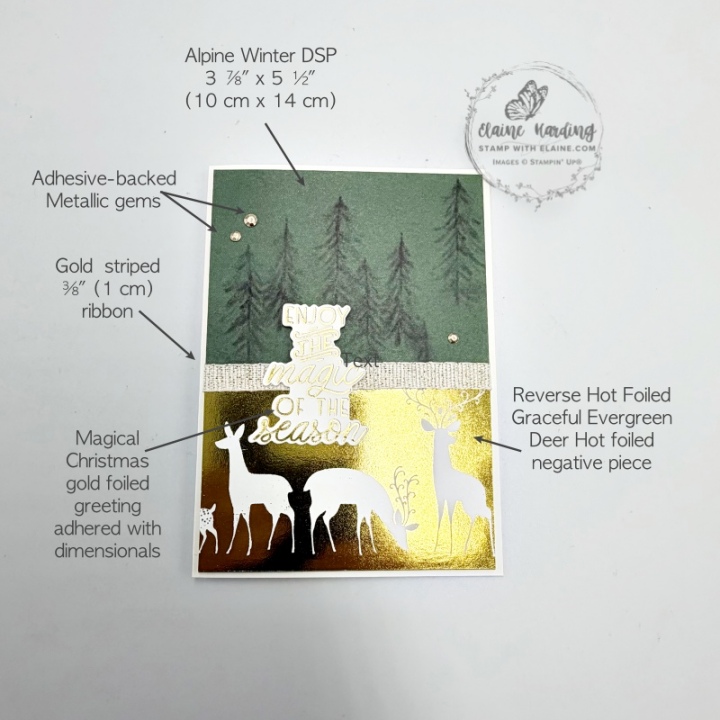
Front of card
- Card base : Basic White thick cut at 5 ¾” x 8 ¼” (14.5 cm x 21 cm) folded in half.
- Cut Alpine Winter 12″ x 12″ (30.5 x 30.5 cm) DSP : 3 ⅞” x 5 ½” (10 cm x 14 cm).
- Trim Reverse Foiled Graceful Evergreen Deer hot foiled piece at 2 ½” x 3 ⅞” (6.4 cm x 10 cm) and adhere to bottom half of front of card on top of DSP.
- Wrap ribbon around card where the join is and secure with tear and tape on the back but do not remove backing tape.
- Apply dimensionals on the back of DSP then adhere to card front leaving an even border on all 4 sides.
- Magical Christmas gold hot foiled die cut greeting and adhere with dimensionals as pictured.
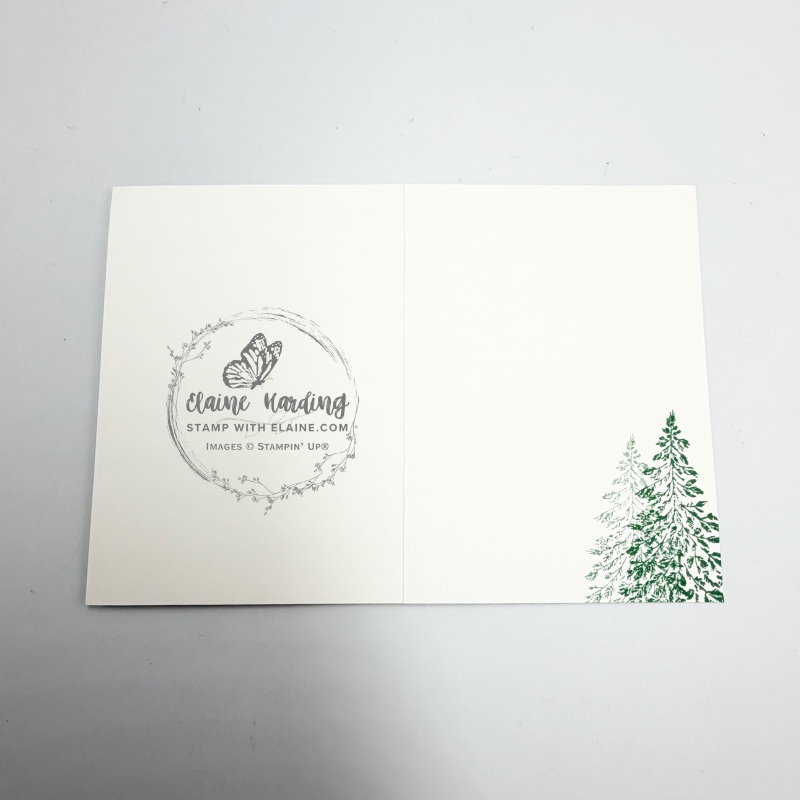
Inside card
- Simply stamp the smaller tree with 1st and 2nd generation Peaceful Pine Ink. to complete card.
Card 2 – Graceful Evergreen Deer hot foil dies with Swirls of Magic Embossing folder
I made another boo-boo so had to add a Basic White layer to cover up the smudges. Otherwise I would omit the inside layer.
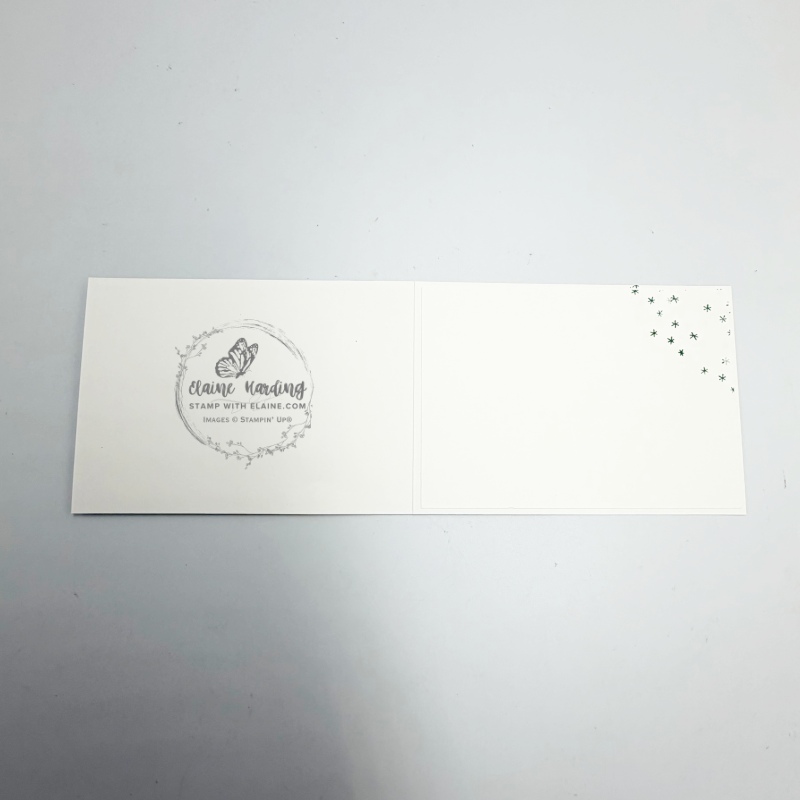
Cutting guide
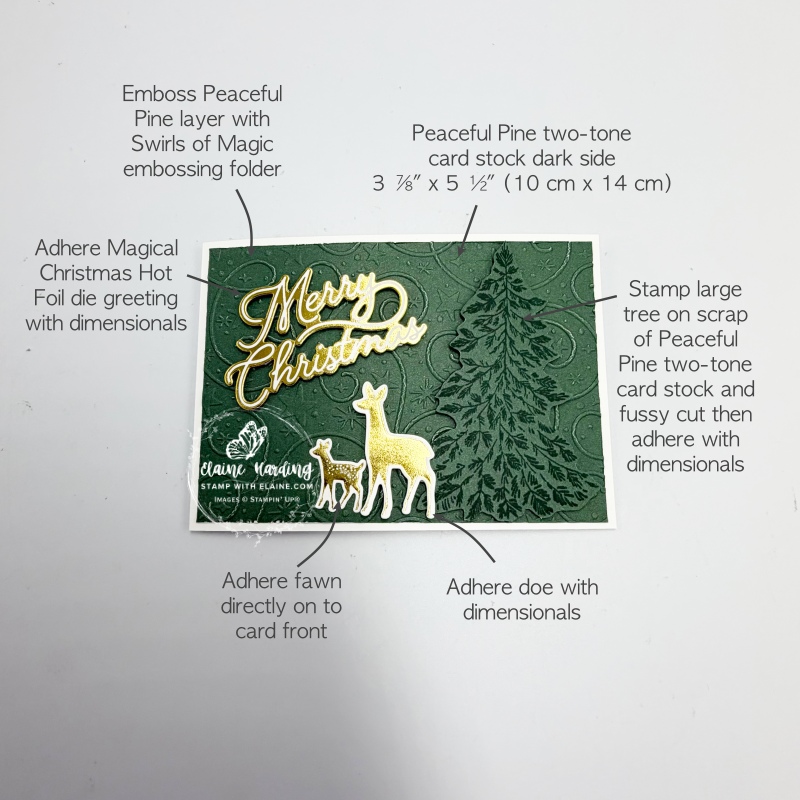
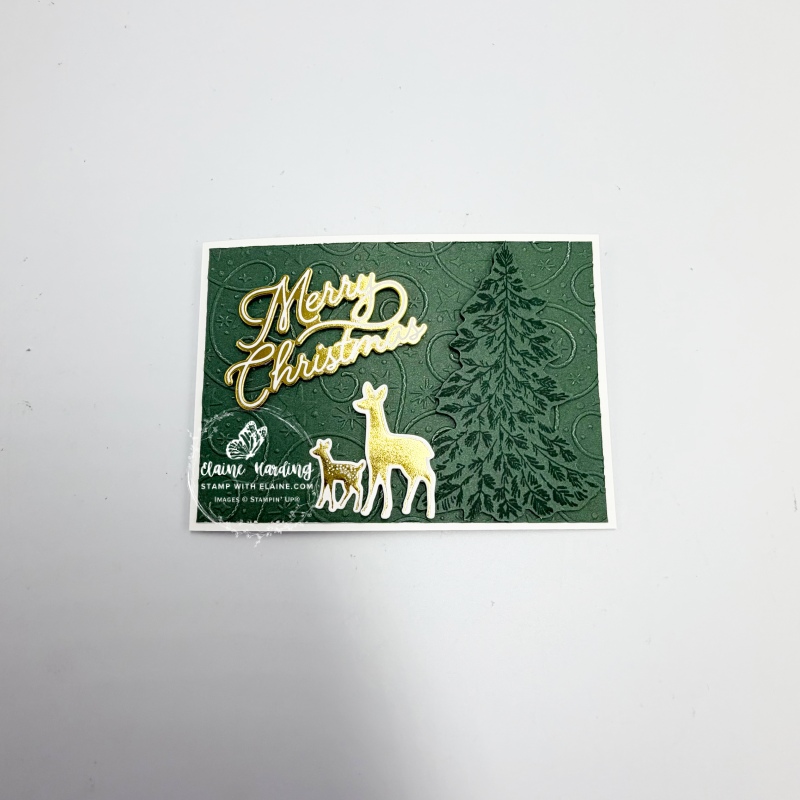
Front of card
- Card base Basic White thick cut at 4 ⅛”” x 11 ½” (10.5 cm x 29 cm) folded in half.
- Peaceful Pine 12″x 12″ (30.5 x 30.5 cm) two-tone card stock cut at 3 ⅞” x 5 ½” (10 cm x 14 cm). Emboss with Swirls of Magic Embossing Folder. Gently distress all 4 edges of this layer with edge of scissors. Adhere to card front leaving an even border on all 4 sides.
- On scrap of Peaceful Pine two-tone card stock, stamp the large tree with Peaceful Pine ink and fussy cut. Apply dimensionals on the back and adhere to embossed Peaceful Pine layer toward the right as pictured.
- Apply dimensionals to Magical Christmas hot foiled greeting and adhere as pictured above.
- Also apply dimensionals to left side of doe and partially adhere resting part of the doe on the tree.
- Adhere her fawn directly on to front of card.
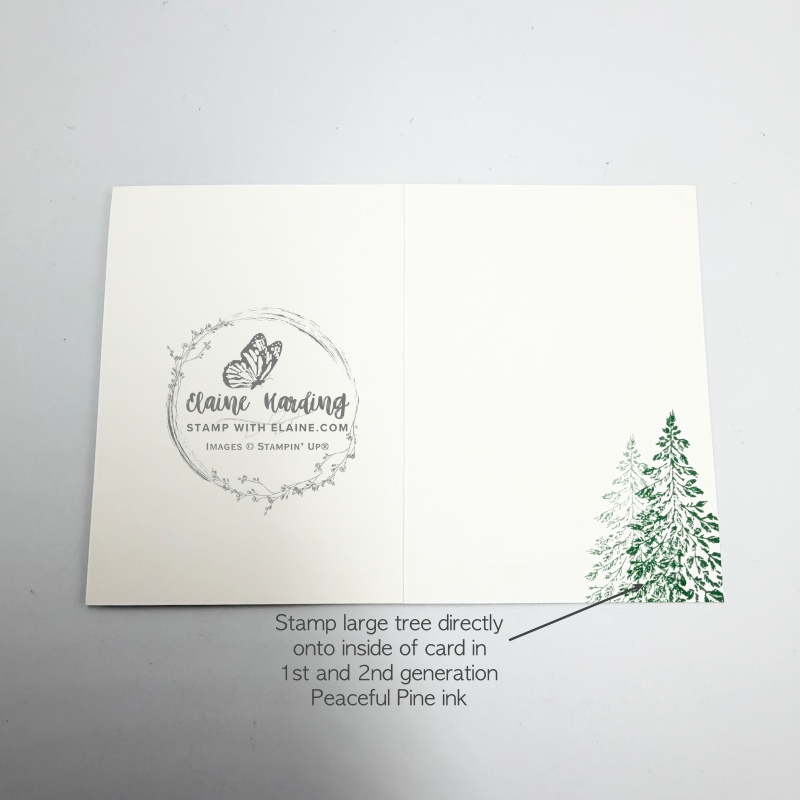
Inside card
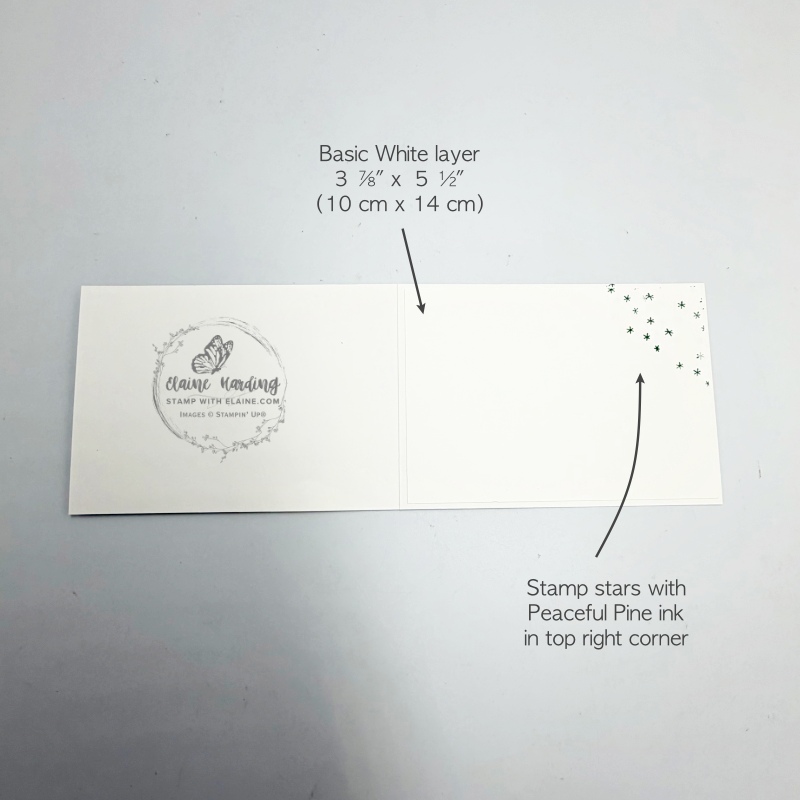
I smudged the inside of the card so had to cut a Basic White layer but it’s optional not to have extra layer.
- Stamp Basic White layer 3 ⅞” x 5 ½” (10 cm x 14 cm) in top right corner with the star stamp in Peaceful Pine ink.
- Adhere to inside of card leaving an even border on all 4 sides.
Supply list
Listed below is the supply list. Just click on the picture to take you directly to the item in my online store.
Product List![Magical Christmas Hot Foil Dies (English) [ 170592 ]](https://assets1.tamsnetwork.com/images/EC042017NF/170592s.jpg "Magical Christmas Hot Foil Dies (English) [ 170592 ]")
![Graceful Evergreen Deer Bundle [ 170567 ]](https://assets1.tamsnetwork.com/images/EC042017NF/170567s.jpg "Graceful Evergreen Deer Bundle [ 170567 ]")
![Reverse Hot Foil Die [ 170043 ]](https://assets1.tamsnetwork.com/images/EC042017NF/170043s.jpg "Reverse Hot Foil Die [ 170043 ]")
![Swirls Of Magic Embossing Folder [ 168179 ]](https://assets1.tamsnetwork.com/images/EC042017NF/168179s.jpg "Swirls Of Magic Embossing Folder [ 168179 ]")
![Gold Stampin' Hot Foil Rolls [ 170066 ]](https://assets1.tamsnetwork.com/images/EC042017NF/170066s.jpg "Gold Stampin' Hot Foil Rolls [ 170066 ]")
![Alpine Winter 12" X 12" (30.5 X 30.5 Cm) Designer Series Paper [ 168304 ]](https://assets1.tamsnetwork.com/images/EC042017NF/168304s.jpg "Alpine Winter 12\" X 12\" (30.5 X 30.5 Cm) Designer Series Paper [ 168304 ]")
![Basic White A4 Thick Cardstock [ 159230 ]](https://assets1.tamsnetwork.com/images/EC042017NF/159230s.jpg "Basic White A4 Thick Cardstock [ 159230 ]")
![Basic White A4 Cardstock [ 166781 ]](https://assets1.tamsnetwork.com/images/EC042017NF/166781s.jpg "Basic White A4 Cardstock [ 166781 ]")
![Peaceful Pine Classic Stampin Pad [ 167679 ]](https://assets1.tamsnetwork.com/images/EC042017NF/167679s.jpg "Peaceful Pine Classic Stampin Pad [ 167679 ]")
![Uk/Ie Stampin' Hot Foil System & Craft Class [ 170011 ]](https://assets1.tamsnetwork.com/images/EC042017NF/170011s.jpg "Uk/Ie Stampin' Hot Foil System & Craft Class [ 170011 ]")
![Stampin' Cut & Emboss Machine [ 149653 ]](https://assets1.tamsnetwork.com/images/EC042017NF/149653s.jpg "Stampin' Cut & Emboss Machine [ 149653 ]")
![Gold Striped 3/8" (1 Cm) Mesh Ribbon [ 165599 ]](https://assets1.tamsnetwork.com/images/EC042017NF/165599s.jpg "Gold Striped 3/8\" (1 Cm) Mesh Ribbon [ 165599 ]")
Stampin’ Hot Foil System
This is a new tool by Stampin’ Up! with special Hot Foil Dies. If you missed the post introducing the machine and information all about it, here’s a video to explain how the system works. Please be aware this machine is designed to fit Stampin’ Up!’s larger Stampin’ Cut & Emboss machine and was tested with their own line of products. It would render the 1 year warranty on the Stampin’ Hot Foil System null and void if you use it on non-Stampin’ Up! machines which may not fit.
Also be sure you’re ordering the machine with the right plug for your market. Foils and dies have to be purchased separately.
If you purchase the Stampin’ Hot Foil System before Jan 4, 2027, it will also include the Metallic Magic Craft Class for free. The class will cost £28.00 to purchase when the free class offer ends.
.
Reverse Hot Foil Die
Maximise your Stampin’ Hot Foil Rolls (and your creativity!) with the Reverse Hot Foil Die. This solid die lets you create two designs from one piece of foil: the main design and the negative image left on the foil. Simply apply the used foil following the usual foiling process for a shiny bonus design.
Watch Stampin’ Up!’s video on how to use the Reverse Hot Foil Die.

- SHOP ONLINE – EARN 10% REWARDS ON ALL PURCHASES OVER £20
- PURCHASE A STARTER KIT : Get £155 worth of products for only £99. Choose from current catalogues and any specials available. Free Shipping. Read more
- Subscribe to my Video Tutorials – click here
