
Interactive cards with a hidden message is so much fun. For this particular type of card, you probably have to include instructions on how to find it! Many years ago, when one of my grandsons was still a toddler, I made him a card which showed a photo of him as a baby. The hidden message contained a second photo of him as a two-year old. You can see it HERE. The post is dated 18 July 2009!
Back then I hadn’t been blogging for long, so my content was pretty basic nor did I include any instructions or visual aids. Creating video tutorials didn’t appear on the horizon until many years later in 2013!
So I thought I’d revisit this technique and include a video tutorial so it would give me a reference point going forward. Surprisingly it is really easy to make when you know how!
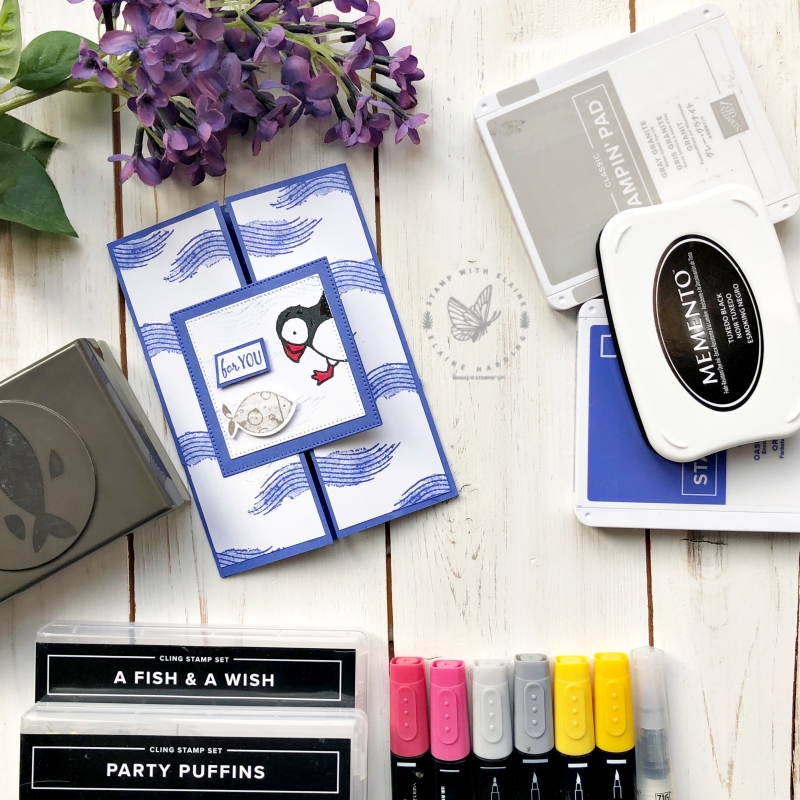
When you look at the card, it looks like an ordinary card. Then when you open it, this is what it looks like.
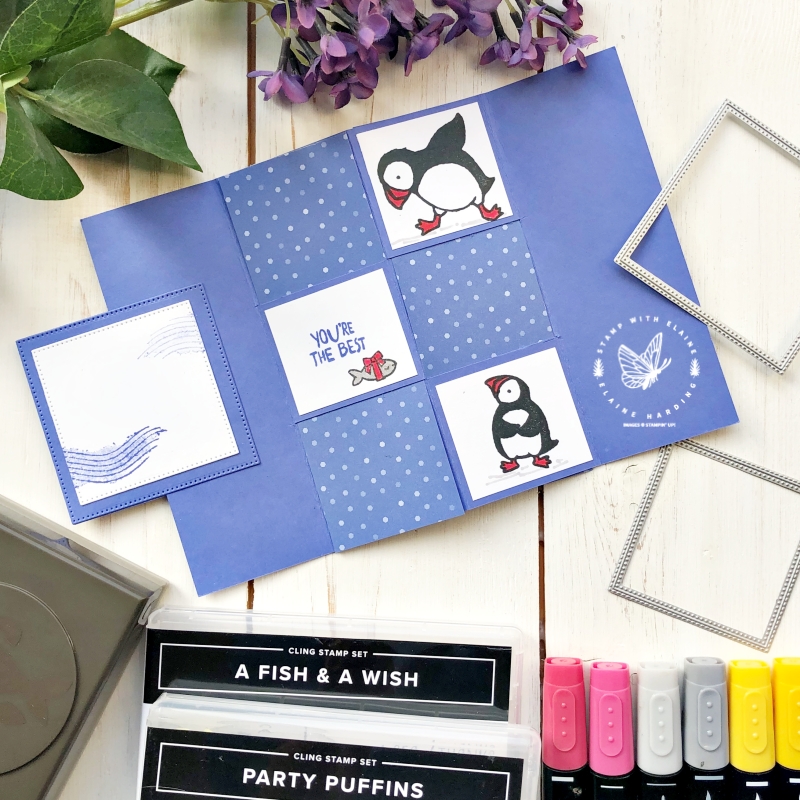
Then to find the hidden message, you push the outer panels toward the centre to form a “W”, and open it up again from the centre to find the hidden section.
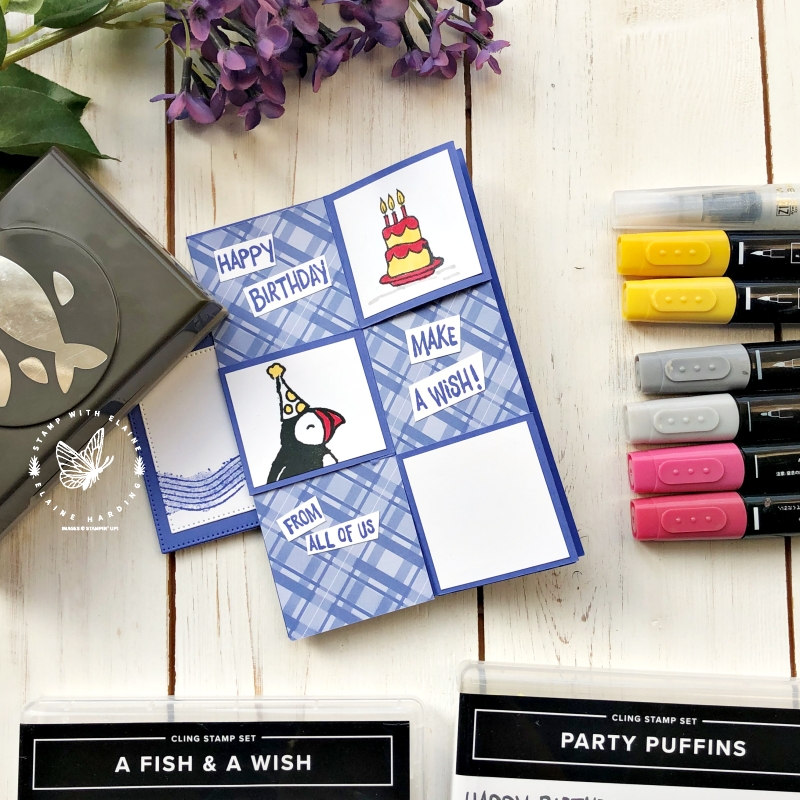
Grab the outer panels and pull it taut and the original image when you first open the card will re-appear again.
Card cutting instructions
- Cut card base at 5 ¾” x 8 ¼”(14.5 cm x 21 cm). On the long side, score at 4 ⅛” (10.5 cm) and fold in half. Pick up front and back of card and bring it toward the 4 ⅛” (10.5 cm) score line into a gate-fold making sure that it meets in the middle without any gaps.
- On the trimmer, orient card stock with short side at the top. Align left edge at 1 ⅞”(4.8 cm) and cut from 1st score line down to 3rd score line.
- Rotate c/s 180 degrees, align left edge at 1 ⅞” (4.8 cm) and cut from 1st score line down to 3rd score line.
- Cut two strips of card stock or patterned paper – 2″ x 5 ¾” (5 cm x 14.5 cm) and weave it into the C6 card.
- Front of card gate-fold panels – 2 pieces Basic White 1-7/8″ x 5-1/2″ (4.8 cm x 14 cm)
- Basic white scrap for cutting individual squares*
NOTE: *You’ll require cutting Basic white squares ⅛” smaller than your individual squares. The left hand squares may be a tad smaller than the right hand squares.
Refer to video tutorial for further instructions on how I stamped and embellished them.
Supply list
Listed below is the supply list. Just click on the picture to take you directly to the item in my online store.
Product List
")

 Designer Series Paper")


- SHOP ONLINE – EARN 10% REWARDS ON ALL PURCHASES OVER £20
- PURCHASE A STARTER KIT : Get £155 worth of products for only £99. Choose from current catalogues and any specials available. Free Shipping. Read more
- Subscribe to my Video Tutorials – click here