
Welcome to episode 2 of 12 in my 12 week Christmas Countdown Series with a Table Favour using the Christmas Lights bundle. It also doubles up as a name place holder.
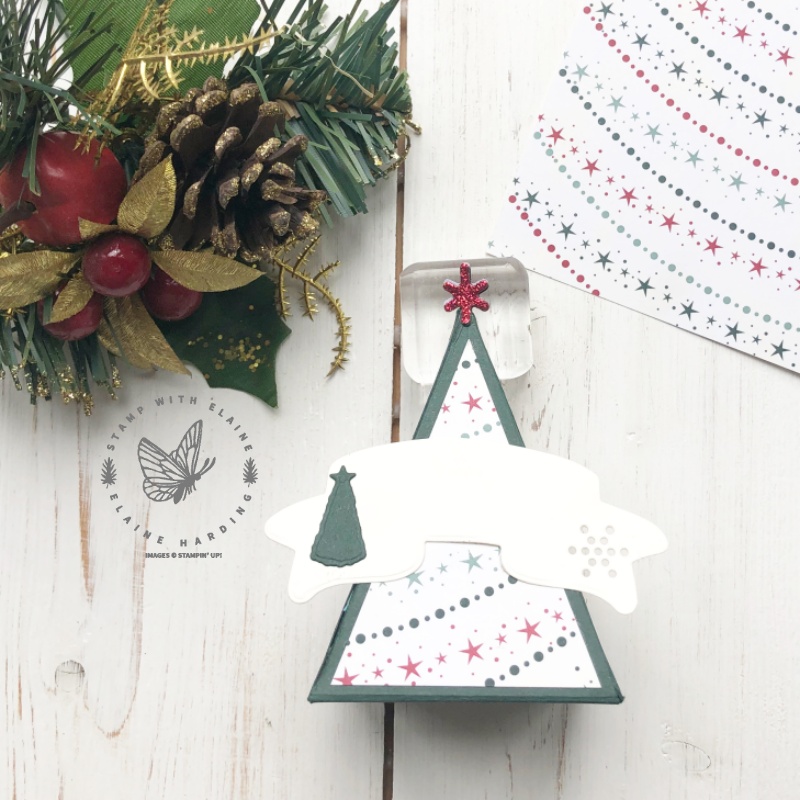
I used the fabulous Lights Aglow 6″x 6″ (15.2 x 15.2 cm) paper, Glimmer 12″x 12″ (30.5 x 30.5 cm) Specialty paper and Evening Evergreen card stock to create a tree. The “tree” is actually a pyramid shape.
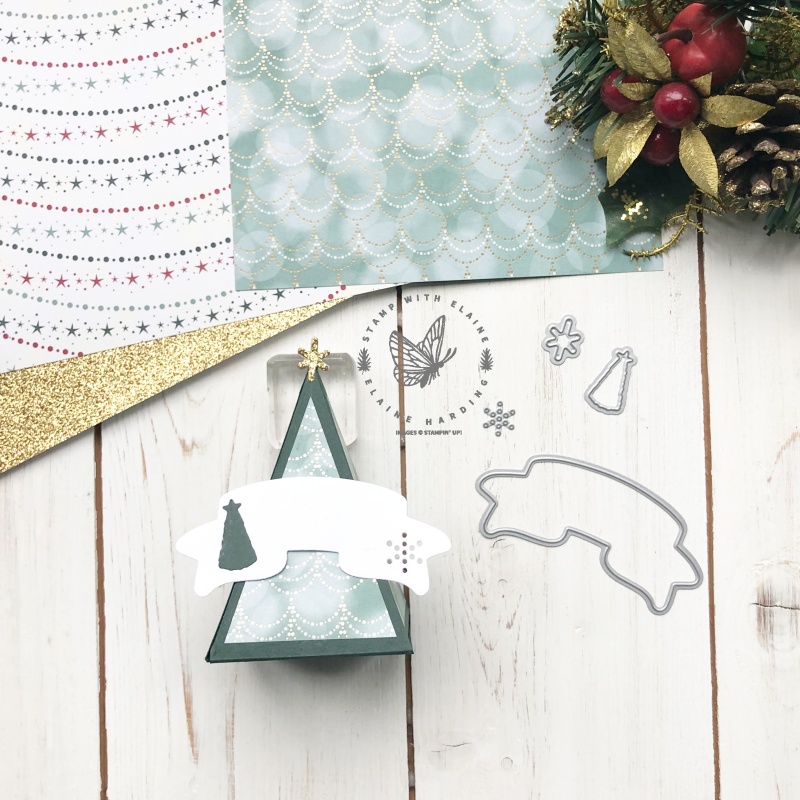
By changing the papers you use, each “tree” will look different. I used the banner die from the Rustic Pumpkin Dies to use as the name place holder. If you allow the Tombow glue to dry, the glue becomes repositionable, so you can take the “label” off and write the person’s name on it and then re-attach it afterwards.
One of the sides incorporates the lid so that you can shut the box after you’ve put your table favours in it.
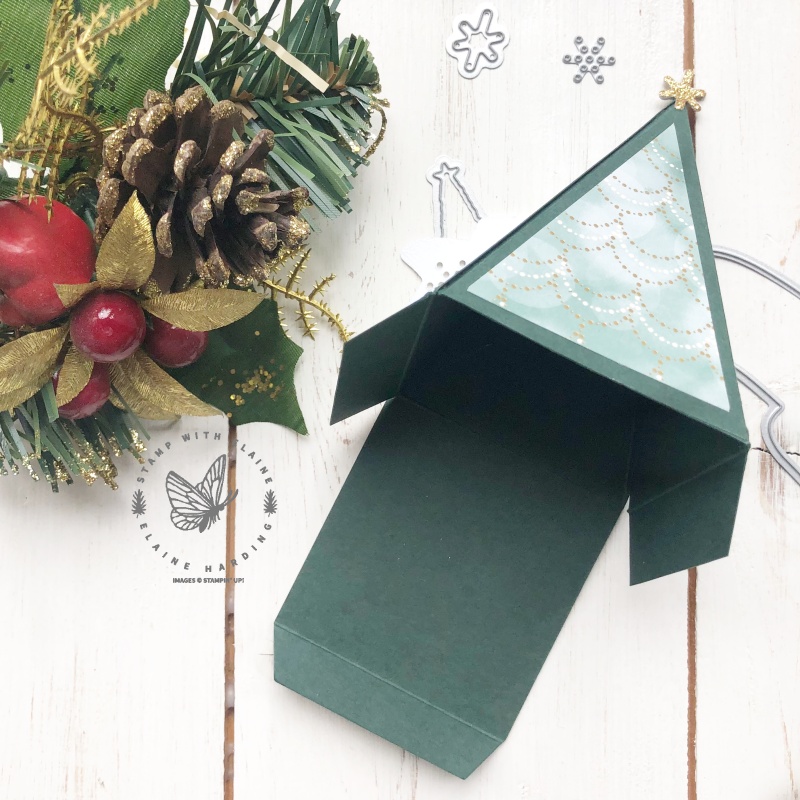
Table favour construction
- Cut 3 pieces in Evening Evergreen measuring 2-3/8″ x 6″ (6 cm x 15.2 cm). On long side, score one end at 2-3/8″(6 cm). Turn c/s anti-clockwise so short side is on top, and mark the centre with scoring blade at 1-3/16″ (3 cm).
- Lid section – cut 1 piece in Evening Evergreen measuring 2-⅜” x 6-½” (6 cm x 16.5 cm). On the long side score one end at ½” to right of cutting groove on trimmer. Rotate c/s 180 degrees and fold the ½” scored section back and align c/s to left of cutting groove at 2-⅜” and score. Rotate c/s anti-clockwise so short side is on top and mark centre at 1-3/16″ (3 cm).
- You need to cut all four pieces on the same side. Orient c/s so that the short side with the 1-3/16 ” (3cm) is at the top of your trimmer. Cut each section from the centre point down to the bottom right at the 2-⅜” (6 cm) score line.
- Next score the left side of each piece from the 1-3/16″ (3 cm) mark down to the left bottom corner at the 2-⅜” (6 cm)
- Apply tear and tape next to the score line on each piece.
- Trim surplus that is not covered by the tear and tape.
Decorative pieces
- Cut 4 pieces of the same pattern paper measuring 2″ x 3″ (5 cm x 7.6 cm).
- Establish which way up your pattern paper is. Mark the top of the patterned paper at 1″ (2.5 cm)
- Then cut from the 1″ (2.5 cm) to the opposite corner on both sides to form a triangle.
- Adhere each piece to the four sides of the pyramid before assembly.
Assembling the box
- Remove the tear and tape and ensure the the top and the base of the box score line is aligned and adhere each piece to the next one until all four pieces are adhered together to form the pyramid.
- Opposite the lid piece, cut off the 2-⅜” x 2-⅜” (6cm x 6cm) section so that you can tuck the ½” flap into the pyramid.
- Adjacent to the lid on both sides, trim the sides leaving a 1″ (2.5 cm) tab on either side as shown in the picture above.
Finishing touch
- Die cut 2 stars in Gold Glimmer paper
- Adhere one of the stars on the side where the lid is.
- On the opposite side of the lid, adhere second star.
- Ensure each star has sufficient glue so that you can glue them together at the top of the pyramid.
Video Tutorial
Supply list
Listed below is the supply list. Just click on the picture to take you directly to the item in my online store.
Product List")


 Specialty Paper")
 Specialty Designer Series Paper")


