
The theme for the November Tech 4 Stampers blog hop is Wonderful Winter. It’s been ages since I’ve done a side step card, you can see a similar one with video instructions I did a while back. I’ve put the link below. So today’s card works on the same principle.
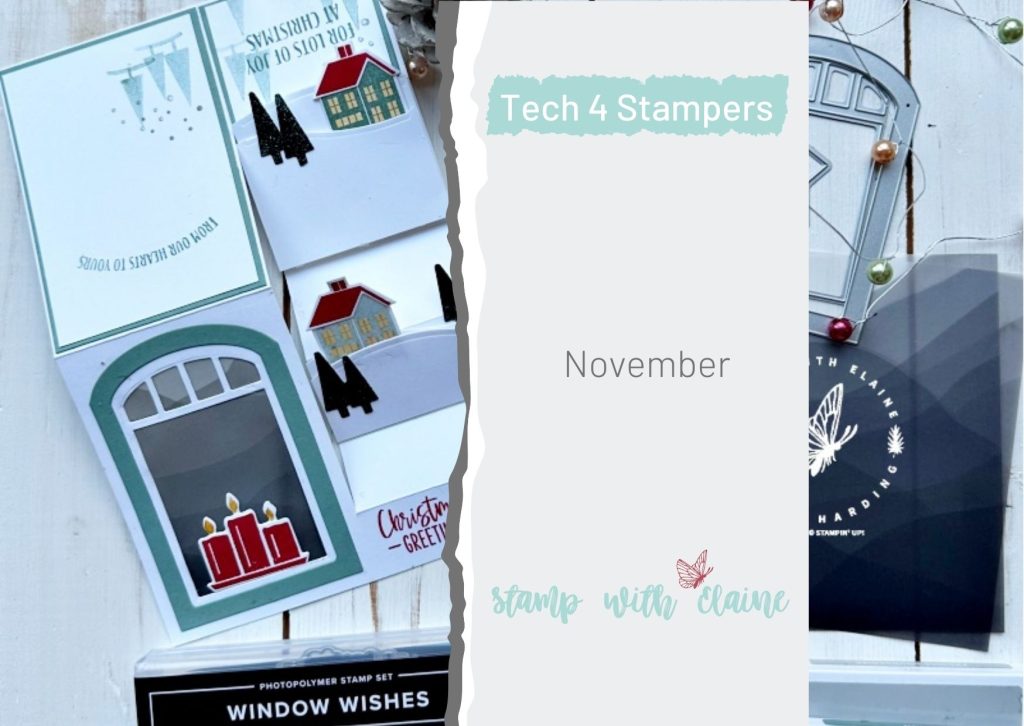

The Build & Bloom Stampers Blog hop (formerly Tech 4 Stampers)is a monthly subscription group run by Louise Sims. She mentors and enables members to understand IT jargon and equips them with a fountain of Technical knowledge to build or manage their own websites. It takes the mystery out of “tech” and I’ve certainly grown in confidence thanks to her expertise, patience and guidance. Not only that, I’ve met and made new friends with my fellow “Techs” and love the camaraderie within the group.
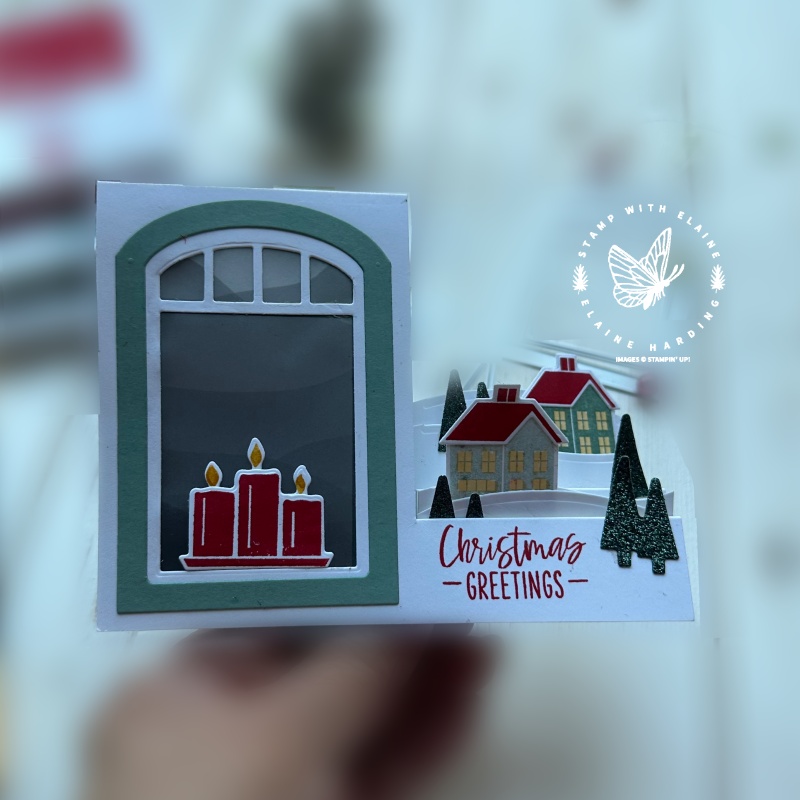
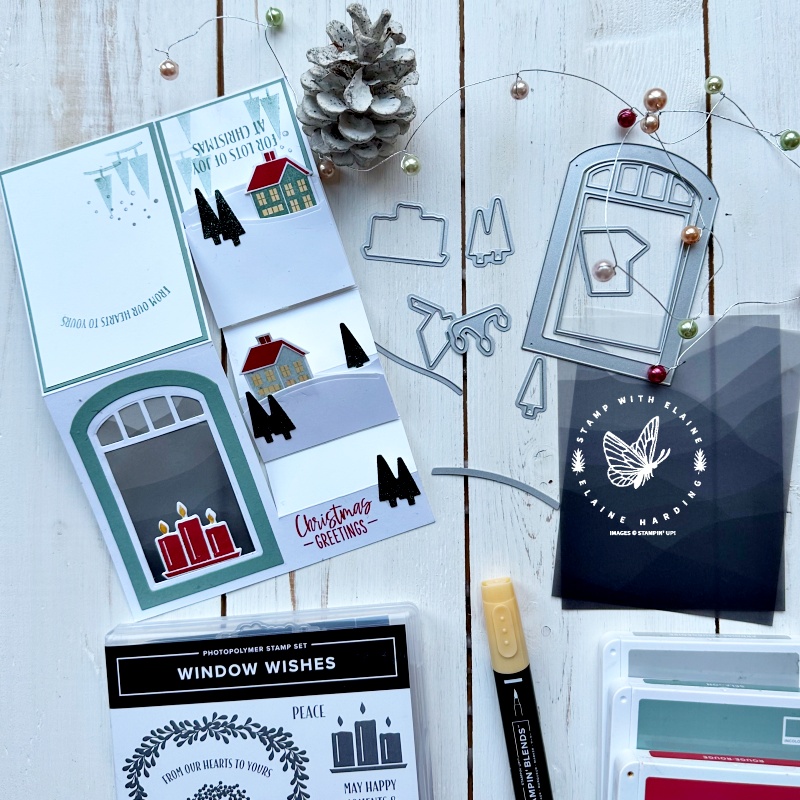
Have you ever tried photographing a flat lay of a side step card? I failed miserably, so had to resort to this hand held version instead. The reason being that all the layers on the side steps have been adhered with dimensionals to make them “pop”. Consequently, it made it really difficult for the card to lie flat! I used the “Lovely Layers” vellum which have both plain and printed vellum designs on for the backing on my window. The one I used has mountain views. The idea is to put one of those battery operated tea lights behind it so you can see the glow. I didn’t have one to hand, so couldn’t demonstrate it.
Card laid out flat
This is the card laid out flat so you can see how all the different elements were added. I used scraps of Basic White same width as the step at 2 ½” to die cut the “hills” and varied the height, lower in the front, but taller in the back.
For the basic instructions how to create a side step card you can refer to this video I made in this post HERE. The measurements are slightly different for this particular card because of the window frame which is much wider.
Cutting guide
Please note metric measurements are in Bold in brackets.
- Card base : Basic White Thick 5 ½” x 8 ½” (14 cm x 21 .5 cm). Short side on top, align left edge at 3″ and cut from 2″ down to 7 ½”. (Metric: align left edge at 7.5 cm and cut from 5.5 cm down to 19 cm)
- Orient Basic White Thick c/s so that the long side is at the top and the wider section (3″ or 7.5 cm) is at the bottom. Also ensure the start of the cut line at 1″ (2.5 cm) is on the left. Partially score to the cut line at 1″, 2″, 3 ¼”, 4 ½” and 6 ½” (*2.5 cm, 5 cm, 8 cm, 11 cm and 16 cm). Note: *Metric measurements were rounded off so it might not be as precise as Imperial, but once it’s stood up, you won’t notice. If it really bothers you, then trim off any excess when card is closed and lying flat.
- Rotate Basic White card base 180 degrees so that the wide section is now at the top and the first 1″ (2.5 cm) is on the left. Score at 4 ¼” (10.75 cm).
- Tease the step folds on the narrow side, first one is a Mountain fold, then alternate with Valley and Mountain until the end. Last one should be a Mountain fold and the single score line on the wider left side is a Mountain fold.
Decorating
- Scraps of Soft Succulent for die cutting window frame
- Scraps of Basic white for cutting the hillocks and stamping the houses, roofs, candle and flame.
- Evening Evergreen Glimmer paper for die cutting trees.
Back of card
- Small step : Soft Succulent Mat layer 1 ⅞” x 2 ⅜” (4.5 cm x 6 cm)
- Mat layer 2 small step : Basic White 1 ¾” x 2 ¼” (4 cm x 5.5 cm)
- Tall step : Soft Succulent Mat layer 2 ⅞” x 4 ⅛” (7 cm x 10 cm)
- Mat layer 2 tall step : Basic White 2 ¾” x 4″ (6.5 cm x 9.5 cm)

Decorate it as you wish – I used the Window Wishes Bundle with the Window dies. There are 16 dies in the set and they were used to create this adorable winter scene. The trees were cut from Glimmer 12″x 12″ (30.5 x 30.5 cm) Specialty paper. They come in a pack of 6 sheets with 2 each in 3 colours – Evening Evergreen, Gold and Vanilla. I used Evening Evergreen…it’s stunning!
This is the back – somewhere for the greeting and for you to pen a few words.
That’s it for today, short and sweet. Before going, I want to wish all the Demos who are attending OnStage a happy trip and reunion in Vienna! Sadly, I can’t go, but had paid to watch the video recording of the event later. Have fun!
Supply list
Listed below is the supply list. Just click on the picture to take you directly to the item in my online store.
Product List")
")

 Vellum")
 Specialty Paper")


Thanks for visiting. I would love to know what you think of my project and would appreciate it if you could leave a comment. To visit the next person on the list and see their fabulous creations, simply click on the link below or before my name depending who you visited initially. Happy hopping!

- SHOP ONLINE – EARN 10% REWARDS ON ALL PURCHASES OVER £20
- PURCHASE A STARTER KIT : Get £155 worth of products for only £99. Choose from current catalogues and any specials available. Free Shipping. Read more
- Subscribe to my Video Tutorials – click here