
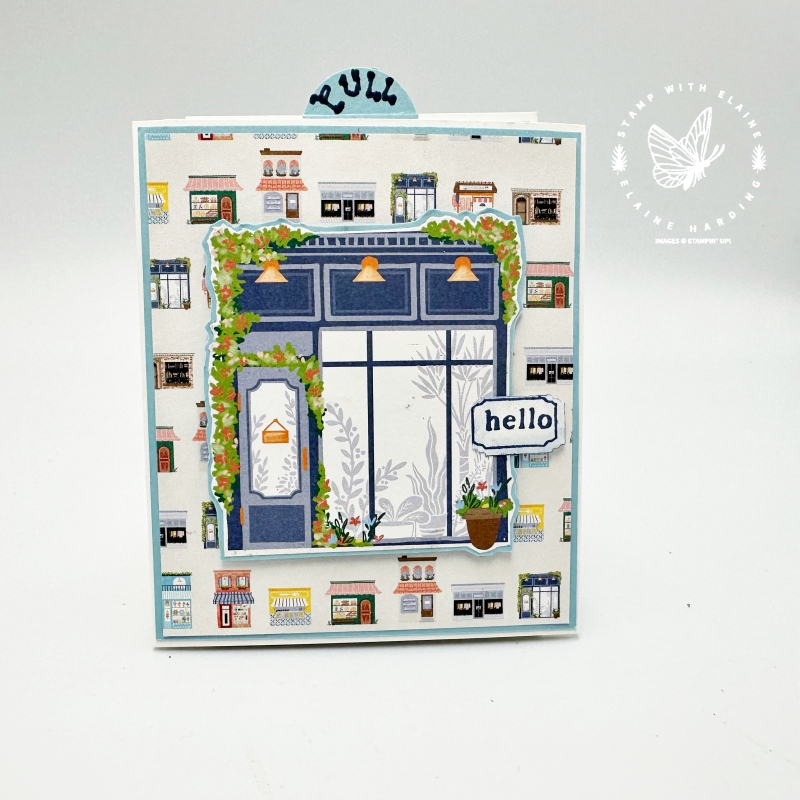
I have a triple tier slider card using the Let’s Go Shopping bundle in today’s post. If you haven’t got this set yet, why not take advantage of the current Bonus Days promotion? There are only 4 more days before the Bonus Days promotion ends.
Just a reminder that during the Bonus Days period, you earn a £4.50 coupon for every £45 spend excluding shipping/handling and this bundle is £45.00 so essentially you’re getting 10% off on top of the bundle price saving of 10%. Make sure you provide a valid email address at check out so that the coupons can be emailed to you. The coupons can be redeemed from 1-31 August, 2023.
The first time I tried my hand at making this triple tier slider card was way back in April 2011. You can see the card HERE and it took me another year before I made another! At the time of creating the cards, I was fairly new to blogging. I didn’t start my foray into making video tutorials until much later in 2014 so I didn’t have any record of the measurements or steps to duplicate this fun fold today. So it’s back to the drawing board, I’m afraid!
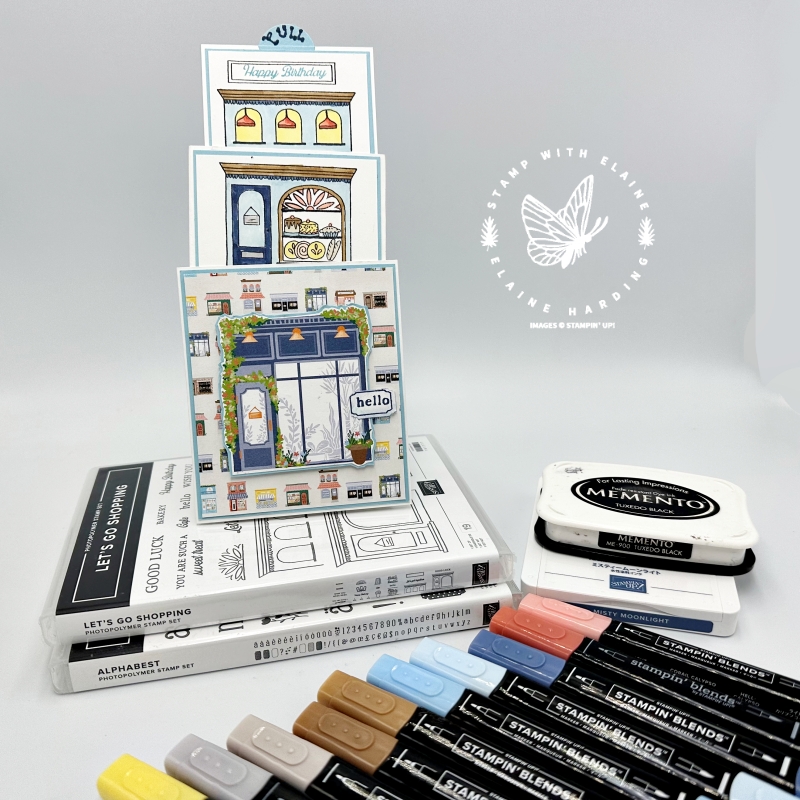
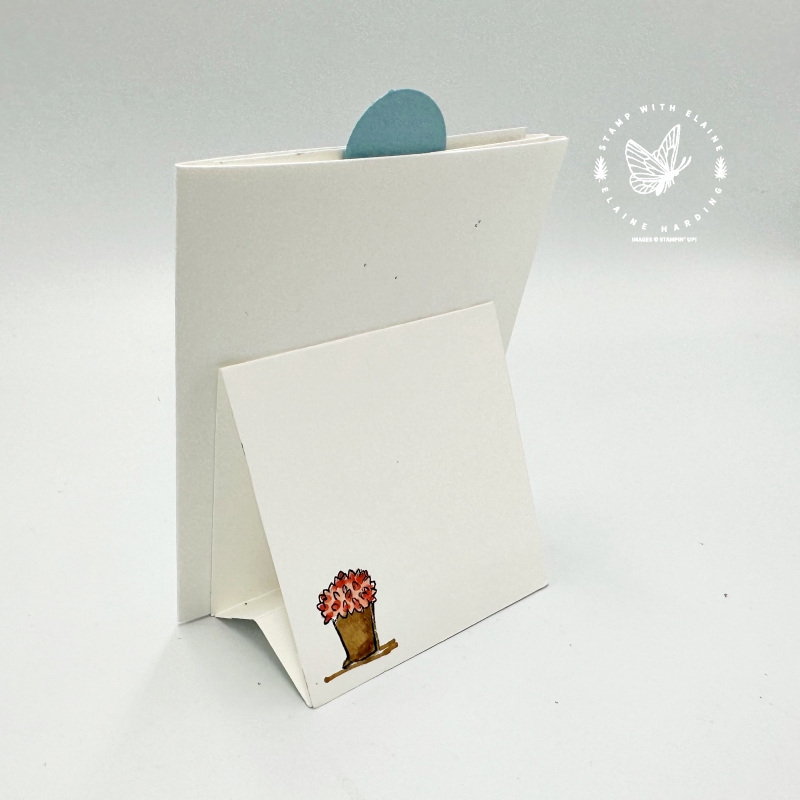
With slider cards, they usually lie flat, so I’ve incorporated a stand which adds to the bulk so you may require extra postage if you’re posting it. It also doubles up as a place to address the recipient and sign off.
Cutting guide
Imperial
- Bottom Layer Basic White : 11 ⅝” x 4 ½”. Long side on top score at 3 ⅞” and 7 ¾”.
- On 3rd panel of Bottom Layer, align the 7 ¾” score line to left of cutting groove at 1” and cut from ½” down to 3”. Then align right edge at 1” to right of cutting groove and cut from ½” down to 3”.
- Middle Layer Basic White : 3 ⅛” x 10 ¼”. Long side score at 3 ⅜” and 6 ⅞”.
- Just as for the Bottom layer, on the 3rd panel of Middle layer align the 6 ⅞” score line at 1” to left of cutting groove and cut from ¼” down to 2 ½”. Next align left edge 1” to right of cutting groove and cut from ¼” and cut from ¼” down to 2 ½”.
- Top layer Basic White : 3″ x 3″
Slider mechanism
Any scrap of DSP will do, it won’t be seen
- Bottom panel – 1 x ½” x 3 ¼”
- Middle panel : 1 x ½” x 3”
First Mat layer Balmy Blue card stock
- Bottom piece : 1 x 3 ¾” x 4 ⅜”
- Middle piece : 1 x 2 ¼” x 3 ¼”
- Top piece : 1 x 2 ¼” x 2 ⅞”
Second Mat layer Basic White
- Middle piece : 1 x 2 ¼” x 3 ¼”
- Top piece : 1 x 2 ¼” x 2 ⅞”
Bottom Mat layer Les Shoppes DSP
- Cut DSP at 3 ⅝” x 4 ¼”
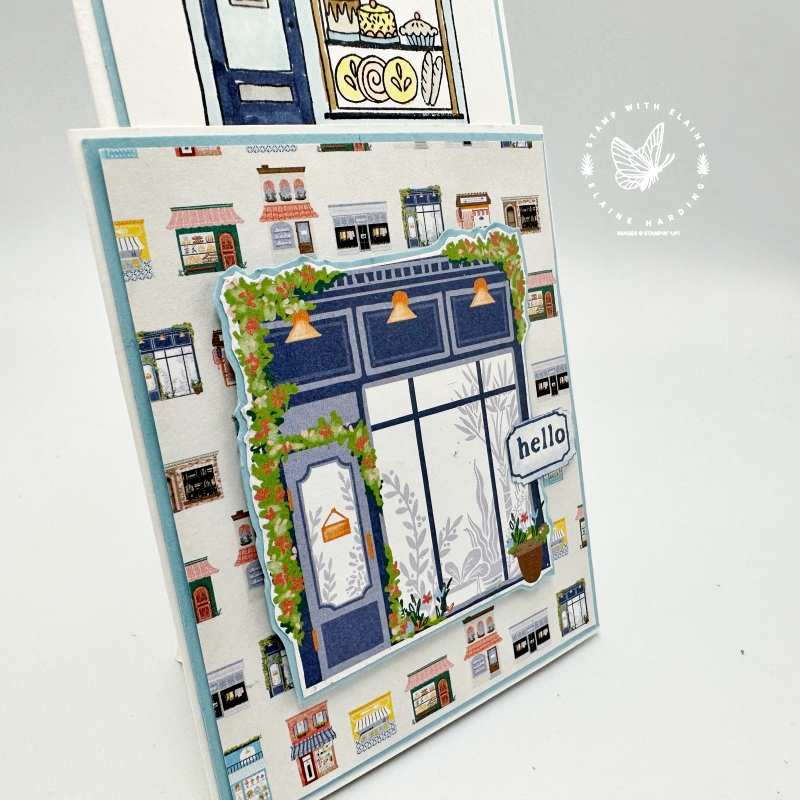
- Select one of the shop fronts from DSP and fussy cut
- Adhere fussy cut shop front to card stock and fussy cut leaving a small border
- Attach to bottom panel with dimensionals
Stand for the back
You need somewhere to address the recipient and sign off so I’ve included a stand for the back.
- Basic White 3” x 8 ½”
- On the long side score 3”, 6”, 7”, 8”.
Metric
- Bottom Layer Basic White : 28.5 cm x 11.5 cm. Long side on top score at 9.5 cm and 19 cm.
- On 3rd panel of Bottom Layer, align the 19 cm score line to left of cutting groove at 1.5 cm and cut from 1.3 cm down to 7.5 cm. Then align right edge at 2.5 cm to right of cutting groove and cut from 1.3 cm down to 7.5 cm.
- Middle Layer Basic White : 8.5 cm x 25.5 cm. Long side score at 8.5 cm and 17 cm.
- Just as for the Bottom layer, on the 3rd panel of Middle layer align the 17 cm score line at 2.5 cm to left of cutting groove and cut from 0.5 cm down to 6.5 cm. Next align left edge 2.5 cm to right of cutting groove and cut from 0.5 cm down to 6.5 cm.
- Top layer Basic White : 7.5 cm x 7.5 cm.
Slider mechanism
Any scrap of DSP will do, it won’t be seen
- Bottom panel – 1 x 1.3 cm x 9.5 cm
- Middle panel : 1 x 1.3 cm x 7.5 cm
First Mat layer Balmy Blue card stock
- Bottom piece : 1 x 9 cm x 11 cm
- Middle piece : 1 x 6 cm x 8 cm
- Top piece : 1 x 6 cm x 7 cm
Second Mat layer Basic White
- Middle piece : 1 x 5.5 cm x 7.5 cm
- Top piece : 1 x 5.5 cm x 6.5 cm
Bottom Mat layer Les Shoppes DSP
- Cut DSP at 9 cm x 11 cm
- Select one of the shop fronts from DSP and fussy cut
- Adhere fussy cut shop front to card stock and fussy cut leaving a small border
- Attach to bottom panel with dimensionals
Stand for the back
You need somewhere to address the recipient and sign off so I’ve included a stand for the back.
- Basic White 7.5 cm x 21.5 cm
- On the long side score 7.5, 15, 17.5 cm, 20 cm.
Video Tutorial
Supply list
Listed below is the supply list. Just click on the picture to take you directly to the item in my online store.
Product List")
")


 Designer Series Paper")


- SHOP ONLINE – EARN 10% REWARDS ON ALL PURCHASES OVER £20
- PURCHASE A STARTER KIT : Get £155 worth of products for only £99. Choose from current catalogues and any specials available. Free Shipping. Read more
- Subscribe to my Video Tutorials – click here