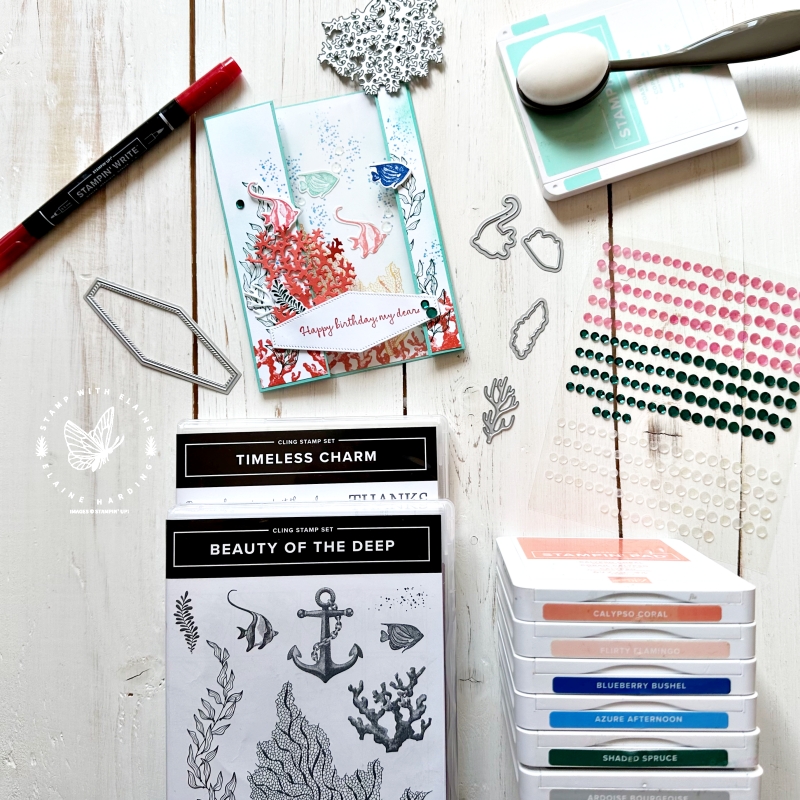
Learn how to make a see-through card with Beauty of the Deep. At the height of summer we love being by the sea. One of summer’s popular pursuits is snorkelling and if you’re lucky enough to be by a coral reef, you can marvel at its beauty.
Many years ago we were at Rockhampton in Perth, Western Australia and we went snorkelling with the dolphins. With my asthma, wearing the equipment and trying to breath in the water freaked me out. We had to squeeze ourselves into wet suits but while hubby was in his element, I had a panic attack and couldn’t breathe, so my experience was cut short. I was quite happy observing from the safety of the deck and didn’t mind not being in the water at all. Anyway, back to the card….
I’m going to try and re-create a coral reef scene with the Beauty of the Deep stamps and dies. Let me know whether or not I succeeded!

Coral Reefs and the life within it are so colourful so needless to say, I’ve used ALOT of inks!
- Azure Afternoon
- Blueberry Bushel
- Calypso Coral
- Coastal Cabana
- Daffodil Delight
- Shaded Spruce
- Smoky Slate
- Real Red. Stampin’ Write marker

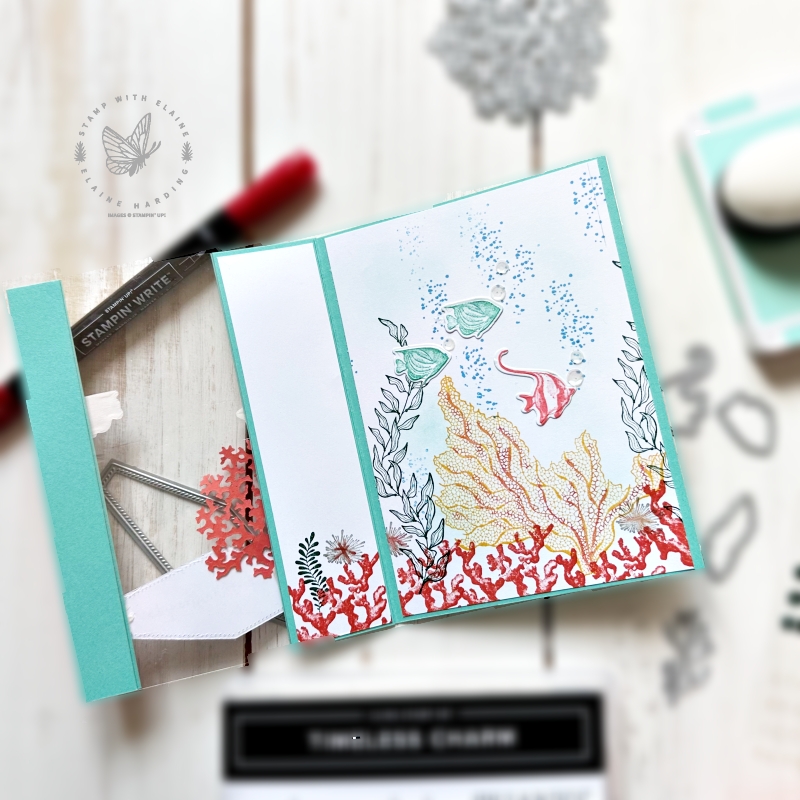
Here’s the inside of the card. You can see how I sandwiched the window sheet between the front and back layers of the card to hide the adhesive strips. It also enabled me to add slim piece of Basic White where you can address the recipient.
Cutting guide
- Card Base : Coastal Cabana 5 ¾” x 5 ¾” (14.5 x 14.5 cm). Score one side at 1 ½” (4 cm).
- Cut 1 strip in Coastal Cabana 1 ½” x 5 ¾” (4 cm x 14.5 cm)
- 2 pieces Coastal Cabana strips cut at ¾” x 5 ¾” (2 cm x 14 cm)
- Basic White piece for inside the card 1 ⅜” x 5 ⅝” (3.5 cm x 14 cm)
- Card stock for stamping ocean scene : Basic White 5 ⅝” x 6” (14 cm x 15.2 cm). Once completed stamping, rotate stamped scene upside down. Align left edge at ⅝” (1.5 cm) and cut. Next align left edge at 4″ (10 cm) and cut. You will have three pieces of card stock with a continuous scene.
- First one measuring 1 ⅜” x 5 ⅝” (3.5 cm x 14 cm)for the front panel on the left (where the fold is)
- Second one for the front panel on the right measures ⅝” x 5 ⅝” (1.5 cm x 14 cm)
- Third is the largest piece for the inside of the card base measuring 4″ x 5 ⅝” (10 cm x 14 cm).
- Window Sheet – cut 3 ⅛” x 5 ¾” (8 cm x 14.5 cm)
- Scraps of Calypso Coral and Basic White for stamping and die cutting elements.
- Adhesive sheet attached to back of 2″ x 4″ strip of Basic White.
Video Tutorial
Supply list
Listed below is the supply list. Just click on the picture to take you directly to the item in my online store.
Product List
- SHOP ONLINE – EARN 10% REWARDS ON ALL PURCHASES OVER £20
- PURCHASE A STARTER KIT : Get £155 worth of products for only £99. Choose from current catalogues and any specials available. Free Shipping. Read more
- Subscribe to my Video Tutorials – click here


