
Second altered card from the Painted Wishes kit. Having made 3 note cards from one of the card designs which you can see HERE, I challenged myself on how to yield two cards from another design.
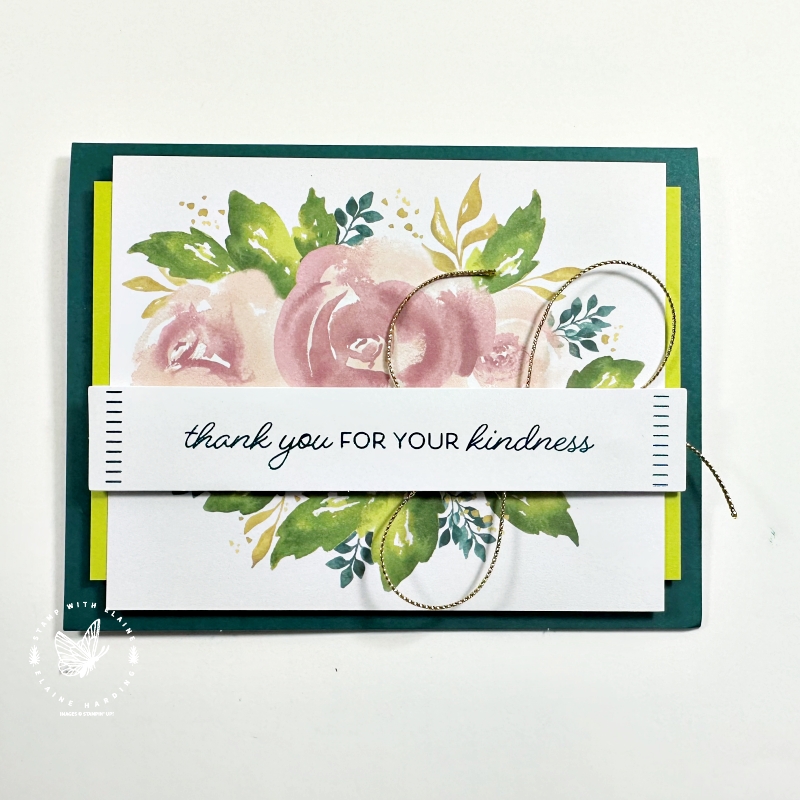
Original design card
Altered card #1
The Pretty Peacock card base was cut in half – I used one half to create the card front to this first card.
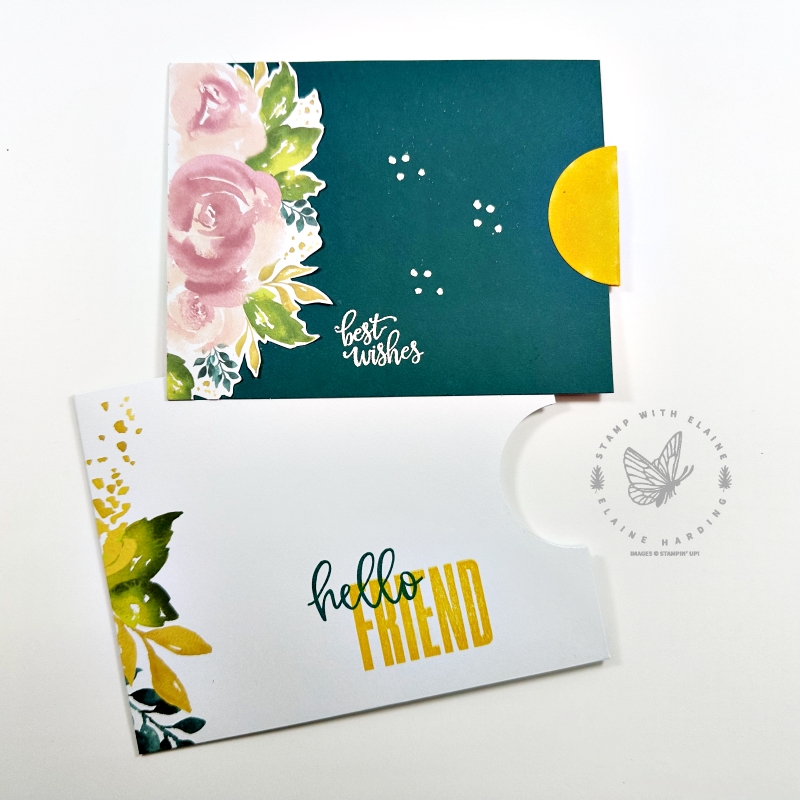
Envelop
- Seal the envelop. Trim 1/16″ on opposite side of floral side of envelop.
- Punch a finger hole with 1 ¾” circle punch. Set aside both these semi-circles.
- Stamp “Friend” from Biggest Wish stamp set in Daffodil Delight ink.
- Next stamp “hello” overlapping “Friend” in Pretty Peacock ink.
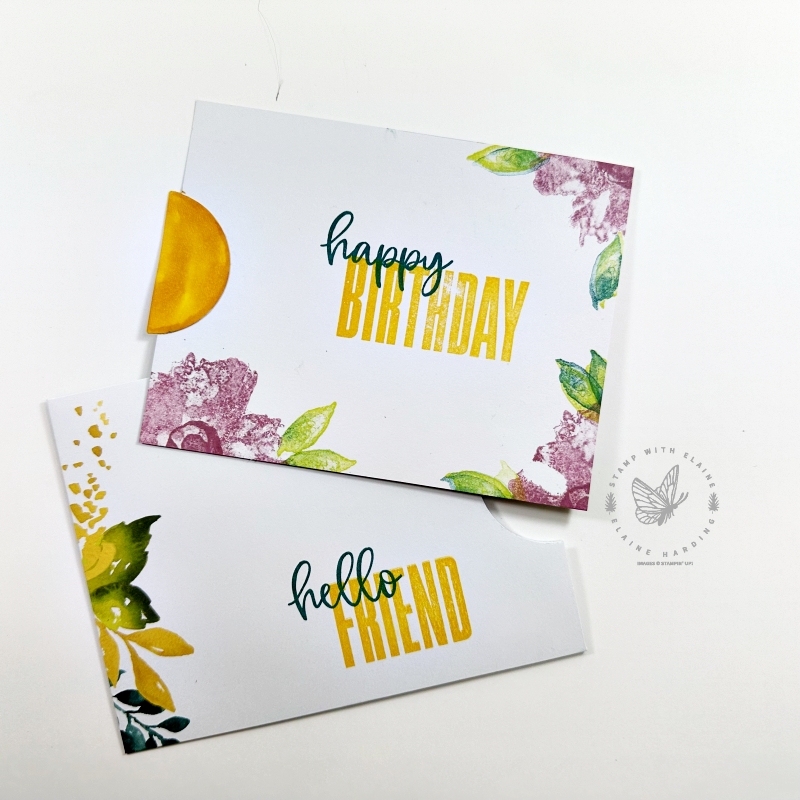
Front of card
- Colour the semi-circles with Daffodil Delight dark Stampin’ Blends.
- Fussy cut the floral element and adhere it to the Pretty Peacock side. You want a straight edge so trim card from floral end so that it measures 5 ⅜” x 4 ¼” (14.3 cm x 10.8 cm).
- Insert card into pocket and using envelop finger hole as guide, adhere Daffodil Delight semi-circles front and back.
- Stamp with Versamark ink “best wishes” and little dots from Artistically Inked stamp set. Sprinkle with white embossing powder and heat set.
Reverse of card
- Stamp “Birthday” in Daffodil Delight and “happy” in Pretty Peacock.
- On the 3 corners, stamp floral images partially off card in Moody Mauve. I stamped off first for a lighter shade of Moody Mauve.
- Stamp the leaves in Lemon Lime Twist.
- Clean and ink stamp in Pretty Peacock, stamp off, and stamp the leaves again.
Altered card #2
Use the second half of the card base as a mat layer. Additional supplies is some extra card stock and one of the new Online Exclusives “Fun Patterns” standard embossing folders. These come in a pair and fit the mini Stamp n’ Cut & Emboss Machine. The sandwich for standard embossing folders is the white platform 1 and the light grey platform 3.
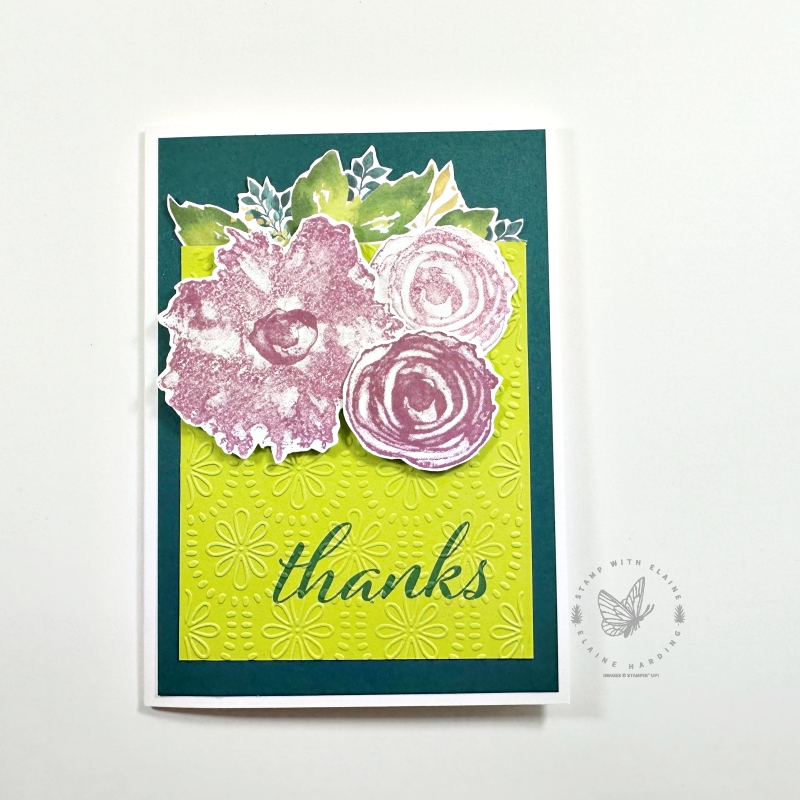
Card front
- Cut a card base in Basic White Thick 5 ¾” x 8 ¼” (14.5 cm x 21 cm) and fold in half.
- Fussy cut the leaves.
- Trim the Lemon Lime Twist layer to 4″ x 3 ⅜”.
- Stamp “thanks” in Pretty Peacock from Artistically Inked stamp set.
- Emboss it with the floral pattern of the Fun Patterns embossing folder.
- Adhere fussy cut leaves to back of embossed Lemon Lime Twist layer.
- On scraps of Basic White card stock, stamp 1 large flower and 2 small ones. Stamp 1st generation on the first small flower and without re-inking, stamp a 2nd generation small flower.
- Fussy cut all three flowers. (note : there are dies to match, but I fussy cut mine)
- Apply dimensionals on the back of largest flower and the 1st generation stamped small flower.
- Adhere large flower on top left, tuck and adhere 2nd generation small flower directly on to mat layer underneath large flower.
- Adhere 1st generation flower on dimensionals on partially on top of both flowers as shown.
- Next adhere this to the Pretty Peacock mat layer and then on to card base
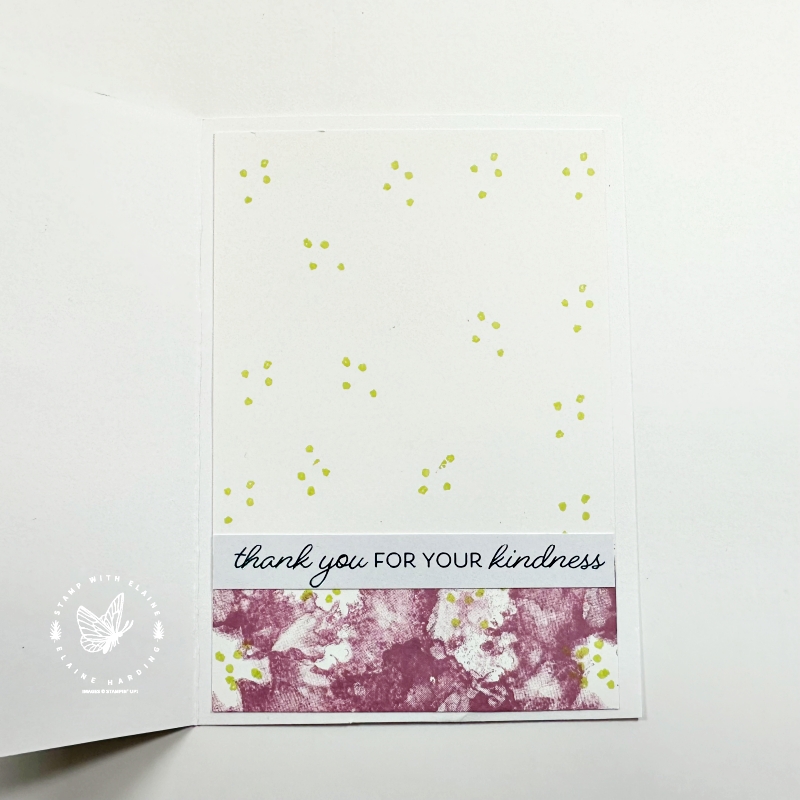
Inside card
- Cut Basic White inside layer 3 ¾” x 5 ½” (9.5 cm x 14 cm)
- Stamp a border in Moody Mauve at the bottom (stamp off first)
- Randomly stamp the little dots above this border all over in Lemon Lime Twist ink. You can omit this step, I did this to hide the accidental smudge!
- Trim and adhere the sentiment from the kit “thank you FOR YOUR kindness” as shown.
Supply list
Listed below is the supply list. Just click on the picture to take you directly to the item in my online store.
Product List
")


- SHOP ONLINE – EARN 10% REWARDS ON ALL PURCHASES OVER £20
- PURCHASE A STARTER KIT : Get £155 worth of products for only £99. Choose from current catalogues and any specials available. Free Shipping. Read more
- Subscribe to my Video Tutorials – click here