
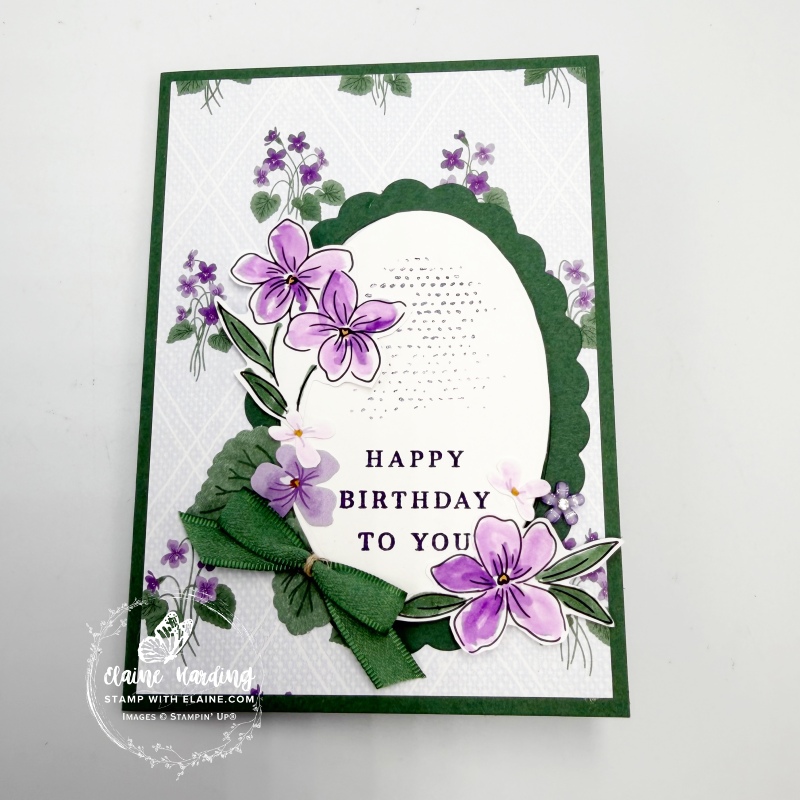
Sneak peek – July Online exclusive. Here’s a sneak peek of the July Online exclusive. This is from the Violet Dreams Suite Collection. It’s an ensemble with beautiful florals and lovely coordinating paper, stamps and dies, satin ribbon and sparkly floral embellishments.
There’s a lot of birthday cards I need to make in June. As a demonstrator, I have the privilege of being able to purchase products ahead of the release date to the public so I thought I’d give you a sneak peek at one I made recently with this suite. I wasn’t able to get the coordinating ribbon but substituted it with the Peaceful Pine ribbon. The Violet Dreams 12″x 12″ (30.5 x 30.5 cm) Specialty Designer Series Papers have 2 sheets each of 5 double sided and 2 pre-cut sheets. See if you can spot which pieces come from these sheets. There are 7 pieces altogether!
How to make the card front
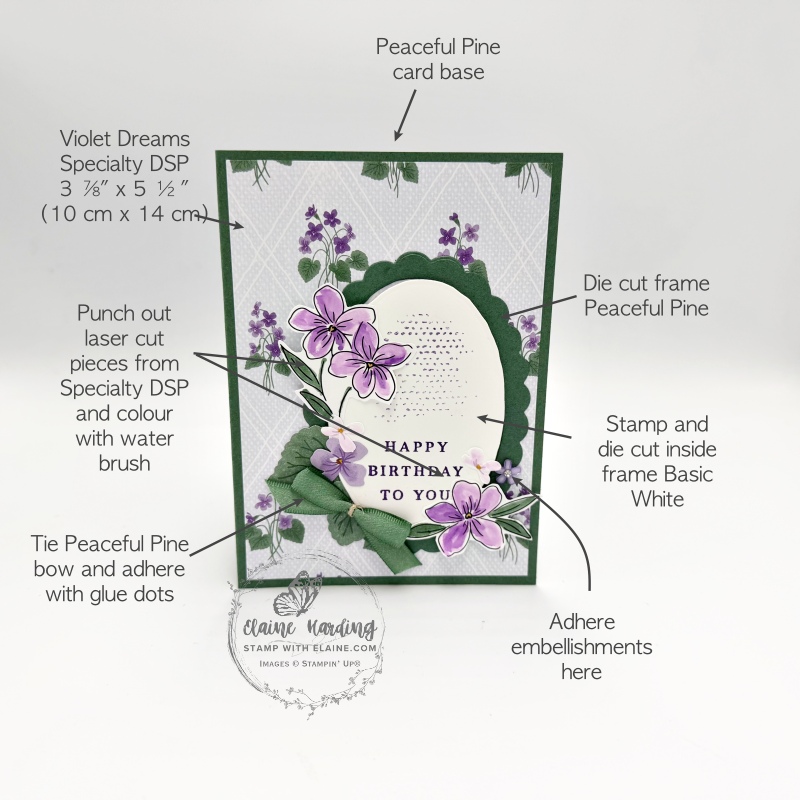
- Card base : Peaceful Pine card stock cut at 5 ¾” x 8 ¼” (14.5 cm x 21 cm) and folded in half.
- Violet Dreams Specialty DSP : card front cut at 3 ⅞” x 5 ½” (10 cm x 14 cm). Adhere to card front leaving an even border on all 4 sides.
- Die cut scalloped frame with Peaceful Pine card stock with Framed Violets die. Apply adhesive on back and adhere directly onto card front as pictured toward bottom right.
- Stamp pattern and sentiment on scrap of Basic White card stock and die cut with corresponding Framed Violets die. Apply dimensionals on the back and align and insert in frame.
- Pop out the black and white floral images from the pre-cut sheets. The white border was too wide for my liking, so I fussy cut them to make it narrower.
- Pick up Gorgeous Grape ink with an acrylic block and use a water brush to colour the black and white floral images. Use Peaceful Pine Stampin’ Blends to colour leaves. Arrange as shown and adhere to card front with dimensionals.
- Pop out a variety of leaves and flowers and arrange as shown to complete vignette.
- Next tie bow and add an embellishment.
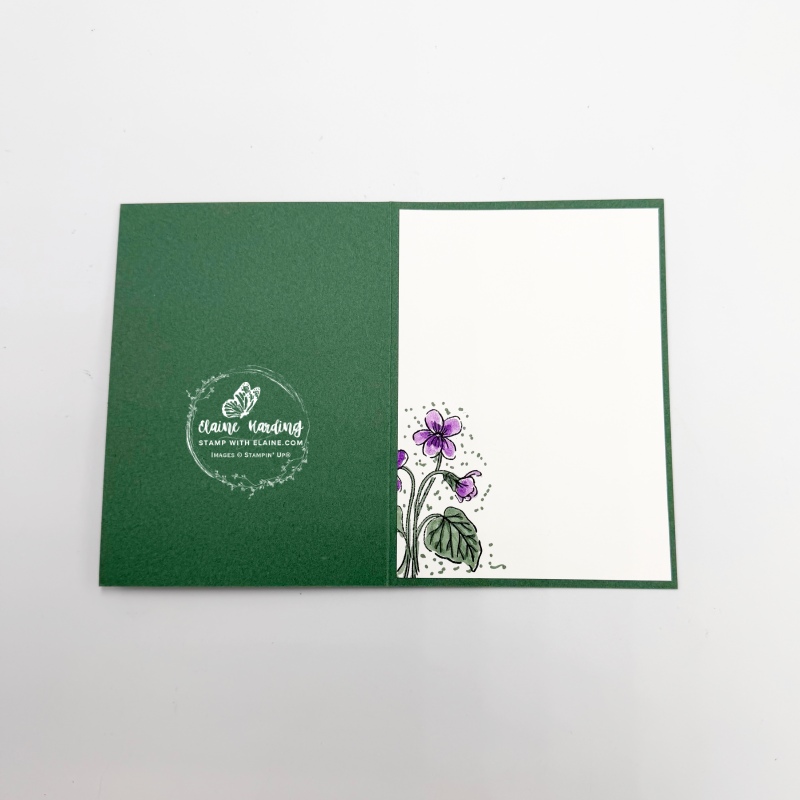
Inside card
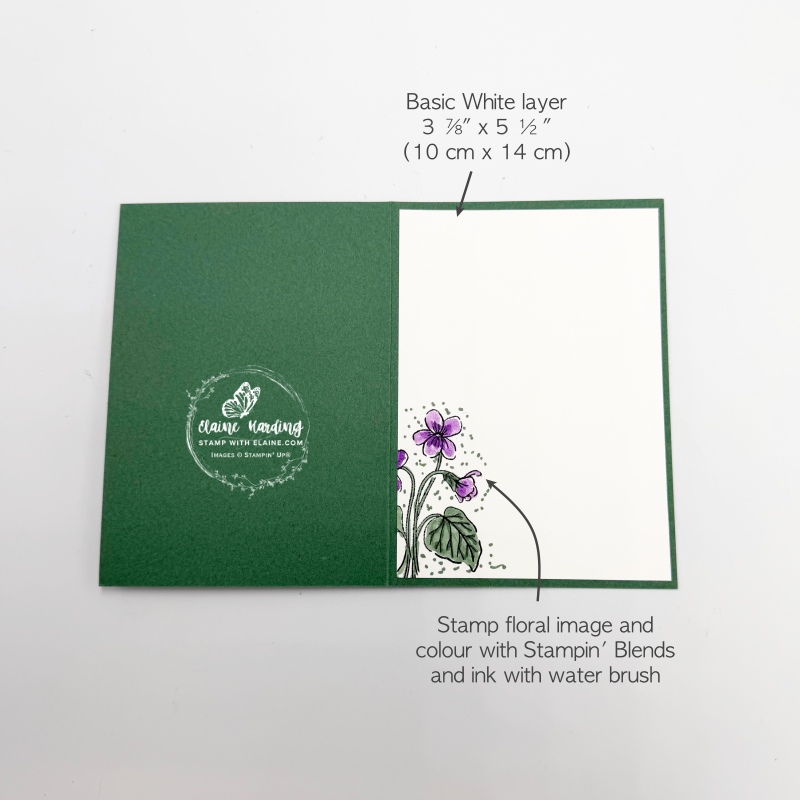
- Cut Basic White layer at 3 ⅞” x 5 ½”(10 cm x 14 cm)
- Stamp outline of image in black (I used Tuxedo Black Memento ink but I think this is retiring). There is a new Basic Black Hybrid Ink available, but it takes a very long time to dry before you can safely colour the images without it smudging.
- Unfortunately there isn’t a Stampin’ Blend combo in Gorgeous Grape. So you can ink up an acrylic block with Gorgeous Grape ink to use as a palette and use a water brush to colour the flowers.
- Colour leaves with Peaceful Pine Stampin’ Blends and adhere layer to inside of card leaving an even border on all 4 sides to complete card.
- Optional : add some dots with the bullet tip of the Stampin’ Blend marker to add interest.
I will add the supply list once it becomes available.

- SHOP ONLINE – EARN 10% REWARDS ON ALL PURCHASES OVER £20
- PURCHASE A STARTER KIT : Get £155 worth of products for only £99. Choose from current catalogues and any specials available. Free Shipping. Read more
- Subscribe to my Video Tutorials – click here