
Sneak peek – coming imminently. In fact it launches this Friday, 10 July! It will be available from 12.00 am in all markets but because of the time difference in EU, the launch date will be 9 July at 11:00 p.m. for the UK and Ireland. I am SO excited! We’ve had to keep it secret for so long! What is it? A new Stampin’ Hot Foil System – a tool for applying hot foil to your projects. Then after it’s been through the hot foiling process on some of the images, you can die cut them as normal with the Stampin’ Cut & Emboss Machine with the 6″ (15.2 cm) wide platform. Unfortunately the Mini Stampin’ Cut & Emboss Machine with the smaller platform is not suitable for the current Hot Foil range.
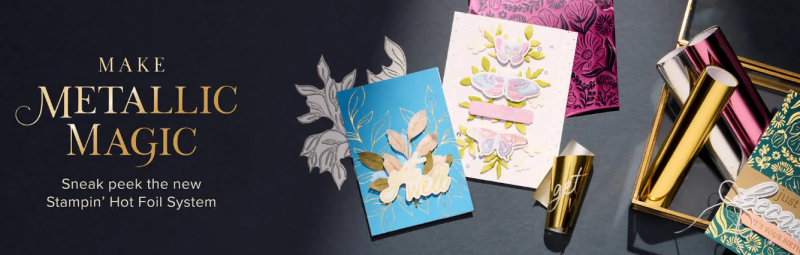
Stampin’ Hot Foil System by Stampin’ Up!
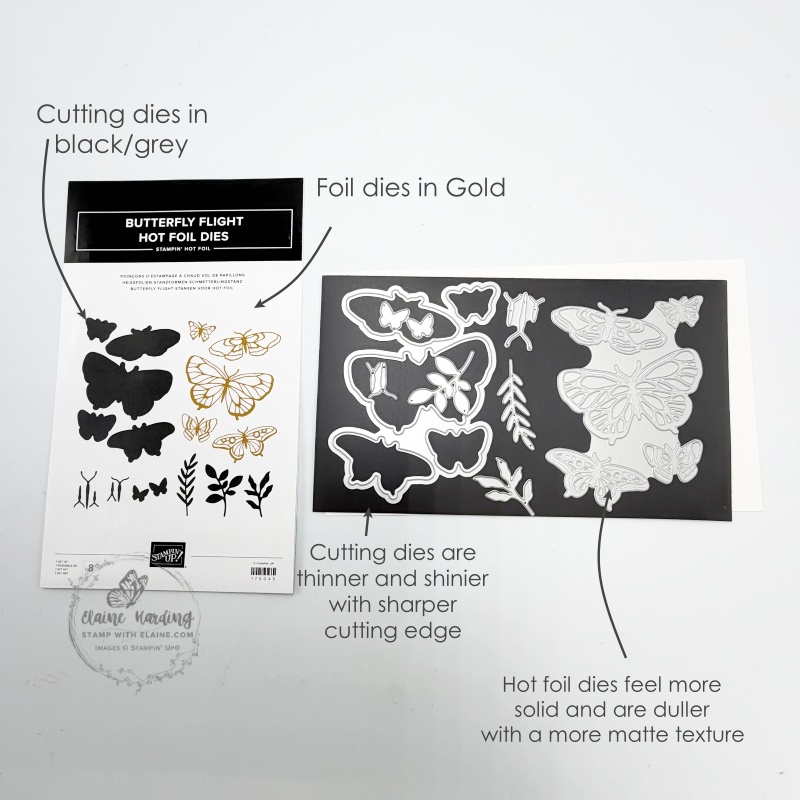
Here’s a teaser as to what to expect! You can tell the difference between a hot foil die which will be marked in gold on the packaging and the usual die cutting dies which appear in a darker grey colour. The foiling dies are thicker and has a matt finish whereas the dies which actually cut out the images are thinner with a sharper edge for die cutting with.
Now take a peek at the video!
As the product has not yet launched to customers, I can’t provide a shop link just yet.
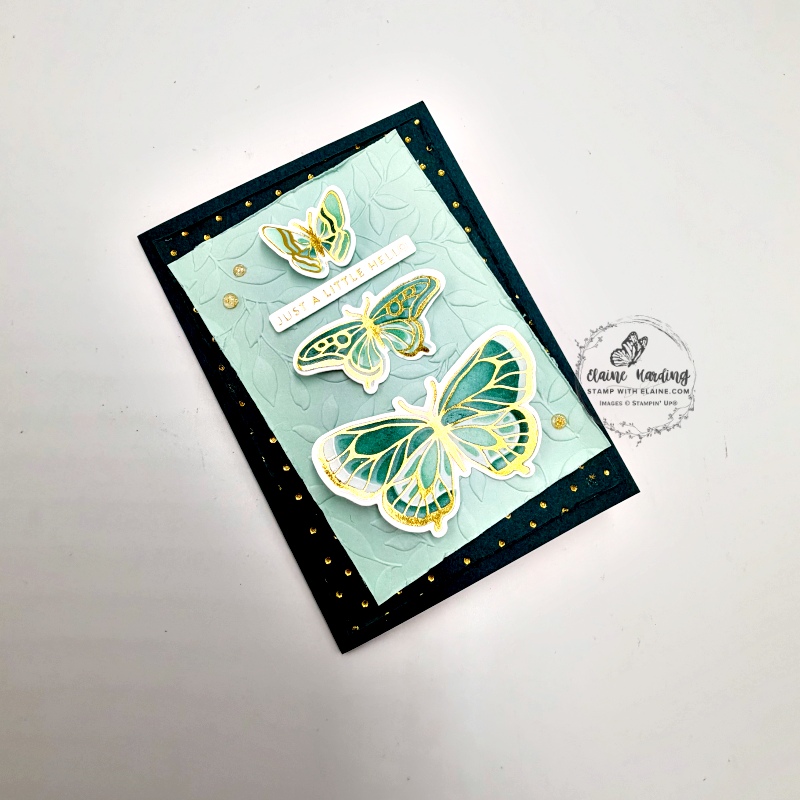
More details are available on July 10 together with a video by Stampin’ Up! experts on how to use the machine. For now, here’s a teaser on the card I made with the Butterfly Flight Bundle which includes the Butterfly Hot Foil Dies and Butterfly Decorative Masks to whet your appetite!
Choosing the right plug and Hot Foil Rolls
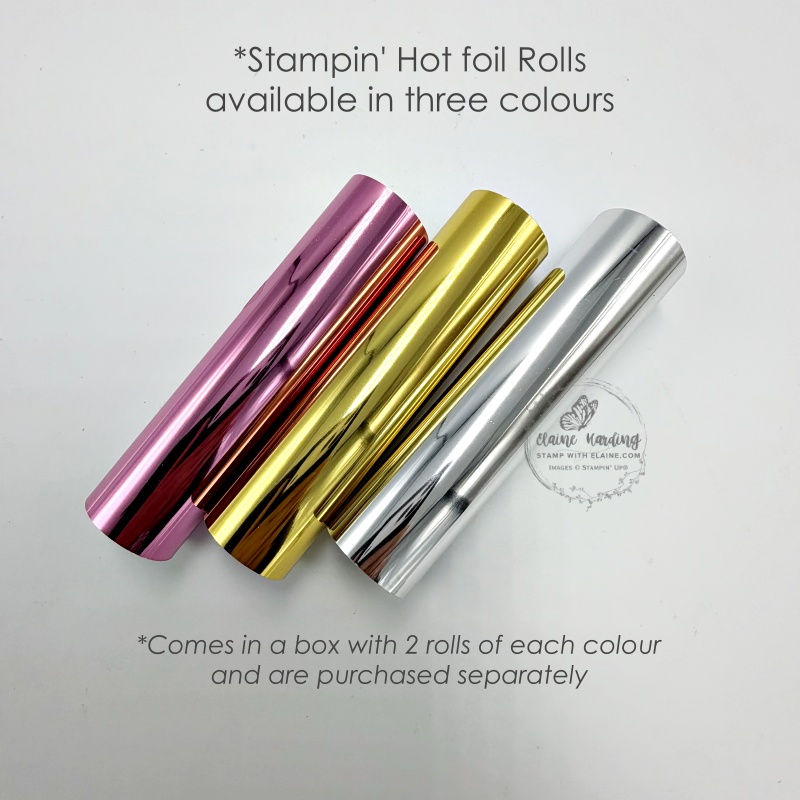
Note: The Stampin’ Hot Foil System includes a Metallic Magic Class up until 4 January 2027. Please be aware that there are different plugs for EU and UK/IE. Make sure you’re ordering the right plug for your market. Also the foils are a separate purchase, so don’t forget to include that in your shopping cart when you purchase the Stampin’ Hot Foil System. There are 3 colours to choose from, each box contains 2 rolls of the same colour.
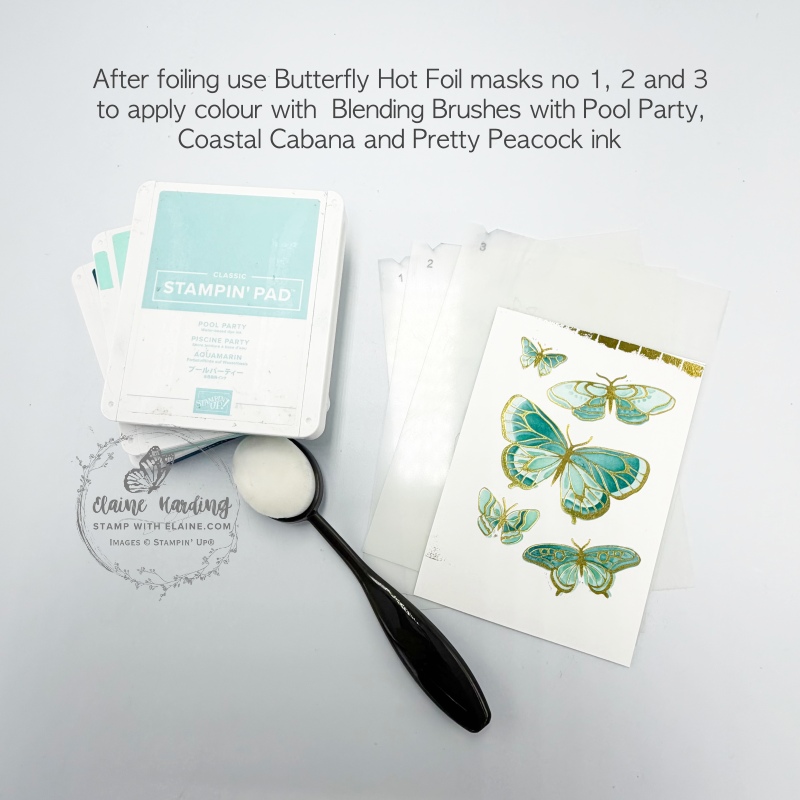
In today’s post, I won’t be covering how to hot foil, but you can check back on Friday 10, July 2026 to see the video tutorial made by Stampin’ Up! experts who will explain the process in detail. In the mean time, here’s a card I made using the Swiss Dots Hot Foil background die, the Butterfly Flight Bundle (which includes Decorative masks) and the Sweetly Sentimental Hot Foil Dies.
Cutting guide
Card front
- Card base : Pretty Peacock cut at 5 ¾” x 8 ¼” (14.5 cm x 21 cm) folded in half.
- Pretty Peacock layer 3 ¾” x 5 ⅜” (9.5 cm x 13.5 cm) – hot foil in Gold with Swiss Dots Hot Foil die. Cut Gold hot foil piece 5″ x 5 ¾” (12.7 cm x 14.5 cm) – not pictured.
- Pool Party layer 3 ⅜” x 4 ⅞” (8.5 cm x 12.5 cm) – emboss with Paradise Garden Hybrid embossing folder.
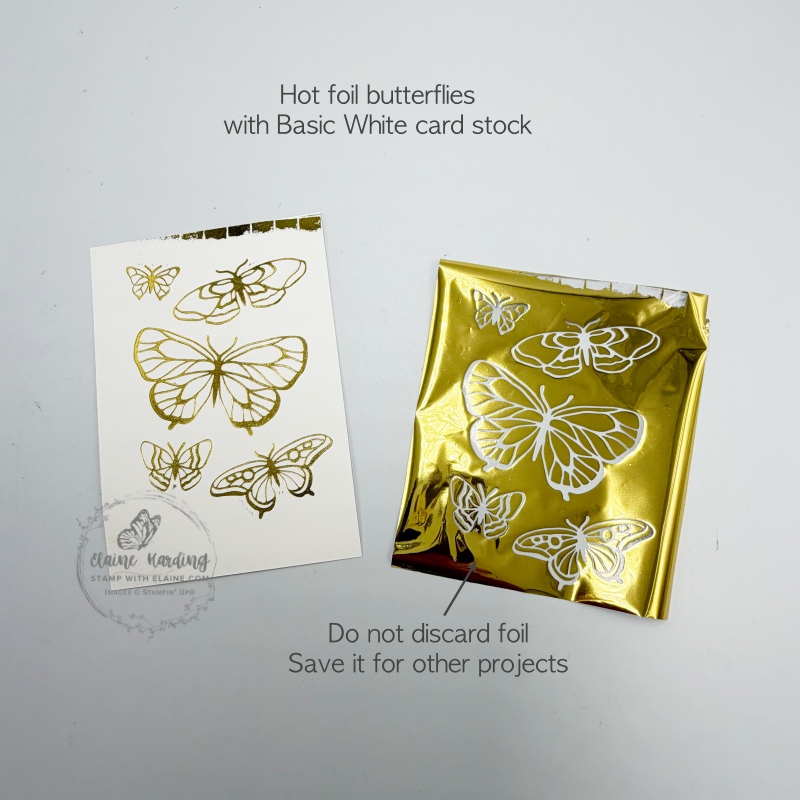
- Gold Hot foil : cut a piece 4″ x 5″ to lay over Butterfly Hot foil die. The foil’s shiny side should be placed face down kissing the hot foil die).
- Basic White card stock 3 ⅞” x 5 ½” (10 cm x 14 cm) to lay on top of the Gold hot foil.
Tip: Do not discard your used up foil. Keep them in a box like a DVD case. They can be used for other projects and gives a distressed, grungy background. You can also store the foil rolls in the video size plastic cases that Stampin’ Up! used to carry. These cases will store 6 hot foil rolls.
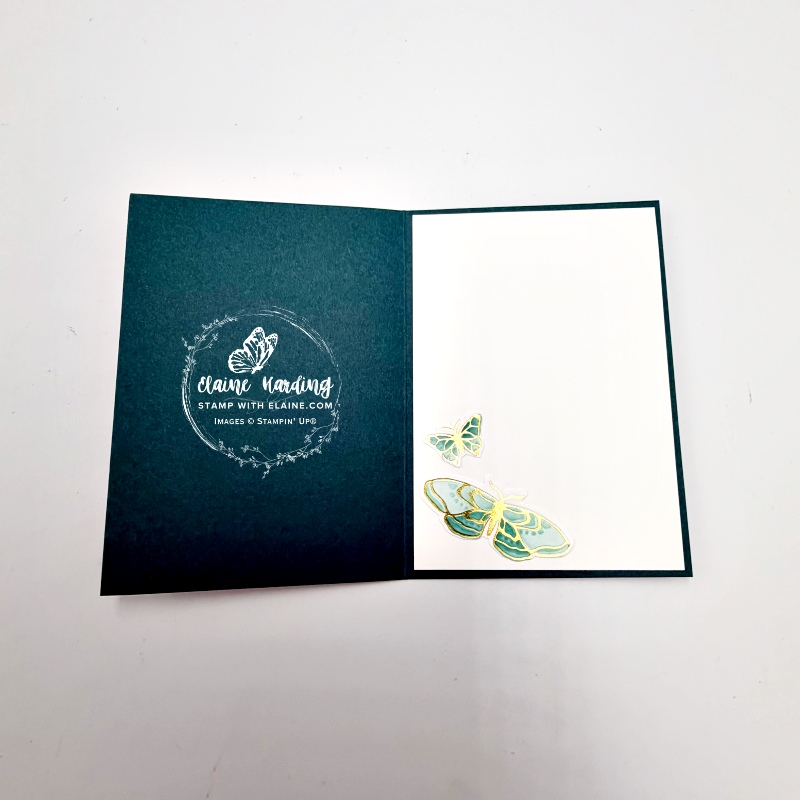
Inside card
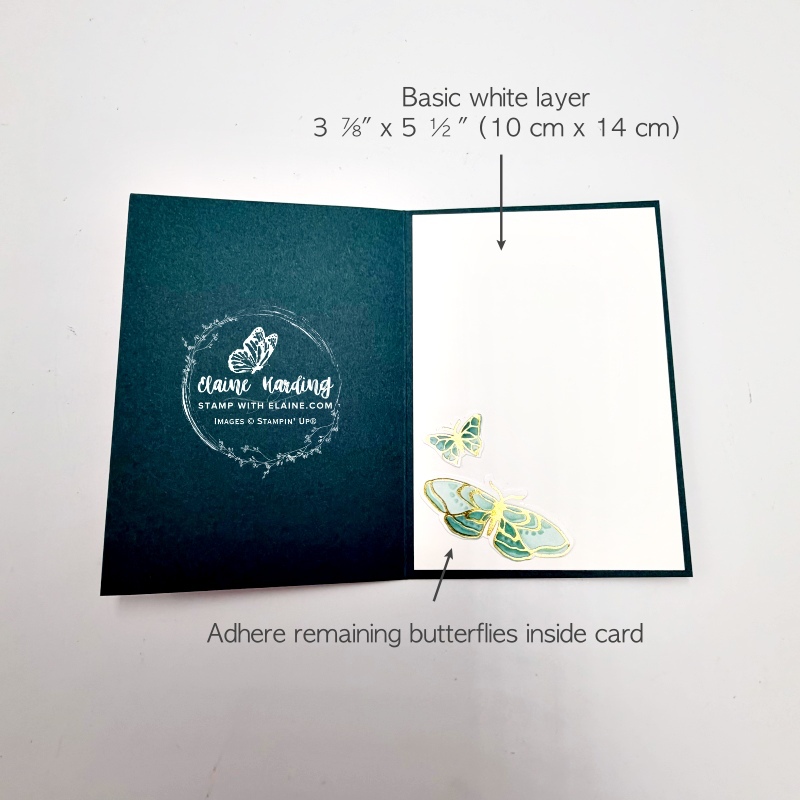
- Basic White layer : 3 ⅞” x 5 ½” (10 cm x 14 cm). Adhere to inside of card base.
- Adhere remaining gold foil butterflies as pictured.
Assembly on card front
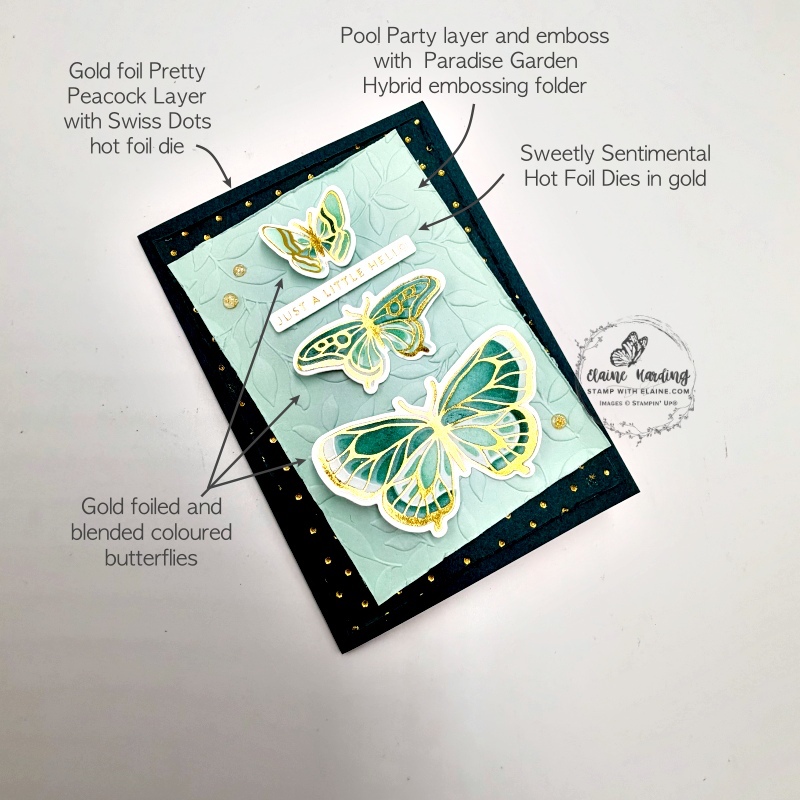
- Hot foil Pretty Peacock layer with Swiss Dots Hot Foil die. Cut layer larger than you need then trim card stock to 3 ¾” x 5 ⅜” (9.5 cm x 13.5 cm). Distress all 4 sides with edge of scissors and adhere to front of card leaving an even border on all 4 sides.
- Distress embossed Pool Party piece and adhere at an angle on top of foiled Pretty Peacock layer.
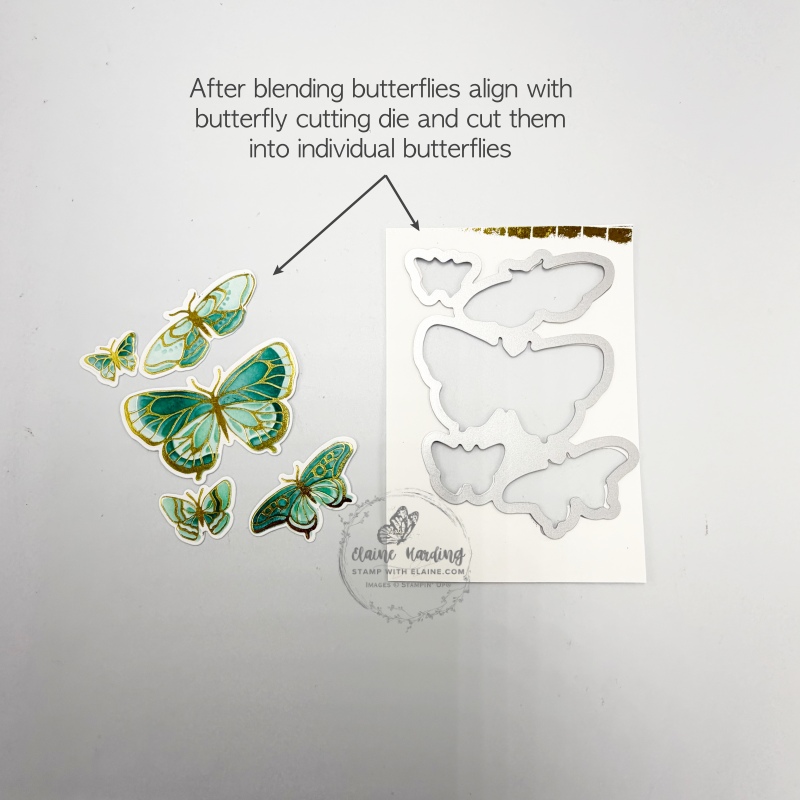
- Apply adhesive to the butterflies on their bodies only and adhere as pictured. Ensure there is a wider gap between the middle butterfly and the smallest butterfly to allow for sentiment.
- Adhere with dimensionals gold foiled Sweetly Sentimental hot foil greeting as shown.
- Finish with embellishments of your choice. I used retired gold foil gems.
Supply list
Listed below is the supply list. Just click on the picture to take you directly to the item in my online store.
Product List![Uk/Ie Stampin' Hot Foil System & Craft Class [ 170011 ]](https://assets1.tamsnetwork.com/images/EC042017NF/170011s.jpg "Uk/Ie Stampin' Hot Foil System & Craft Class [ 170011 ]")
![Butterfly Flight Bundle [ 170065 ]](https://assets1.tamsnetwork.com/images/EC042017NF/170065s.jpg "Butterfly Flight Bundle [ 170065 ]")
![Gold Stampin' Hot Foil Rolls [ 170066 ]](https://assets1.tamsnetwork.com/images/EC042017NF/170066s.jpg "Gold Stampin' Hot Foil Rolls [ 170066 ]")
![Paradise Garden Hybrid Embossing Folder [ 167120 ]](https://assets1.tamsnetwork.com/images/EC042017NF/167120s.jpg "Paradise Garden Hybrid Embossing Folder [ 167120 ]")
![Basic White A4 Cardstock [ 166781 ]](https://assets1.tamsnetwork.com/images/EC042017NF/166781s.jpg "Basic White A4 Cardstock [ 166781 ]")
![Pool Party A4 Card Stock [ 124391 ]](https://assets1.tamsnetwork.com/images/EC042017NF/124391s.jpg "Pool Party A4 Card Stock [ 124391 ]")
![Pretty Peacock A4 Cardstock [ 150886 ]](https://assets1.tamsnetwork.com/images/EC042017NF/150886s.jpg "Pretty Peacock A4 Cardstock [ 150886 ]")
![Pool Party Classic Stampin' Pad [ 147107 ]](https://assets1.tamsnetwork.com/images/EC042017NF/147107s.jpg "Pool Party Classic Stampin' Pad [ 147107 ]")
![Coastal Cabana Classic Stampin' Pad [ 147097 ]](https://assets1.tamsnetwork.com/images/EC042017NF/147097s.jpg "Coastal Cabana Classic Stampin' Pad [ 147097 ]")
![Pretty Peacock Classic Stampin’ Pad [ 150083 ]](https://assets1.tamsnetwork.com/images/EC042017NF/150083s.jpg "Pretty Peacock Classic Stampin’ Pad [ 150083 ]")
![Blending Brushes [ 153611 ]](https://assets1.tamsnetwork.com/images/EC042017NF/153611s.jpg "Blending Brushes [ 153611 ]")
![Stampin' Cut & Emboss Machine [ 149653 ]](https://assets1.tamsnetwork.com/images/EC042017NF/149653s.jpg "Stampin' Cut & Emboss Machine [ 149653 ]")

- SHOP ONLINE – EARN 10% REWARDS ON ALL PURCHASES OVER £20
- PURCHASE A STARTER KIT : Get £155 worth of products for only £99. Choose from current catalogues and any specials available. Free Shipping. Read more
- Subscribe to my Video Tutorials – click here
