
Mystery stamping – Heirloom Boutique. Last month I took part in a mystery stamping event and used the Heirloom Boutique Bundle and coordinating papers. Both the Heirloom Boutique and Bloom Boutique 12″x 12″ (30.5 x 30.5 cm) Specialty Paper is on the Last Chance List. I’m sorry to see it go.
The Bloom Boutique 12″ x 12″ (30.5 x 30.5 cm) Specialty Designer Series Paper are in pastel shades with dainty florals and soft, artistic designs. This paper feels like it was made for a boutique window display. Perfect for card making, memory keeping, and gift packaging and it adds a sweet and timeless touch to every handmade project.
Mystery Stamping
What is mystery stamping? Mystery stamping is an interactive card-making activity where a host gives step-by-step clues of measurements one at a time and participants assemble a unique handmade card using their own craft supplies without knowing what the final design looks like. No Two Alike: Because everyone uses their own choice of colours, stamps, and patterned paper, every finished card turns out completely different.
Double Flap card
This is what I made with the measurements given.
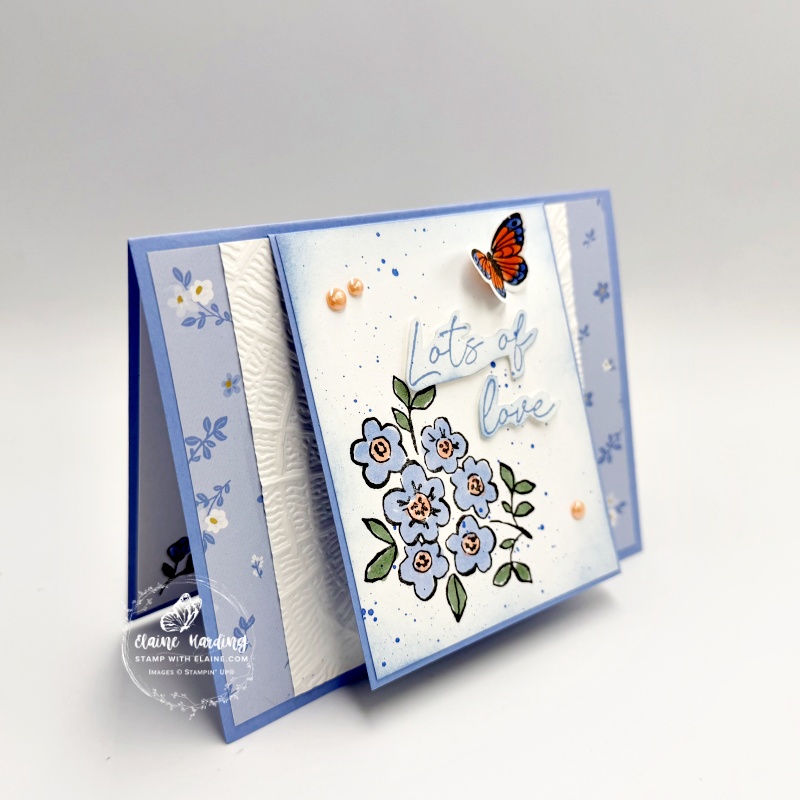
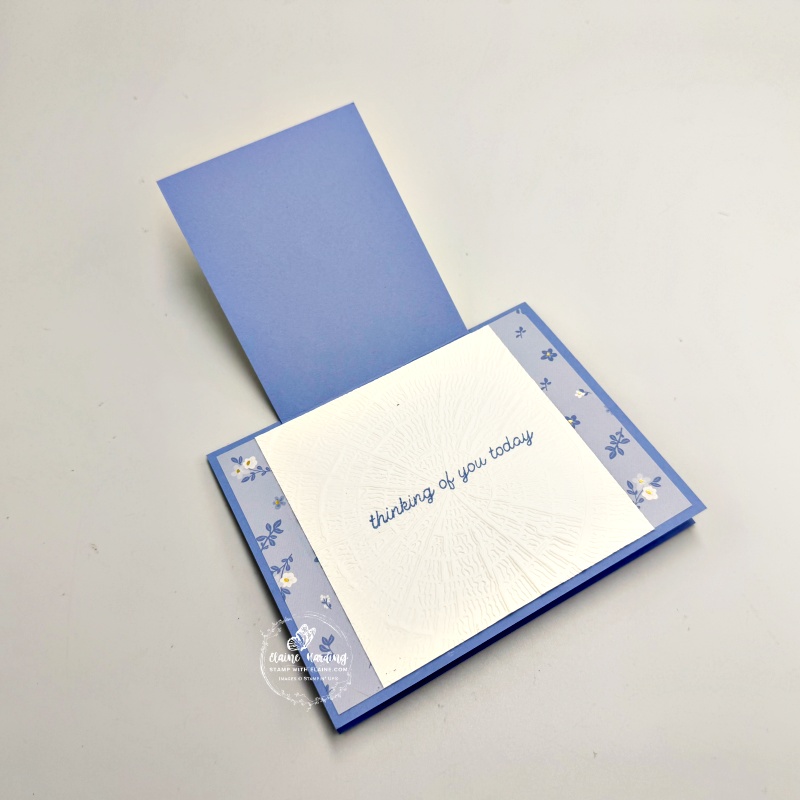
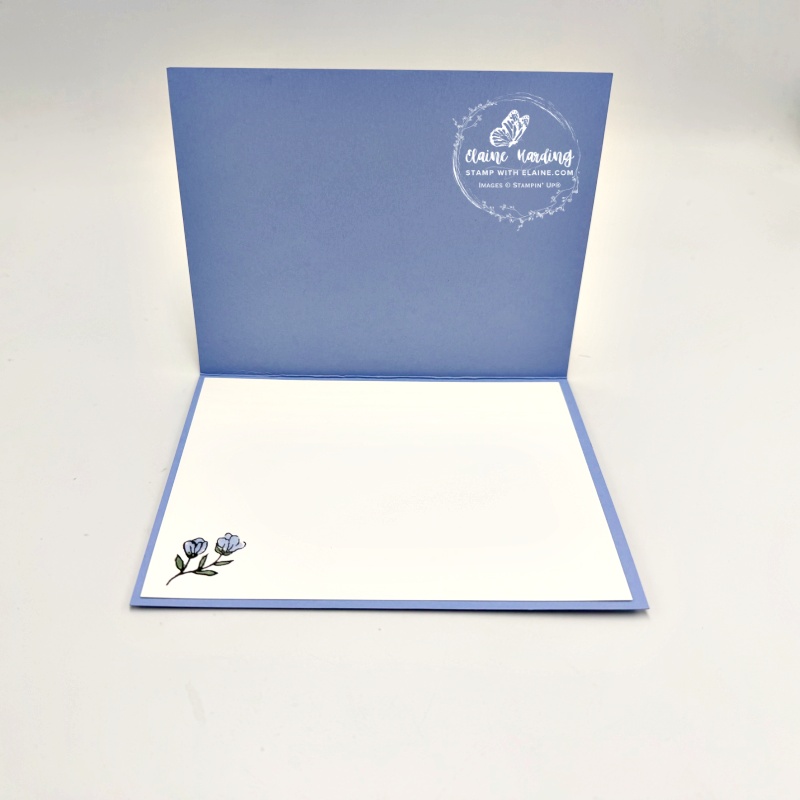
- Card base : Coloured card stock cut at 5 ½” x 8 ½” (14.8 cm x 21 cm) folded in half
- Mini card : Same coloured card stock 3 ¼” x 7 ½” – long side scored at 4″ (8.2 cm x 20 cm – long side score at 10.5 cm)
- Basic White : 1 piece cut at 4″ x 5 ¼” (10.2 cm x 14.5 cm)
- DSP : 4″ x 5 ¼” (10.2 cm x 14.5 cm)
- For Embossing – cut Basic White piece 4″ x 4″ (10 x 10 cm)
- Front mini card : cut Basic White piece 3 ⅛” x 3 ⅞” (7.9 cm x 9.8 cm)
- Basic White for stamping
How to assemble card
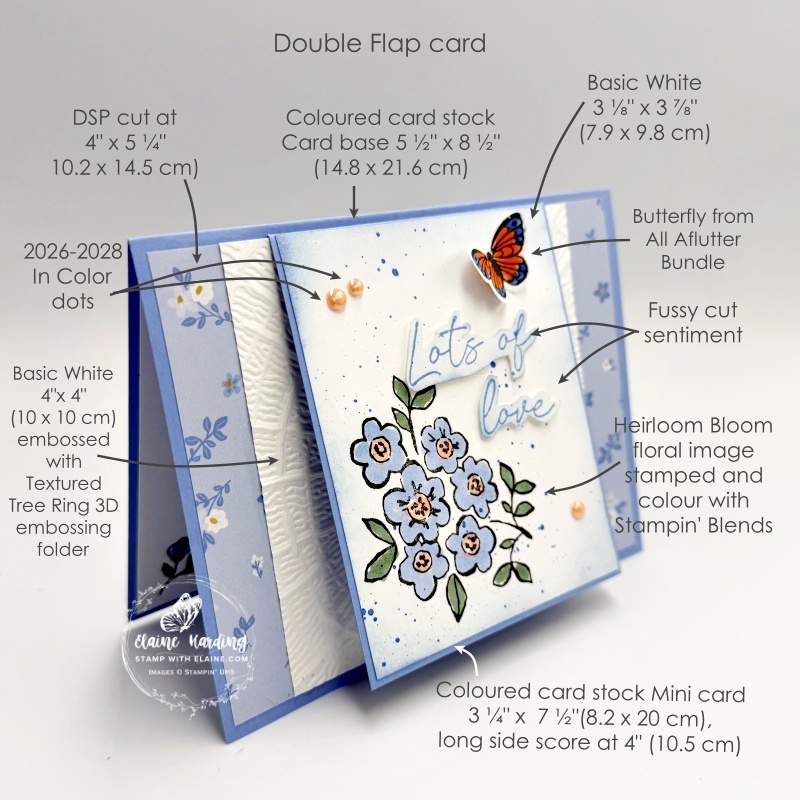
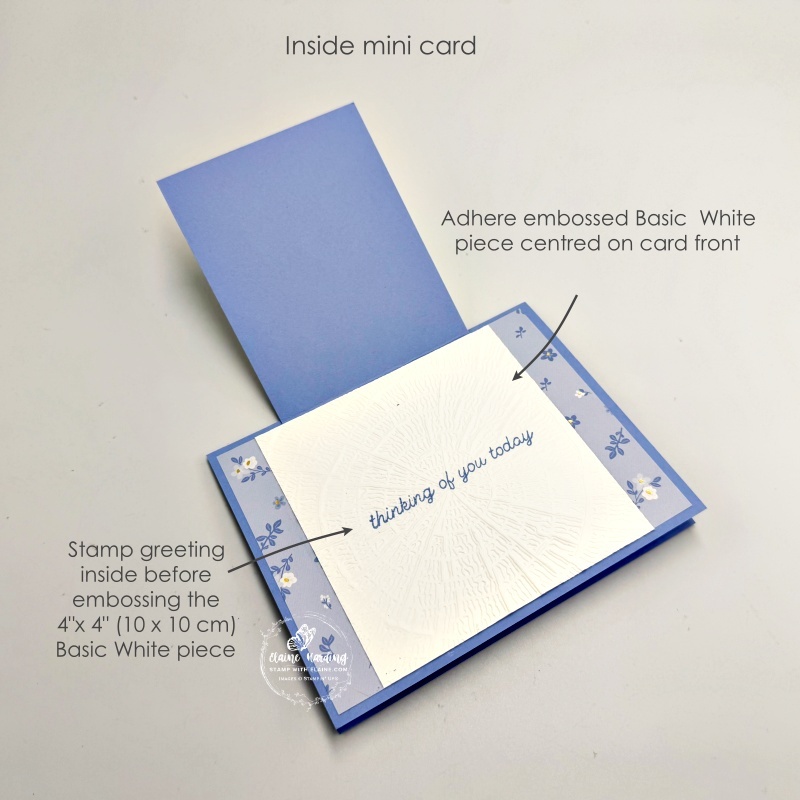
Card base
- Adhere DSP first to card front leaving an even border on all 4 sides.
- Next adhere mini card base aligning score line centred on card in line with the top edge of DSP.
- Stamp the 4″x 4″ (10 x 10 cm) piece with sentiment first (picture on right) then emboss with the Textured Tree Ring 3D embossing folder. Adhere on top of mini card in line with DSP.
Decorating front of mini card
- Use blending brush to apply Hydrangea Hue colour on all 4 edges of Basic White piece measuring 3 ⅛” x 3 ⅞” (7.9 cm x 9.8 cm).
- Stamp large floral image in bottom left corner and colour with Hydrangea Hue, Crisp Cantaloupe and Peaceful Pine Stampin’ Blends.
- On scrap of Basic White, stamp sentiment in Hydrangea Hue and fussy cut. Add a touch of colour with blending brush.
- Splatter some ink with Hydrangea Hue Shimmer Brush.
- Apply dimensionals to greeting and adhere as pictured.
- Embellish with 2026-2028 In Color Dots.
Optional
Stamp and punch out a butterfly from All Aflutter bundle. I smudged mine, so I used a butterfly which was left from a different project to cover up the smudge.
Inside card
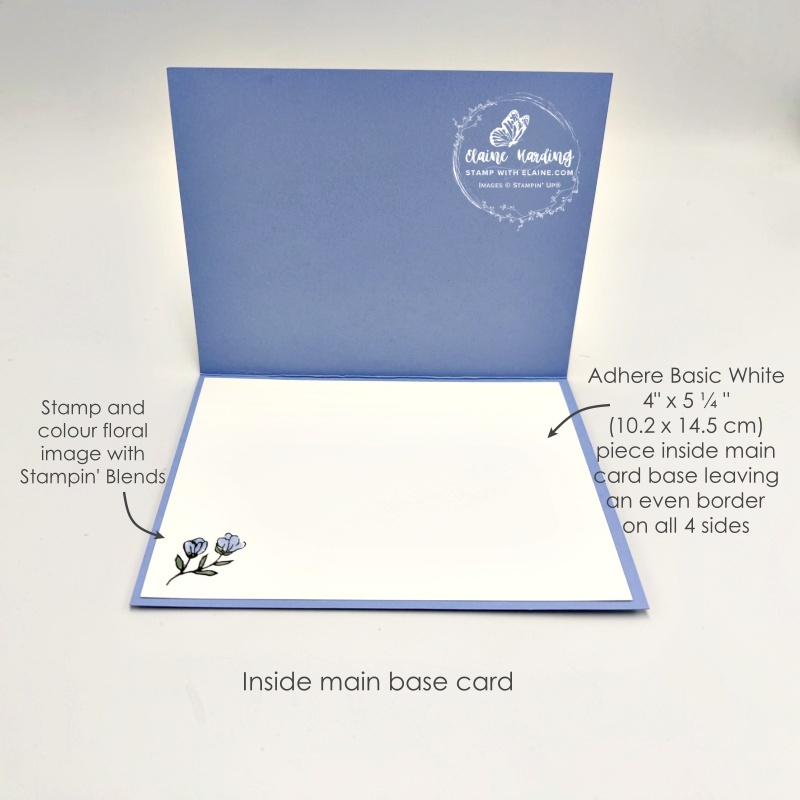
- Adhere Basic White piece measuring 4″ x 5 ¼” (10.2 x 14.5 cm) piece inside the main card base leaving an even border on all 4 sides.
- Stamp the floral image and colour in with Hydrangea Hue and Peaceful Pine Stampin’ Blends .
Supply list
Listed below is the supply list. Just click on the picture to take you directly to the item in my online store.
Product List![Heirloom Boutique Bundle (English) [ 167731 ]](https://assets1.tamsnetwork.com/images/EC042017NF/167731s.jpg "Heirloom Boutique Bundle (English) [ 167731 ]")
![Heirloom Boutique Dies [ 167730 ]](https://assets1.tamsnetwork.com/images/EC042017NF/167730s.jpg "Heirloom Boutique Dies [ 167730 ]")
![Heirloom Boutique Photopolymer Stamp Set (English) [ 167725 ]](https://assets1.tamsnetwork.com/images/EC042017NF/167725s.jpg "Heirloom Boutique Photopolymer Stamp Set (English) [ 167725 ]")
![All Aflutter Bundle (English) [ 167570 ]](https://assets1.tamsnetwork.com/images/EC042017NF/167570s.jpg "All Aflutter Bundle (English) [ 167570 ]")
![Textured Tree Ring 3 D Embossing Folder [ 168220 ]](https://assets1.tamsnetwork.com/images/EC042017NF/168220s.jpg "Textured Tree Ring 3 D Embossing Folder [ 168220 ]")
![Bloom Boutique Specialty Designer Series Paper & Sticker Sheet (English) [ 167734 ]](https://assets1.tamsnetwork.com/images/EC042017NF/167734s.jpg "Bloom Boutique Specialty Designer Series Paper & Sticker Sheet (English) [ 167734 ]")
![Basic White A4 Cardstock [ 166781 ]](https://assets1.tamsnetwork.com/images/EC042017NF/166781s.jpg "Basic White A4 Cardstock [ 166781 ]")
![Hydrangea Hue A4 Cardstock [ 167688 ]](https://assets1.tamsnetwork.com/images/EC042017NF/167688s.jpg "Hydrangea Hue A4 Cardstock [ 167688 ]")
![Basic Black Hybrid Stampin' Pad [ 166648 ]](https://assets1.tamsnetwork.com/images/EC042017NF/166648s.jpg "Basic Black Hybrid Stampin' Pad [ 166648 ]")
![Hydrangea Hue Classic Stampin' Pad [ 167677 ]](https://assets1.tamsnetwork.com/images/EC042017NF/167677s.jpg "Hydrangea Hue Classic Stampin' Pad [ 167677 ]")
![2026–2028 In Color™ Dots [ 167546 ]](https://assets1.tamsnetwork.com/images/EC042017NF/167546s.jpg "2026–2028 In Color™ Dots [ 167546 ]")
![Hydrangea Hue Shimmer Brush [ 167663 ]](https://assets1.tamsnetwork.com/images/EC042017NF/167663s.jpg "Hydrangea Hue Shimmer Brush [ 167663 ]")
![Hydrangea Hue Stampin’ Blends Combo Pack [ 167666 ]](https://assets1.tamsnetwork.com/images/EC042017NF/167666s.jpg "Hydrangea Hue Stampin’ Blends Combo Pack [ 167666 ]")
![Crisp Cantaloupe Stampin’ Blends Combo Pack [ 167669 ]](https://assets1.tamsnetwork.com/images/EC042017NF/167669s.jpg "Crisp Cantaloupe Stampin’ Blends Combo Pack [ 167669 ]")
![Peaceful Pine Stampin’ Blends Combo Pack [ 167668 ]](https://assets1.tamsnetwork.com/images/EC042017NF/167668s.jpg "Peaceful Pine Stampin’ Blends Combo Pack [ 167668 ]")

- SHOP ONLINE – EARN 10% REWARDS ON ALL PURCHASES OVER £20
- PURCHASE A STARTER KIT : Get £155 worth of products for only £99. Choose from current catalogues and any specials available. Free Shipping. Read more
- Subscribe to my Video Tutorials – click here
