
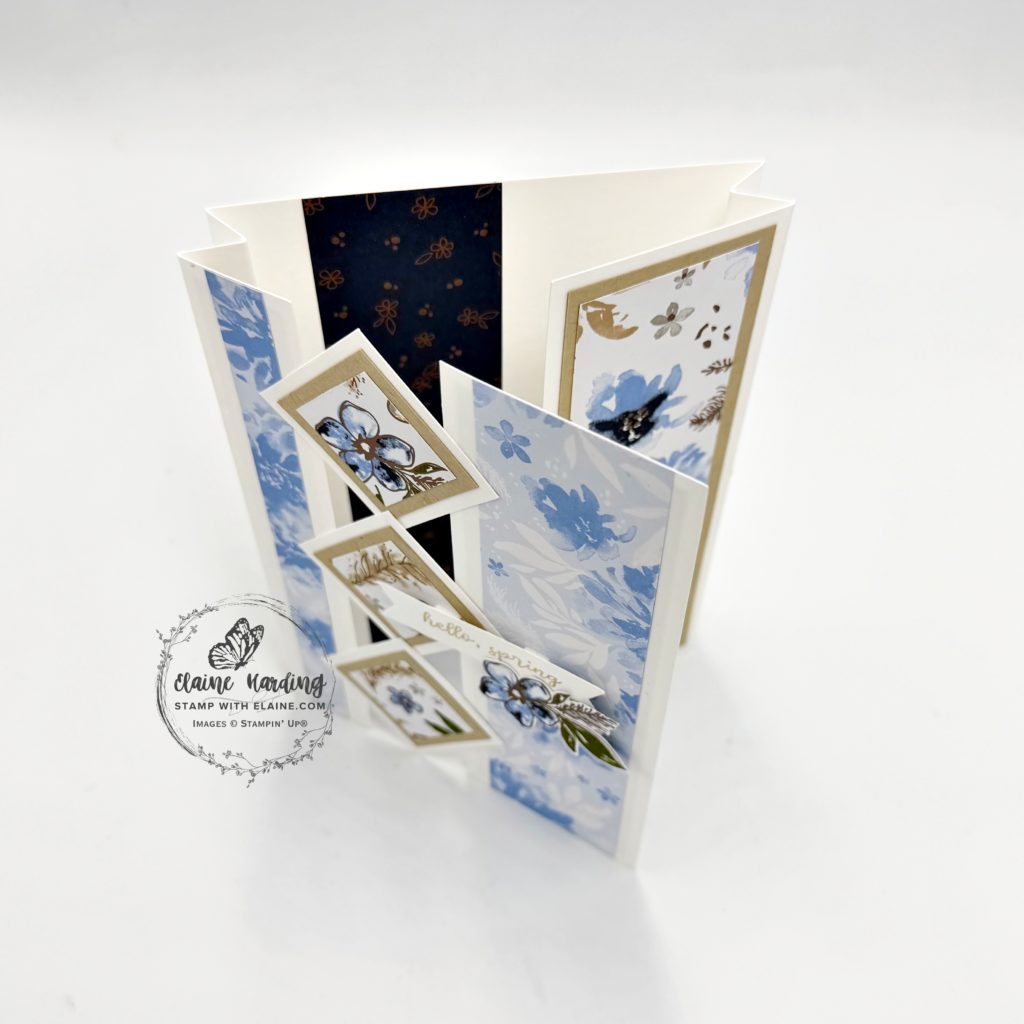
Triple diamond bridge fold. The front of the card is built by attaching a trio of squares on a card base (which has a shortened card front) to a separate piece of card stock to complete the card front. It will become clearer as you read on. It has lots of layers but is easy to assemble. Lots of photos to help visualise it.

Cutting guide
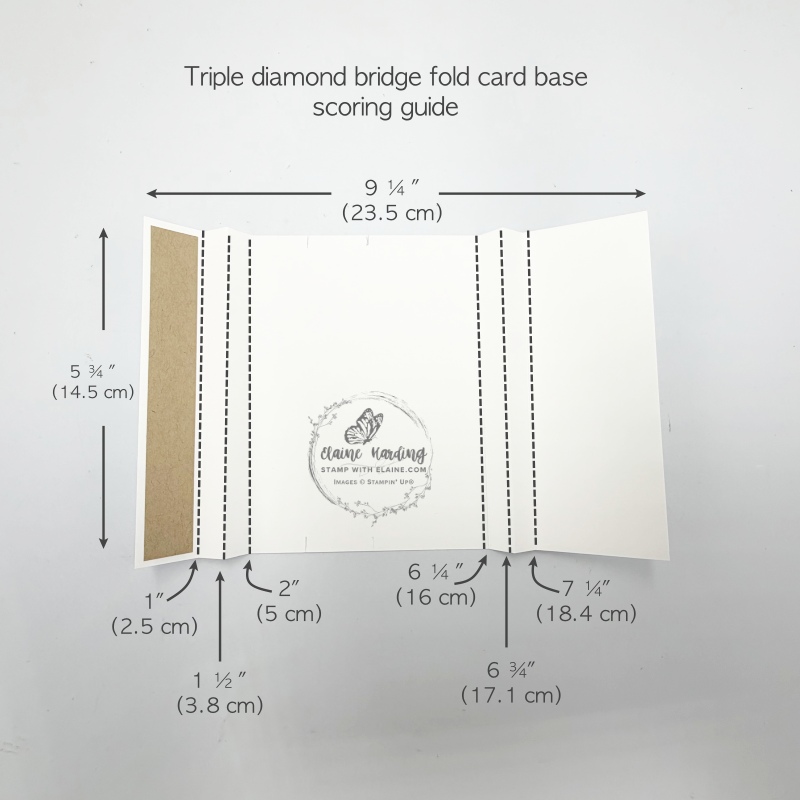
- Basic White card stock cut at 5 ¾” x 9 ¼” (23.5 cm x 14.5 cm). On the long side score at 1″, 1 ½”, 2″, 6 ¼”, 6 ¾” and 7 ¼” (2.5 cm, 3.8 cm, 5 cm, 16 cm, 17.1 cm and 18.4 cm)
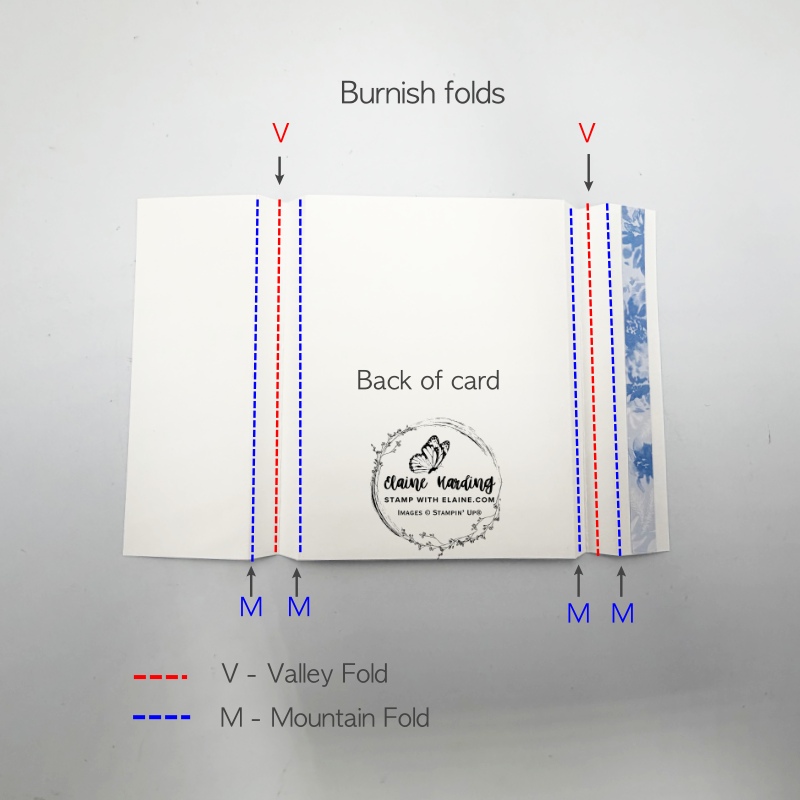
- Burnish folds – in picture I’ve flipped it so front of card with DSP strip already adhered is on the right. Dashed blue lines are Mountain folds, and the red dashed lines are Valley folds.
Cutting and adhering DSP inside centre panel
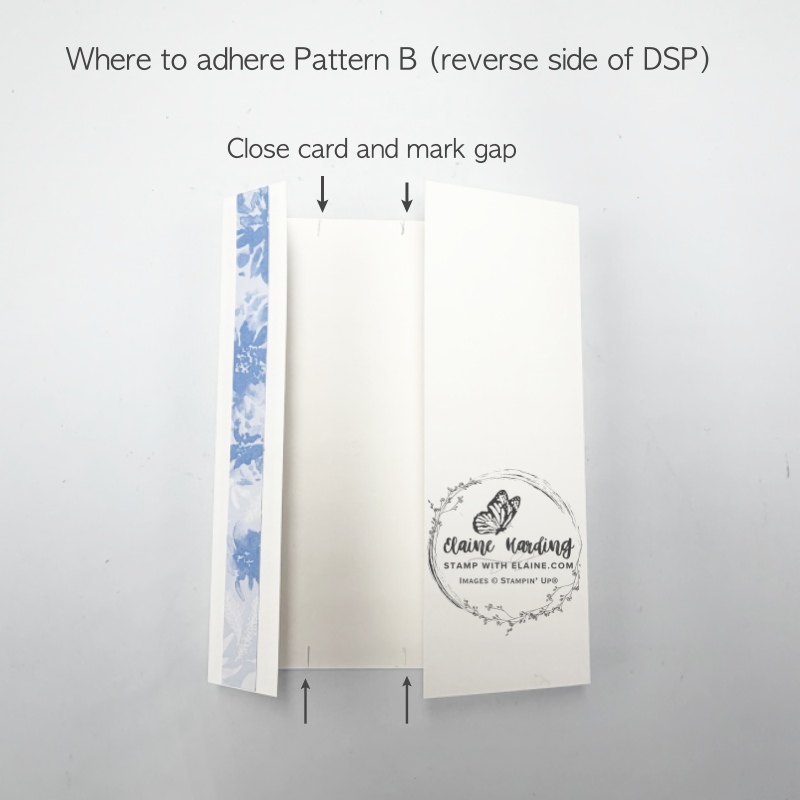
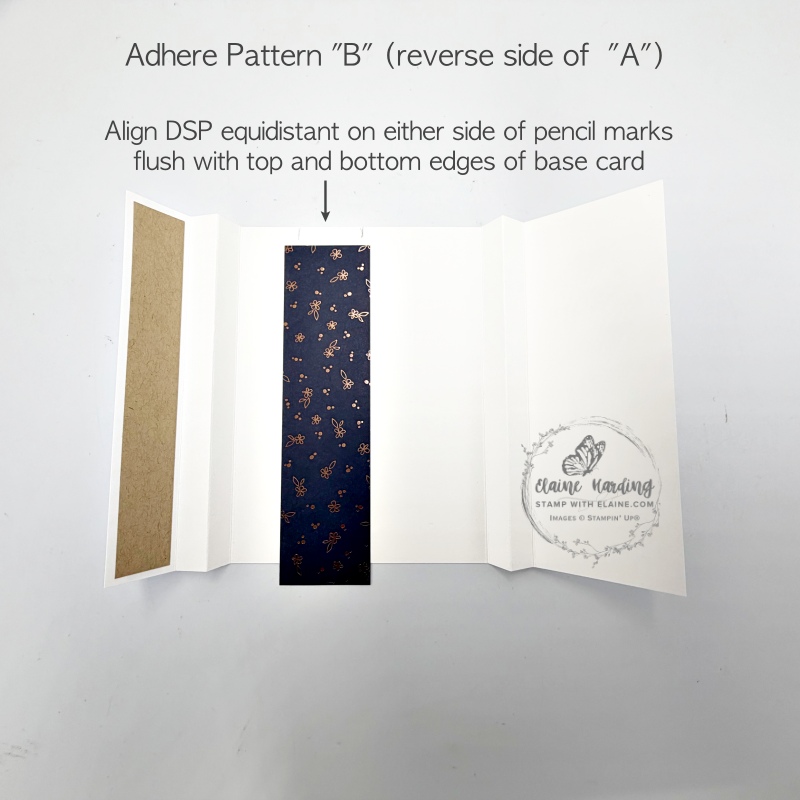
- Close card and mark gap top and bottom in pencil. No need to erase them because when you adhere the DSP, it won’t show.
- Cut pieces of DSP Pattern “A” at 1 ½” x 5 ¾” (4 cm x 14.5 cm). Flip Pattern “A” to reverse side for Pattern “B” – Pattern “B” face up and adhere as pictured above equidistant on either side of pencil marks and flush with top and bottom edge of card base.
Remaining DSP and mat layers
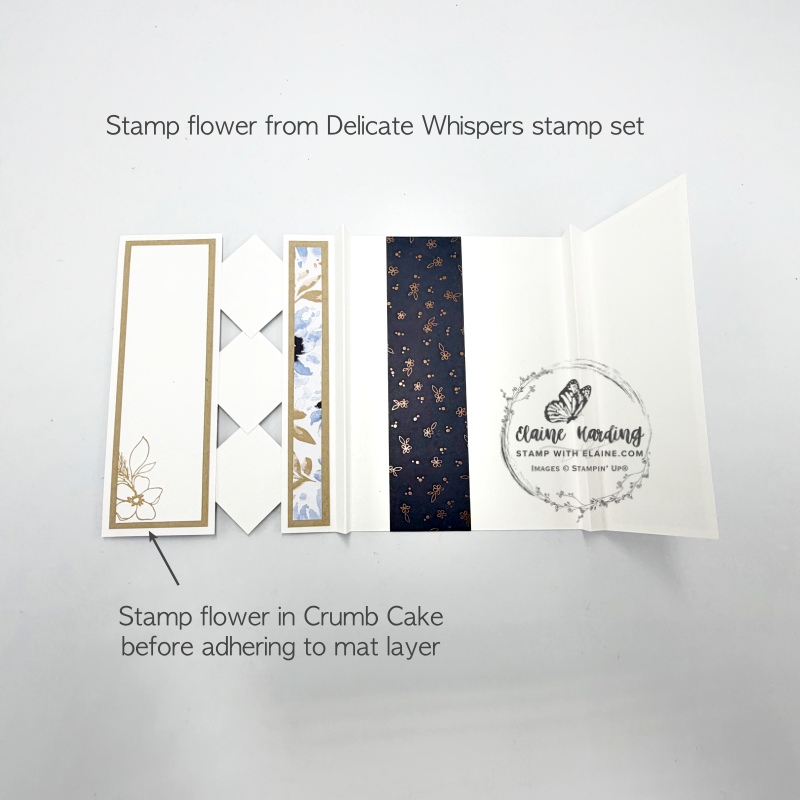
Pattern A & B are on one sheet – Hydrangea Hue (new in colour) and Secret Sea on the back. Pattern C is on another sheet with foiled accents on the pine leaves and small floral details similar to the one in the Delicate Whispers stamp set. The 3rd sheet has the large flowers with Pattern D for the inside of the main card base.
Please note, as the new in-colours haven’t been released yet, I fussy cut the flower from the Pattern C sheet to decorate front of card.
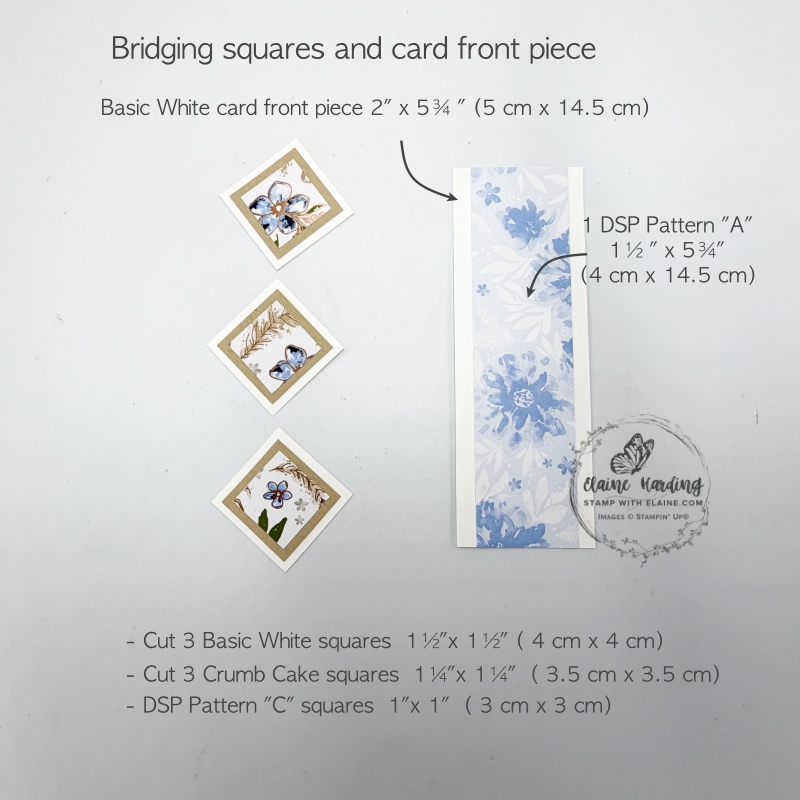
- Bridging squares : Cut 3 Basic White squares 1 ½” x 1 ½” (4 cm x 4 cm)
- Mat layer #1 bridging squares : cut 3 Crumb Cake squares 1 ¼” x 1 ¼” (3.5 cm x 3.5 cm). Adhere on top of Basis White squares.
- DSP Pattern C squares : cut 3 pieces 1″ x 1″ (3 cm x 3 cm). Adhere on top. of Crumb Cake squares.
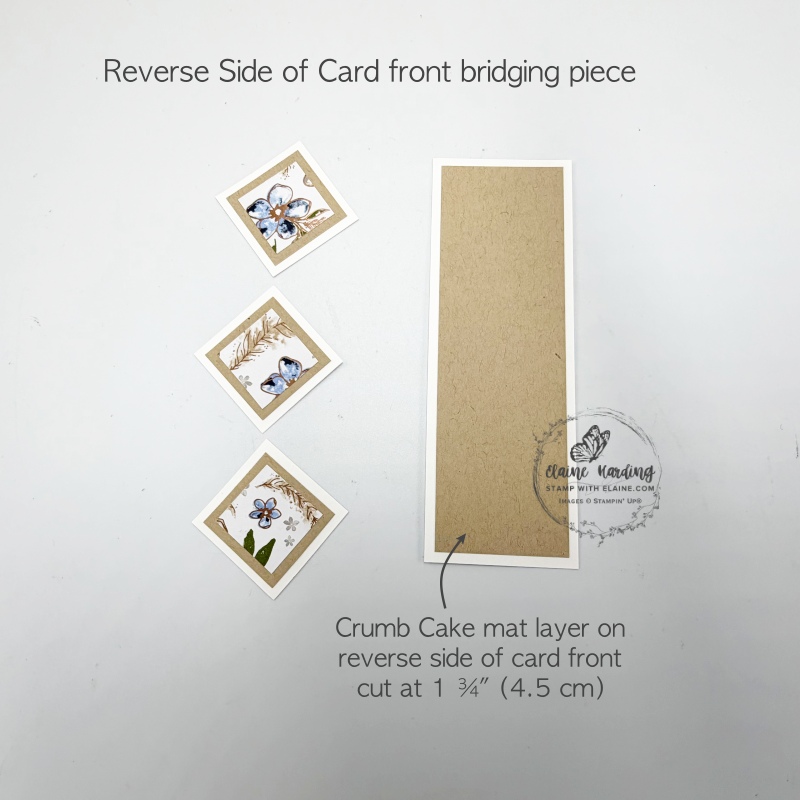
- Reverse side of Card Front Bridging piece – 1 x Crumb Cake 1 ¾” x 5 ½” (4.5 cm x 14 cm)
Adhering mat layers
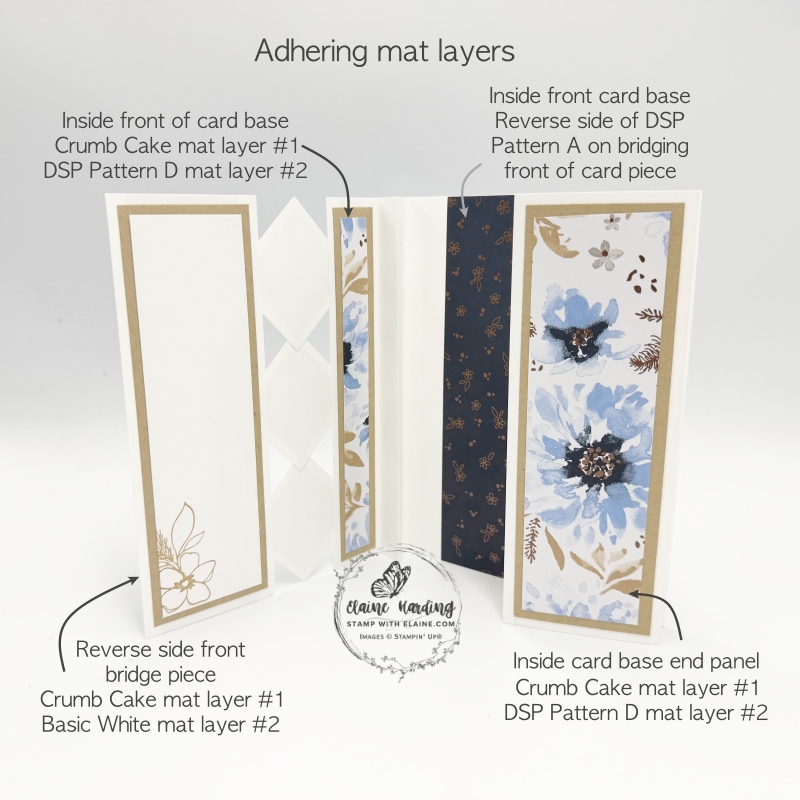
- Inside front card base mat layer #1 : Crumb Cake ¾” x 5 ½” (2 cm x 14 cm)
- DSP mat layer Pattern D #2 : ½” x 5 ¼” (1.5 cm x 13.5 cm)
- Inside front bridge – Adhere Crumb Cake mat layer first. Stamp on Basic White layer before adhering to Crumb Cake mat layer.
- Card base right side panel – adhere Crumb Cake mat layer
- Adhere DSP mat layer Pattern D mat layer #2 : 1 ½” X 5 ¼” (4 cm x 13.5 cm)
How to adhere bridging pieces
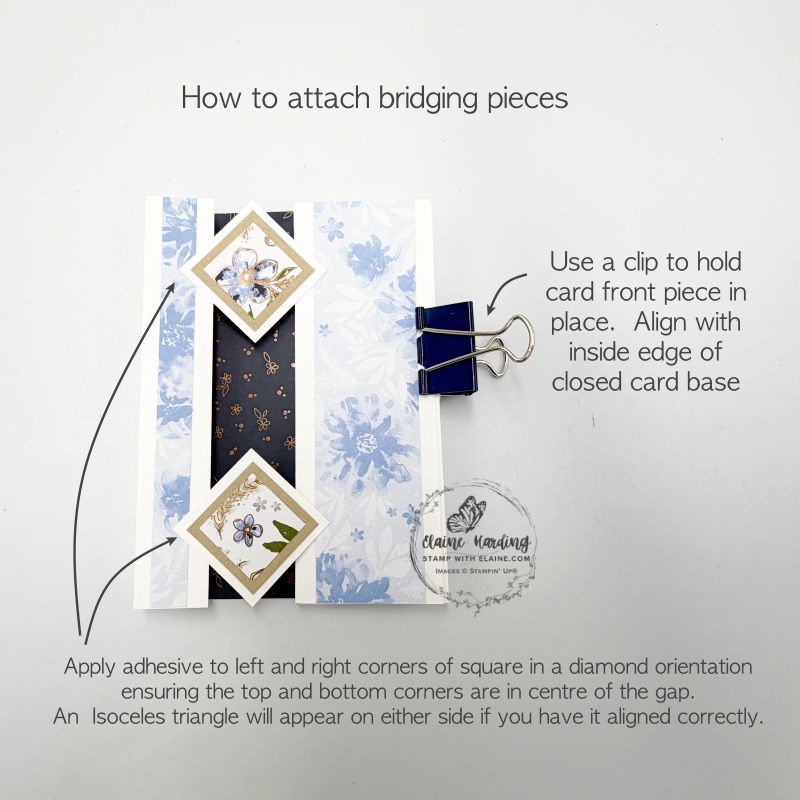
- Close card and use a clip – bulldog clip is best, or a clothes peg. Align bridging card front piece with the inside edge of card base end panel and keep in place with the bulldog clip.
- Apply adhesive to one square at the top in diamond orientation. Keep the north and south points centred on DSP piece underneath and aligned with top edge of card base. You will know when it’s at the right spot when two isoceles triangles appear on either side.
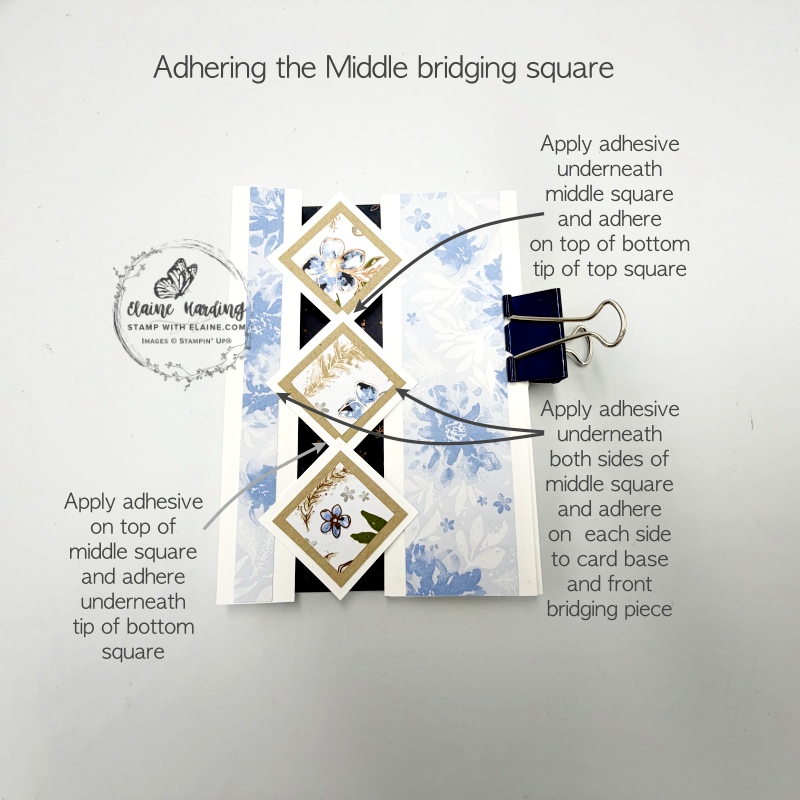
- Repeat for the bottom square but this time with the southern point aligned with the bottom edge of the card base.
- Lastly apply adhesive on the underside of the two sides and the north point of the middle square. For the south point, apply adhesive on top so that it adheres underneath the bottom square as pictured.
Finishing touches

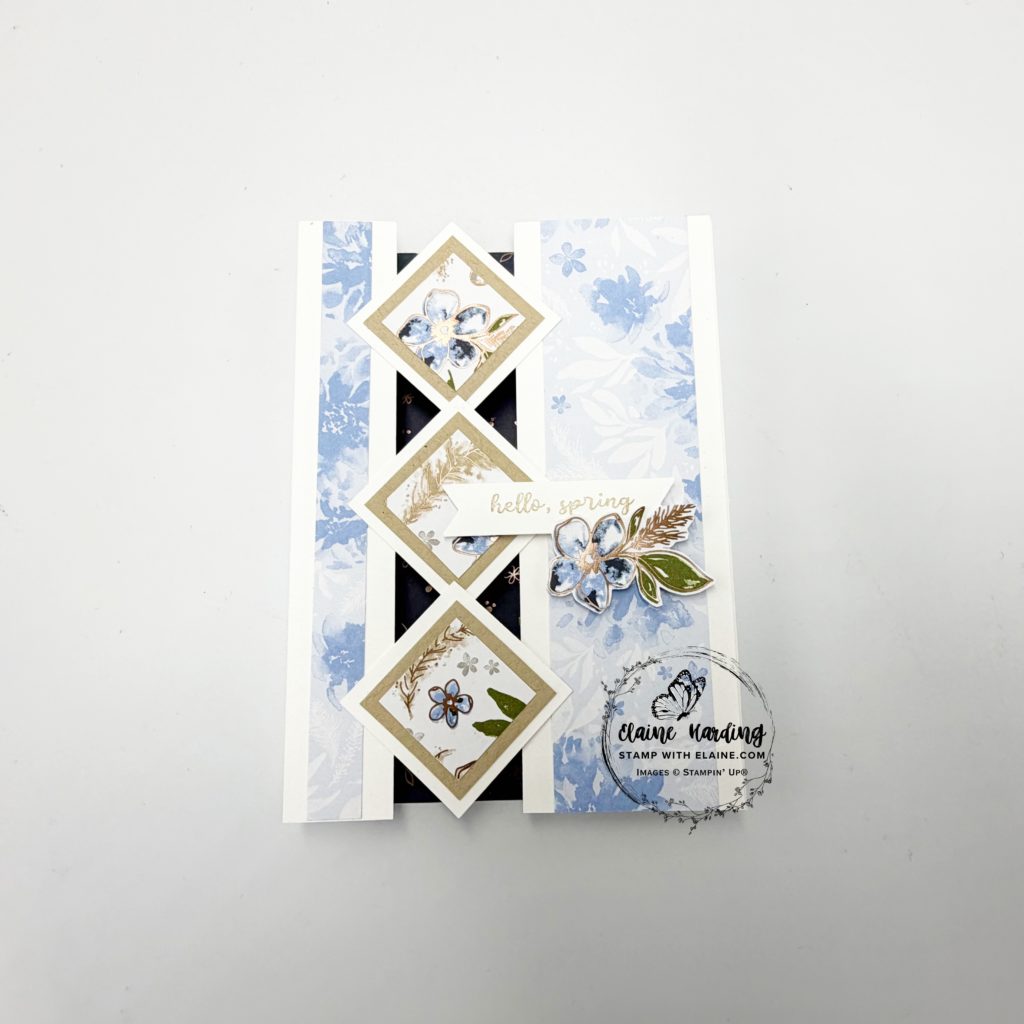
- Stamp “Hello Spring” from Easter Basket stamp set and punch out with Three Banner punch. Adhere as pictured above with dimensionals.
- Fussy cut a flower from Pattern “C” sheet and adhere with dimensionals partialy with dimensionals.
- Completed card on the right.
Supply list
Listed below is the supply list. Just click on the picture to take you directly to the item in my online store.
Product List![Delicate Whispers Bundle (English) [ 167506 ]](https://assets1.tamsnetwork.com/images/EC042017NF/167506s.jpg "Delicate Whispers Bundle (English) [ 167506 ]")
![Delicate Dreams 12" X 12" (30.5 X 30.5 Cm) Specialty Designer Series Paper [ 167498 ]](https://assets1.tamsnetwork.com/images/EC042017NF/167498s.jpg "Delicate Dreams 12\" X 12\" (30.5 X 30.5 Cm) Specialty Designer Series Paper [ 167498 ]")
![Crumb Cake Classic Stampin' Pad [ 147116 ]](https://assets1.tamsnetwork.com/images/EC042017NF/147116s.jpg "Crumb Cake Classic Stampin' Pad [ 147116 ]")
![Basic White A4 Cardstock [ 166781 ]](https://assets1.tamsnetwork.com/images/EC042017NF/166781s.jpg "Basic White A4 Cardstock [ 166781 ]")
![Crumb Cake A4 Card Stock [ 121685 ]](https://assets1.tamsnetwork.com/images/EC042017NF/121685s.jpg "Crumb Cake A4 Card Stock [ 121685 ]")
![Paper Trimmer [ 152392 ]](https://assets1.tamsnetwork.com/images/EC042017NF/152392s.jpg "Paper Trimmer [ 152392 ]")
![Three Banner Punch [ 167050 ]](https://assets1.tamsnetwork.com/images/EC042017NF/167050s.jpg "Three Banner Punch [ 167050 ]")

- SHOP ONLINE – EARN 10% REWARDS ON ALL PURCHASES OVER £20
- PURCHASE A STARTER KIT : Get £155 worth of products for only £99. Choose from current catalogues and any specials available. Free Shipping. Read more
- Subscribe to my Video Tutorials – click here