
Impressions Plate – Opulent Oasis. The Impressions plate is a new addition to use with Impressions Dies for best cutting and embossing results. Adding this plate to your sandwich results in precise die-cut images and detailed embossing. Naturally, I had to try it out – so here’s a peek of the results.
Currently there are only two sets of dies suitable for using with the Impressions Plate. You can find them in the May-August 2026 catalogue on pages 36 and 37 in the Bundles section clearly marked as Impressions Dies. In the artwork both in the catalogue and on the die packaging itself, you can differentiate the impressions die in a lighter grey colour whereas the standard dies will be in the darker grey colour.
You can also find them on page 58 of the May-August 2026 catalogue under “Dies” and again they will have the word “Impressions” in its label. As they are new, this will also be highlighted.
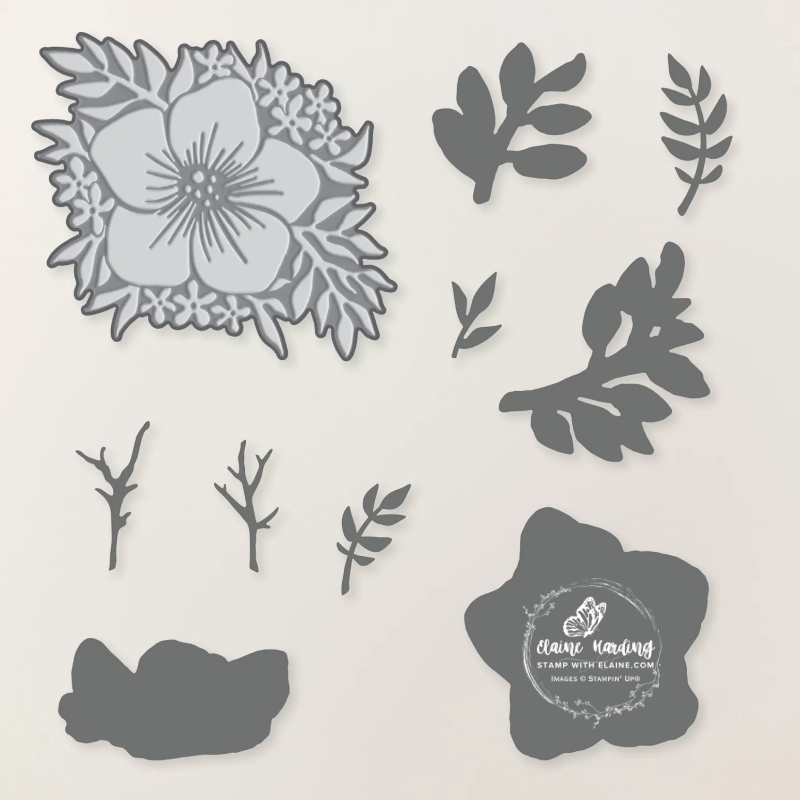
Opulent Oasis dies
One such die set is the Opulent Oasis dies. This innovative die set includes detailed dies for deep embossing with bevelled edges, open dies for cutting stamped images and floral accents. Layer both styles to build custom arrangements for handmade cards and paper crafts. If you purchase an Impressions Die set for the first time, you’ll need to get the Impressions Plate too. However the Impressions Plate can be used for future Impressions dies that Stampin’ Up! may release in the future.
How to use the Impressions Plate
The Impressions Plate is made out of silicone and is soft and flexible which will get in all the nooks and crannies of the special Impressions dies consequently giving a more precise detailed embossed image. For best results use cardstock which has been dyed all the way through rather than a two-tone card stock which has a white core.
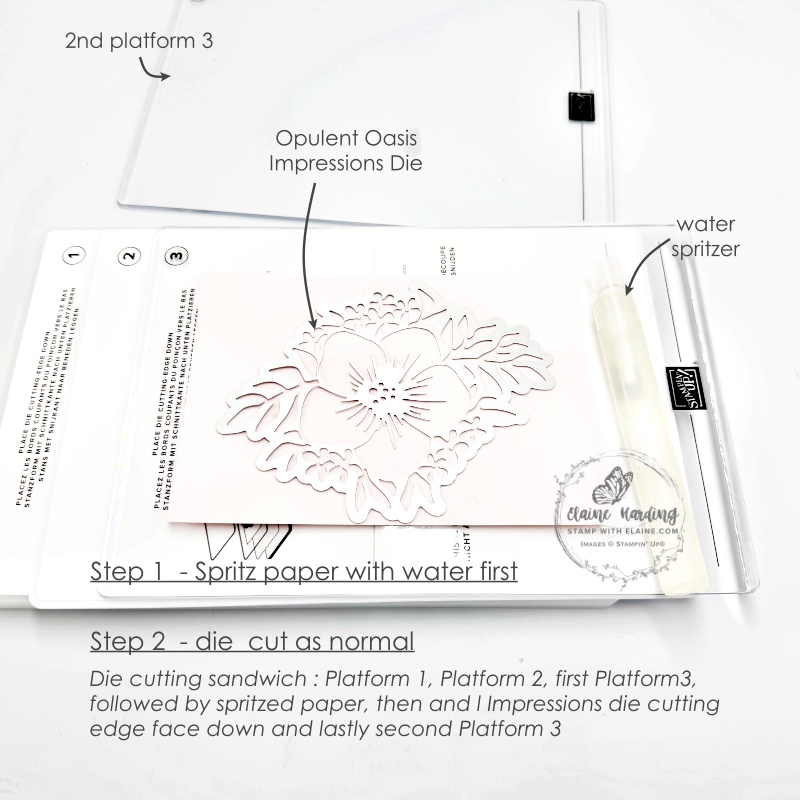
- First spritz the paper with water to break up fibres in card stock. Place die face down on cardstock and die cut as normal with Platform 1, 2 and both Platform 3 cutting plates.
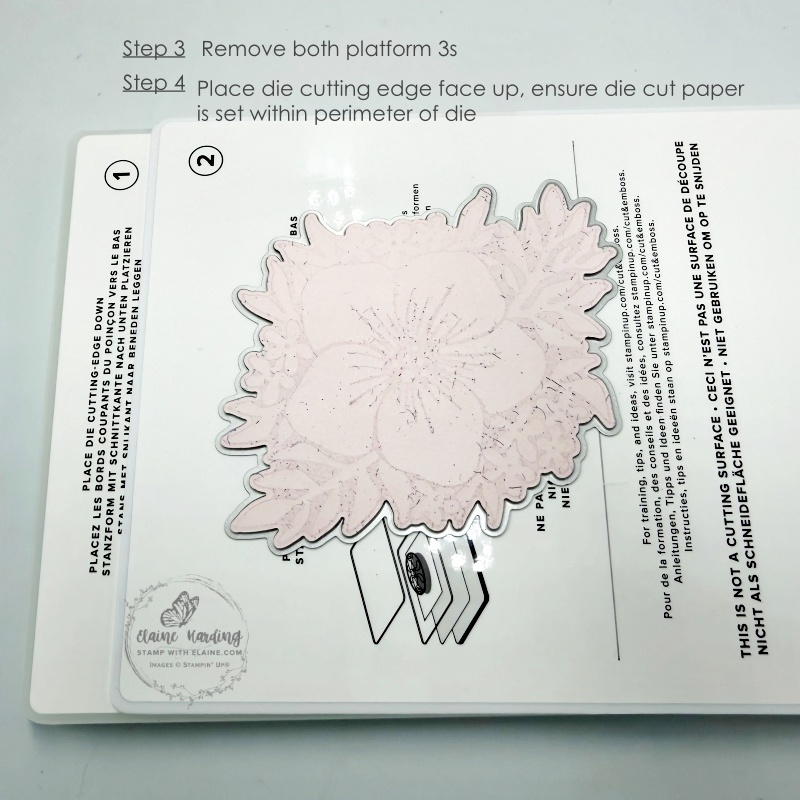
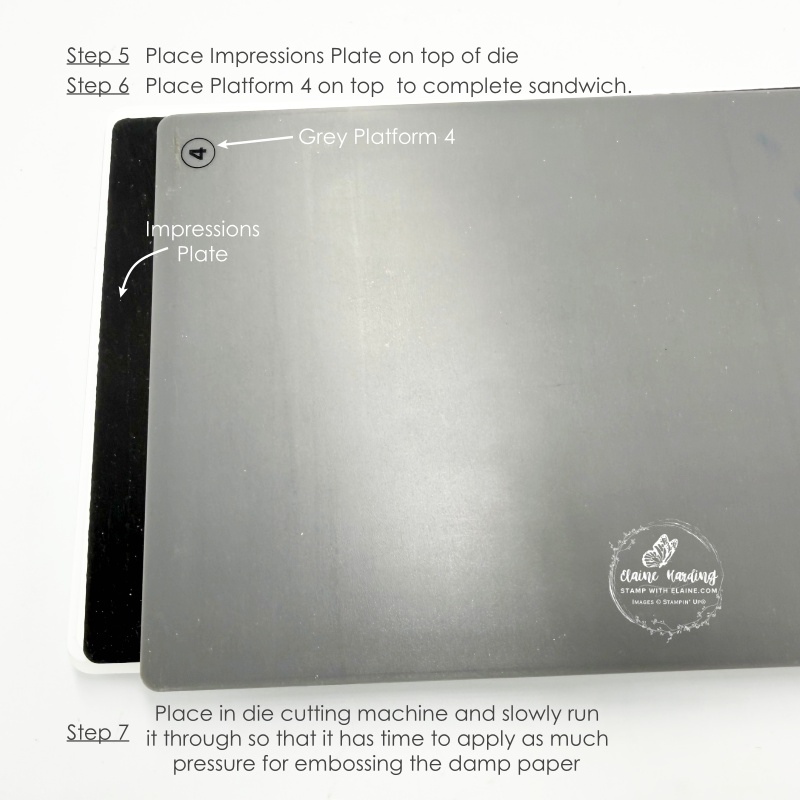
- To emboss, keep paper in place in the die with cutting edge face up toward the top of the cutting platforms 1 & 2. Place the Impressions Plate on top followed by the Grey plate Platform 4 and run it slowly through the die cutting machine.
- Clean off any debris that may be left.
FYI: For visual purposes, I have staggered the plates so you can see the platforms numbers used to make the sandwich. Be aware that the plates should be aligned on top of one another when you put it through the die cutting machine platform.
Comparison between spritzed paper and non-spritzed paper
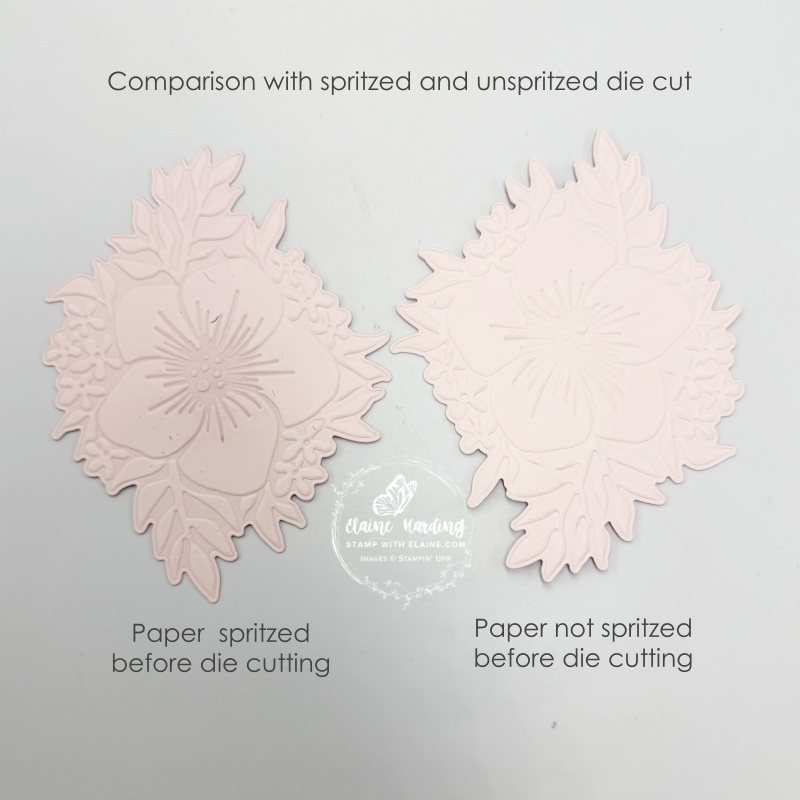
If you spritz your cardstock with water before you die cut it, it will break up the fibres and you’ll get a higher definition of the embossed areas on the Impressions die. You can see the difference between the die cut piece on the left which has been spritzed, and the one on the right which was not spritzed has much less detail.
It is optional to use rubbing alcohol in your spritzer because it will dry faster. However, I found that it dried too fast, so my personal preference is to use water.
Notes on the Impressions Plate
- The Impressions plate will stretch and probably appear to shift at the end of the sandwich as you crank it through, but this is completely normal.
- Through extended use, the Impressions Plate will pick up paper through the “scars” left by previous dies but this too is normal.
- It will not impair its use or performance. To clean it, you can just wash it off with a little detergent but allow it to dry thoroughly before using it again.
I haven’t made a card with this yet, but I will be back very soon to show you a sample using this Impressions die cut piece.
Supply list
Listed below is the supply list. Just click on the picture to take you directly to the item in my online store.
Product List![Opulent Oasis Bundle (English) [ 167595 ]](https://assets1.tamsnetwork.com/images/EC042017NF/167595s.jpg "Opulent Oasis Bundle (English) [ 167595 ]")
![Impressions Plate [ 167767 ]](https://assets1.tamsnetwork.com/images/EC042017NF/167767s.jpg "Impressions Plate [ 167767 ]")
![Barely Blush A4 Cardstock [ 167690 ]](https://assets1.tamsnetwork.com/images/EC042017NF/167690s.jpg "Barely Blush A4 Cardstock [ 167690 ]")
![Stampin' Spritzer [ 126185 ]](https://assets1.tamsnetwork.com/images/EC042017NF/126185s.jpg "Stampin' Spritzer [ 126185 ]")
![Stampin' Cut & Emboss Machine [ 149653 ]](https://assets1.tamsnetwork.com/images/EC042017NF/149653s.jpg "Stampin' Cut & Emboss Machine [ 149653 ]")

- SHOP ONLINE – EARN 10% REWARDS ON ALL PURCHASES OVER £20
- PURCHASE A STARTER KIT : Get £155 worth of products for only £99. Choose from current catalogues and any specials available. Free Shipping. Read more
- Subscribe to my Video Tutorials – click here
Pingback: Clean simple card - Opulent Oasis - Stamp with Elaine