
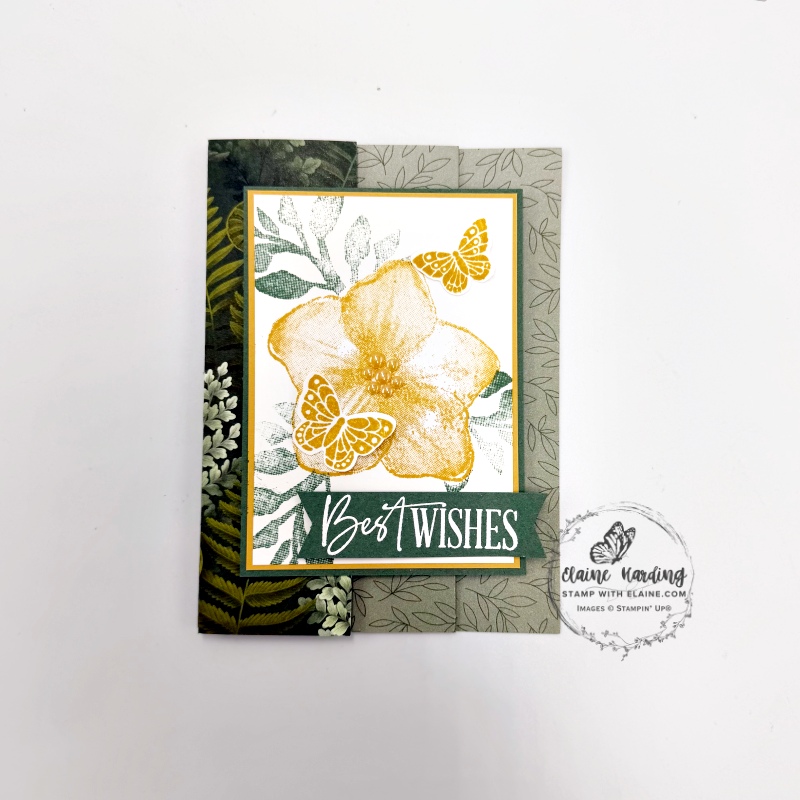
Fun fold best wishes – Opulent Oasis. Here’s another card using the standard dies in Opulent Oasis, this time using the Best Wishes greeting in the stamp set. There are two more sentiments like “Hello Friend”, “special thanks” and “sending happy thoughts” which you can switch out if you wish to use the same layout.
Shhh! I’ll let you into a secret – I probably didn’t clean my stamp very well and there were hints of green in the flower petal when I stamped it and I didn’t notice till after I’d finished my card! Thank goodness I had the All Aflutter set – because the butterflies came to my rescue and I covered up the smudge!
Fun fold (trifold) card
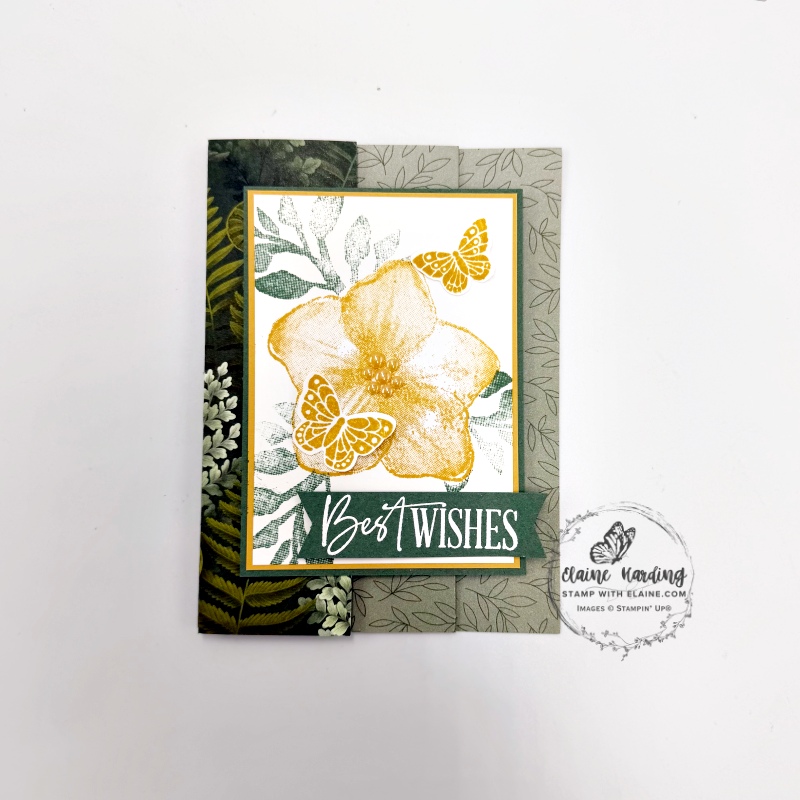
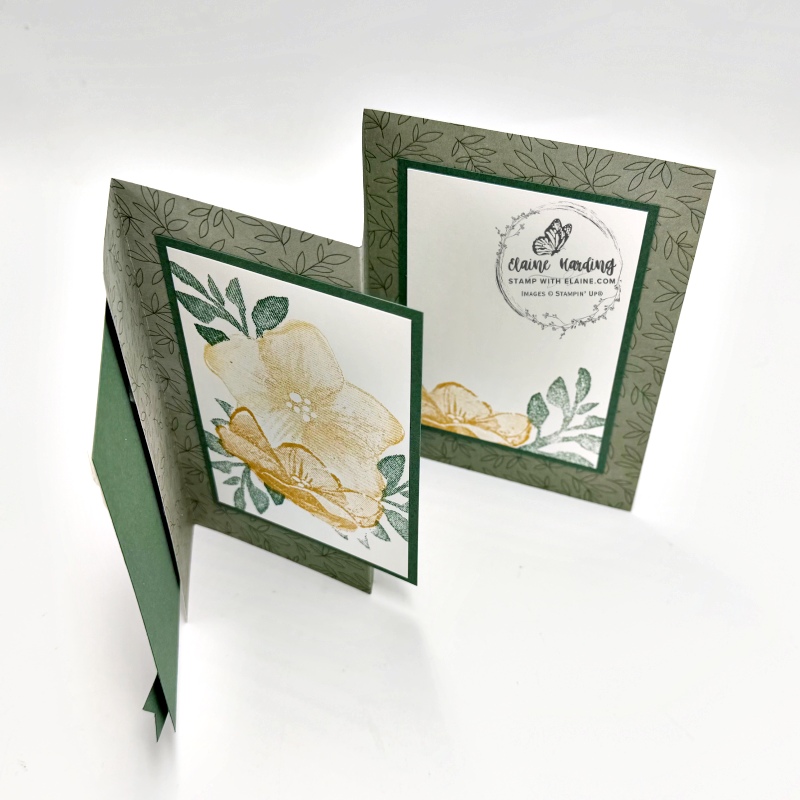
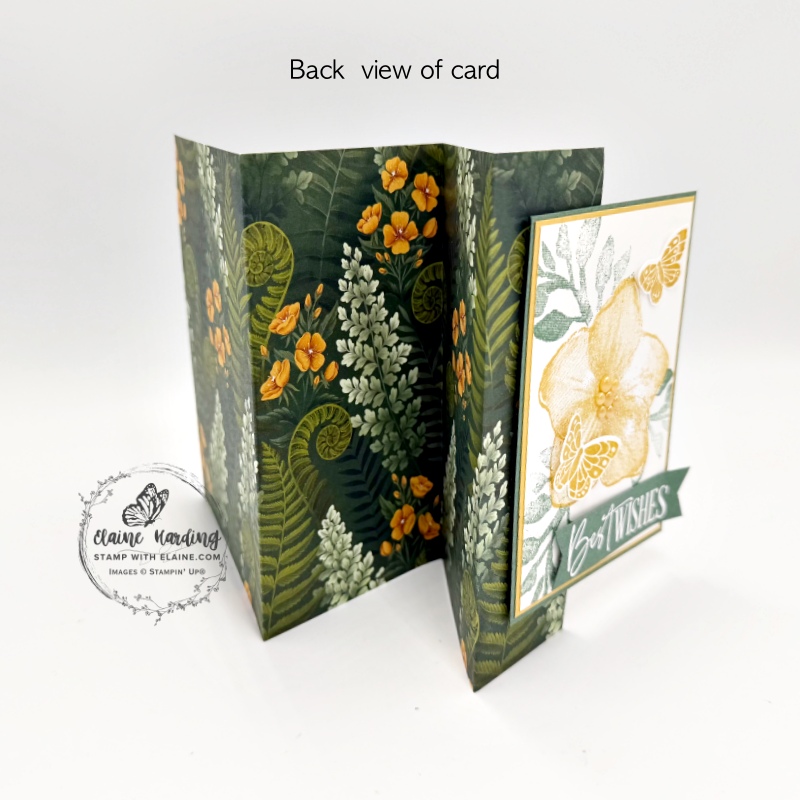
- First picture – card closed for putting in envelop for posting
- Middle picture – front of card open
- Picture on right – back of card displaying beautiful Specialty Designer Series Paper called Moonlit Flora.
Cutting guide for fun fold trifold card
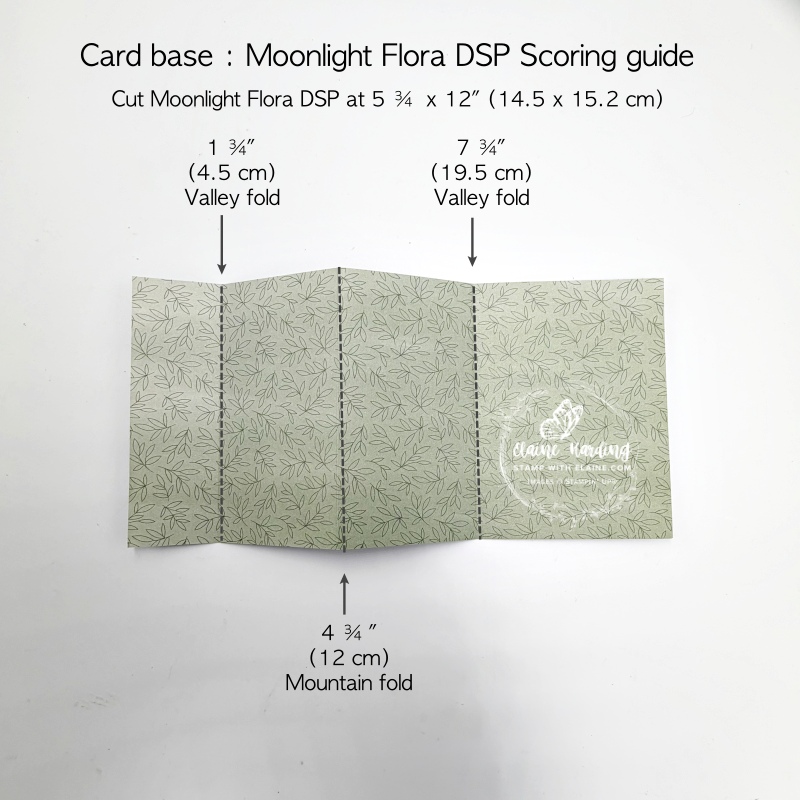
- Moonlit Flora Specialty DSP : 5 ¾” x 12 ” (14.5 cm x 30.5 cm). Long side at the top, score at 1 ¾”, 4 ¾” and 7 ¾” (4.5 cm, 12 cm and 19.5 cm).
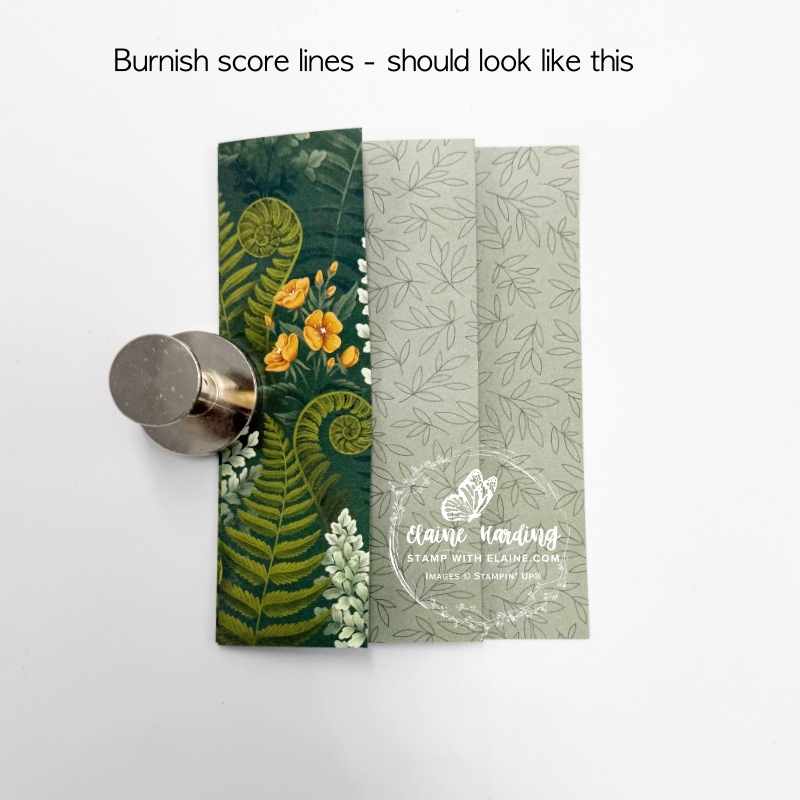
- Burnish score lines, 1st score line – valley fold, 2nd score line – mountain fold, 3rd score line – Valley fold. should look like the picture on the right.
- Cut 3 pieces Peaceful Pine mat layers at 3 ¼” x 4 ½” (8.5 cm x 11.5 cm)
- Extra mat layer front panel piece – Golden Glow cut at 3 ⅛” x 4 ⅜” (8 cm x 11 cm)
- Basic White for stamping : cut 3 pieces at 3″ x 4 ¼” (7.5 cm x 10.5 cm)
- Scrap of Peaceful Pine for white embossing sentiment.
How to assemble card
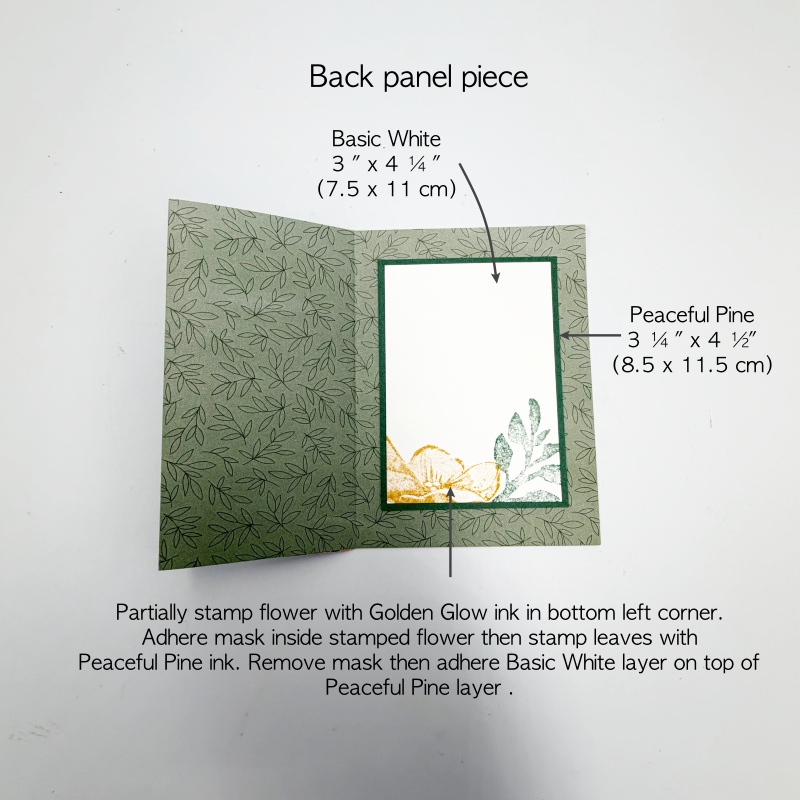
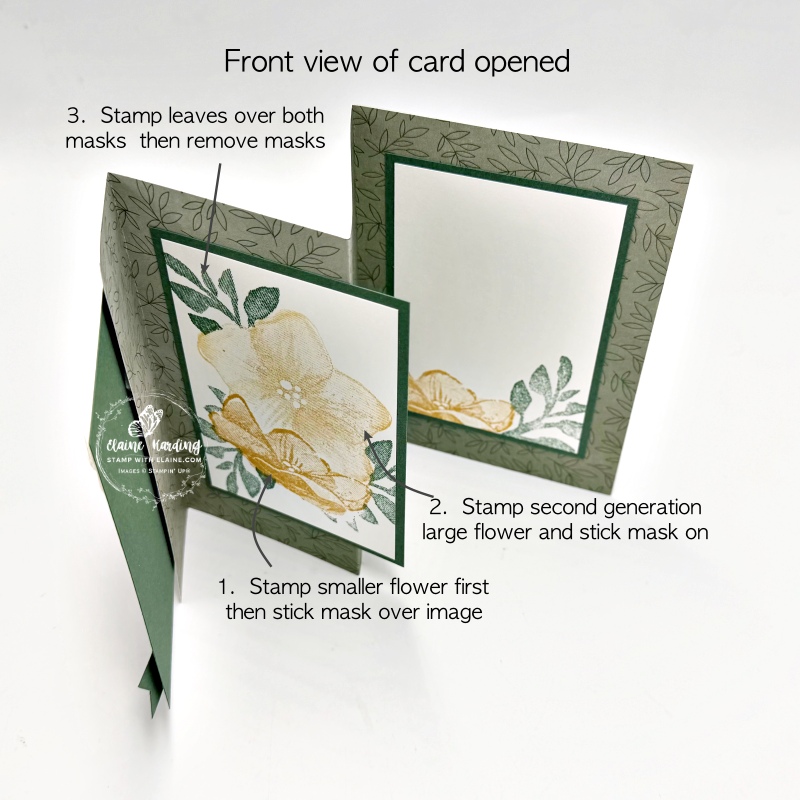
Back panel piece
- Centre and adhere Peaceful Pine piece on back panel (widest panel)
- Partially stamp flower with Golden Glow ink in bottom left corner. Adhere mask inside stamped flower. Stamp leaves next with Peaceful Pine ink. Remove mask then adhere Basic White layer on top of Peaceful Pine layer.
- Middle Panel – stamp smaller flower first on Basic white layer. Adhere mask on top inside flower. Stamp second generation Golden Glow ink with large flower and adhere mask to that flower. Lastly stamp leaves before removing both masks.
Adhere front panel piece to narrow front panel
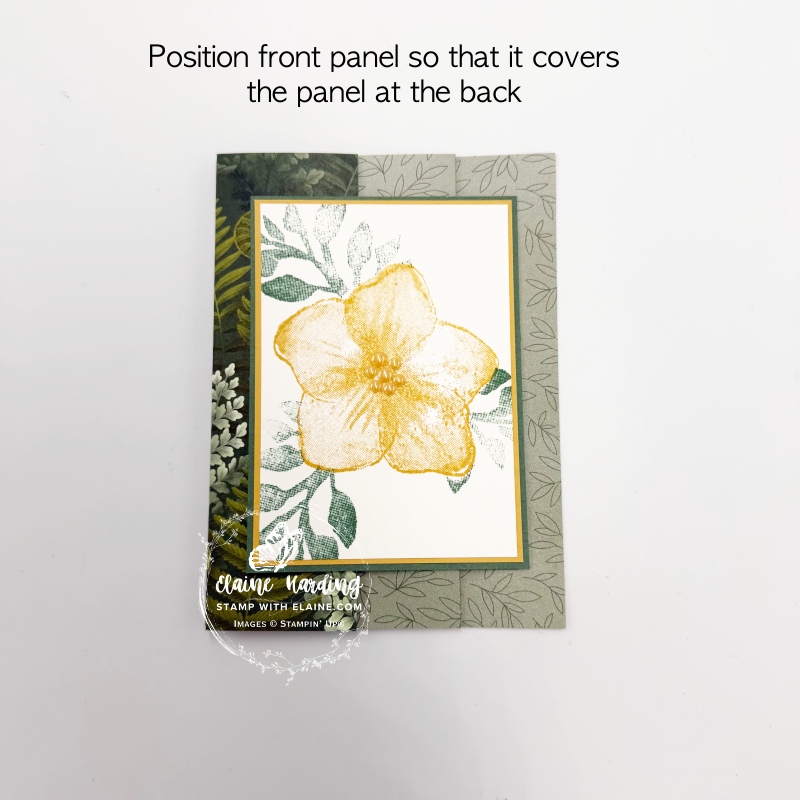
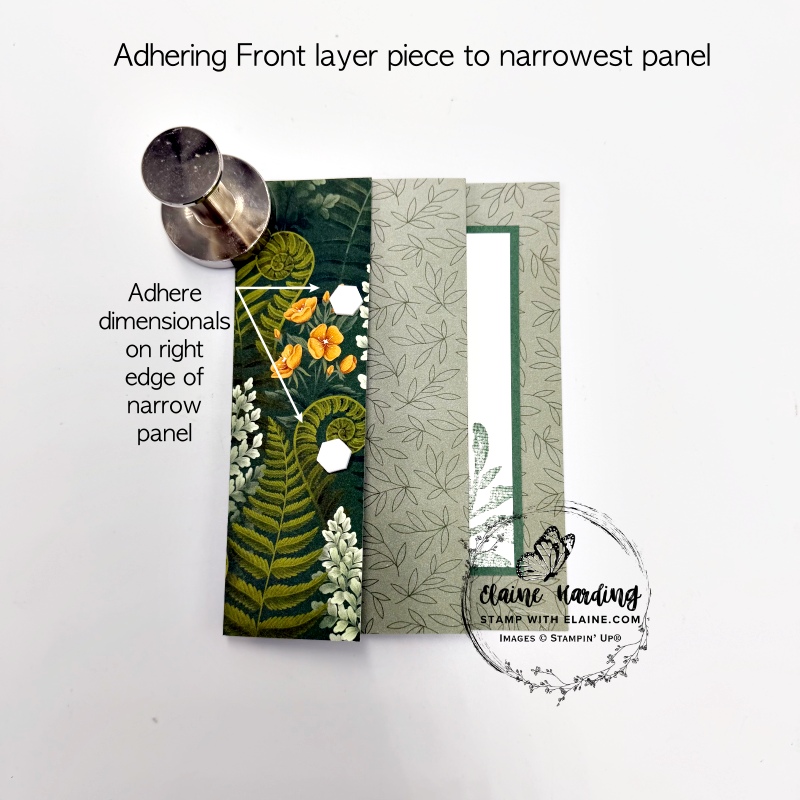
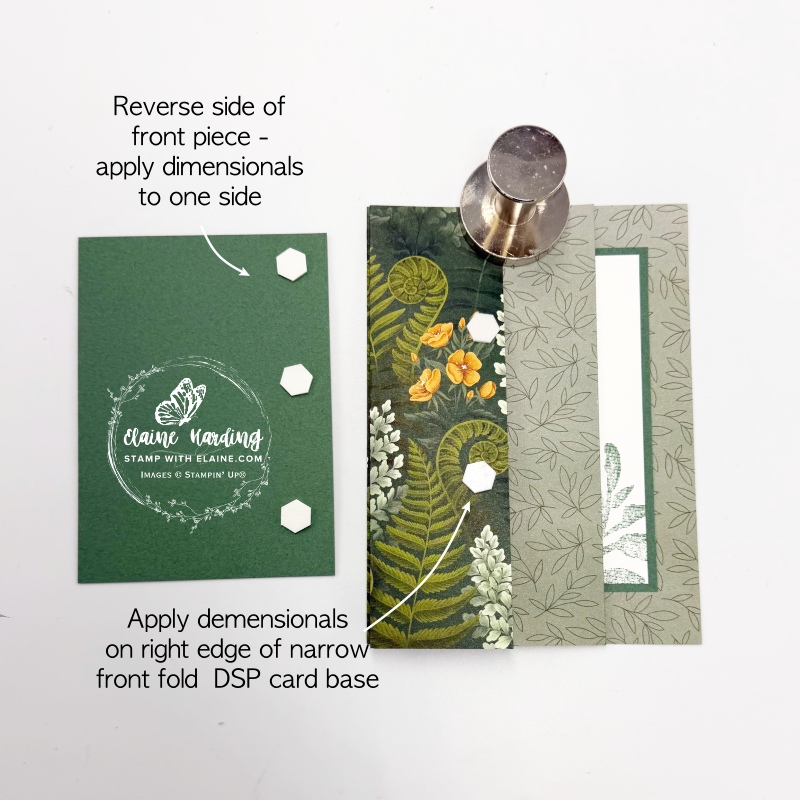
- Align front panel piece on front panel so that it covers the back panel piece.
- Apply dimensionals on the right side of narrow panel in between the other dimensionals on the front panel piece.
- Flip it over to the reverse side and put dimensionals on the right side as shown.
- Remove backing and adhere to front panel ensuring that it covers up the back panel piece too.
How to adhere middle panel
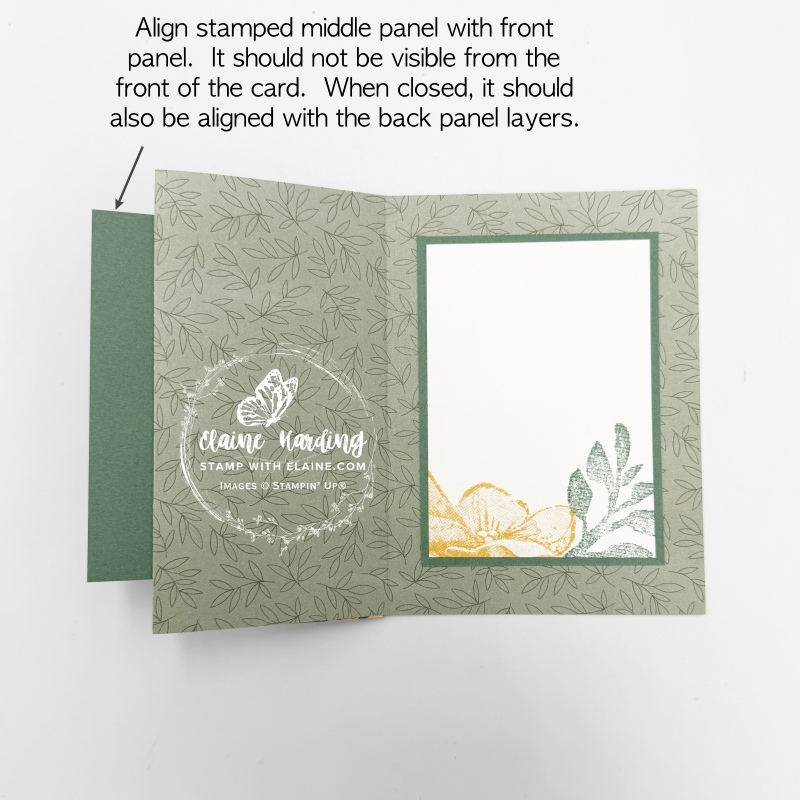
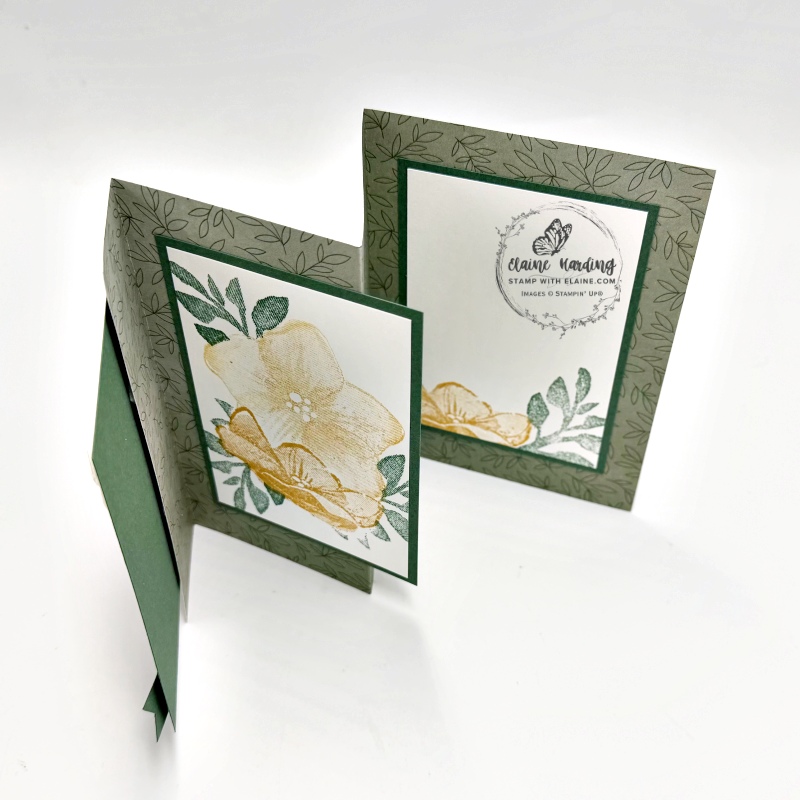
- Align middle piece with the front panel.
- Partially apply adhesive to the back of middle panel piece and close the middle fold panel on top of it to adhere it as shown in picture on the right.
Final touches card front
- On a scrap of Peaceful Pine card stock, stamp in Versamark “Best Wishes”.
- Sprinkle with white embossing powder and heat set. Trim to desired width and cut flag ends each end then adhere to bottom of front piece with dimensionals as pictured.
- Optional (stamp butterflies from All Aflutter and punch out) add butterflies. I only added those ‘cos I smudged it!
Supply list
Listed below is the supply list. Just click on the picture to take you directly to the item in my online store.
Product List![Opulent Oasis Bundle (English) [ 167595 ]](https://assets1.tamsnetwork.com/images/EC042017NF/167595s.jpg "Opulent Oasis Bundle (English) [ 167595 ]")
![All Aflutter Bundle (English) [ 167570 ]](https://assets1.tamsnetwork.com/images/EC042017NF/167570s.jpg "All Aflutter Bundle (English) [ 167570 ]")
![Moonlit Flora 12" X 12" (30.5 X 30.5 Cm) Designer Series Paper [ 167737 ]](https://assets1.tamsnetwork.com/images/EC042017NF/167737s.jpg "Moonlit Flora 12\" X 12\" (30.5 X 30.5 Cm) Designer Series Paper [ 167737 ]")
![Basics Wow! Embossing Powder [ 165679 ]](https://assets1.tamsnetwork.com/images/EC042017NF/165679s.jpg "Basics Wow! Embossing Powder [ 165679 ]")
![Basic White A4 Cardstock [ 166781 ]](https://assets1.tamsnetwork.com/images/EC042017NF/166781s.jpg "Basic White A4 Cardstock [ 166781 ]")
![Peaceful Pine A4 Cardstock [ 167692 ]](https://assets1.tamsnetwork.com/images/EC042017NF/167692s.jpg "Peaceful Pine A4 Cardstock [ 167692 ]")
![Versamark Pad [ 102283 ]](https://assets1.tamsnetwork.com/images/EC042017NF/102283s.jpg "Versamark Pad [ 102283 ]")
![Embossing Additions Tool Kit [ 159971 ]](https://assets1.tamsnetwork.com/images/EC042017NF/159971s.jpg "Embossing Additions Tool Kit [ 159971 ]")
![Heat Tool - Eu Plug [ 129055 ]](https://assets1.tamsnetwork.com/images/EC042017NF/129055s.jpg "Heat Tool - Eu Plug [ 129055 ]")

- SHOP ONLINE – EARN 10% REWARDS ON ALL PURCHASES OVER £20
- PURCHASE A STARTER KIT : Get £155 worth of products for only £99. Choose from current catalogues and any specials available. Free Shipping. Read more
- Subscribe to my Video Tutorials – click here