
Embossed card – Lily of the Valley. Lily of the Valley is a bundle from the Valley in Bloom Suite in the new May-August 2026 catalogue on pages 22-23.
You can bring timeless beauty to your crafting with the Valley in Bloom Suite Collection, inspired by the delicate charm of lilies of the valley. This suite includes coordinating stamps, dies, a 3D embossing folder, patterned paper, elegant foil paper designs, and sparkling embellishments—giving you endless ways to create cards and scrapbook pages for birthdays, thanks, friendship, and more. It has versatile florals, textured backgrounds, and subtle shimmers. This collection is one you’ll reach for all year long. Add ink, cardstock, and adhesive to complete your projects.
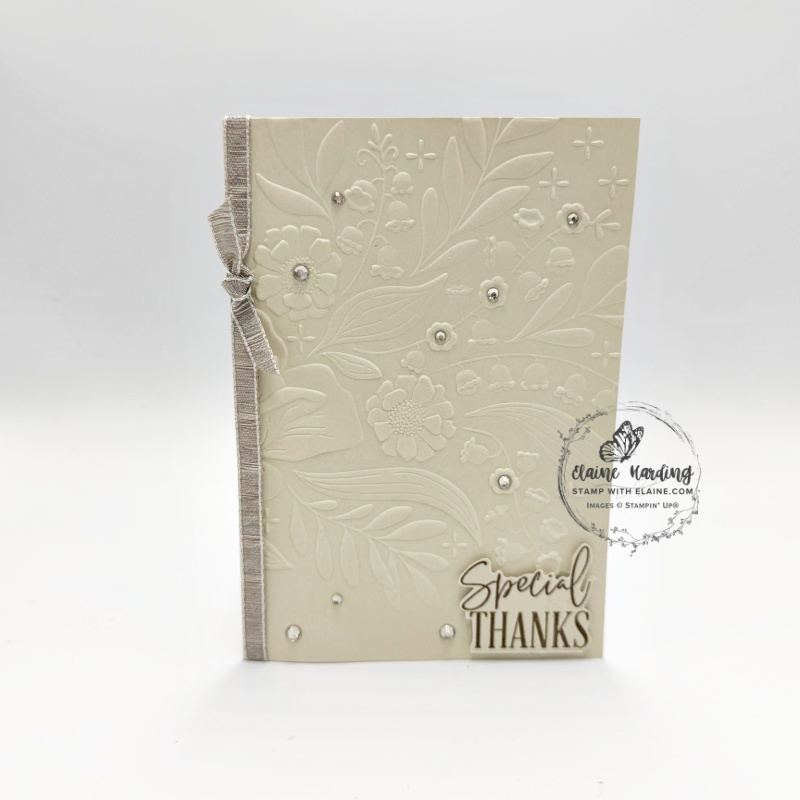
My first foray is the oversized Floral Spray 3D embossing folder which measures 6″ x 8 ½” (15.2 x 21.6 cm). You can make a beautiful card with minimal supplies and still give it this “Wow” factor. Don’t worry, I’ll be back with more ideas very soon! I did, however, go a bit overboard with the Rhinestones! lol!
Cutting guide
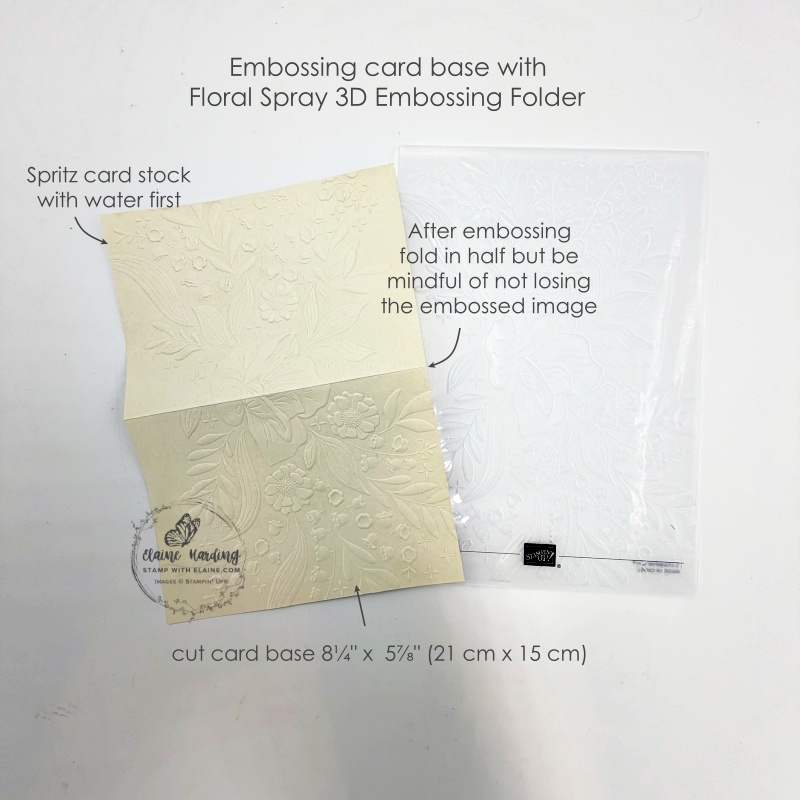
- Basic Beige card base cut at 5 ⅞” x 8 ¼” (30 cm x 21 cm). Lightly spritz with water before embossing it with the oversized Floral Spray 3D embossing folder. Carefully fold it in half without de-bossing the embossed areas.
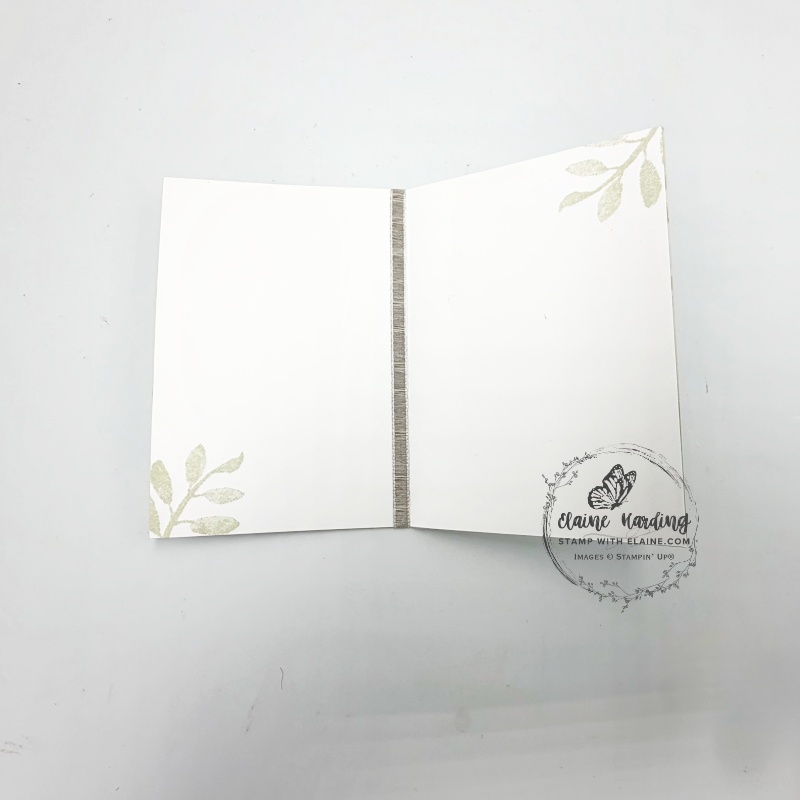
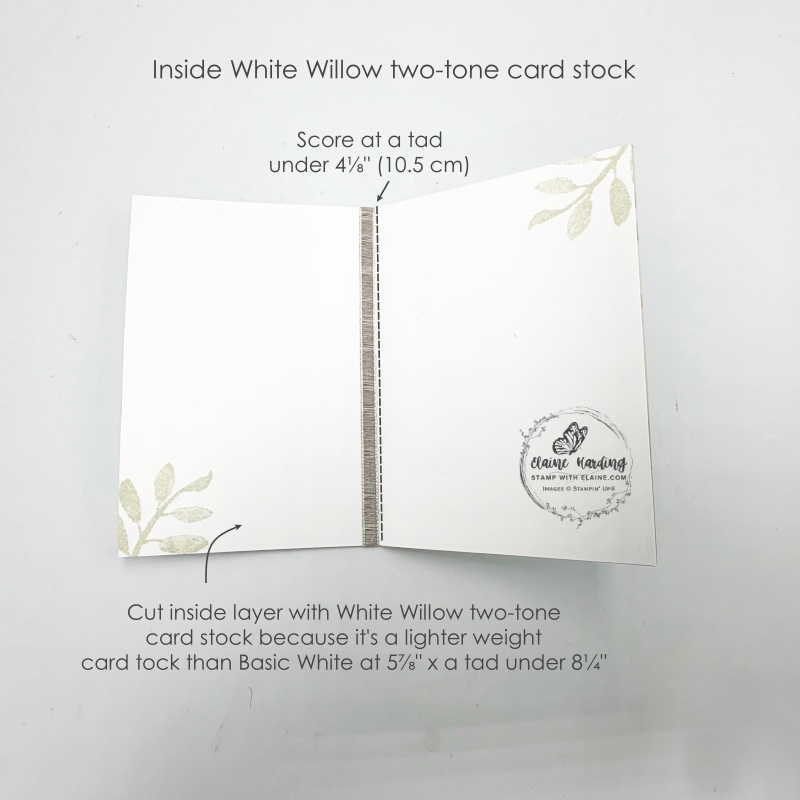
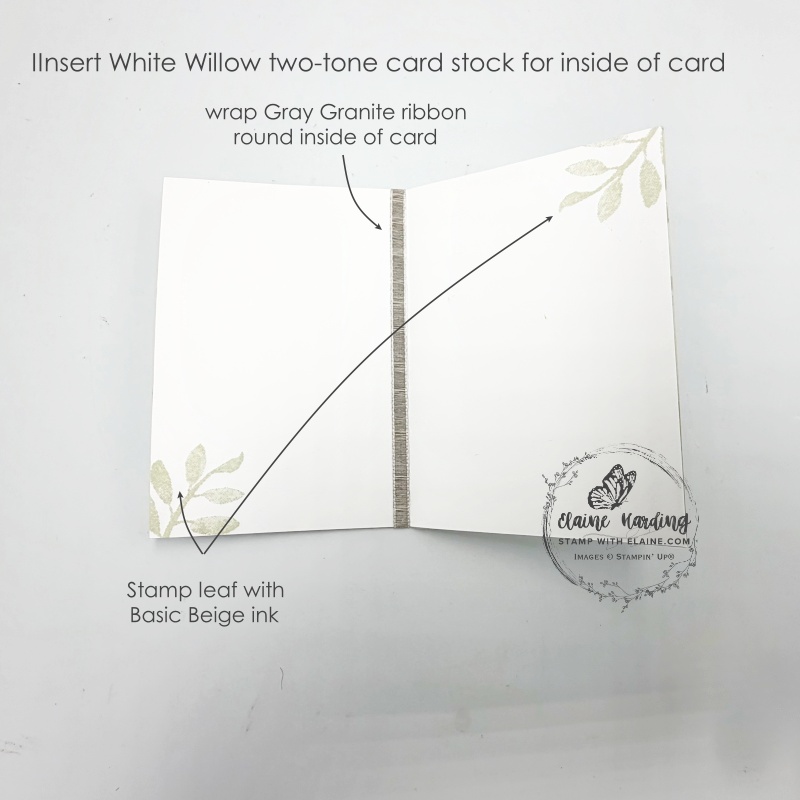
- Cut White Willow two-tone card stock for inside card at a tad under 5 ⅞” x 8 ¼” (a tad under 21 cm x 15 cm) so that it won’t show underneath when card is closed.
- Basic Beige scrap to stamp and trim sentiment.
How to adhere White Willow insert
FYI after spritzing card stock with water in order to get a good impression without the paper cracking, you’ll probably find that the paper will warp as it dries. Picture below on the left shows how adhesive is applied.
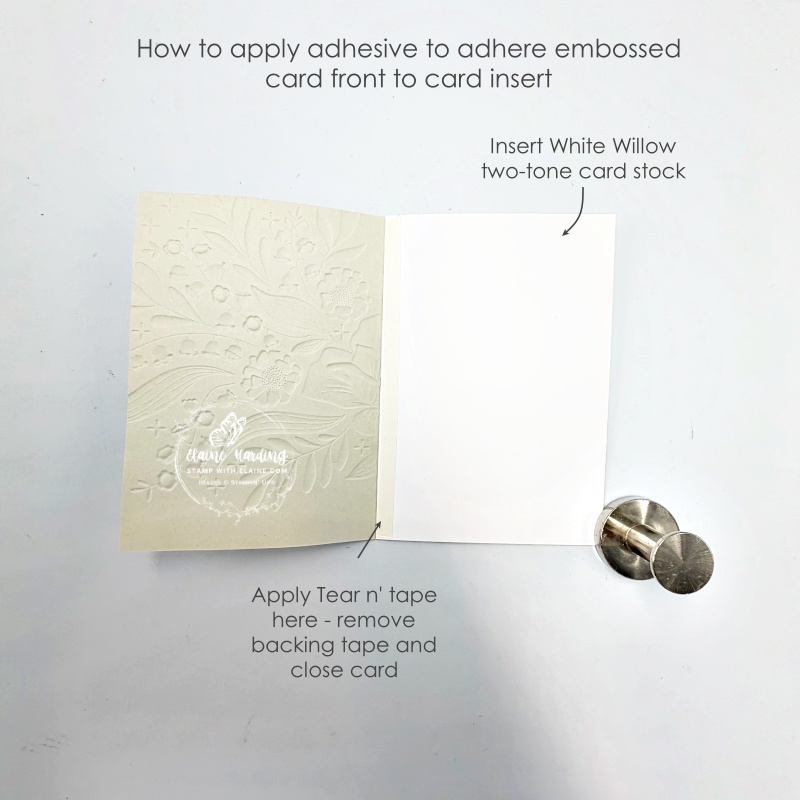
- (Step 1 – unfortunately I forgot to take a picture). To adhere insert to the right side of card base – apply tear n’ tape along the score line of the Basic Beige embossed card base.
- Next, remove the backing tape and hold Basic Beige front of card at a right angle. Butt card base up into the corner of Simply Scored board. Fold White Willow piece in half, butt it up into the corner aligned with card base and adhere.
- Step 2 – The picture above shows how to apply tear n’ tape to the White Willow insert for the front half of the Basic Beige embossed card base. Simply remove backing tape then close the Basic Beige embossed card front over the top of the White Willow insert.
Optional
If you do not like the warped appearance of the embossed front and back of card, you can add additional tear n’ tape to the remaining 3 sides on White Willow insert.
- Apply tear n’ tape to top, side and bottom of White Willow insert on the card front.
- Partially peel back each section of tear n’ tape, close card front and work from fold outwards to prevent air bubbles, continuing to peel backing tape from each side until it is fully secured.
- Repeat for back portion of card too.
Finishing touches
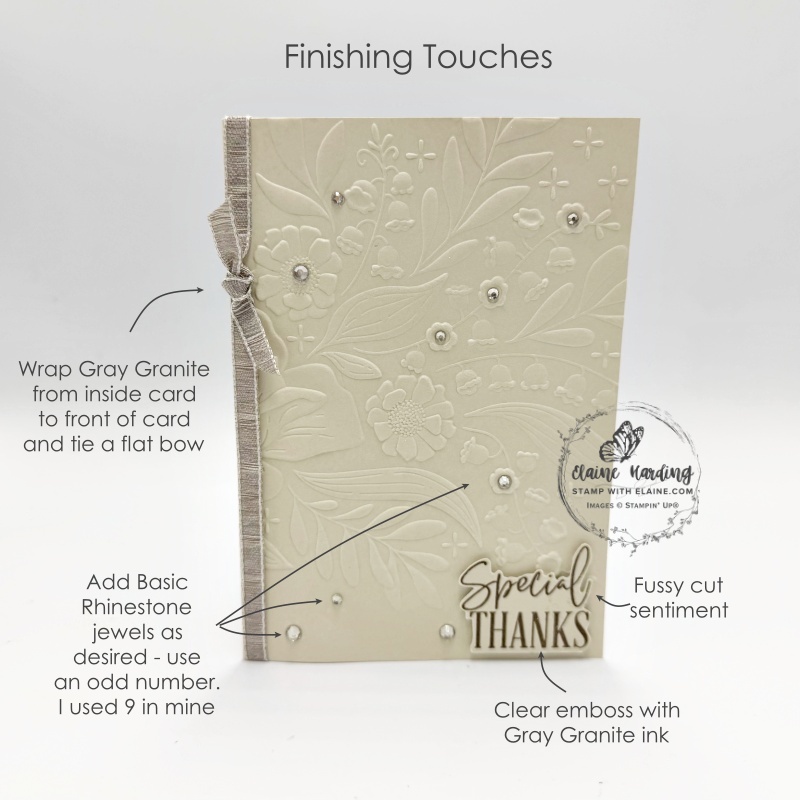

- Wrap Gray Granite ribbon round card and tie a flat knot to the front of the card.
- Clear emboss “Special Thanks” from Opulent Oasis and fussy cut out sentiment. Adhere with dimensionals to bottom right of card front.
- Add Basic Rhinestones in some of the flower centres and where appropriate.
- Stamp in bottom left corner a leaf sprig with Basic Beige ink from Opulent Oasis stamp set.
- Repeat stamping leaf in top right corner as pictured above.
Supply list
Listed below is the supply list. Just click on the picture to take you directly to the item in my online store.
Product List![Floral Spray 3 D Embossing Folder [ 167946 ]](https://assets1.tamsnetwork.com/images/EC042017NF/167946s.jpg "Floral Spray 3 D Embossing Folder [ 167946 ]")
![White Willow 12" X 12" (30.5 X 30.5 Cm) Cardstock [ 166703 ]](https://assets1.tamsnetwork.com/images/EC042017NF/166703s.jpg "White Willow 12\" X 12\" (30.5 X 30.5 Cm) Cardstock [ 166703 ]")
![Basic Beige A4 Cardstock [ 164512 ]](https://assets1.tamsnetwork.com/images/EC042017NF/164512s.jpg "Basic Beige A4 Cardstock [ 164512 ]")
![Stampin' Spritzer [ 126185 ]](https://assets1.tamsnetwork.com/images/EC042017NF/126185s.jpg "Stampin' Spritzer [ 126185 ]")
![Gray Granite Classic Stampin' Pad [ 147118 ]](https://assets1.tamsnetwork.com/images/EC042017NF/147118s.jpg "Gray Granite Classic Stampin' Pad [ 147118 ]")
![Versamark Pad [ 102283 ]](https://assets1.tamsnetwork.com/images/EC042017NF/102283s.jpg "Versamark Pad [ 102283 ]")
![Embossing Additions Tool Kit [ 159971 ]](https://assets1.tamsnetwork.com/images/EC042017NF/159971s.jpg "Embossing Additions Tool Kit [ 159971 ]")
![Basics Wow! Embossing Powder [ 165679 ]](https://assets1.tamsnetwork.com/images/EC042017NF/165679s.jpg "Basics Wow! Embossing Powder [ 165679 ]")
![Heat Tool - Uk Plug [ 129054 ]](https://assets1.tamsnetwork.com/images/EC042017NF/129054s.jpg "Heat Tool - Uk Plug [ 129054 ]")
![Rhinestone Basic Jewels [ 144220 ]](https://assets1.tamsnetwork.com/images/EC042017NF/144220s.jpg "Rhinestone Basic Jewels [ 144220 ]")

- SHOP ONLINE – EARN 10% REWARDS ON ALL PURCHASES OVER £20
- PURCHASE A STARTER KIT : Get £155 worth of products for only £99. Choose from current catalogues and any specials available. Free Shipping. Read more
- Subscribe to my Video Tutorials – click here
Pingback: Accordian pop-up Birthday card - Lily of the Valley - Stamp with Elaine