
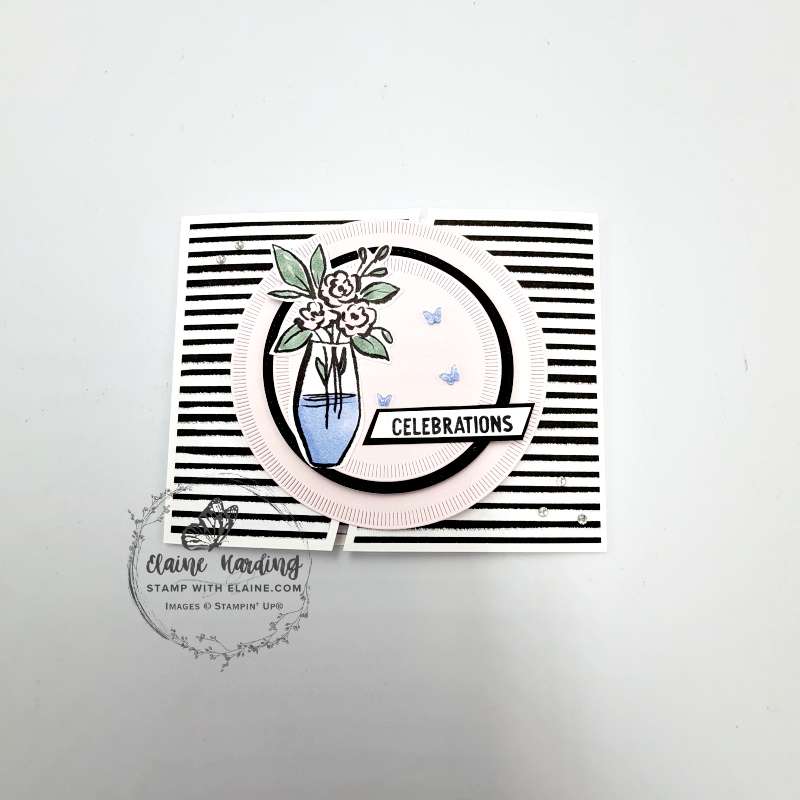
Angled slider card – Artisan Sketched Garden. I promised I would re-visit this type of card when I posted an altered Paper Pumpkin card from the Lakeside Retreat kit which you can see HERE. Today I’m using the Artisan Sketched Garden 12″x 12″ (30.5 x 30.5 cm) to make an angled slider card. The process is the same as for the card I altered with the kit.
Cutting guide
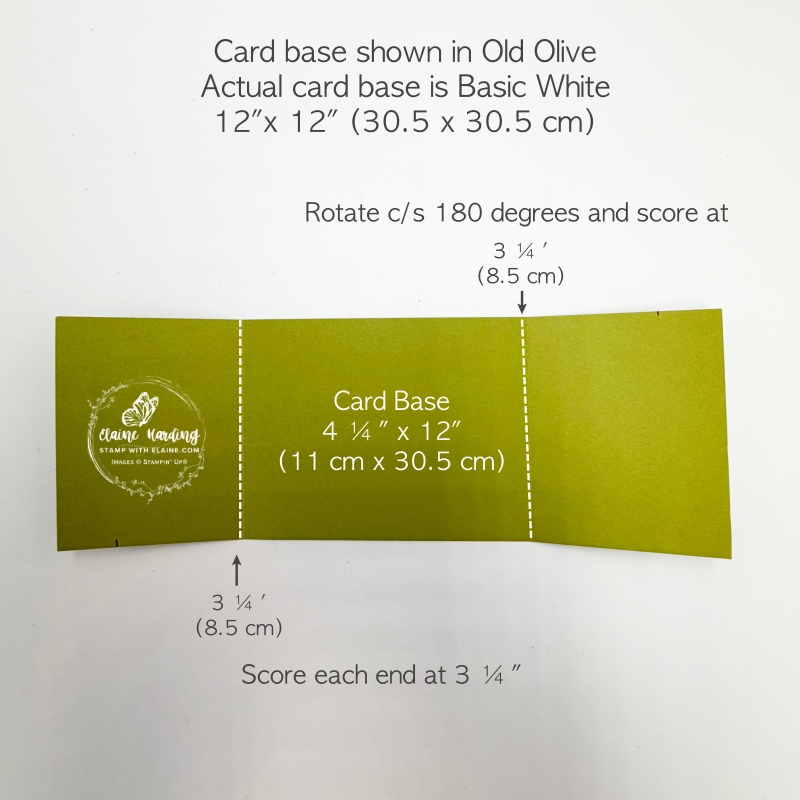
- Cut Basic White cardstock at 4 ¼” x 12″ (11 cm x 30.5 cm)
- Score one side on the long side at 3 ¼” (8.5 cm), then rotate card stock 180 degrees and score the other side at 3 ¼” (8.5 cm).
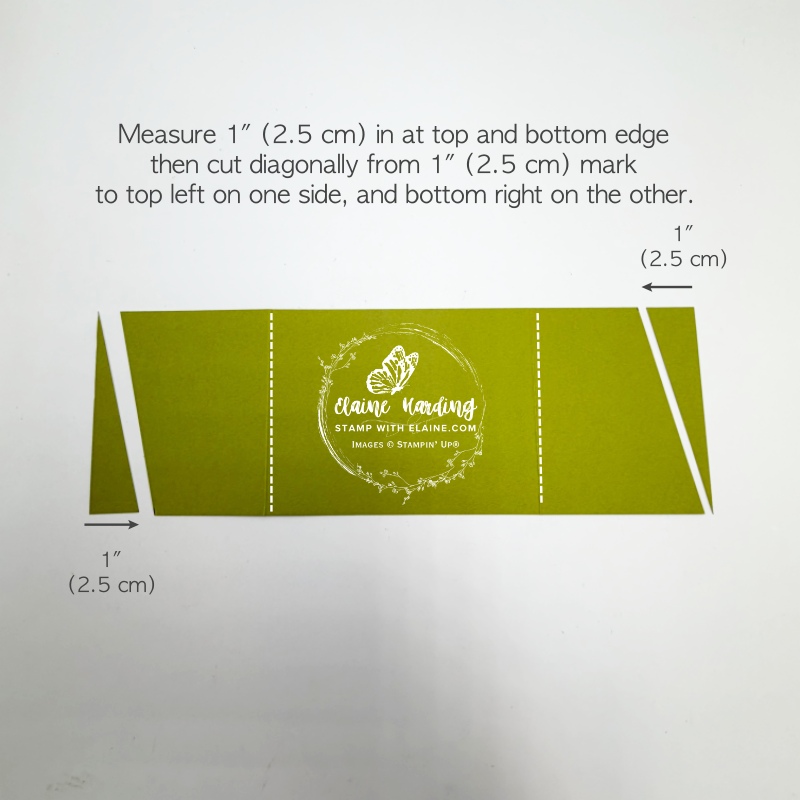
- Make a pencil mark 1″ (2.5 cm) in at bottom left, and repeat at the top right edge.
- From pencil mark at the bottom, align pencil mark in cutting groove with the tip and cut diagonally.
- Repeat for the other side in the opposite direction as pictured. Take your time to do this so you’re cutting it in the right direction.
How to cut DSP
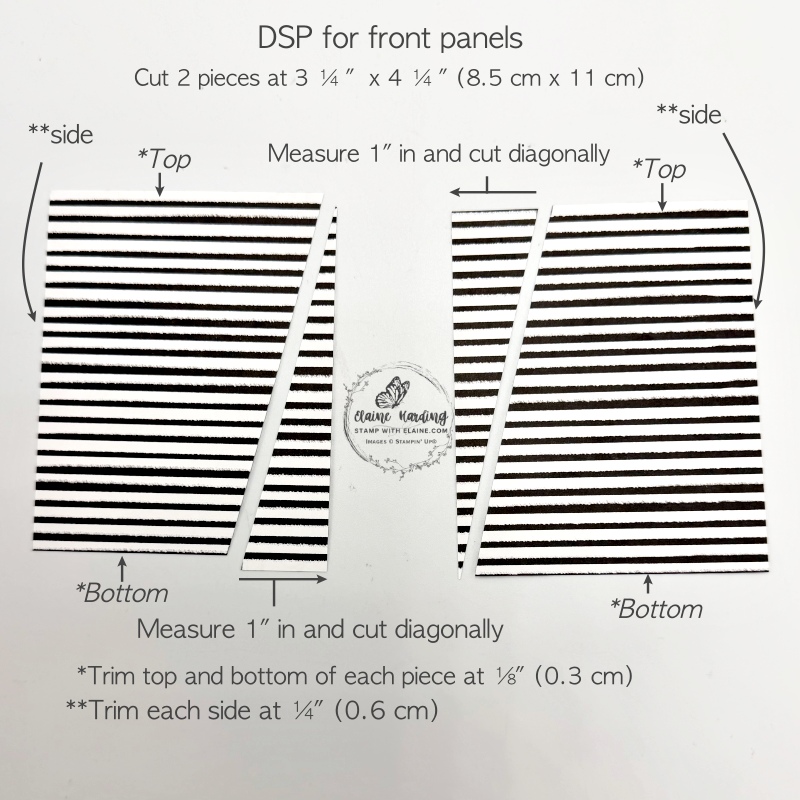
- Cut 2 pieces of DSP same size as card front at 3 ¼” x 4 ¼” (8.5 x 11 cm)
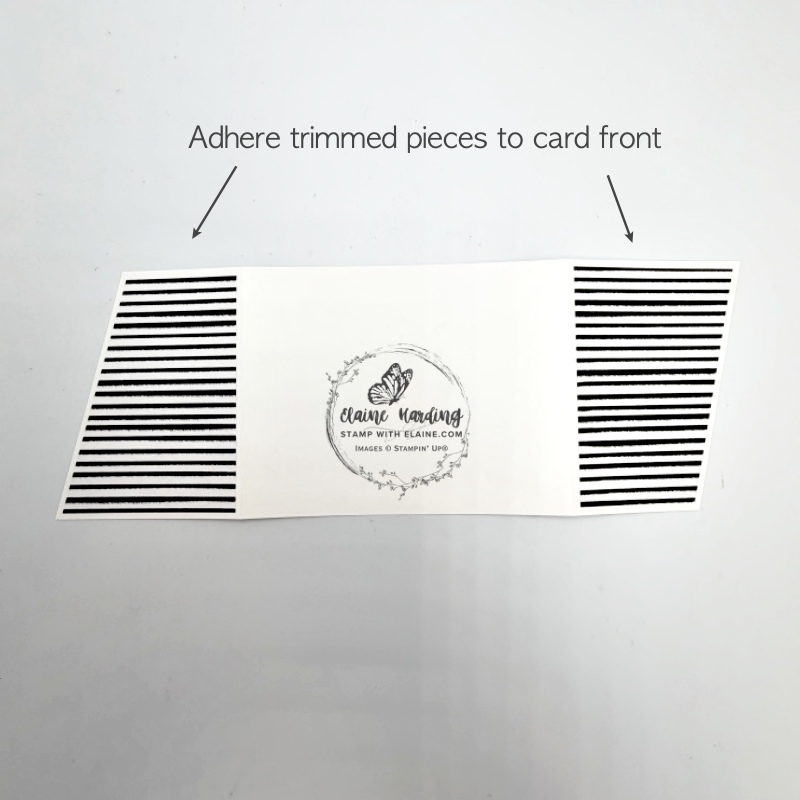
- Measure 1″ in on opposite ends on each piece and cut diagonally as shown in picture. In order to keep the angles parallel to the angles on the card fronts, trim ⅛” from top and bottom straight edges, and ¼ ” on the straight side which will be parallel to the folds on each sides of the card base.
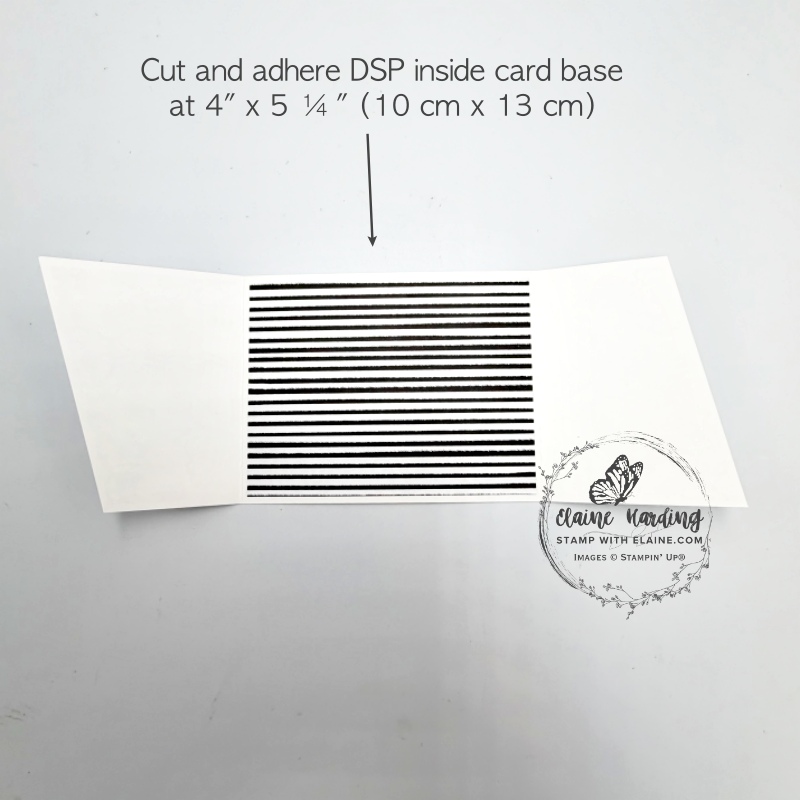
- Cut DSP with the same pattern for the inside of the card at 4″ x 5 ¼” (10 cm x 13 cm) and adhere to inside of card base leaving an even border on all 4 sides.
Slider mechanism
This where the magic happens. The mechanism consists of 3 circles – two folded in half and each half adhered to 3rd whole circle.
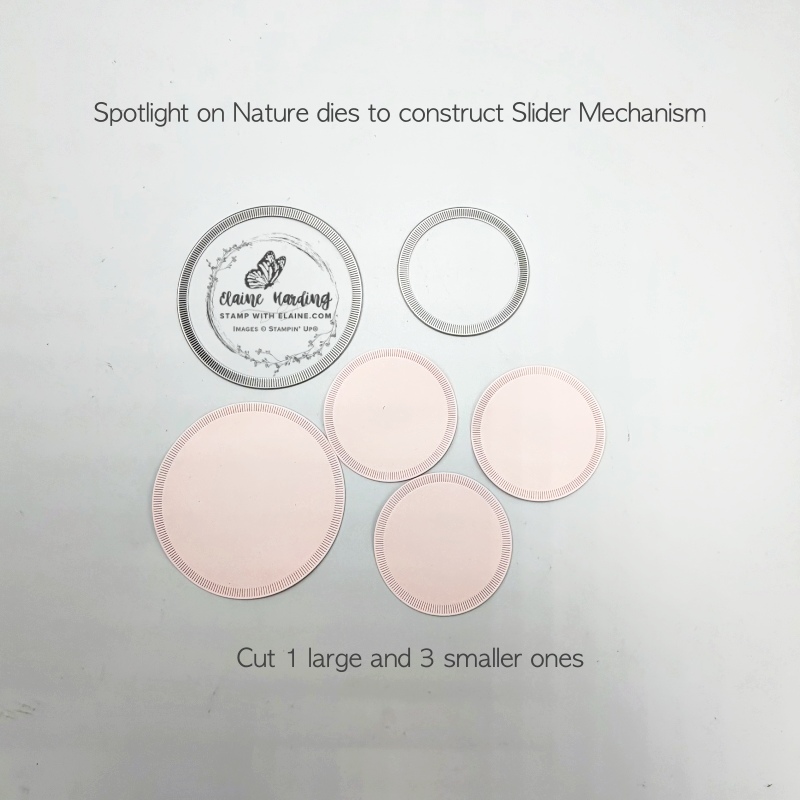
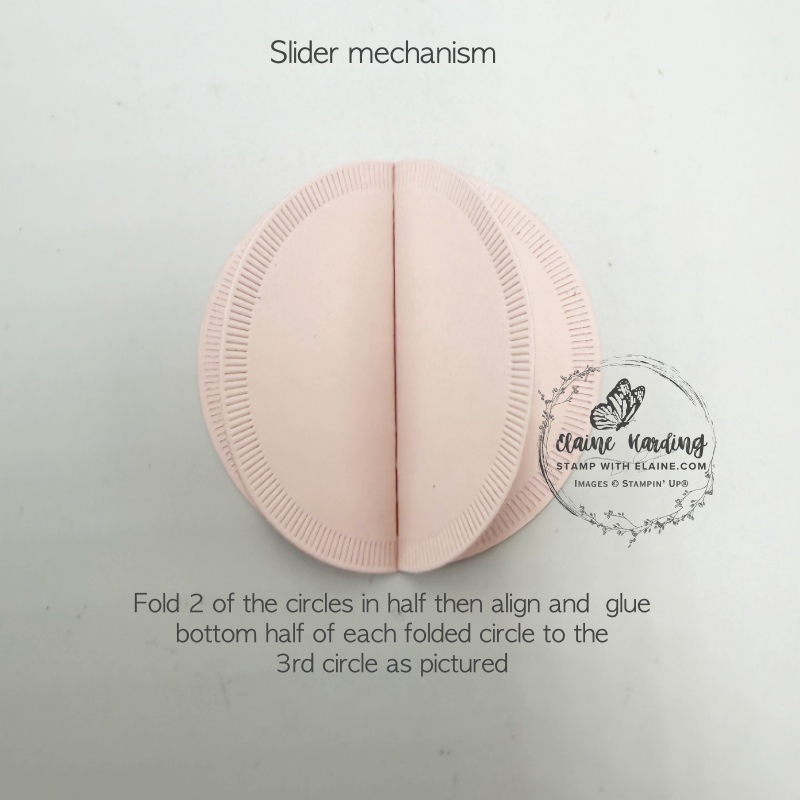
- Spotlight on Nature dies – use the largest to die cut a circle in Barely Blush.
- Cut 3 smaller circles with the next size circle. Fold two of the circles in half. Apply adhesive to the bottom half of each circle and align and adhere to remaining circle as shown above.
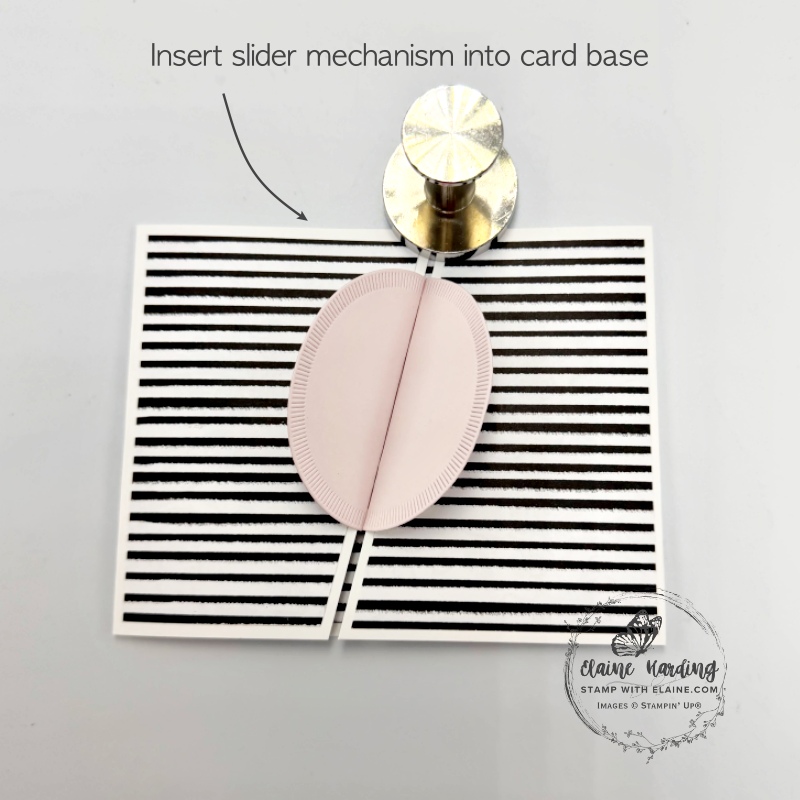
- Insert slider mechanism into card as pictured.
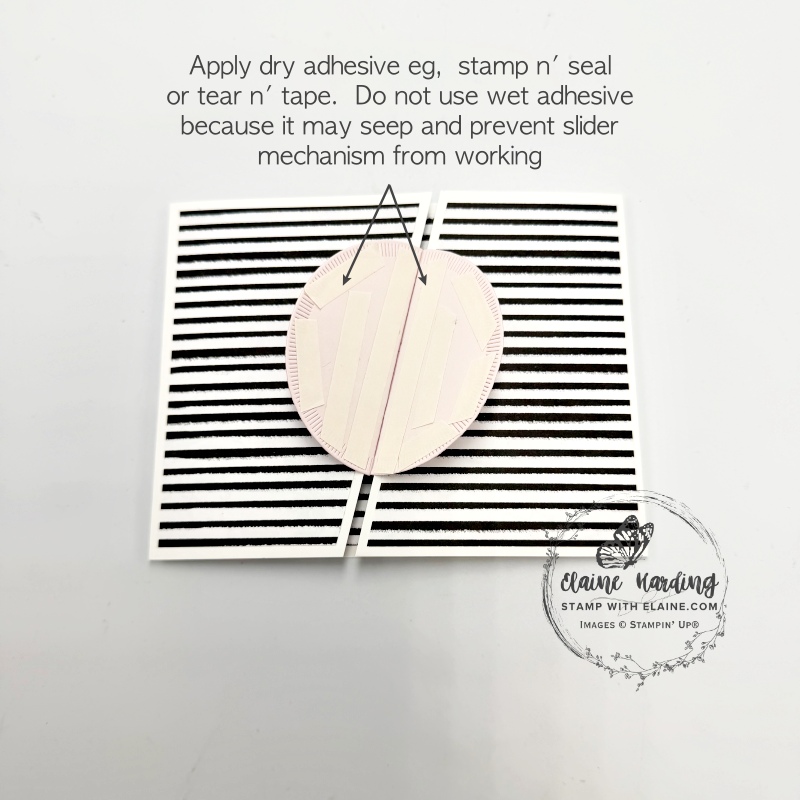
- Apply dry adhesive eg. stamp n’ seal or tear n’ tape to each half. Avoid wet adhesive because this can seep and prevent the slider from moving freely.
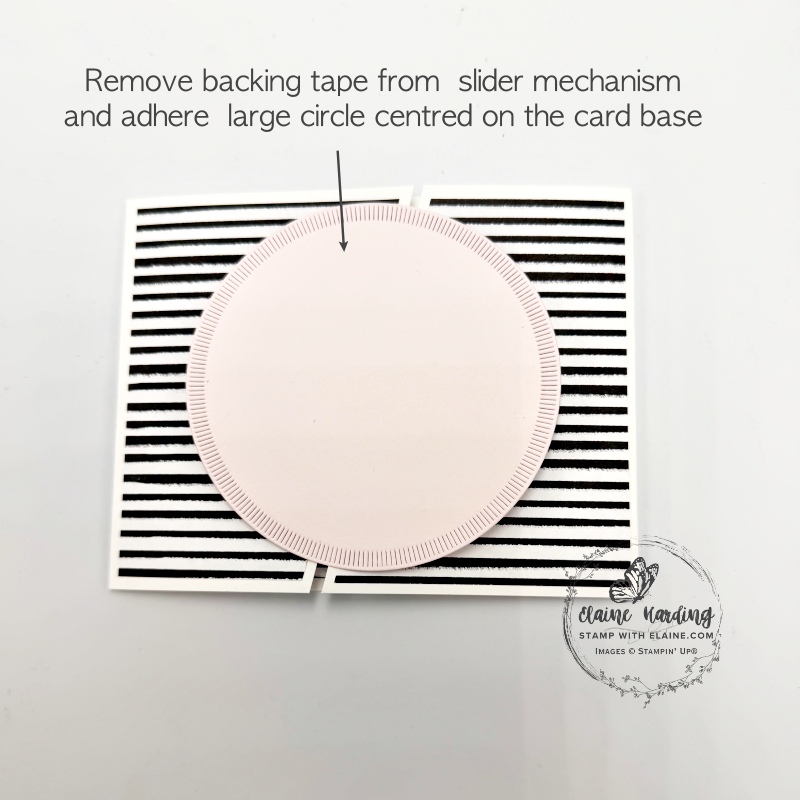
- Remove backing tape from the slider mechanism, place the large circle centred on the card and adhere to slider mechanism underneath.
Stylish Shapes circle die
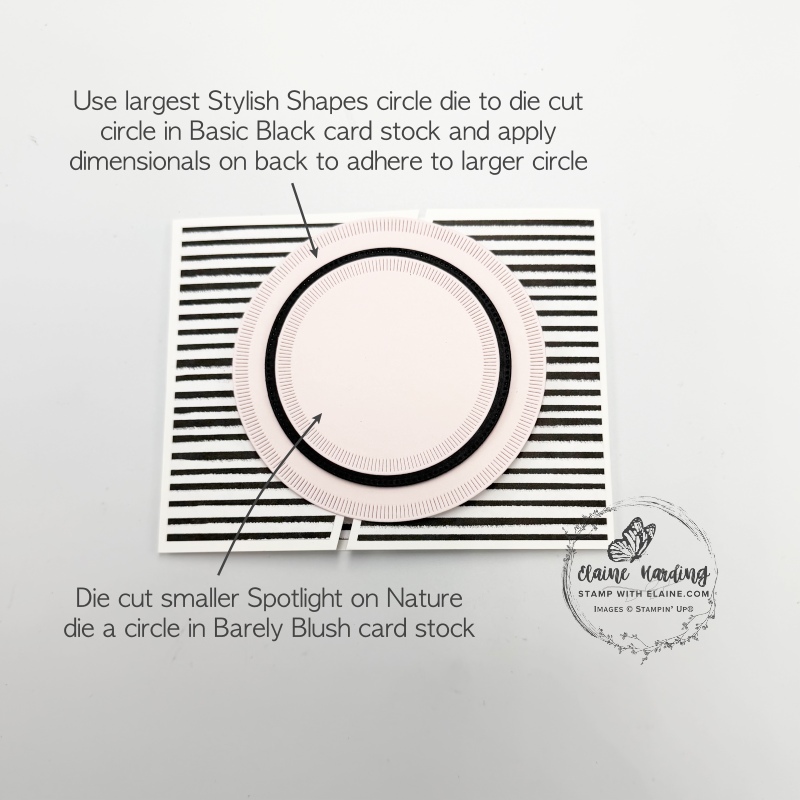
- Use the largest Stylish Shapes circle die to die cut the black circle. Apply dimensionals on the back and centre and adhere to large Barely Blush circle.
- Die cut the smaller coordinating circle shape from Spotlight in Nature and adhere on top of black circle leaving an even border around the circumference of the black circle.
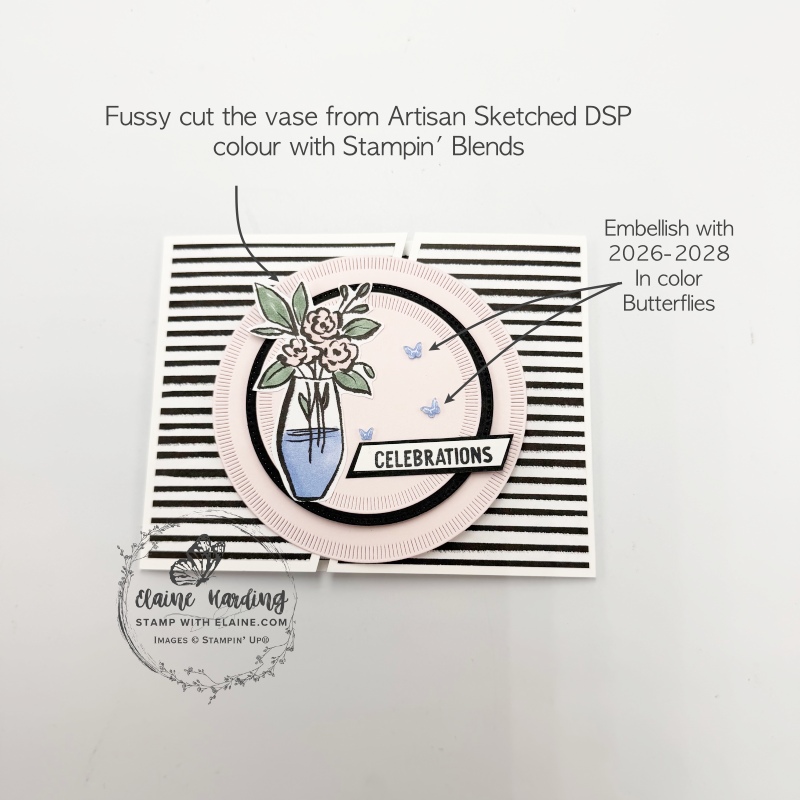
- Fussy cut the vase from Artisan Sketched DSP. Colour with Hydrangea Hue, Barely Blush and Peaceful Pine Stampin’ Blends.
- Add 2026-2028 In Color Butterlies in the blank space and adhere the stamped greeting from “Reason to Celebrate” stamp set.
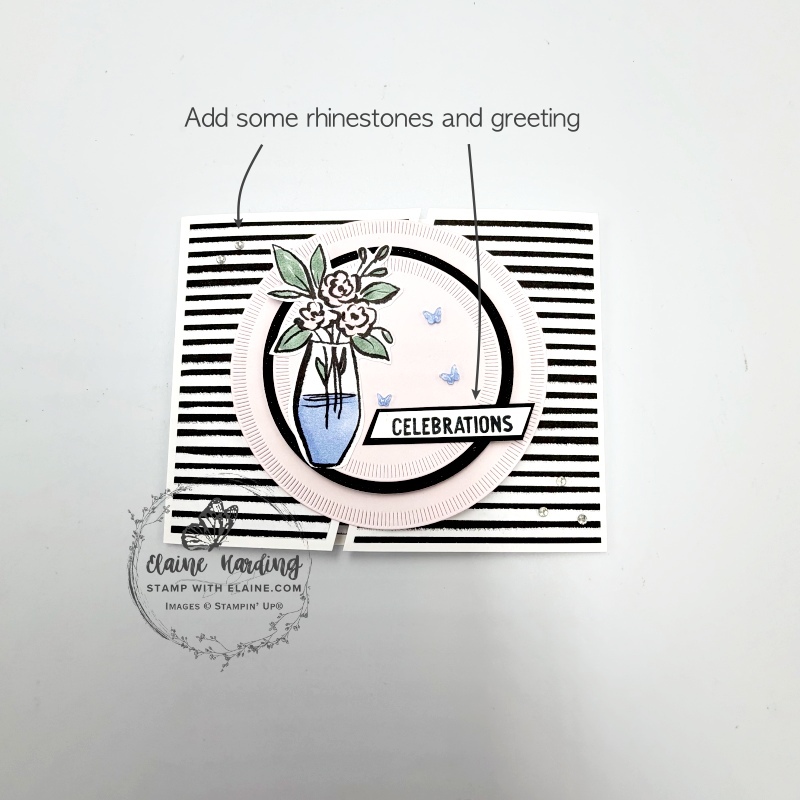
- Add some Basic Rhinestone jewels on the card front panels on the left and right as pictured.
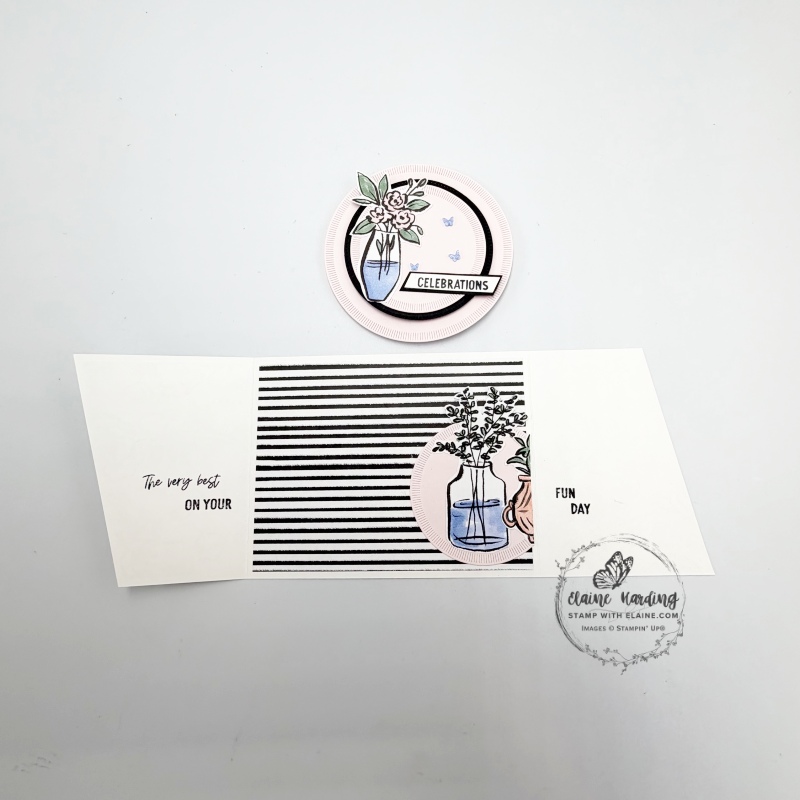
Inside card
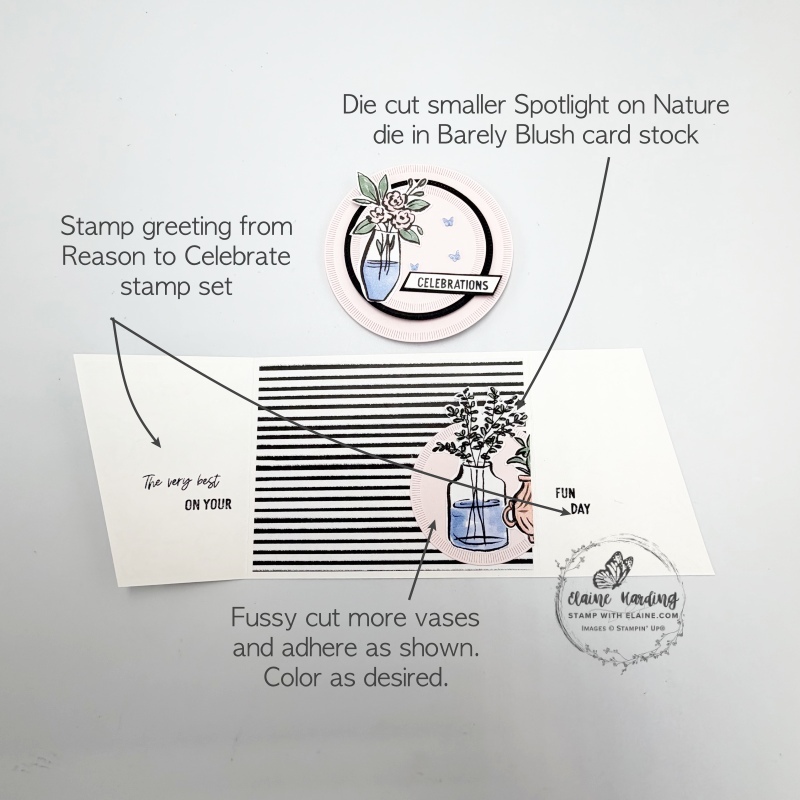
- Stamp the sentiments across both inside front panels as shown.
- Die cut a Barely Blush circle and cut off one end so you can butt it up to the edge as shown above.
- Fussy cut vases and the partial one too from the edge of the paper. Colour in with Stampin’ Blends and adhere to circle. Ensure it is properly adhered so that the slider mechanism can still move freely.
Hope this has inspired you to make your own!
Supply list
Listed below is the supply list. Just click on the picture to take you directly to the item in my online store.
Product List![Spotlight On Nature Dies [ 163580 ]](https://assets1.tamsnetwork.com/images/EC042017NF/163580s.jpg "Spotlight On Nature Dies [ 163580 ]")
![Stylish Shapes Dies [ 159183 ]](https://assets1.tamsnetwork.com/images/EC042017NF/159183s.jpg "Stylish Shapes Dies [ 159183 ]")
![Artisan Sketched Garden 12" X 12" (30.5 X 30.5 Cm) Designer Series Paper [ 167752 ]](https://assets1.tamsnetwork.com/images/EC042017NF/167752s.jpg "Artisan Sketched Garden 12\" X 12\" (30.5 X 30.5 Cm) Designer Series Paper [ 167752 ]")
![Basic White 12" X 12" (30.5 X 30.5 Cm) Thick Cardstock [ 166782 ]](https://assets1.tamsnetwork.com/images/EC042017NF/166782s.jpg "Basic White 12\" X 12\" (30.5 X 30.5 Cm) Thick Cardstock [ 166782 ]")
![Basic Black A4 Card Stock [ 121688 ]](https://assets1.tamsnetwork.com/images/EC042017NF/121688s.jpg "Basic Black A4 Card Stock [ 121688 ]")
![Barely Blush A4 Cardstock [ 167690 ]](https://assets1.tamsnetwork.com/images/EC042017NF/167690s.jpg "Barely Blush A4 Cardstock [ 167690 ]")
![Basic Black Hybrid Stampin' Pad [ 166648 ]](https://assets1.tamsnetwork.com/images/EC042017NF/166648s.jpg "Basic Black Hybrid Stampin' Pad [ 166648 ]")
![Barely Blush Shimmer Brush [ 167664 ]](https://assets1.tamsnetwork.com/images/EC042017NF/167664s.jpg "Barely Blush Shimmer Brush [ 167664 ]")
![Hydrangea Hue Stampin’ Blends Combo Pack [ 167666 ]](https://assets1.tamsnetwork.com/images/EC042017NF/167666s.jpg "Hydrangea Hue Stampin’ Blends Combo Pack [ 167666 ]")
![Barely Blush Stampin’ Blends Combo Pack [ 167667 ]](https://assets1.tamsnetwork.com/images/EC042017NF/167667s.jpg "Barely Blush Stampin’ Blends Combo Pack [ 167667 ]")
![Peaceful Pine Stampin’ Blends Combo Pack [ 167668 ]](https://assets1.tamsnetwork.com/images/EC042017NF/167668s.jpg "Peaceful Pine Stampin’ Blends Combo Pack [ 167668 ]")
![2026–2028 In Color™ Butterflies [ 167656 ]](https://assets1.tamsnetwork.com/images/EC042017NF/167656s.jpg "2026–2028 In Color™ Butterflies [ 167656 ]")
![Rhinestone Basic Jewels [ 144220 ]](https://assets1.tamsnetwork.com/images/EC042017NF/144220s.jpg "Rhinestone Basic Jewels [ 144220 ]")

- SHOP ONLINE – EARN 10% REWARDS ON ALL PURCHASES OVER £20
- PURCHASE A STARTER KIT : Get £155 worth of products for only £99. Choose from current catalogues and any specials available. Free Shipping. Read more
- Subscribe to my Video Tutorials – click here