
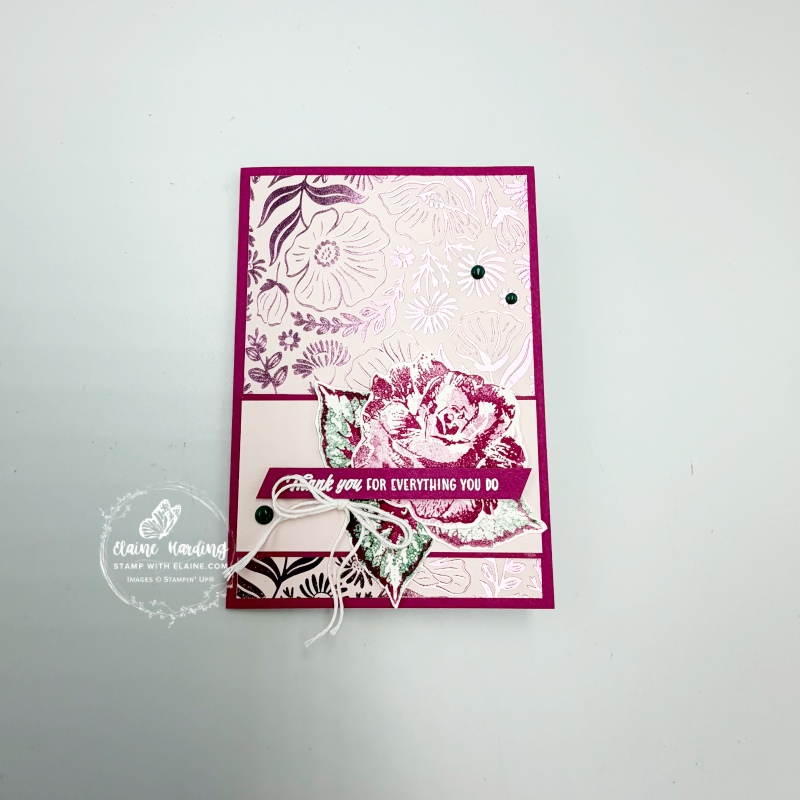
Thank you card – Garden Silhouette. Before July ends, I thought I’d squeeze in another card with July’s Product of the month – Begonia Belle! I also made use of the Garden Silhouette Hot Foil die which arrived a couple of days ago. It is beautiful for making quick simple cards. I wanted to make use of the pink foil and today’s thank you card is therefore very PINK!
Tips on different ways you can use die
The photo doesn’t do it justice, but it’s stunning in real life. There’s so many ways you can use this background. Cut it up to use the individual flowers or colour the flowers in with different mediums. You could also cut round the flowers into two pieces and use each piece to make two cards. Each piece will have 3 straight sides which you can align with your card base or mat layer and just add a sentiment. Choose any colour palette you wish with the silver or gold hot foil rolls – the whole spectrum of Stampin’ Up!’s 50 colours!
Cutting guide
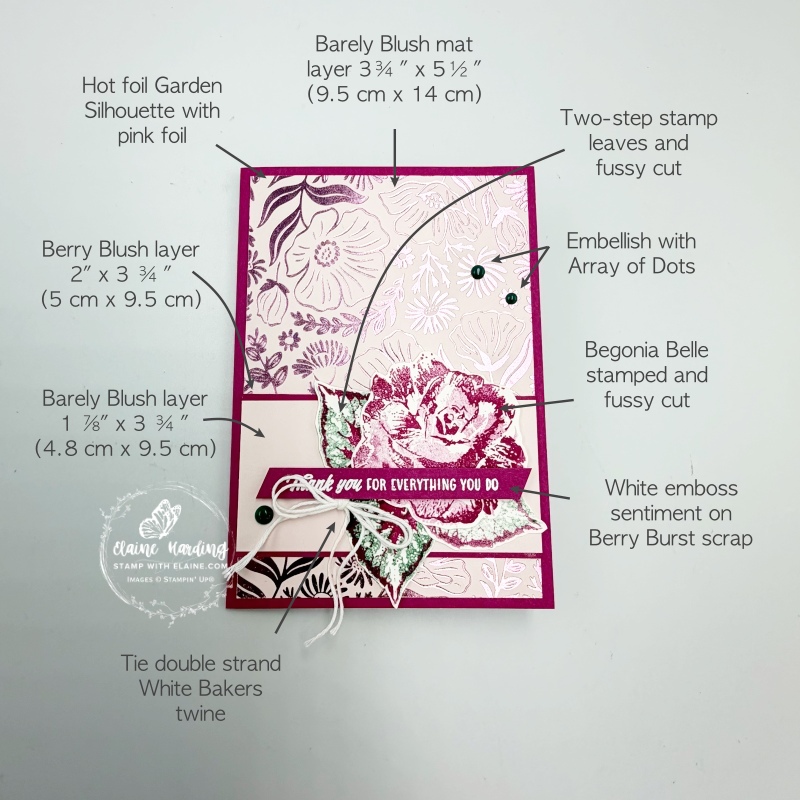
- Card base is 5 ¾” x 8 ¼” (14.5 cm x 21 cm) folded in half.
- Hot Foil Garden Silhouette Hot Foil die with ½ a sheet of Barely Blush card stock and Pink Hot foil large enough to cover whole die. After hot foiling, trim to 3 ¾” x 5 ½” (9.5 cm x 14 cm). Reserve a strip for inside of card.
- Berry Burst layer : cut at 2″ x 3 ¾” (5 cm x 9.5 cm)
- Barely Blush layer : cut at 1 ⅞” x 3 ¾”(4.8 cm x 9.5 cm)
- White emboss sentiment on a strip of Berry Burst and adhere to card base after adhering the leaves and flower as pictured above.
Begonia Belle stamp set
This is July’s Product of the month. It is a one time purchase subject to a qualifying order of £70 excluding shipping/tax.
- Two step stamp Begonia the floral stamps with first and second generation Berry Burst ink. Fussy cut and set aside.
- Repeat for leaves. Stamp each leaf with Berry Burst followed by stamping with Peaceful Pine 2nd generation ink. You need 3 altogether.
- Fussy cut flower and leaves and arrange before adhering to Barely Blush strip as pictured above.
Array of Dots and Bakers Twine
- Embellish with Array of Dots
- Tie a double strand of White Bakers twine and adhere with a glue dot as pictured above.
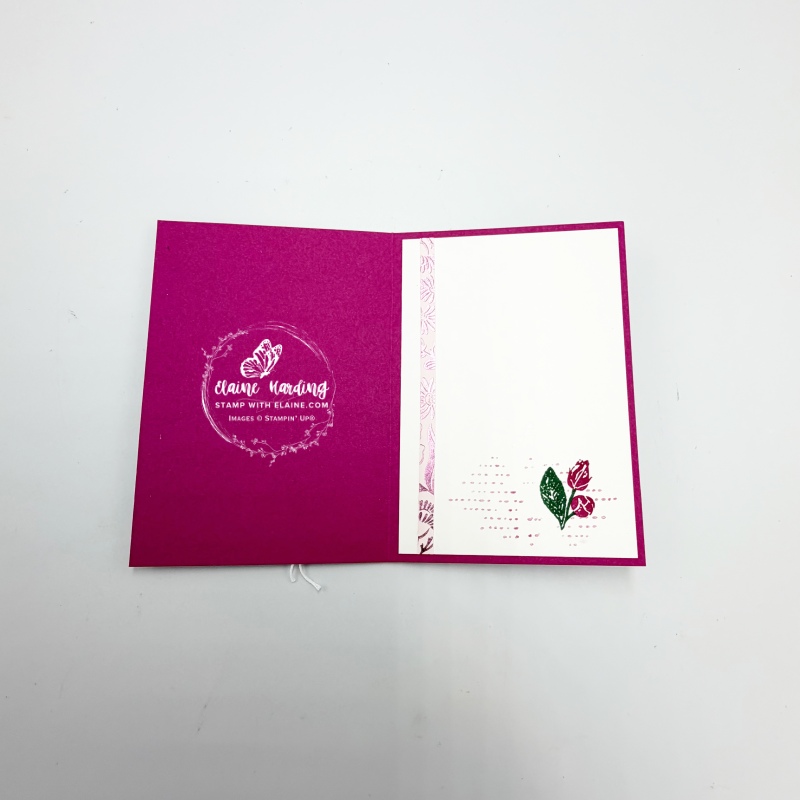
Inside card
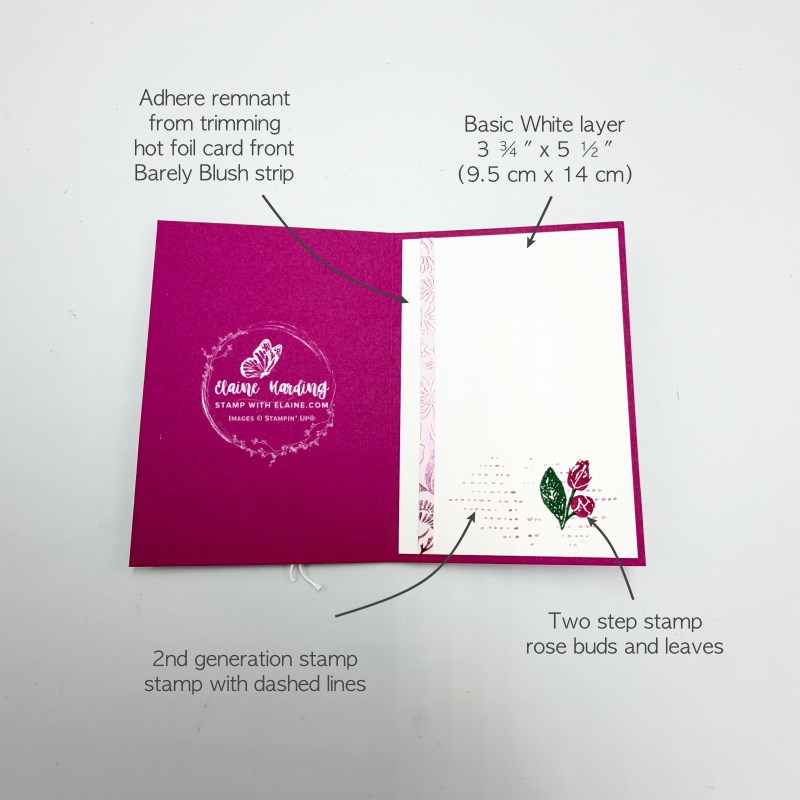
- Basic White layer cut at 3 ¾” x 5 ½” (9.5 cm x 14 cm).
- Adhere remnant from trimming hot foiled card front to the inside of Basic White layer. Trim off excess before adhering Basic White layer to inside card.
- Stamp 2nd generation Berry Burst ink with dashed line stamp.
- Two-step stamp buds in Berry Burst and leaves with Peaceful Pine.
Voila! How quick and easy was that!
Stampin’ Hot Foil System
This is a new tool by Stampin’ Up! with special Hot Foil Dies. If you missed the post introducing the machine and information all about it, here’s a video to explain how the system works. Please be aware this machine is designed to fit Stampin’ Up!’s larger Stampin’ Cut & Emboss machine and was tested with their own line of products. It would render the 1 year warranty on the Stampin’ Hot Foil System null and void if you use it on non-Stampin’ Up! machines which may not fit.
Also be sure you’re ordering the machine with the right plug for your market. Foils and dies have to be purchased separately.
If you purchase the Stampin’ Hot Foil System before Jan 4, 2027, it will also include the Metallic Magic Craft Class for free. The class will cost £28.00 to purchase when the free class offer ends.
Supply list
Listed below is the supply list. Just click on the picture to take you directly to the item in my online store.
Product List![Uk/Ie Stampin' Hot Foil System & Craft Class [ 170011 ]](https://assets1.tamsnetwork.com/images/EC042017NF/170011s.jpg "Uk/Ie Stampin' Hot Foil System & Craft Class [ 170011 ]")
![Garden Silhouette Hot Foil Die [ 170041 ]](https://assets1.tamsnetwork.com/images/EC042017NF/170041s.jpg "Garden Silhouette Hot Foil Die [ 170041 ]")
![Light Pink Stampin' Hot Foil Rolls [ 170068 ]](https://assets1.tamsnetwork.com/images/EC042017NF/170068s.jpg "Light Pink Stampin' Hot Foil Rolls [ 170068 ]")
![Begonia Belle Photopolymer Stamp Set (English) [ 168592 ]](https://assets1.tamsnetwork.com/images/EC042017NF/168592s.jpg "Begonia Belle Photopolymer Stamp Set (English) [ 168592 ]")
![Basic White A4 Cardstock [ 166781 ]](https://assets1.tamsnetwork.com/images/EC042017NF/166781s.jpg "Basic White A4 Cardstock [ 166781 ]")
![Barely Blush A4 Cardstock [ 167690 ]](https://assets1.tamsnetwork.com/images/EC042017NF/167690s.jpg "Barely Blush A4 Cardstock [ 167690 ]")
![Berry Burst A4 Cardstock [ 144249 ]](https://assets1.tamsnetwork.com/images/EC042017NF/144249s.jpg "Berry Burst A4 Cardstock [ 144249 ]")
![Berry Burst Classic Stampin' Pad [ 147143 ]](https://assets1.tamsnetwork.com/images/EC042017NF/147143s.jpg "Berry Burst Classic Stampin' Pad [ 147143 ]")
![Peaceful Pine Classic Stampin Pad [ 167679 ]](https://assets1.tamsnetwork.com/images/EC042017NF/167679s.jpg "Peaceful Pine Classic Stampin Pad [ 167679 ]")
![Versamark Pad [ 102283 ]](https://assets1.tamsnetwork.com/images/EC042017NF/102283s.jpg "Versamark Pad [ 102283 ]")
![Embossing Additions Tool Kit [ 159971 ]](https://assets1.tamsnetwork.com/images/EC042017NF/159971s.jpg "Embossing Additions Tool Kit [ 159971 ]")
![Basics Wow! Embossing Powder [ 165679 ]](https://assets1.tamsnetwork.com/images/EC042017NF/165679s.jpg "Basics Wow! Embossing Powder [ 165679 ]")
![Heat Tool - Uk Plug [ 129054 ]](https://assets1.tamsnetwork.com/images/EC042017NF/129054s.jpg "Heat Tool - Uk Plug [ 129054 ]")
![Baker's Twine Essentials Pack [ 155475 ]](https://assets1.tamsnetwork.com/images/EC042017NF/155475s.jpg "Baker's Twine Essentials Pack [ 155475 ]")
![Array Of Dots [ 167559 ]](https://assets1.tamsnetwork.com/images/EC042017NF/167559s.jpg "Array Of Dots [ 167559 ]")

- SHOP ONLINE – EARN 10% REWARDS ON ALL PURCHASES OVER £20
- PURCHASE A STARTER KIT : Get £155 worth of products for only £99. Choose from current catalogues and any specials available. Free Shipping. Read more
- Subscribe to my Video Tutorials – click here
