
Hot foil technique 1 – Garden Silhouette. Naturally I’ve been exploring other ways to use the Garden Silhouette Hot Foil die. Did you know you can dry emboss with the hot foil die? First I’ll show you the card I made. You can hot foil the Garden Silhouette Hot Foil Die on a 6 ¼” x 5″ piece of card stock so that you foil the whole die. Then you can fussy cut around the contour of the flowers to separate it into 2 pieces and trim it to fit your card base accordingly.
Fussy cut hot foiled Garden Silhouette to make two cards
I’ve used one piece for this card and have set aside the other to make a second card with a different technique which I’ll cover in another blogpost so do pop back!
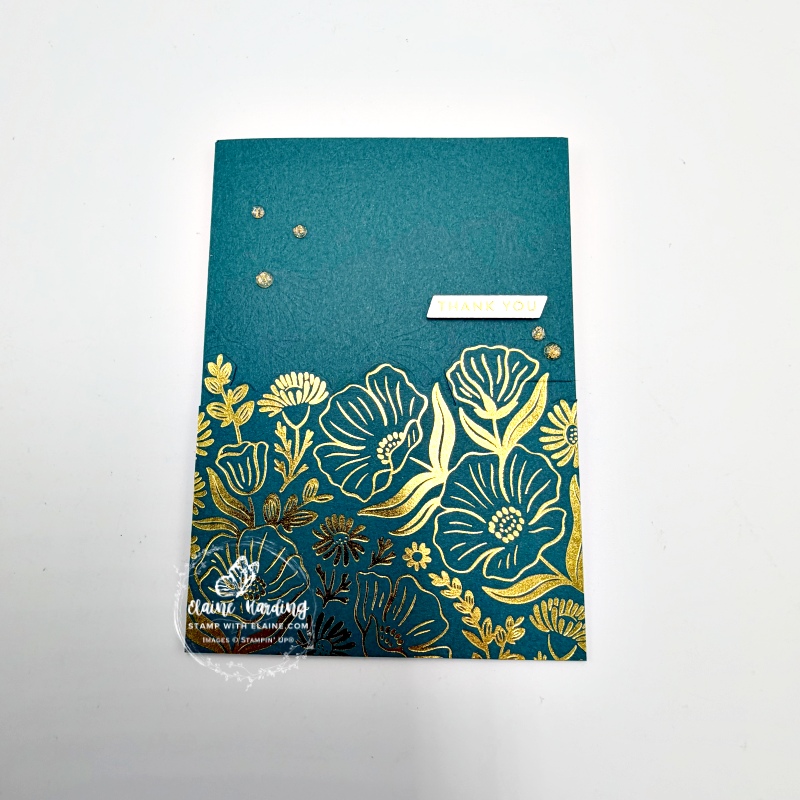
Technique 1 – how to emboss with the hot foil background die
This is a close up of the upper portion of the card so that you can see the embossing.
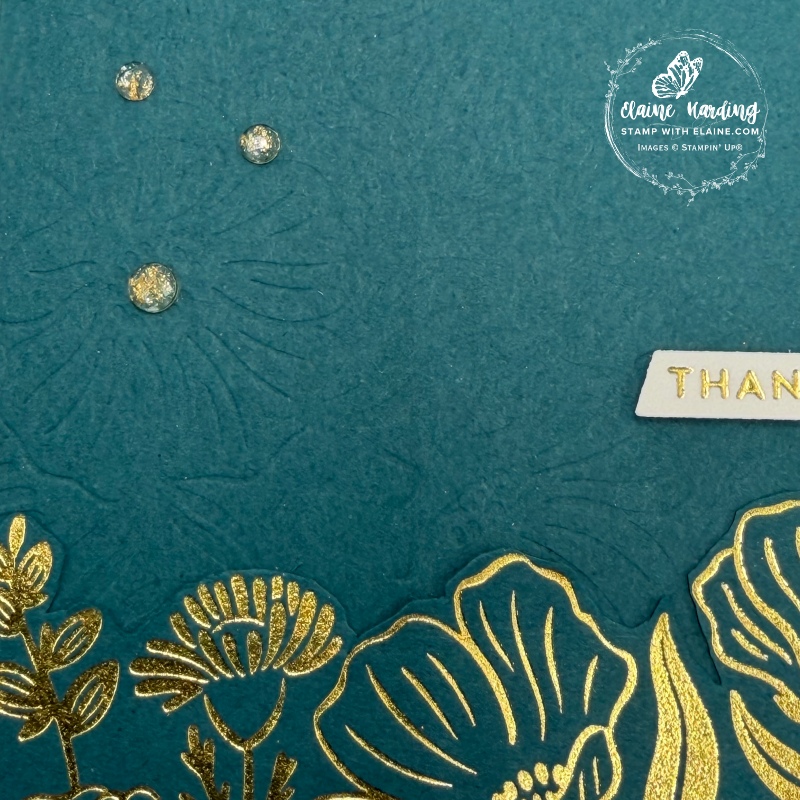
- Place the Garden Silhouette Die on the Stampin’ Hot Foil System machine but do not heat up machine. Remember we are embossing, not hot foiling.
- Cut a piece of card stock, I used Pretty Peacock for my card at 4 ⅛” x 5 ¾” (10.5 cm x 14.5 cm) which is the same size as my card front. Place card stock on top of die.
- Next place the green shim followed by the clear plate and insert the Stampin’ Hot Foil System into the Stampin’ Cut & Emboss Machine (larger one) and run it through slowly just as you would if you were actually hot foiling. Only difference is that you haven’t heated up the machine and you have no foil in between the die and your card stock.
Note : I have not tried to use the hot foil die using the Stampin’ Cut & Emboss machine plates because I didn’t want to risk damaging the die nor did I want to deviate from instructions in case it made the warranty null and void.
Cutting guide
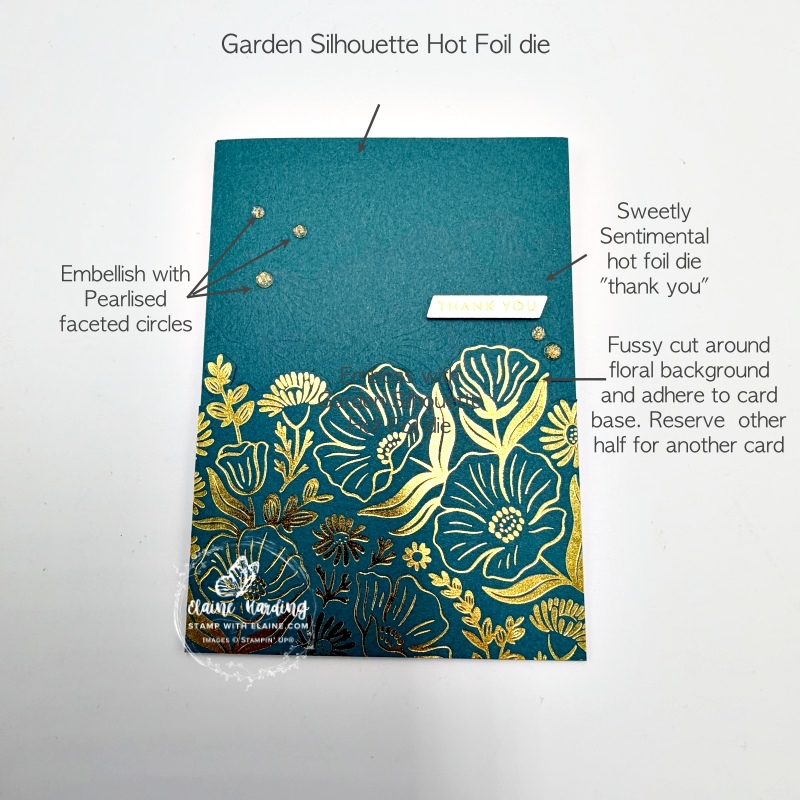
- Card base : Pretty Peacock cut at 5 ¾” x 8 ¼”(14.5 cm x 21 cm) folded in half.
- Cut 6 ¼” x 5″ (16 cm x 13 cm) Gold Stampin’ Hot Foil roll and Pretty Peacock card stock the same size. Hot Foil per instruction sheet which comes with your Stampin’ Hot Foil System.
- Fussy cut after foiling as pictured above.
- Dry emboss per instructions under Technique 1 heading and adhere to card front.
- Then adhere fussy cut foiled piece as pictured.
- Sweetly Sentimental Hot Foil dies – select sentiment “thank you” and adhere with dimensionals.
- Add embellishments an odd number as shown.
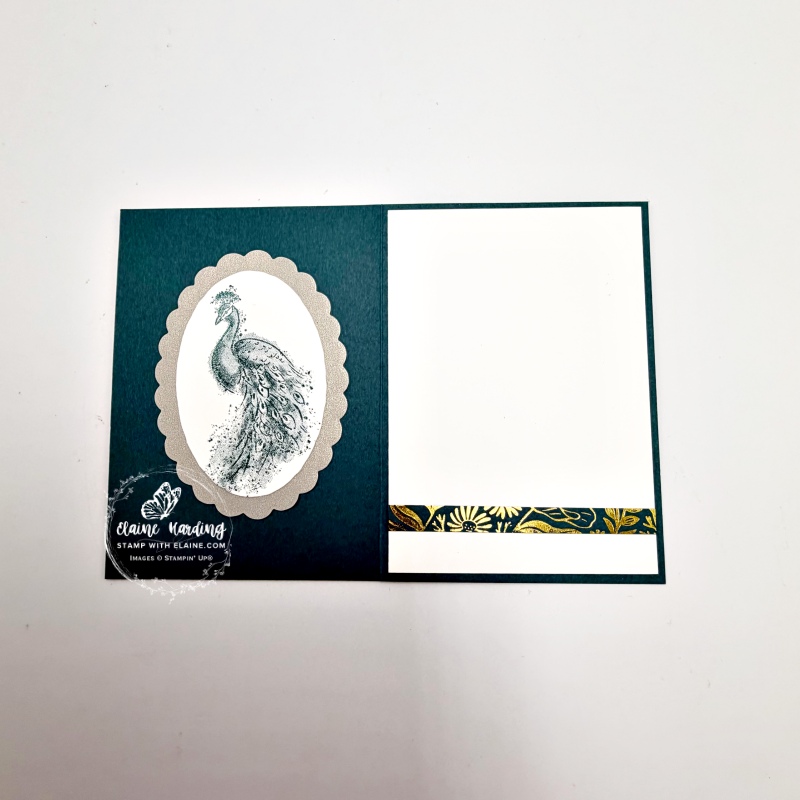
Inside card
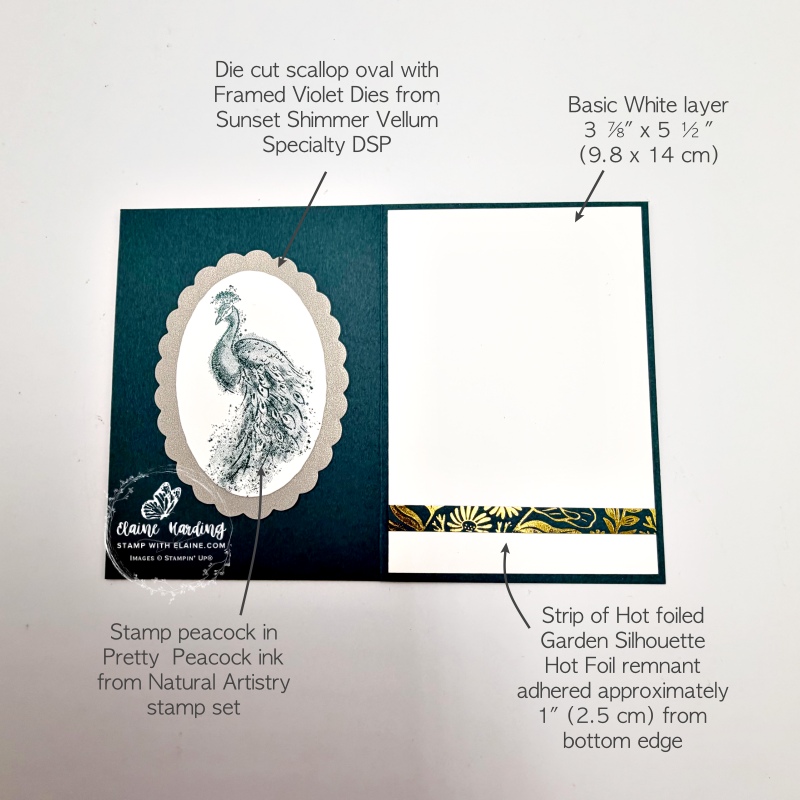
- Die cut scallop oval with Framed Violet scallop oval die out of Sunset Shimmer Vellum Specialty paper. Adhere centred on left side of inside of card.
- Stamp peacock from Natural Artistry stamp set in Pretty Peacock ink on Basic White card stock and die cut with Framed Violet oval die. Apply adhesive and adhere to scallop oval.
- Trim a remnant of the hot foiled Garden Silhouette piece and adhere approximately 1″ (2.5 cm) from bottom edge to finnish.
Stampin’ Hot Foil System
This is a new tool by Stampin’ Up! with special Hot Foil Dies. If you missed the post introducing the machine and information all about it, here’s a video to explain how the system works. Please be aware this machine is designed to fit Stampin’ Up!’s larger Stampin’ Cut & Emboss machine and was tested with their own line of products. It would render the 1 year warranty on the Stampin’ Hot Foil System null and void if you use it on non-Stampin’ Up! machines which may not fit.
Also be sure you’re ordering the machine with the right plug for your market. Foils and dies have to be purchased separately.
If you purchase the Stampin’ Hot Foil System before Jan 4, 2027, it will also include the Metallic Magic Craft Class for free. The class will cost £28.00 to purchase when the free class offer ends.
.
Supply list
Listed below is the supply list. Just click on the picture to take you directly to the item in my online store.
Product List![Uk/Ie Stampin' Hot Foil System & Craft Class [ 170011 ]](https://assets1.tamsnetwork.com/images/EC042017NF/170011s.jpg "Uk/Ie Stampin' Hot Foil System & Craft Class [ 170011 ]")
![Garden Silhouette Hot Foil Die [ 170041 ]](https://assets1.tamsnetwork.com/images/EC042017NF/170041s.jpg "Garden Silhouette Hot Foil Die [ 170041 ]")
![Gold Stampin' Hot Foil Rolls [ 170066 ]](https://assets1.tamsnetwork.com/images/EC042017NF/170066s.jpg "Gold Stampin' Hot Foil Rolls [ 170066 ]")
![Sweetly Sentimental Bundle (English) [ 170053 ]](https://assets1.tamsnetwork.com/images/EC042017NF/170053s.jpg "Sweetly Sentimental Bundle (English) [ 170053 ]")
![Framed Violets Dies [ 168193 ]](https://assets1.tamsnetwork.com/images/EC042017NF/168193s.jpg "Framed Violets Dies [ 168193 ]")
![Natural Artistry Photopolymer Stamp Set (English) [ 167959 ]](https://assets1.tamsnetwork.com/images/EC042017NF/167959s.jpg "Natural Artistry Photopolymer Stamp Set (English) [ 167959 ]")
![Pretty Peacock A4 Cardstock [ 150886 ]](https://assets1.tamsnetwork.com/images/EC042017NF/150886s.jpg "Pretty Peacock A4 Cardstock [ 150886 ]")
![Basic White A4 Cardstock [ 166781 ]](https://assets1.tamsnetwork.com/images/EC042017NF/166781s.jpg "Basic White A4 Cardstock [ 166781 ]")
![Sunset Shimmer Vellum 12" X 12" (30.5 X 30.5 Cm) Specialty Paper [ 167784 ]](https://assets1.tamsnetwork.com/images/EC042017NF/167784s.jpg "Sunset Shimmer Vellum 12\" X 12\" (30.5 X 30.5 Cm) Specialty Paper [ 167784 ]")
![Pretty Peacock Classic Stampin’ Pad [ 150083 ]](https://assets1.tamsnetwork.com/images/EC042017NF/150083s.jpg "Pretty Peacock Classic Stampin’ Pad [ 150083 ]")
![Pearlized Faceted Circles [ 166978 ]](https://assets1.tamsnetwork.com/images/EC042017NF/166978s.jpg "Pearlized Faceted Circles [ 166978 ]")

- SHOP ONLINE – EARN 10% REWARDS ON ALL PURCHASES OVER £20
- PURCHASE A STARTER KIT : Get £155 worth of products for only £99. Choose from current catalogues and any specials available. Free Shipping. Read more
- Subscribe to my Video Tutorials – click here

Pingback: Hot Foil technique 2 - Anniversary card - Stamp with Elaine