
Recently I made an. infinity birthday box for a blog hop which you can see HERE with Sale-a-bration’s level 2 Beautifully Happy stamp set. There’s less than 2 weeks to the end of Sale-a-bration for a chance to earn this stamp set free with a purchase of £90 excluding shipping/handling.
The infinity box is a series of boxes which have been joined together decreasing in size so they fit inside each other easily. It works like the “explosion” boxes, with the sides coming down and requires a lid to keep the sides up.
The one I created for the blog hop was in metric and I hadn’t worked out the imperial measurements but have now. This project uses rather a lot of card stock and isn’t a five minute job, but the effort is worth it in the end. You could also use it as a unique way of memory keeping by adding photos. There is ½” tolerance between each box size to allow for extra layers.
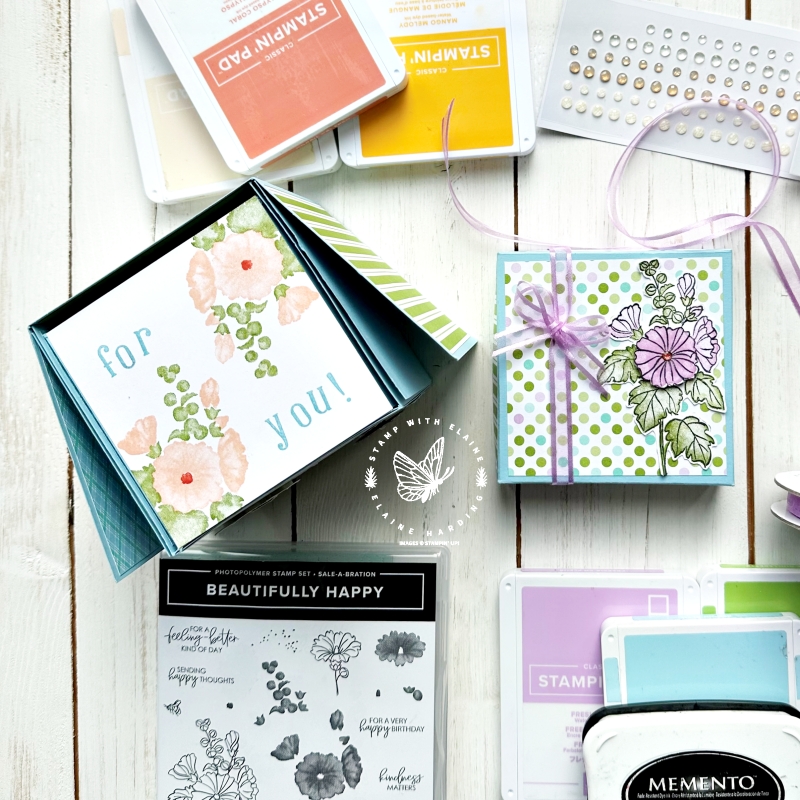
This is the view from the top when you take the box lid off.

The purpose of decorating the front of the box was so you could easily identify which way round the lid of the box would fit.
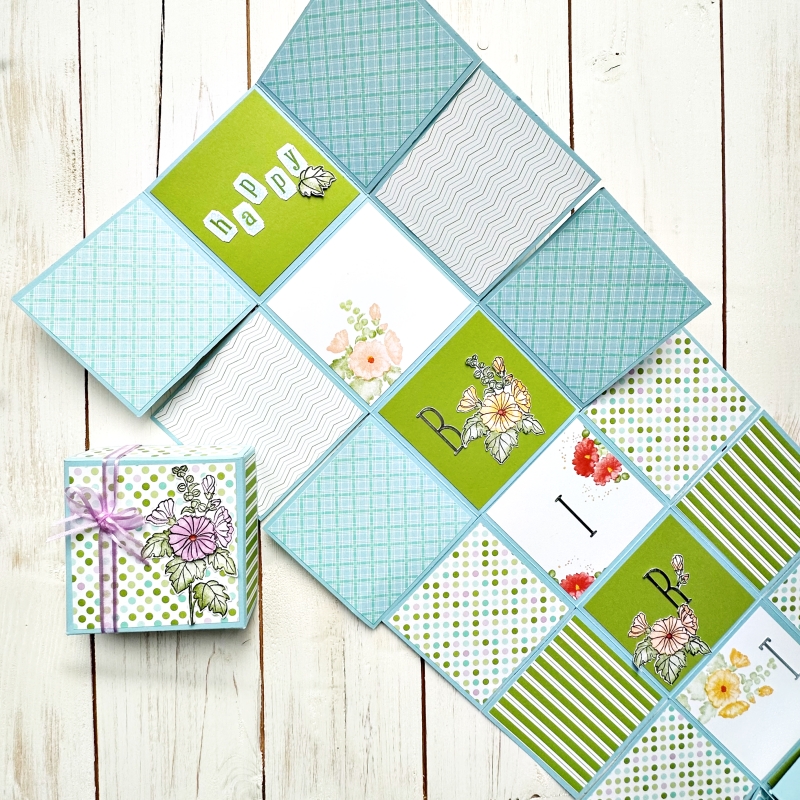
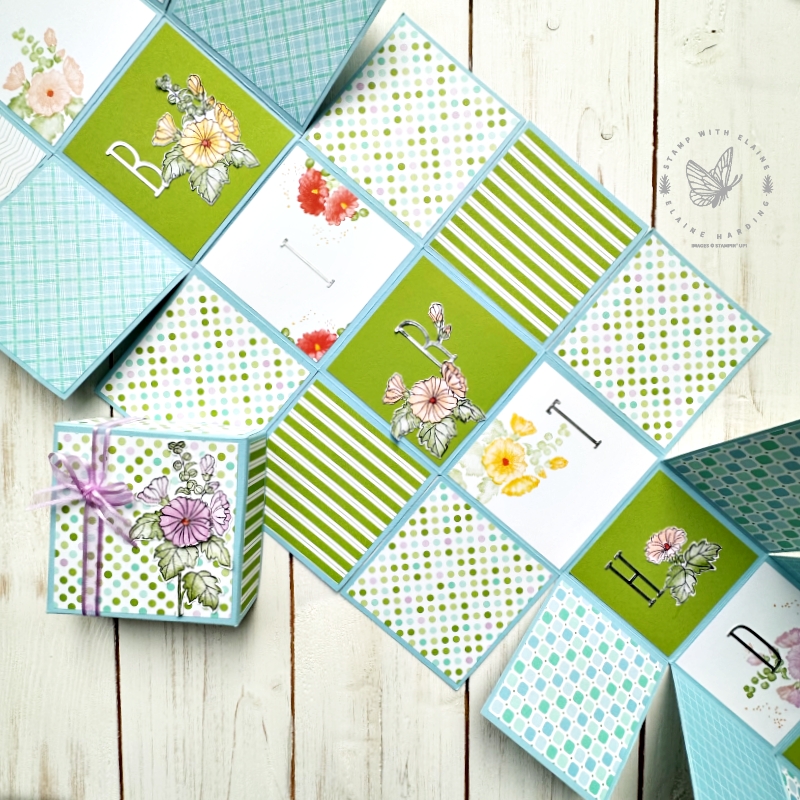
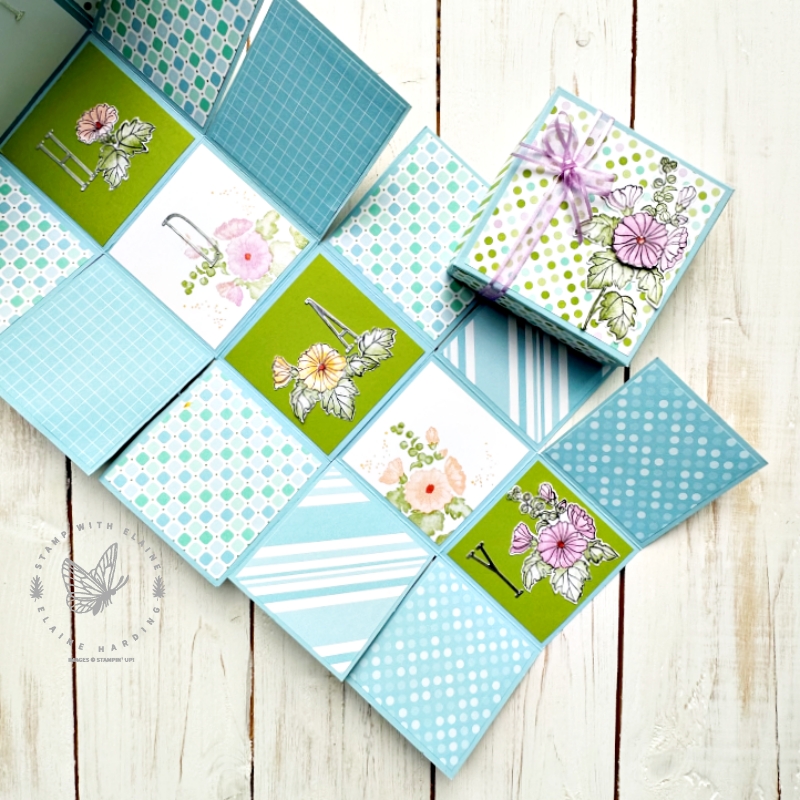
The infinity box was rather long, so I’ve had to take a series of photos to show off each section. In the first photo it says “Happy” on the first square using the Alphabest bundle. The second square was left blank for addressing the recipient. Below that I used the Alphabet a la mode dies to spell out “Birthday” with a letter in each square.
Cutting details
Currently, a 12″ x 12″ in a Colour family collection only has 2 each of 10 colours with 20 sheets in a pack. You need 3 sheets of 12″ x 12″, so you can substitute one of the Balmy Blue I used with an alternative colour.
Box 1 or Box A
- Balmy Blue 12″ x 12″(30 x 30 cm) card stock, score at 4″ and 8″(10 cm, and 20 cm). Rotate c/s quarter turn and score other side at 4″ and 8″ (10 cm and 20 cm).
- DSP – 4 pieces Pattern 1 cut at 3 ¾” x 3 ¾” (9 x 9 cm)
- Pattern 2 DSP – 2 pieces cut at 3 ¾” x 3 ¾” (9 x 9 cm)
- Granny Apple Green – 2 pieces cut at 3 ¾” x 3 ¾” (9 x 9 cm)
- Basic White – 1 piece cut at 3 ¾” x 3 ¾” (9 x 9 cm)
Box 2 or Box B
- You can substitute Balmy Blue for an alternate colour here. It needs to be cut 11 ¾” x 11 ¼” (28.5 cm x 30 cm) card stock. On the long side score at 3 ¾”, 7 ½”, 11 ¼”. Rotate c/s quarter turn and on short side score 3 ¾” and 7 ½”. (Metric – long score 9.5, 19, 28.5 cm then rotate ¼ turn and on short side score 9.5, 19 cm)
- DSP – 4 pieces Pattern 3 cut at 3 ½” x 3 ½” (8.5 x 8.5 cm)
- Pattern 4 DSP – 2 pieces cut at 3 ½” x 3 ½” (8.5 x 8.5 cm)
- Basic White – cut 2 pieces at 3 ½” x 3 ½” (8.5 x 8.5 cm)
- Granny Apple Green – cut 1 piece at 3 ½” x 3 ½” (8.5 x 8.5 cm)
Box 3 or Box C
- Balmy Blue cut 11”x 10 ½” (27 cm x 29 cm), Long side score 3 ½”, 7” and 10 ½”, rotate c/s and on short side score 3 ½” and 7”. (Metric – long side score 9, 18 and 27 cm, rotate c/s and on short side score at 9 cm and 18 cm.)
- DSP – 4 pieces Pattern 5 cut at 3 ¼” x 3 ¼” (8 x 8 cm)
- Pattern 6 DSP – 2 pieces cut at 3 ¼” x 3 ¼” (8 x 8 cm)
- Granny Apple Green – cut 2 pieces at 3 ¼” x 3 ¼” (8 x 8 cm)
- Basic White – cut 1 piece at 3 ¼” x 3 ¼” (8 x 8 cm)
Box 4 or Box D
- A4 sheet to match whatever colour you’re using for Box B cut 9 ¾” x 7” (19 x 25.5 cm) – long side score 3 ¼”, 6 ½”. Rotate c/s short side score 3 ¼”, 6 ½”. (Metric long side score 8.5 cm, 17 cm. Rotate c/s and on short side score 8.5 cm, 17 cm)
- DSP – Pattern 7 cut 4 pieces 3″ x 3″ (7.5 x 7.5 cm)
- Pattern 8 DSP cut 2 pieces at 3” x 3” (7.5 x 7.5 cm)
- Basic White – cut 1 piece at 3” x 3” (7.5 x 7.5 cm)
- Granny Apple Green – cut 1 piece at 3” x 3” (7.5 x 7.5 cm)
Joining pieces
Joining pieces for back of box
- Cut 1 piece 4” x 4” in Balmy Blue (cover join between A & B)
- Second piece of Balmy Blue cut at 3 ¾” x 3 ¾” (cover join between B & C)
- Third piece of Balmy Blue 3 ½” x 3 ½” (cover join between C & D)
Lid
- Balmy Blue cut at : 6 ½” x 6 ½” (16.5 x 16.5 cm)
- Score all 4 sides at 1 ¼” (3 cm)
- Side of lid : Cut 4 pieces of DSP 1” x 3 ¾” (2.5 cm x 10 cm). Alternate the pattern by using the reverse side of DSP.
- Top of Lid – DSP cut 3 ¾” x 3 ¾” (10 cm x 10 cm)
Outer Shell of box
The outer shell of the box needs to be decorated.
- DSP – cut 4 pieces 3 ¾” x 3 ¾”.
- Alternate the pattern by using the reverse side of the DSP.
Starter Panel
When you take the lid off the box, there is a starter panel.
- Basic White cut at 3 ¾” x 3 ¾”.
- Stamp “For You” from Alphabest stamp set.
- Also stamp floral images from Beautifully Happy.
Video Tutorial
To better understand how the box was constructed, please watch video tutorial.
Supply list
Listed below is the supply list. Just click on the picture to take you directly to the item in my online store.
Product List
")
 Designer Series Paper")
 Cardstock")


 Open Weave Ribbon")

I hope you won’t find this project too complex because it really isn’t. It just requires a little patience and if you’re creating this for a special occasion or for that someone special, it is so worth it!

- SHOP ONLINE – EARN 10% REWARDS ON ALL PURCHASES OVER £20
- PURCHASE A STARTER KIT : Get £155 worth of products for only £99. Choose from current catalogues and any specials available. Free Shipping. Read more
- Subscribe to my Video Tutorials – click here