
The theme for July’s Tech 4 Stampers Blog Hop is a fun fold. Over the years, I have made a plethora of fun folds. Some are complicated and some are easy, but they are always fun to do. I thought I’d keep the fun fold for July’s Tech 4 Stampers Blog hop simple and easy to follow. This is a gate-fold, but a gate-fold with a difference which I made many moons ago. I called it the “angled overlapping gate-fold” .
Any type of fold can be used as a standard. Just by switching the pattern papers, or using different stamp sets, punches or dies will give the card a completely different look.

The Build & Bloom Stampers Blog hop (formerly Tech 4 Stampers)is a monthly subscription group run by Louise Sims. She mentors and enables members to understand IT jargon and equips them with a fountain of Technical knowledge to build or manage their own websites. It takes the mystery out of “tech” and I’ve certainly grown in confidence thanks to her expertise, patience and guidance. Not only that, I’ve met and made new friends with my fellow “Techs” and love the camaraderie within the group.
Angled Overlapping Gatefold
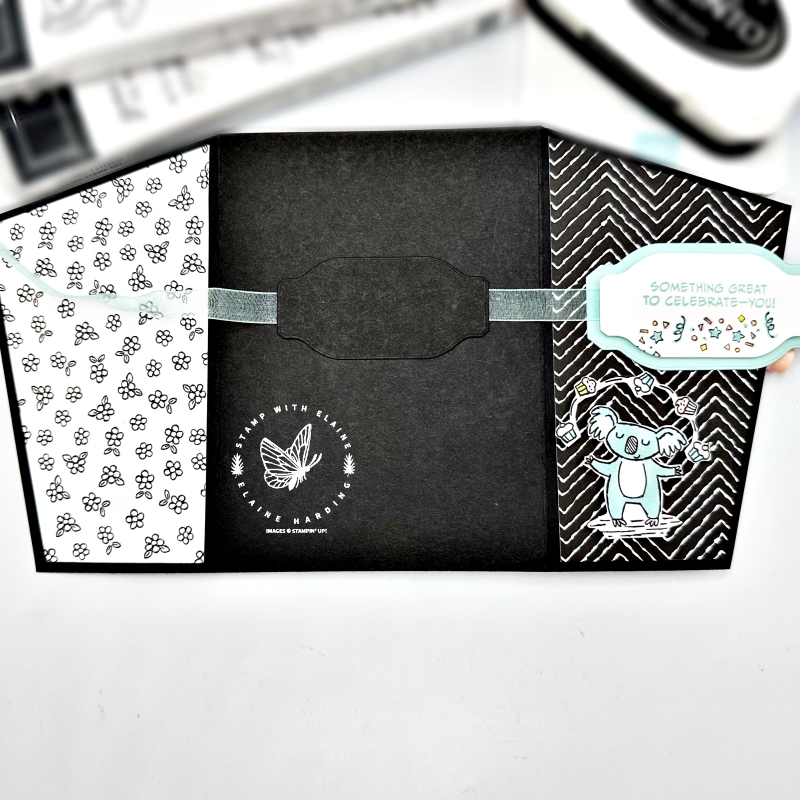
Here’s my fun fold card. This time I thought I’d use the Zany Zoo bundle and the Zoo Crew 12″x 12″ (30.5 x 30.5 cm) Designer Series Papers. It gave me such a giggle looking at the different animals in different poses, some in balletic poses, others engrossed in hobbies and even a Llama knitting a scarf!
In addition, I used the Something Fancy bundle for the sentiments and labels.
Card details
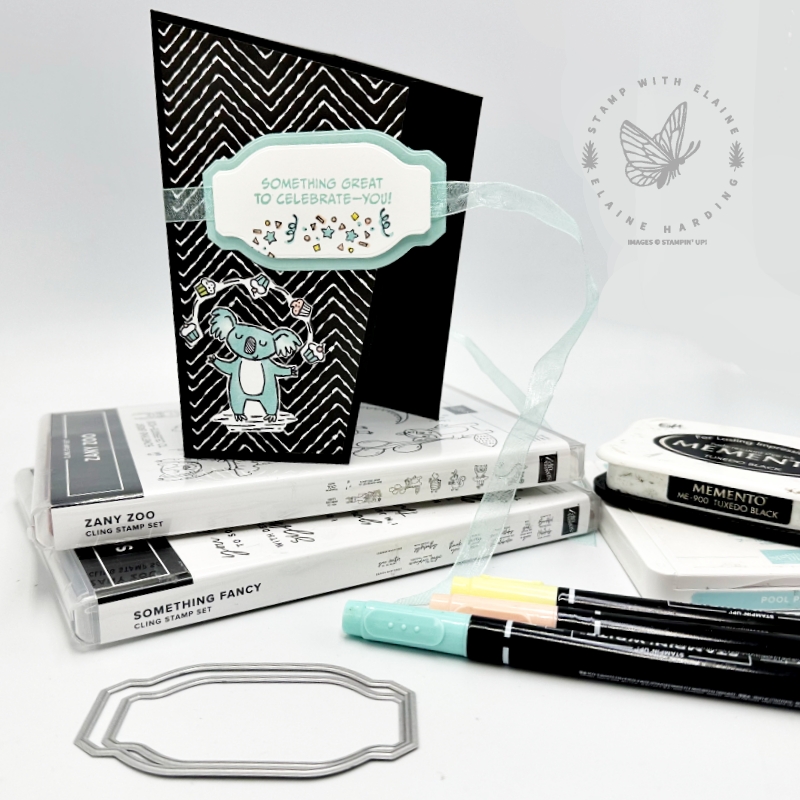
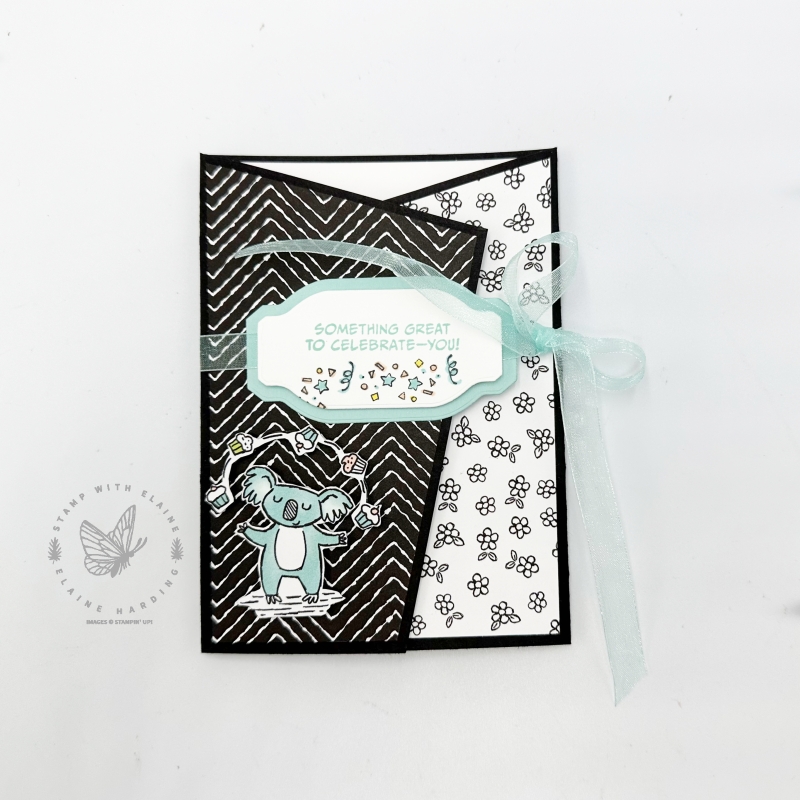
- First photo : the card is closed and kept shut by the ribbon. I fussy cut the Koala juggling cup cakes from the Zoo Crew DSP.
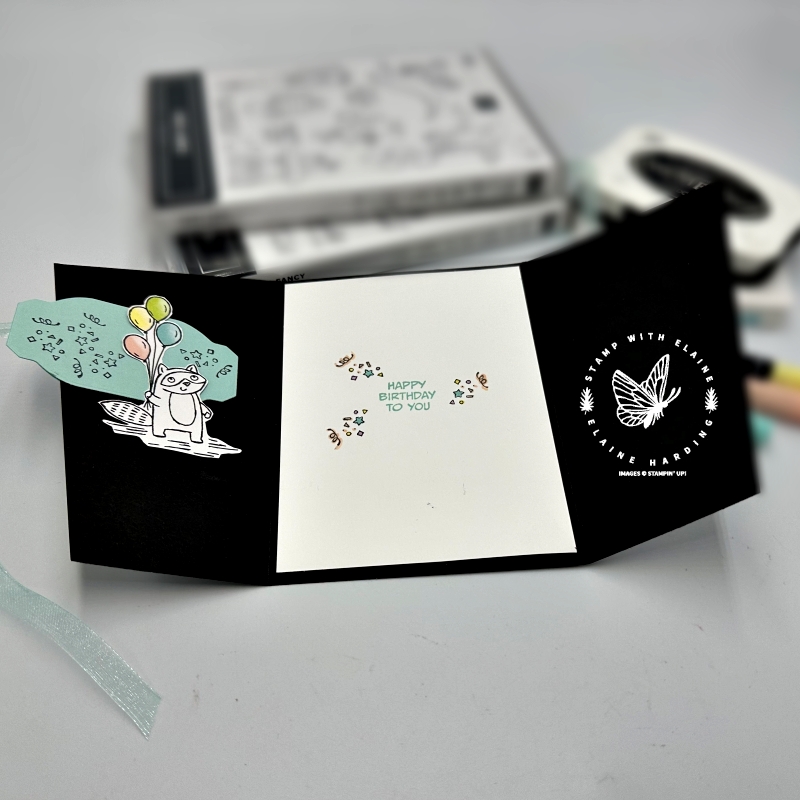
- Second photo : I die cut an additional label in Pool party and stamped the confetti in Tuxedo Black memento ink. I fussy cut the raccoon holding the balloons and adhered it on top and for the centre panel, I stamped a sentiment and additional confetti which was coloured in with the Subtles Stampin’ Write Markers.
- Third photo : An additional label was cut in Basic Black card stock so I could secure the ribbon from the back.
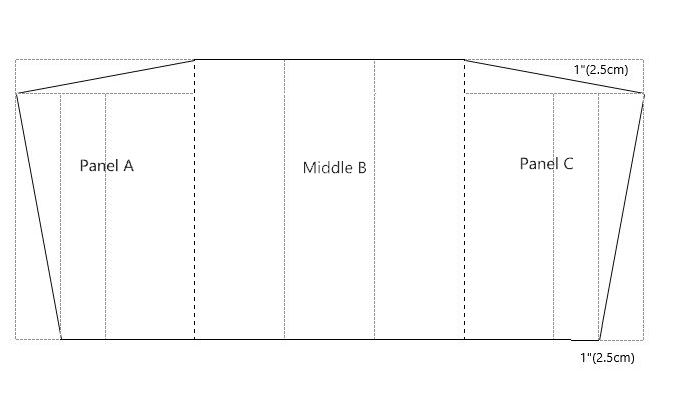
How to create the card
My skills in drawing diagrams is rather limited, and I couldn’t “merge” the cells so that the lines didn’t show. So please ignore the small dotted lines – they’re supposed to be invisible and shows the original size of the paper.
Imperial measurements
Cut Basic White Thick card base 11″ x 5 ¾”.
- Orient c/s with long side at the top and score at 3 ⅜”.
- Rotate c/s 180 degrees and score opposite side at 3 ⅜”.
- Mark Panel A & C 1″ down from top edge on the short side. Cut from score line on either side to these marks. Refer to diagram.
- Orient c/s on the long side and mark 1″ in. Cut from the angled tip down to 1″ mark on the long side. Refer to diagram.
- Cut 2 pieces of Designer Series Paper 3 ⅛” x 5 ½” Mark 1″ on long and short sides as in steps 4 & 5 for your mat layers. Refer to a previous card video tutorial for further tips for completing card. For the centre panel cut a piece in Basic White : 4″ x 5 ½”
Metric measurements
- Cut Basic White Thick card base 28 cm x 14.5 cm.
- Orient c/s with long side at the top and score at 8.5 cm.
- Rotate c/s 180 degrees and score opposite side at 8.5 cm.
- Mark Panel A & C 2.5 cm down from top edge on the short side. Cut from score line on either side to these marks. Refer to diagram.
- Orient c/s on the long side and mark 2.5 cm in. Cut from the angled tip down to 2.5 cm mark on the long side. Refer to diagram.
- Cut 2 pieces of Designer Series Paper 8 cm x 14 cm. Mark 1″ on long and short sides as in steps 4 & 5 for your mat layers on gatefold panels. Refer to a previous card video tutorial for further tips for completing card. For the centre panel cut a piece in Basic White : 10.2 cm x 14 cm.
Video tutorial
If you’d like a visual aid, you can see the video tutorial I made for a different card in a previous post HERE. The basics are the same for assembling the card, but with little tweaks because the design and papers are different.
Supply list
Listed below is the supply list. Just click on the picture to take you directly to the item in my online store.
Product List")
")

")
")

 Designer Series Paper")


Thanks for visiting. I would love to know what you think of my project and would appreciate it if you could leave a comment. To visit the next person on the list and see their fabulous creations, simply click on the link below or before my name depending who you visited initially. Happy hopping!
Love your angled gatefold card Elaine. The Zoo crew papers work perfectly
Thank you, Sara.
What a great card, thank you Elaine
Thank you Carol
I think this is one of my favourite fun folds you know! and a gorgeous design ?
Thanks, Heather.