
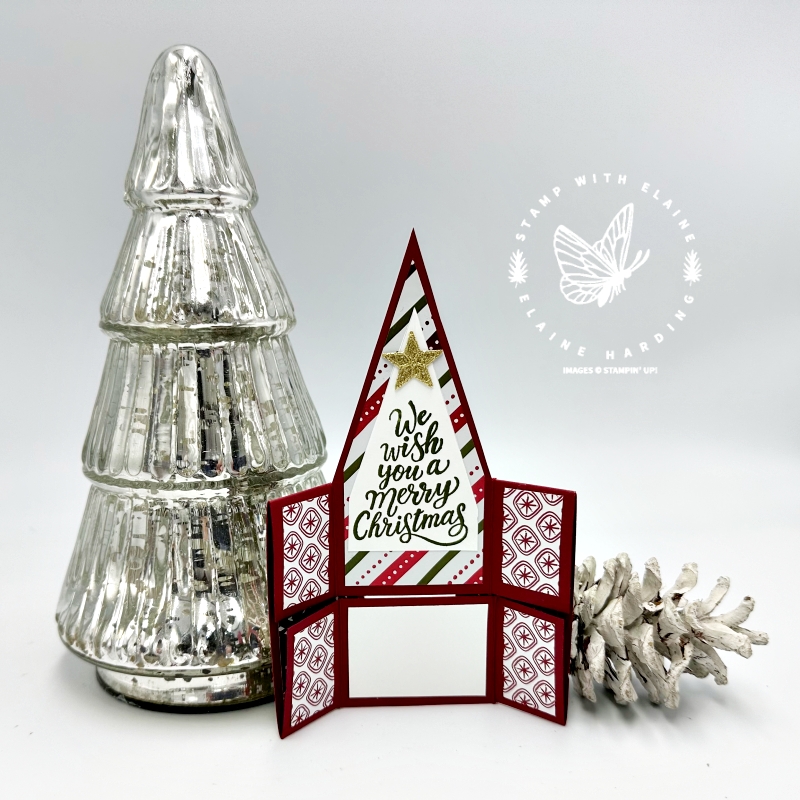
The Merriest Trees Infinity card, or never ending card folds into a shape of a tree. Pinterest popped this into my feed, but there were no instructions and I had to figure out how to do it myself. I wanted it to fit into a normal size C6 envelope and had never tried making one that resembled a tree! The mechanics of creating one is really easy. It’s just knowing where to score, cut and fold your card stock.
I presented my creation to hubby who is a non-paper crafter to see if he could figure out how to open it and came to the conclusion that a picture aid to the recipient would have to be included to illustrate how it opens.
How to open the Inifinity card
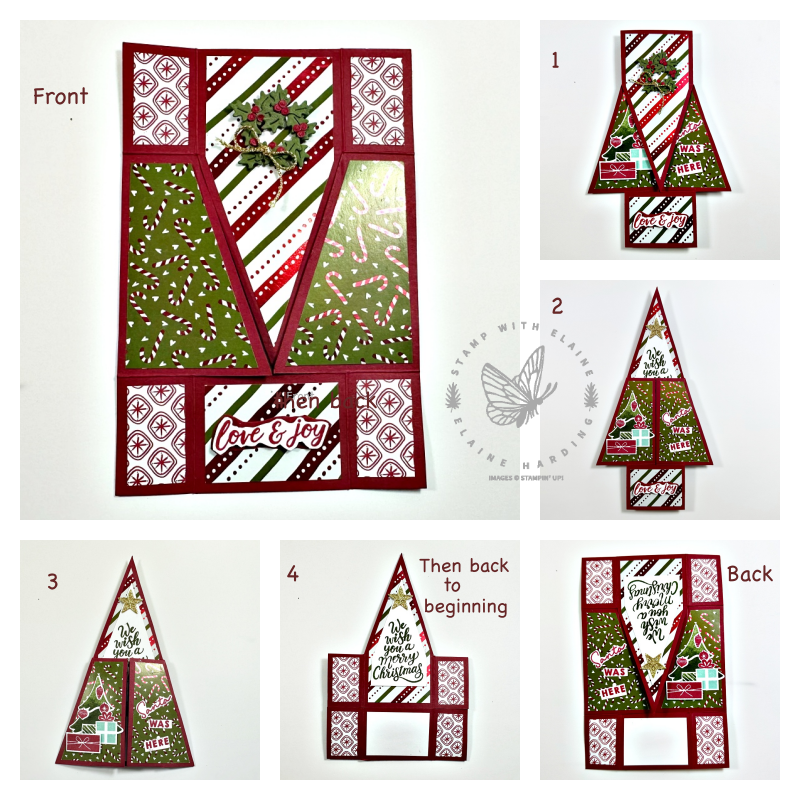
- Fold back the 2 candy cane flaps.
- Next flip the top with the wreath back and it reveals “We Wish you a” section.
- Fold back the “love and joy” rectangle at the bottom to create this triangle. This side reveals a Christmas Tree with presents on the left and the sentiment “Santa was here” on the right.
- Open the the Tree and Santa panels to expose the rest of the greeting in the centre panel. You’ll find a Basic White rectangle at the bottom where you can address your recipient and say who it’s from.
- Flip the triangle and Basic White section at the bottom back and you’re right back to the front of the card.
In the last picture, this shows the back of the card laid flat. You can see the the centre panel greeting is upside down.
Cutting guide card base
Imperial
- Card base Cherry Cobbler 4” x 6”. Score short side first. Align left edge to left of cutting groove on trimmer at 1″ and score. Next align right edge to right of cutting groove at 1″ and score.
- Rotate c/s ¼ turn so long side is at the top and align left edge on trimmer at 1 ½” (3.8 cm) and cut between 1” and 3” (2.5 cm and 7.6 cm) score line. With c/s still in situ, score above and below at 1 ½”(3.8 cm) to their respective edges.
- Next rotate c/s 1800 on long side and align at 1 ½” and score all the way down.
- Mark the centre of the card in the middle section where the cut is. Use a ruler and pencil to lightly draw a diagonal line from centre of cut to the top left corner of the 1 ½” score line, and repeat from centre cut to top right corner so that it resembles a triangle. Use scissors to cut along these guide lines.
Metric
- Card base Cherry Cobbler 10.2 cm x 15.2 cm. Score short side first. Align left edge to left of cutting groove on trimmer at 2.5 cm and score. Next align right edge to right of cutting groove at 2.5 cm and score.
- Rotate card stock ¼ turn so long side is at the top and align left edge on trimmer at 3.8 cm and cut between 2.5 cm and 7.6 cm score line. With c/s still in situ, score above and below at 3.8 cm to their respective edges.
- Next rotate card stock 1800 on long side and align at 3.8 cm and score all the way down.
- Mark the centre of the card in the middle section where the cut is. Use a ruler and pencil to lightly draw a diagonal line from centre of cut to the top left corner of the 3.8 cm score line, and repeat from centre cut to top right corner so that it resembles a triangle. Use scissors to cut along these guide lines.
Creating templates for Designer Series paper
Imperial & Metric
- Cut a second template with the same measurements as above and same cutting and scoring process.
- Please watch video on how to cut up this template for the centre panel and side panels.
Designer series paper mat layers
Imperial
- First pattern DSP – 8 pieces for corners on both sides cut 8 pieces ¾” x 1 ¼”.
- Second pattern DSP – Side panels Pattern – cut 4 pieces 1 ¾” x 2 ¾”. Using template, trim 2 pieces with diagonal cut sloping from to ¾” in on top left edge down to bottom right corner and 2 pieces diagonal cut sloping down from ¾” in from right edge down to bottom left corner.
- Third pattern DSP for the Centre panel : Cut 2 pieces 1 ¾” x 4” and use centre panel template to trim it down to size.
- Bottom section front of card : Pattern #3 same as centre panel DSP cut 1 ¼” x 1 ¾”.
- Bottom section back of card : Basic White also cut 1 ¼” x 1 ¾” as a place for addressee and to say who it’s from.
Metric
- First pattern DSP – 8 pieces for corners on both sides cut 8 pieces 2 cm x 3.2 cm.
- Second pattern DSP – Side panels Pattern – cut 4 pieces 2 cm x 7 cm. Using template, trim 2 pieces with diagonal cut sloping from to 2 cm in on top left edge down to bottom right corner and 2 pieces diagonal cut sloping down from 2 cm in from right edge down to bottom left corner.
- Third pattern DSP for the Centre panel : Cut 2 pieces 4.4 cm x 10.2 cm and use centre panel template to trim it down to size.
- Bottom section front of card : Pattern #3 same as centre panel DSP cut 3.2 cm x 4.4 cm.
- Bottom section back of card : Basic White also cut 3.2 cm x 4.4 cm as a place for addressee and to say who it’s from.
Video tutorial
Supply list
Listed below is the supply list. Just click on the picture to take you directly to the item in my online store.
Product List  Mossy Meadow Classic Stampin’ Pad [133645] | ||
")

")
")
 Adhesive Backed Glimmer Paper")


I hope you enjoyed this fun fold, leave me a comment and if you have a go yourself, send me a link so I can see your creation!

- SHOP ONLINE – EARN 10% REWARDS ON ALL PURCHASES OVER £20
- PURCHASE A STARTER KIT : Get £155 worth of products for only £99. Choose from current catalogues and any specials available. Free Shipping. Read more
- Subscribe to my Video Tutorials – click here