
Card with vellum – product of the month in May is the Berry Botanical Vellum specialty paper which you can get as a one time purchase for £5 on the proviso you submit an online order totalling £70 excluding shipping or coupons.
In order to make the vellum “pop”, especially printed vellum, you need to place card stock behind it, usually Basic White, but you can experiment with different coloured card stocks which coordinate with the printed vellum colour palette also.
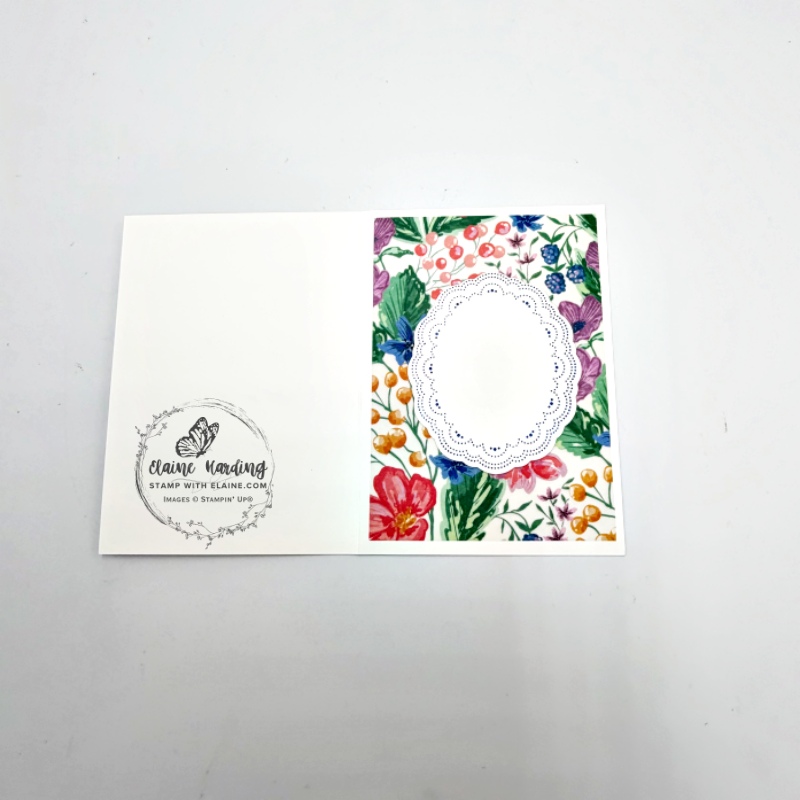
I’ve done both so you can see the difference between the two. The vellum on the front was adhered with a coloured card stock background, and the one inside the card is against Basic White. Which do you prefer?

Cutting guide
- Card base : Basic White thick 5 ¾” x 8 ¼” (14.5 cm x 21 cm) folded in half.
- Blueberry Bushel : 3 ¾” x 5 ⅜” (9.5 cm x 13.5 cm)
- Berry Botanical Vellum Specialty paper cut at 3 ⅝” x 5 ¼” (9 cm x 13 cm) and cut Adhesive sheet same size as vellum 3 ⅝” x 5 ¼” (9 cm x 13 cm) – adhere to back of vellum
- Inside card – cut Berry Botanical Vellum Specialty paper at 3 ¾” x 5 ⅜” (9.5 cm x 13.5 cm) and cut Adhesive sheet same size as vellum and adhere to to inside of card leaving an even border on all 4 sides.
- Stamp oval scallop in Blueberry Bushel ink and die cut with corresponding Scallop Wishes die.
Assembling card
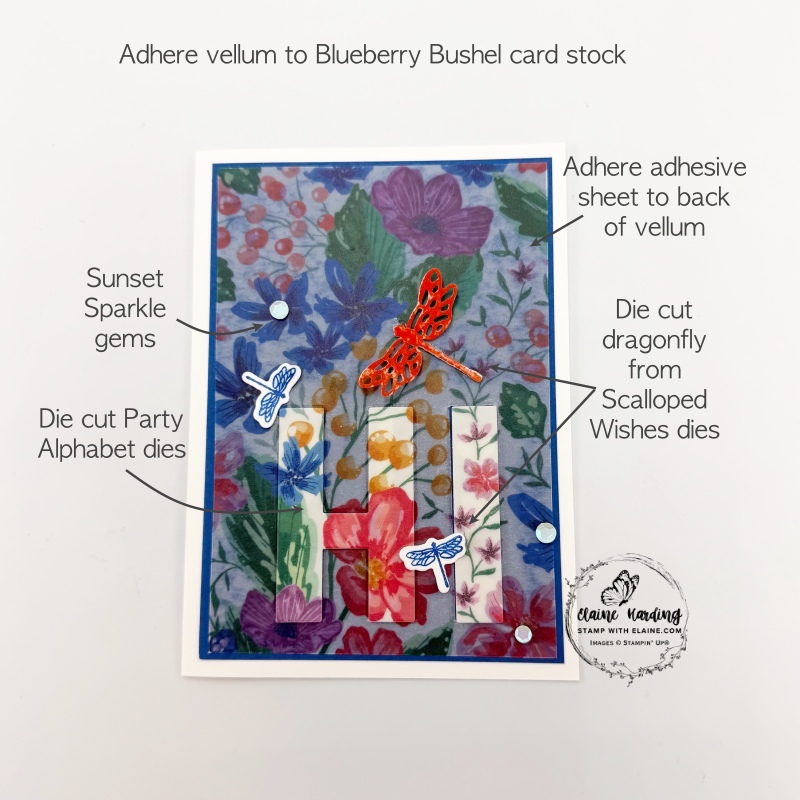
- Attach adhesive sheet to vellum. Position Party Alphabets and die cut “HI”. Remove backing from adhesive sheet and adhere to Blueberry Bushel layer leaving an even border on all 4 sides.
- Apply dimensionals to letters and adhere to as pictured above.
- Stamp dragonflies with Blueberry Bushel ink and die cut from corresponding die from Scalloped Wishes bundle.
- Die cut large dragonfly from Velveteen Assortment Specialty Paper in white and colour with Crisp Cantaloupe Shimmer brush.
- Decorate with Sunset Sparkle gems.
Inside card
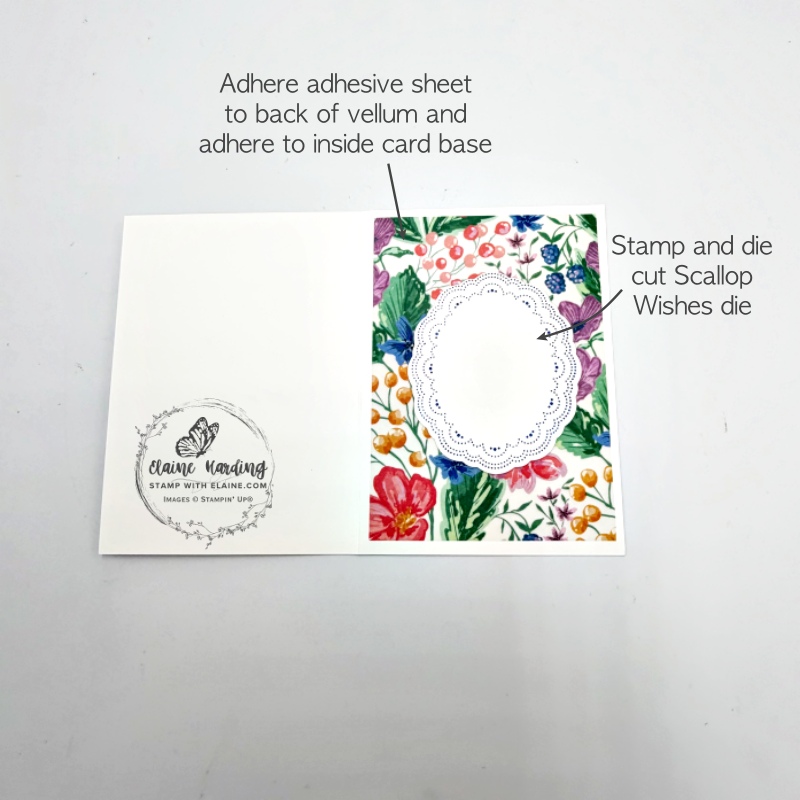
- Remove backing from adhesive sheet on the second larger piece of Berry Botanical Vellum and adhere inside card leaving an even border on all 4 sides.
- Stamp scalloped frame from Scalloped Wishes Bundle and die cut then centre and glue inside as shown to complete card.
Supply list
Listed below is the supply list. Just click on the picture to take you directly to the item in my online store.
Product List![Berry Botanical Vellum 12" X 12" (30.5 X 30.5 Cm) Specialty Designer Series Paper [ 167985 ]](https://assets1.tamsnetwork.com/images/EC042017NF/167985s.jpg "Berry Botanical Vellum 12\" X 12\" (30.5 X 30.5 Cm) Specialty Designer Series Paper [ 167985 ]")
![Party Alphabet Dies [ 165263 ]](https://assets1.tamsnetwork.com/images/EC042017NF/165263s.jpg "Party Alphabet Dies [ 165263 ]")
![Scalloped Wishes Bundle (English) [ 167453 ]](https://assets1.tamsnetwork.com/images/EC042017NF/167453s.jpg "Scalloped Wishes Bundle (English) [ 167453 ]")
![Scalloped Wishes Dies [ 167452 ]](https://assets1.tamsnetwork.com/images/EC042017NF/167452s.jpg "Scalloped Wishes Dies [ 167452 ]")
![Scalloped Wishes Photopolymer Stamp Set (English) [ 167447 ]](https://assets1.tamsnetwork.com/images/EC042017NF/167447s.jpg "Scalloped Wishes Photopolymer Stamp Set (English) [ 167447 ]")
![Velveteen Assortment 12" X 12" (30.5 X 30.5 Cm) Specialty Paper [ 167915 ]](https://assets1.tamsnetwork.com/images/EC042017NF/167915s.jpg "Velveteen Assortment 12\" X 12\" (30.5 X 30.5 Cm) Specialty Paper [ 167915 ]")
![Adhesive Sheets [ 152334 ]](https://assets1.tamsnetwork.com/images/EC042017NF/152334s.jpg "Adhesive Sheets [ 152334 ]")
![Basic White A4 Thick Cardstock [ 159230 ]](https://assets1.tamsnetwork.com/images/EC042017NF/159230s.jpg "Basic White A4 Thick Cardstock [ 159230 ]")
![Blueberry Bushel A4 Cardstock [ 146991 ]](https://assets1.tamsnetwork.com/images/EC042017NF/146991s.jpg "Blueberry Bushel A4 Cardstock [ 146991 ]")
![Sunset Sparkle Sequins [ 167785 ]](https://assets1.tamsnetwork.com/images/EC042017NF/167785s.jpg "Sunset Sparkle Sequins [ 167785 ]")
![Blueberry Bushel Classic Stampin' Pad [ 147138 ]](https://assets1.tamsnetwork.com/images/EC042017NF/147138s.jpg "Blueberry Bushel Classic Stampin' Pad [ 147138 ]")
![Crisp Cantaloupe Shimmer Brush [ 167661 ]](https://assets1.tamsnetwork.com/images/EC042017NF/167661s.jpg "Crisp Cantaloupe Shimmer Brush [ 167661 ]")

- SHOP ONLINE – EARN 10% REWARDS ON ALL PURCHASES OVER £20
- PURCHASE A STARTER KIT : Get £155 worth of products for only £99. Choose from current catalogues and any specials available. Free Shipping. Read more
- Subscribe to my Video Tutorials – click here