
Graceful Evergreen Deer Pt 1- Wk 3 Chritmas Countdown Series. Welcome to week 3 of my Christmas Countdown Series. I’ve separated the 4 cards made with the Graceful Evergreen Deer Hot Foil bundle into 2 parts. This week is Part 1 and Part 2 will be the following Friday next week.
This stamp and hot foil die bundle combines illustrated trees, snowfall, and starry details with metallic foiled deer designs to add warmth, texture, and shine to your cards and tags.
This is a Hot Foil Die set; it adds metallic foil details for an elegant, eye-catching finish when used with Stampin’ Hot Foil Rolls and the Stampin’ Hot Foil System (both sold separately).
If you’re new to hot foiling and the virtues of the Reverse Hot Foil die, scroll down to the end of the post to see the videos that Stampin’ Up! had produced.
Part 1 – Features both the Graceful Evergreen Deer and Magical Christmas Hot Foil dies
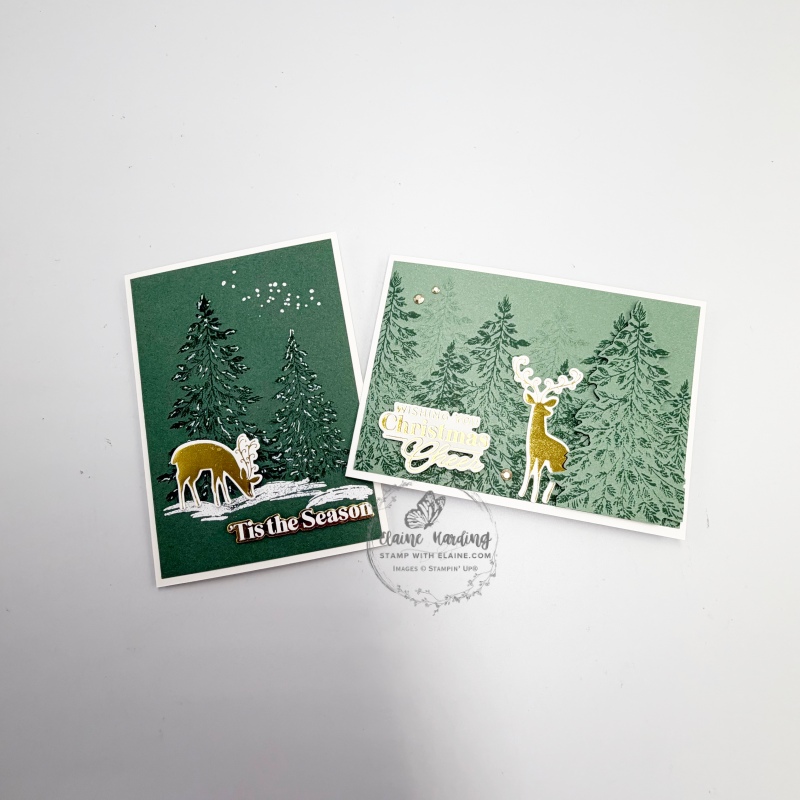
Card 1 – White embossed technique and white gel pen
In a previous post which you can see HERE I had featured the new Reverse Hot Foil die and had hot foiled several sets of positive and negative Magical Christmas Hot Foiled sentiments. I just dip into them to use for Christmas cards going forward.
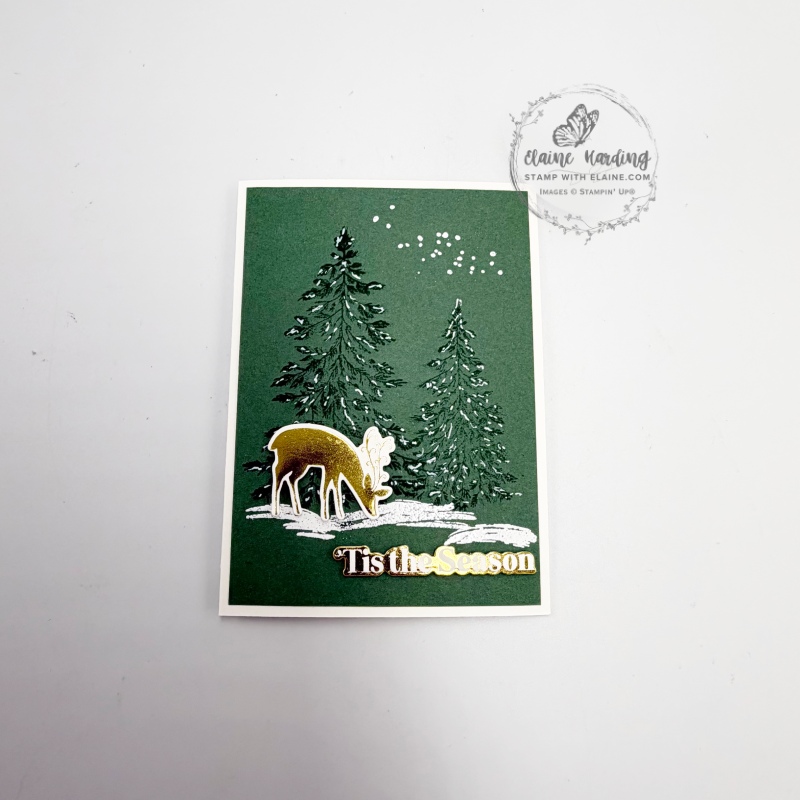
Cutting guide
- Card Base : Thick Basic White cut at 5 ¾” x 8 ¼” (14.5 cm x 21 cm) and folded in half.
- Peaceful Pine card stock cut at 3 ⅞” x 5 ½” (10 cm x 14 cm).
- Hot foil the Graceful Evergreen Deer – arrange them in a line using the Hot Foil System grid on the machine and die cut with corresponding dies.
Assembling card
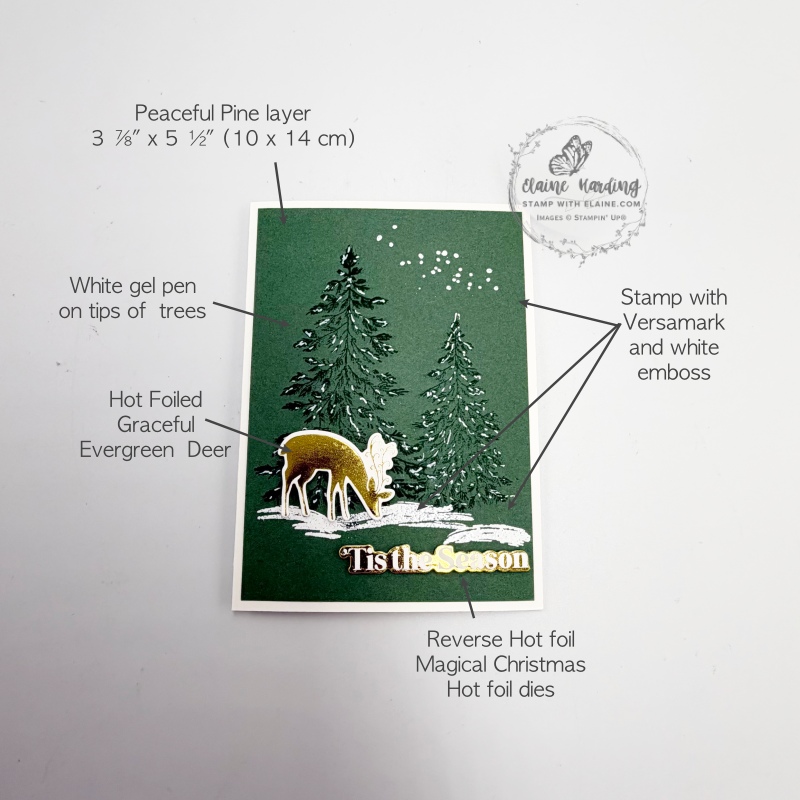
Front of card
- Stamp the Peaceful Pine layer with large and smaller tree images with Peaceful Pine ink.
- Use embossing buddy to prevent static on card stock then stamp dotty stamp and ground with Versamark. Sprinkle with white embossing powder and heat set.
- Use white gel pen to add “snow” on the pine branches.
- Apply dimensionals to back of gold hot foiled deer and greeting and adhere as pictured.
Inside card
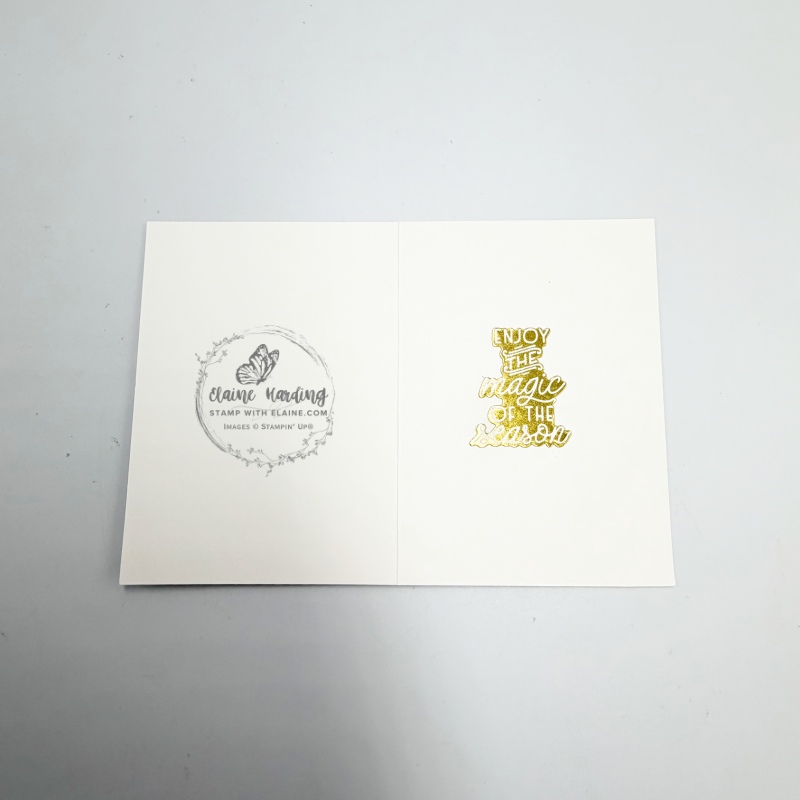
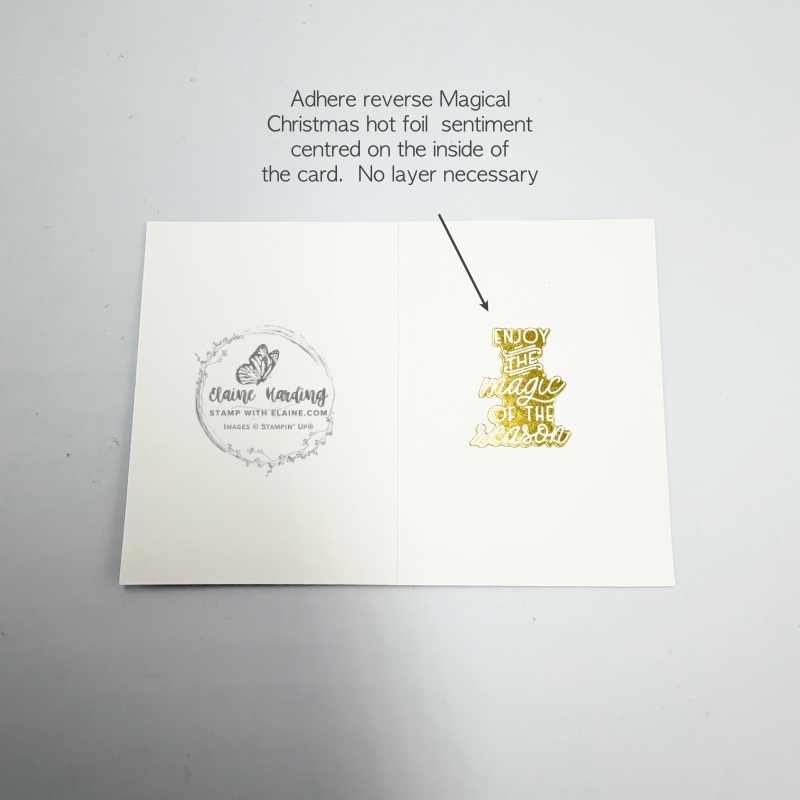
I have omitted adding a layer for the inside of the card. Simply adhere one of the foiled Magical Christmas greetings in the centre of card.
Card 2 – Landscape card using Peaceful Pine 12 x 12 two-tone card stock
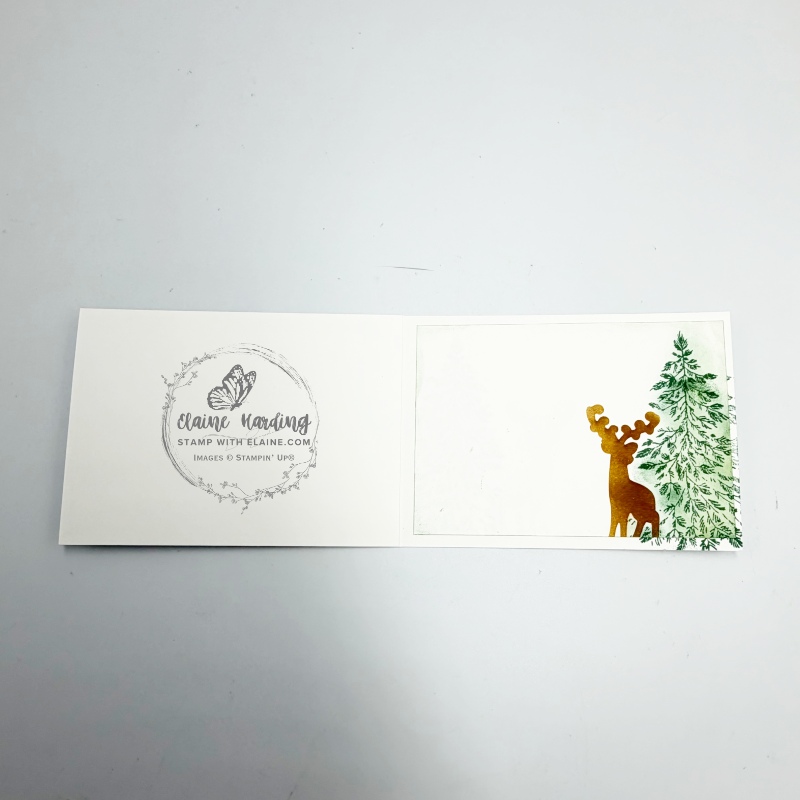
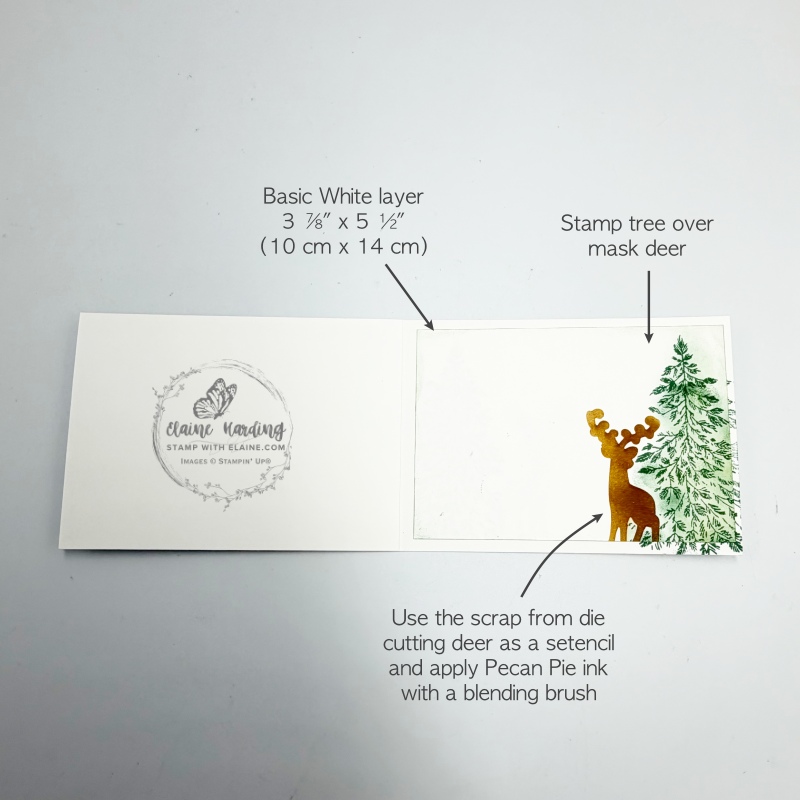
Shh! I’ll let you into a secret! I smudged the inside of the card. Initially I was going to omit a layer, but had to cover it up. It’s another way of correcting mistakes!
Other tip is to use the scrap piece of card stock you hot foiled deer with as a stencil.
Cutting guide
- Card base : Basic White thick cut at 4 ⅛” x 11 ½” (10.5 cm x 29 cm) folded in half.
- Peaceful Pine two-tone card stock cut at 3 ⅞” x 5 ½” (10 cm x 14 cm)
- Basic White : 3 ⅞” x 5 ½”(10 cm x 14 cm)
- Hot foiled and die cut stag with gold foil
- Magical Christmas hot foil greeting
Assembling card
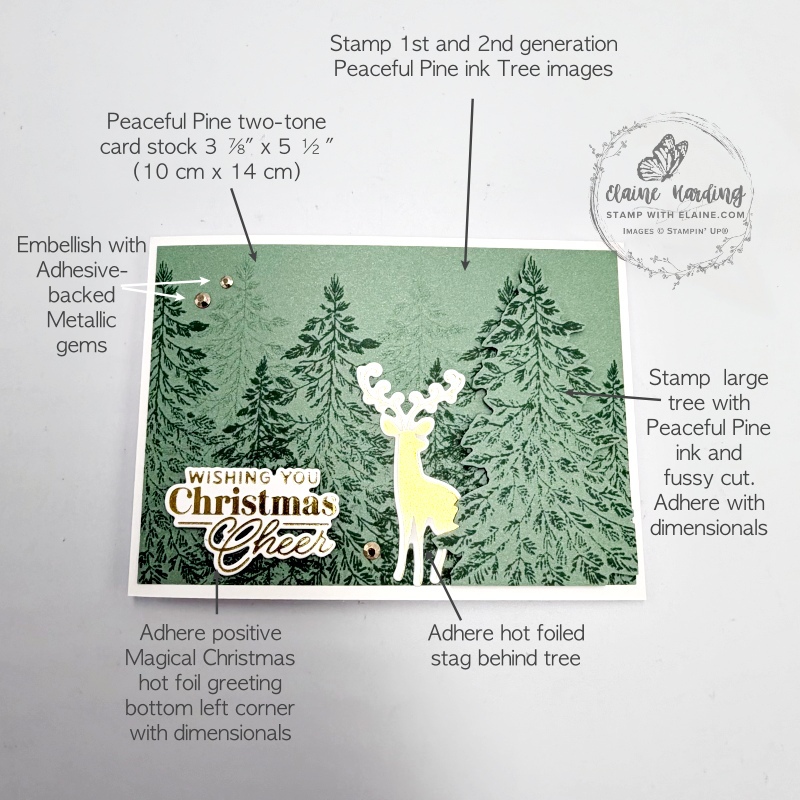
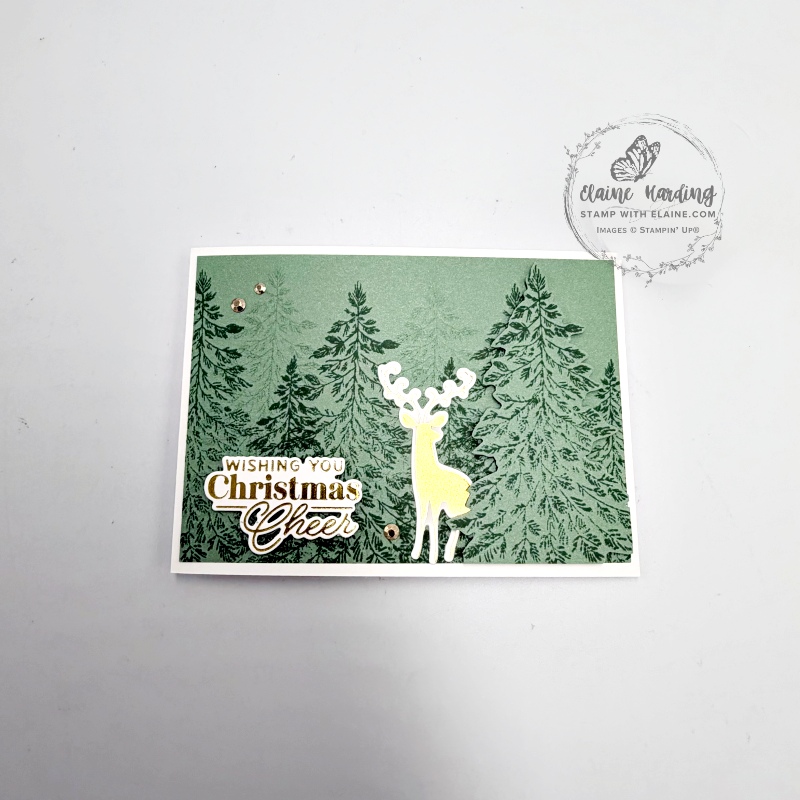
Card front
- Stamp on the lighter side of the Peaceful Pine two-tone card stock. Stamp both 1st and 2nd generation Peaceful Pine ink of the larger tree followed by 1st generation Peaceful Pine ink for the smaller tree in front.
- On scrap of Peaceful Pine two-tone card stock, stamp a large tree and fussy cut. Adhere to front of card with dimensionals right justified as pictured.
- Adhere hot foiled stag behind tree.
- Apply dimensionals to back of Magical Christmas greeting and adhere to left of card front.
- Add a trio of Adhesive-backed Metallic gems as embellishments.
Inside card
- Apply a non-permanent adhesive on back of stag and position it in bottom right corner as a mask then stamp the large tree on top with Peaceful Pine ink.
- Place scrap piece of card stock you hot foiled deer with and align over the stag you used for the mask while stamping the tree. Once it’s in position, remove the die cut stag. Use blending brush to add Pecan Pie ink for silhouette of the stag. (see picture on right above).
Voila – card done!
How to prevent Over-foiling tip
From my own experience using the Stampin’ Hot Foil System, I had better results by following the instructions that came with the Stampin’ Hot Foil System. I added a thin piece of copy paper on top of the card stock before placing the green Hot Foil Shim on. This helps protect the shim from picking up any excess foil in the process.
- After the red light goes solid red, put your hot foil die on to the heated surface with flat side down. Press the white timer button. The platform beeps and a yellow light flashes while the die heats up (approximately 1 ½ minutes). The white timer button and the red light stays lit and when ready, the platform beeps again and the green light turns on. All lights will be lit.
- Next build your sandwich by placing these items on the die in order: Foil (shiny side down)>Card stock/or desired material> thin piece of copy paper (to prevent foil from getting on to your shim)>Hot Foil Shim>Hot Foil Spacer.
- Unplug the cord from the platform and carefully remove it from the silicone platform station, keeping the sandwich stable to prevent foil transfer. Place it on the Stampin’ Cut & Emboss Machine and slowly run it through without reversing as the die may shift and smudge the card stock.
Stampin’ Hot Foil System
This is a new tool by Stampin’ Up! with special Hot Foil Dies. If you missed the post introducing the machine and information all about it, here’s a video to explain how the system works. Please be aware this machine is designed to fit Stampin’ Up!’s larger Stampin’ Cut & Emboss machine and was tested with their own line of products. It would render the 1 year warranty on the Stampin’ Hot Foil System null and void if you use it on non-Stampin’ Up! machines which may not fit.
Also be sure you’re ordering the machine with the right plug for your market. Foils and dies have to be purchased separately.
If you purchase the Stampin’ Hot Foil System before Jan 4, 2027, it will also include the Metallic Magic Craft Class for free. The class will cost £28.00 to purchase when the free class offer ends.
.
Supply list
Listed below is the supply list. Just click on the picture to take you directly to the item in my online store.
Product List![Graceful Evergreen Deer Bundle [ 170567 ]](https://assets1.tamsnetwork.com/images/EC042017NF/170567s.jpg "Graceful Evergreen Deer Bundle [ 170567 ]")
![Magical Christmas Hot Foil Dies (English) [ 170592 ]](https://assets1.tamsnetwork.com/images/EC042017NF/170592s.jpg "Magical Christmas Hot Foil Dies (English) [ 170592 ]")
![Reverse Hot Foil Die [ 170043 ]](https://assets1.tamsnetwork.com/images/EC042017NF/170043s.jpg "Reverse Hot Foil Die [ 170043 ]")
![Peaceful Pine 12" X 12" (30.5 X 30.5 Cm) Two Tone Cardstock [ 167698 ]](https://assets1.tamsnetwork.com/images/EC042017NF/167698s.jpg "Peaceful Pine 12\" X 12\" (30.5 X 30.5 Cm) Two Tone Cardstock [ 167698 ]")
![Peaceful Pine A4 Cardstock [ 167692 ]](https://assets1.tamsnetwork.com/images/EC042017NF/167692s.jpg "Peaceful Pine A4 Cardstock [ 167692 ]")
![Basic White A4 Thick Cardstock [ 159230 ]](https://assets1.tamsnetwork.com/images/EC042017NF/159230s.jpg "Basic White A4 Thick Cardstock [ 159230 ]")
![Basic White A4 Cardstock [ 166781 ]](https://assets1.tamsnetwork.com/images/EC042017NF/166781s.jpg "Basic White A4 Cardstock [ 166781 ]")
![Gold Stampin' Hot Foil Rolls [ 170066 ]](https://assets1.tamsnetwork.com/images/EC042017NF/170066s.jpg "Gold Stampin' Hot Foil Rolls [ 170066 ]")
![Peaceful Pine Classic Stampin Pad [ 167679 ]](https://assets1.tamsnetwork.com/images/EC042017NF/167679s.jpg "Peaceful Pine Classic Stampin Pad [ 167679 ]")
![Uk/Ie Stampin' Hot Foil System & Craft Class [ 170011 ]](https://assets1.tamsnetwork.com/images/EC042017NF/170011s.jpg "Uk/Ie Stampin' Hot Foil System & Craft Class [ 170011 ]")
![Stampin' Cut & Emboss Machine [ 149653 ]](https://assets1.tamsnetwork.com/images/EC042017NF/149653s.jpg "Stampin' Cut & Emboss Machine [ 149653 ]")

- SHOP ONLINE – EARN 10% REWARDS ON ALL PURCHASES OVER £20
- PURCHASE A STARTER KIT : Get £155 worth of products for only £99. Choose from current catalogues and any specials available. Free Shipping. Read more
- Subscribe to my Video Tutorials – click here
